Love this? Save it for later!
Share the inspiration with your friends
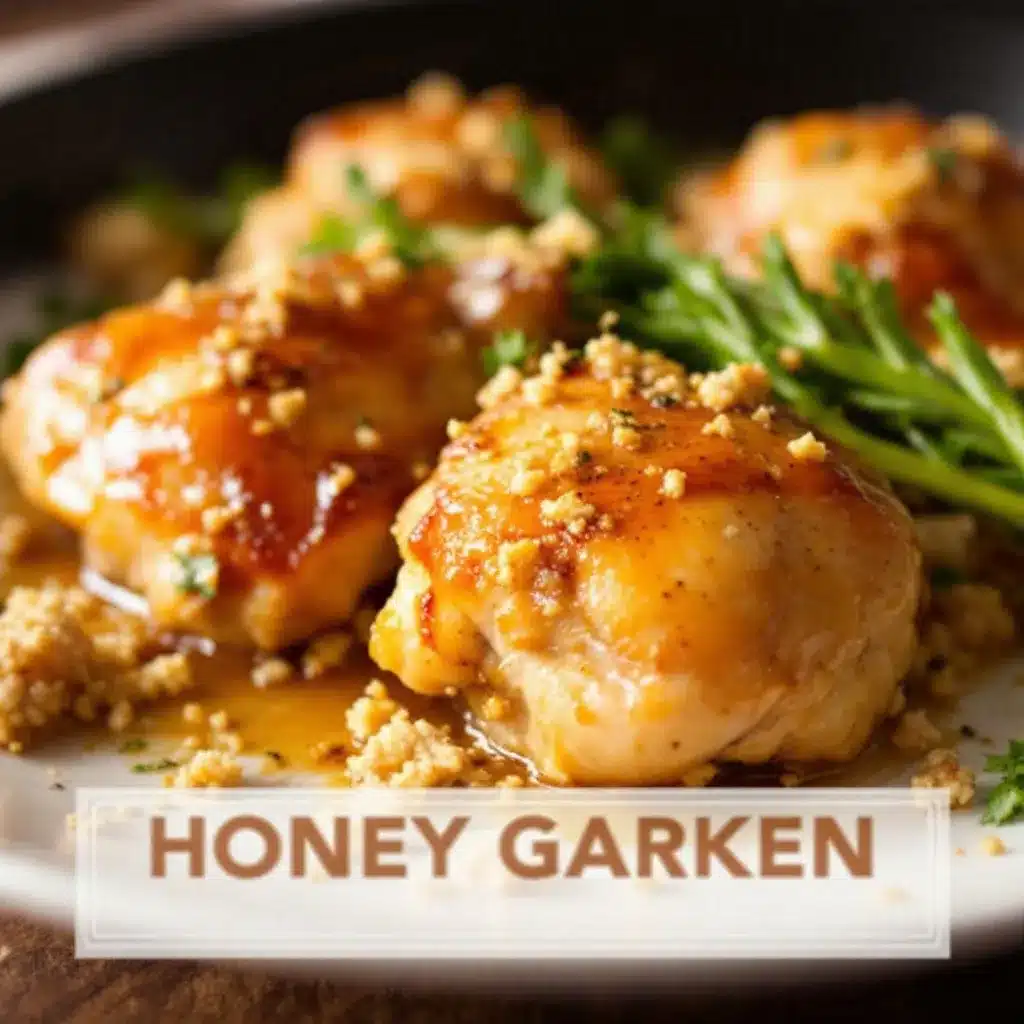
The way the sauce clings to the chicken—thick, glossy, almost sticky—that’s the whole point. I’m not here to tell you about the flavor first, though it’s undeniably good. I’m here to tell you about that moment you pull the pan from the oven and see those thighs sitting in a puddle of amber syrup, the edges of the skin caramelized to a deep bronze. That visual is what sold me on this recipe, and honestly, it’s what keeps me coming back on nights when I need dinner to be both fast and feel like a little bit of a win.
I stumbled onto this combination by accident, which is usually how the best things happen in the kitchen. I had a pack of chicken thighs thawing on the counter, a half-empty bottle of honey in the pantry, and absolutely no energy for a multi-step cooking process. (You know those days.) I just wanted something that would come together in one pan, with minimal cleanup, and still taste like I actually tried. So I threw some garlic in a hot skillet, added the chicken, and drizzled honey over the top before sliding it into the oven. The result was better than I expected—way better.
That first bite, with the sweet glaze sticking to my fingers and the tender meat pulling apart under my fork, I knew this was going to be a regular thing. It’s not fancy. It’s not complicated. It’s just honest, straightforward cooking that delivers exactly what you want: a satisfying dinner without the stress. And really, isn’t that what most of us are after on a Tuesday night?
Why You’ll Love This Recipe
I’ve tested this recipe more times than I can count—adjusting the honey-to-soy ratio, tweaking the cooking time, trying it with bone-in versus boneless thighs. After all that trial and error, I can confidently say this version is the one. Here’s why it works:
- Quick & Easy: From start to finish, this comes together in about 30 minutes. Perfect for those nights when you walk through the door at 6 PM and need dinner on the table before 7.
- Simple Ingredients: You probably already have most of these in your kitchen. Honey, soy sauce, garlic, chicken thighs—that’s the backbone of the whole dish.
- One-Pan Wonder: Less cleanup means more time to actually relax after dinner. The pan does all the work.
- Crowd-Pleaser: I’ve served this to picky eaters, spice lovers, and even folks who claim they don’t like chicken thighs. Every single time, the plate comes back clean.
- Unbelievably Delicious: The sauce reduces into this gorgeous, sticky glaze that coats every bite. It’s sweet, savory, and just a little bit garlicky—comfort food at its finest.
What makes this recipe different from all the other honey garlic chicken recipes out there? It’s the technique. Instead of just mixing everything together and hoping for the best, I sear the chicken first to get that golden-brown crust, then let it finish cooking in the oven with the sauce. That extra step makes a huge difference in texture—crispy on the outside, juicy on the inside, and absolutely drenched in flavor.
This is the kind of meal that makes you close your eyes after the first bite. It’s simple enough for a weeknight but good enough to serve to guests without feeling embarrassed. And honestly, in a world where dinner can feel like a chore, that’s something worth holding onto.
What Ingredients You Will Need
This recipe uses straightforward, pantry-friendly ingredients to build big flavor without any fuss. Here’s what you’ll need:
For the Chicken
- 4 bone-in, skin-on chicken thighs (about 1.5 pounds total) — Bone-in thighs stay juicier during cooking, and the skin gets beautifully crispy. If you only have boneless, skinless thighs, they’ll work too—just reduce the cooking time by about 5-7 minutes.
- Salt and black pepper — For seasoning the chicken before searing. Don’t skip this step; it’s the foundation of flavor.
- 1 tablespoon olive oil — For searing the chicken. Avocado oil works great too if that’s what you have.
For the Honey Garlic Sauce
- 1/3 cup honey — Use a good-quality honey here; the flavor really comes through. I prefer a mild, floral honey like clover or orange blossom, but any honey will work.
- 1/4 cup low-sodium soy sauce — Regular soy sauce is fine, but low-sodium gives you more control over the saltiness. If you’re gluten-free, swap in tamari or coconut aminos.
- 4 cloves garlic, minced — Fresh garlic is non-negotiable here. The pre-minced stuff in a jar just doesn’t have the same punch. Trust me on this one.
- 1 tablespoon rice vinegar — Adds a little acidity to balance the sweetness. Apple cider vinegar or white wine vinegar work as substitutes.
- 1 teaspoon sesame oil — Optional, but it adds a lovely nutty depth that takes the sauce to another level.
- 1/2 teaspoon red pepper flakes — Optional, for a touch of heat. Leave it out if you’re sensitive to spice, or add more if you like things fiery.
For Garnish (Optional but Recommended)
- Chopped green onions — For freshness and color.
- Sesame seeds — Adds a nice visual touch and a subtle crunch.
I’ve made this recipe with different brands of soy sauce and honey over the years, and I’ve found that the quality of the honey really matters. Cheap, overly processed honey tends to be thin and less flavorful, which means your sauce won’t have that same rich, sticky texture. I like to use local honey when I can find it—it’s usually more flavorful, and it supports local beekeepers, which is a nice bonus.
If you’re out of rice vinegar, don’t worry. A squeeze of fresh lemon juice or a splash of apple cider vinegar will work just fine. The acidity is important for balancing the sweetness, but you don’t need to be precious about which type you use.
Equipment Needed
The beauty of this recipe is that it really only requires one piece of equipment—an oven-safe skillet. Here’s what you’ll need:
- Large oven-safe skillet (10-12 inches) — Cast iron is ideal because it retains heat beautifully and gives you that perfect sear. But any oven-safe skillet will work—stainless steel, enameled cast iron, or even a heavy-duty nonstick pan (just make sure it’s labeled oven-safe). I use my trusty 12-inch cast iron skillet for this, and it’s never let me down.
- Tongs — For flipping the chicken without piercing the skin. A spatula works too, but tongs give you more control.
- Small bowl — For whisking together the sauce ingredients.
- Measuring spoons and cups — For accurate measurements.
- Chef’s knife and cutting board — For mincing the garlic and chopping green onions.
If you don’t have an oven-safe skillet, you can sear the chicken in a regular skillet and then transfer everything to a baking dish before putting it in the oven. It’s not quite as streamlined, but it gets the job done. I’ve done it that way when I was traveling and didn’t have access to my usual kitchen tools, and it still turned out great.
A quick note on cast iron maintenance: after you’re done cooking, let the pan cool completely before washing it. Use a stiff brush and a little bit of soap (yes, it’s okay to use soap on cast iron—the seasoning won’t come off unless you scrub aggressively). Dry it thoroughly and rub a thin layer of oil over the surface to keep it seasoned. This will extend the life of your pan and keep it performing well for years.
Preparation Method
Let me walk you through this step by step. It’s simpler than you think, and I’ll point out a few things I’ve learned along the way.
- Preheat your oven to 400°F (200°C). This gives it time to come to temperature while you prep everything else. Trust me, you don’t want to be waiting around for the oven to heat up while your chicken sits on the counter.
- Pat the chicken thighs dry with paper towels. This is crucial for getting that crispy skin. Wet skin steams instead of sears, and nobody wants soggy chicken. Season both sides generously with salt and pepper.
- In a small bowl, whisk together the honey, soy sauce, minced garlic, rice vinegar, sesame oil, and red pepper flakes (if using). Set it aside. The sauce will look thin now, but it’ll thicken up beautifully as it cooks.
- Heat the olive oil in your oven-safe skillet over medium-high heat. You want the oil shimmering but not smoking. If you see wisps of smoke, the pan is too hot—turn it down a notch.
- Place the chicken thighs skin-side down in the hot skillet. Don’t crowd the pan—if your thighs are touching, use a larger pan or cook them in batches. Let them sear undisturbed for 4-5 minutes, until the skin is golden brown and crispy. This is the most important step for texture, so don’t rush it.
- Flip the chicken thighs using tongs. The skin should release easily from the pan. If it sticks, give it another 30 seconds—it’ll release when it’s ready. Cook the other side for 2-3 minutes, just to lightly brown the underside.
- Pour the honey garlic sauce over the chicken thighs. Be careful—the sauce will sizzle and bubble when it hits the hot pan. That’s normal. Use a spoon to drizzle some of the sauce over the tops of the thighs so they’re all evenly coated.
- Transfer the skillet to the preheated oven. Bake for 15-20 minutes, depending on the size of your thighs. The chicken is done when it reaches an internal temperature of 165°F (74°C) at the thickest part, and the sauce is bubbling and thickened.
- Remove the skillet from the oven and let it rest for 5 minutes. This is important—the chicken continues cooking from residual heat, and the sauce thickens further as it cools slightly. Don’t skip this step, or you’ll end up with runny sauce.
- Spoon the pan sauce over the chicken thighs before serving. Garnish with chopped green onions and sesame seeds if you’re using them. Serve immediately.
A few things I’ve learned the hard way: first, don’t skip the step of patting the chicken dry. I did that once when I was in a hurry, and the skin came out pale and rubbery instead of crispy and golden. Second, if you’re using a nonstick skillet, be careful not to scratch the surface when you’re flipping the chicken. Silicone tongs are your friend here. And third, if the sauce starts to look too thick or starts burning around the edges of the pan before the chicken is done, add a tablespoon or two of water to thin it out. Better safe than sorry.
Cooking Tips & Techniques
After making this recipe probably two dozen times (conservative estimate), I’ve picked up a few tricks that make a real difference. Let me share them with you.
Get the pan hot enough. This is the number one mistake I see people make. If your pan isn’t hot enough when you add the chicken, the skin won’t sear properly. It’ll stick to the pan, and you’ll lose that beautiful golden crust. Give the oil a full 2-3 minutes to heat up before adding the chicken. You should see little ripples in the oil, but not smoke.
Don’t move the chicken too early. I know it’s tempting to peek and poke and flip, but resist the urge. Let the chicken sit undisturbed for the full 4-5 minutes. You’ll know it’s ready to flip when the skin releases easily from the pan. If you have to tug at it, it’s not ready yet.
Watch the sauce toward the end. Honey-based sauces can go from perfectly sticky to burnt in a matter of minutes. Keep an eye on it during the last 5 minutes of baking. If the edges of the pan look dark and the sauce smells caramelized (in a good way), you’re on track. If it smells acrid or smoky, pull it out immediately.
Use an instant-read thermometer. This is the single best investment you can make for cooking meat. Chicken thighs are forgiving because they have more fat than breasts, but you still want to hit that 165°F (74°C) mark. I’ve pulled chicken out at 160°F before and let it rest—the carryover cooking brought it up to 165°F perfectly. But if you’re nervous, just wait until the thermometer reads 165°F.
Let the sauce work for you. When you pour the sauce over the chicken before baking, make sure every surface gets coated. The sauce reduces and concentrates as it bakes, so even coverage means every bite will be flavorful. I like to use a pastry brush to spread the sauce evenly over the skin, but a spoon works fine too.
I once forgot to add the garlic to the sauce. (I know, I know.) I realized it about 10 minutes into baking, so I pulled the pan out, sprinkled minced garlic directly over the chicken, and put it back in. It actually worked fine—the garlic softened in the oven and infused the sauce as it finished cooking. So if you forget something, don’t panic. There’s almost always a workaround.
Variations & Adaptations
One of the best things about this recipe is how adaptable it is. Here are a few variations I’ve tried and loved:
Spicy Honey Garlic Chicken: Add an extra teaspoon of red pepper flakes or a minced fresh chili (like a Thai bird chili or serrano) to the sauce. The heat cuts through the sweetness beautifully. I made this version for a friend who loves spicy food, and she said it was the best chicken she’d had in months.
Garlic Lover’s Version: Double the garlic. Use 8 cloves instead of 4. I’ve done this when I was fighting off a cold and wanted something with serious flavor. The garlic mellows as it cooks, so you get a deep, savory sweetness without any harshness.
Lemon Honey Garlic Chicken: Add the juice of half a lemon and a few thin lemon slices to the pan before baking. The acidity brightens up the whole dish and adds a fresh, citrusy note that’s especially nice in spring and summer.
Bone-In, Skin-On Chicken Breasts: If you prefer white meat, bone-in, skin-on chicken breasts work beautifully here. Just increase the baking time to 25-30 minutes, and keep an eye on the internal temperature. Breasts dry out faster than thighs, so don’t overcook them.
Vegetable Add-Ins: Toss some broccoli florets, green beans, or asparagus spears into the pan during the last 10 minutes of baking. They’ll roast in the sauce and come out tender and flavorful. I’ve done this on nights when I wanted a complete meal in one pan, and it works perfectly.
Gluten-Free Adaptation: Use tamari or coconut aminos instead of soy sauce, and you’re good to go. Everything else in the recipe is naturally gluten-free.
I once tried this recipe with chicken drumsticks instead of thighs, and it worked just as well. The cooking time was about the same, and the sauce coated the drumsticks beautifully. So if you have drumsticks on hand and want to switch things up, go for it.
Serving & Storage Suggestions
This chicken is best served hot, straight from the oven, with plenty of pan sauce spooned over the top. The sauce will be thick and sticky, clinging to every surface. I like to serve it with steamed rice or mashed potatoes to soak up the extra sauce—it’s too good to waste.
What to serve with it:
- Steamed jasmine rice or brown rice
- Mashed potatoes or roasted potatoes
- Steamed or roasted vegetables (broccoli, green beans, asparagus)
- A simple green salad with a light vinaigrette
- For a complete one-pan meal, try this alongside our Easy Sheet Pan Sweet Potato and Chicken Sausage Dinner for a hearty, no-fuss dinner.
Storage: Leftover chicken can be stored in an airtight container in the refrigerator for up to 4 days. The sauce will thicken as it cools, so don’t be alarmed if it looks more like a glaze than a sauce when you pull it out of the fridge.
Reheating: The best way to reheat this chicken is in a skillet over medium-low heat with a splash of water or chicken broth. Cover the pan and let it warm through for 5-7 minutes, flipping once. This helps rehydrate the sauce and keeps the chicken from drying out. You can also reheat it in the microwave, but the skin won’t be as crispy.
Freezing: This chicken freezes surprisingly well. Let it cool completely, then transfer to a freezer-safe container or bag. It’ll keep for up to 3 months. To reheat, thaw overnight in the refrigerator and follow the stovetop reheating instructions above.
One thing I’ve noticed: the flavors actually deepen and meld together more after a day in the fridge. So if you’re meal prepping, this is a great candidate. Make it on Sunday, and you’ll have an easy, delicious dinner ready to go on Monday or Tuesday.
Nutritional Information & Benefits
Here’s an approximate nutritional breakdown for one serving (one chicken thigh with sauce, without sides):
| Nutrient | Amount |
|---|---|
| Calories | 380 |
| Protein | 26g |
| Fat | 18g |
| Saturated Fat | 5g |
| Carbohydrates | 24g |
| Sugar | 22g |
| Sodium | 720mg |
| Fiber | 0g |
Chicken thighs are a great source of protein, iron, and B vitamins, which support energy metabolism and overall health. The honey provides quick energy and contains trace amounts of antioxidants, though it’s still sugar, so moderation is key. Garlic is known for its anti-inflammatory and immune-supporting properties—which is why I load it up whenever I’m feeling under the weather.
If you’re watching your sodium intake, use low-sodium soy sauce and go easy on the salt when seasoning the chicken. You can also reduce the honey slightly if you’re cutting back on sugar, though the sauce won’t be as thick and sticky.
This recipe is naturally dairy-free and can be made gluten-free with a simple swap. It’s not low-carb, but if you’re following a moderate carb plan, it fits well—especially if you serve it with vegetables instead of rice.
Conclusion
This Easy One-Pan Honey Garlic Chicken Thighs recipe has become my go-to for busy weeknights, lazy Sundays, and everything in between. It’s one of those rare recipes that delivers on every front: it’s fast, it’s simple, it uses ingredients I almost always have on hand, and it tastes like something I spent way more effort on than I actually did.
I love that I can customize it depending on my mood—spicy, extra garlicky, with lemon, or just as-is. And I really love that there’s almost no cleanup. One pan, a few minutes of prep, and dinner is done. That’s the kind of cooking I can get behind.
If you try this recipe, I’d love to hear how it turns out. Leave a comment below and let me know if you made any changes or additions. Did you add extra spice? Did you serve it with something unexpected? I’m always looking for new ideas to try myself.
And if you’re looking for another quick, one-pan dinner, you might enjoy our Easy Ground Beef and Rice Skillet—it’s another weeknight hero that comes together in about 30 minutes with minimal fuss.
Happy cooking, friends. I hope this recipe becomes as much of a staple in your kitchen as it has in mine.
Frequently Asked Questions
Can I use boneless, skinless chicken thighs instead?
Yes, absolutely. Boneless, skinless thighs will cook faster—about 10-12 minutes in the oven instead of 15-20. Just keep an eye on the internal temperature. The downside is you won’t get that crispy skin, but the flavor will still be fantastic.
Can I make this recipe on the stovetop instead of the oven?
You can! After searing the chicken, reduce the heat to low, pour in the sauce, cover the pan, and let it simmer for 15-20 minutes until the chicken is cooked through. The sauce won’t reduce as much, so you might want to remove the lid for the last 5 minutes to thicken it up.
How do I prevent the honey from burning?
Honey burns easily because of its high sugar content. To prevent this, make sure your oven isn’t too hot (400°F is perfect), and keep an eye on the pan during the last 5 minutes of cooking. If the edges of the pan look dark, pull it out. You can also add a tablespoon of water to the sauce to dilute the sugar slightly.
Can I double this recipe?
Yes, but you’ll need a larger skillet or cook the chicken in batches. Crowding the pan will prevent the skin from getting crispy, so give each thigh plenty of space. If you’re doubling, use a 14-inch skillet or divide the chicken between two smaller pans.
What can I use instead of soy sauce?
Tamari or coconut aminos are the best substitutes. Tamari is gluten-free and has a very similar flavor to soy sauce. Coconut aminos are slightly sweeter and less salty, so you might want to add a pinch of salt to compensate. You could also use fish sauce in a pinch, but the flavor will be quite different.
Pin This Recipe!

Easy One-Pan Honey Garlic Chicken Thighs: Best 30-Minute Dinner

A quick and easy one-pan dinner featuring juicy bone-in chicken thighs coated in a sweet and savory honey garlic glaze. Ready in just 30 minutes with minimal cleanup, this crowd-pleasing recipe is perfect for busy weeknights.
- Prep Time: 10 minutes
- Cook Time: 20 minutes
- Total Time: 30 minutes
- Yield: 4 servings 1x
- Category: Main Course
- Cuisine: American
Ingredients
- 4 bone-in, skin-on chicken thighs (about 1.5 pounds total)
- Salt and black pepper, to taste
- 1 tablespoon olive oil
- 1/3 cup honey
- 1/4 cup low-sodium soy sauce
- 4 cloves garlic, minced
- 1 tablespoon rice vinegar
- 1 teaspoon sesame oil (optional)
- 1/2 teaspoon red pepper flakes (optional)
- Chopped green onions for garnish (optional)
- Sesame seeds for garnish (optional)
Instructions
- Preheat your oven to 400°F (200°C).
- Pat the chicken thighs dry with paper towels. Season both sides generously with salt and pepper.
- In a small bowl, whisk together the honey, soy sauce, minced garlic, rice vinegar, sesame oil, and red pepper flakes (if using). Set aside.
- Heat the olive oil in an oven-safe skillet over medium-high heat until shimmering.
- Place the chicken thighs skin-side down in the hot skillet. Sear undisturbed for 4-5 minutes, until the skin is golden brown and crispy.
- Flip the chicken thighs using tongs. Cook the other side for 2-3 minutes to lightly brown.
- Pour the honey garlic sauce over the chicken thighs. Use a spoon to drizzle some sauce over the tops.
- Transfer the skillet to the preheated oven. Bake for 15-20 minutes, until the chicken reaches an internal temperature of 165°F (74°C) and the sauce is bubbling and thickened.
- Remove the skillet from the oven and let it rest for 5 minutes.
- Spoon the pan sauce over the chicken thighs before serving. Garnish with chopped green onions and sesame seeds if desired. Serve immediately.
Notes
Pat the chicken dry for crispy skin. Don’t crowd the pan when searing. Watch the sauce toward the end to prevent burning. Let the chicken rest for 5 minutes before serving. For a gluten-free version, use tamari or coconut aminos instead of soy sauce.
Nutrition
- Serving Size: 1 chicken thigh with
- Calories: 380
- Sugar: 22
- Sodium: 720
- Fat: 18
- Saturated Fat: 5
- Carbohydrates: 24
- Protein: 26
Keywords: honey garlic chicken, one-pan chicken, 30-minute dinner, chicken thighs, easy dinner, weeknight dinner



