Love this? Save it for later!
Share the inspiration with your friends
For a while, I just accepted that meringue wasn’t going to taste like a playful ghost. It was always either too serious, too delicate, or frankly, just too much work for a simple Halloween snack. I had been looking for a treat that actually looked whimsical without requiring the steady hand of a pastry chef. You know how it is—meringue is notoriously finicky. One wrong move with the mixer, and you’re left with a sad, weepy mess instead of crisp, airy clouds.
I remember standing in my kitchen last October, staring at a batch of plain white meringues that looked less like spooky spirits and more like forgotten egg whites. They were good, sure, but they lacked that little bit of personality you want when you’re handing them out to trick-or-treaters. They needed eyes. They needed personality. They needed to be slightly terrifying but mostly delicious.
Honestly, I tried piping them into shapes before. It was a disaster. The peaks collapsed, the tips burned, and the whole thing felt like a chore. Then I stopped trying to force traditional forms and just looked at what I had: a bowl of stiff, glossy whites and a bag of chocolate chips. It was surprisingly simple. The gap wasn’t in the technique; it was in the presentation.
I started experimenting with just two chocolate chips per cookie. It turned out that was all it took. Suddenly, those plain white discs had faces. They weren’t just cookies; they were little characters. It wasn’t some grand culinary breakthrough, just a small shift in perspective. But that shift made all the difference. Now, every time I make these, I’m reminded that sometimes the best Halloween treats are the ones that are easy to make and fun to look at. It’s a quiet satisfaction, knowing you made something special with just a few simple ingredients.
Why You’ll Love This Recipe
Let’s be honest, meringue has a reputation. People think it’s hard. They think you need a stand mixer, a candy thermometer, and a degree in chemistry. But this version of crispy ghost meringue cookies with chocolate chip eyes breaks that mold. It’s accessible, it’s forgiving, and it tastes like pure sugar air. I’ve tested this recipe dozens of times, tweaking the drying times and the chocolate placement, and I can tell you with confidence that this is the easiest way to get that professional, crisp texture without the stress.
Here is why these cookies belong in your Halloween baking rotation:
- Quick & Easy: The actual active time is minimal. You whip the egg whites, you spoon them onto a tray, and you wait. While they dry, you can hang out with your family or prep other treats. It’s perfect for busy weeknights or last-minute Halloween prep when you realize you forgot to buy candy.
- Simple Ingredients: You likely have everything in your kitchen right now. Egg whites, sugar, and chocolate chips. No fancy grocery trips needed. It’s pantry-friendly and straightforward, which is exactly what you want when you’re in the holiday spirit.
- Perfect for Parties: These are great for classroom parties, office Halloween celebrations, or as a light dessert after a heavy meal. Because they are so light, guests can eat several without feeling weighed down, unlike heavier pumpkin bars or dense brownies.
- Crowd-Pleaser: Always gets rave reviews from kids and adults alike. The visual factor is huge. Kids love the “ghosts,” and adults appreciate the sophisticated, not-too-sweet flavor profile. It’s a win-win.
- Unbelievably Delicious: The texture and flavor combo is next-level comfort food. Once you bite into that crisp shell, it shatters into a sweet, airy center. It’s like eating a cloud that happened to be made of sugar. It’s a sensory experience that feels luxurious but tastes familiar.
What makes this recipe different from the rest is the simplicity of the decoration. Many meringue recipes require royal icing, food coloring, and patience. This one uses chocolate chips. You just press them in while the meringue is still warm, and as it cools, they set in place. It’s a clever twist that saves time and reduces cleanup. This isn’t just another version of a meringue recipe; it’s your best version because it removes the friction and keeps the fun.
This recipe isn’t just good—it’s the kind that makes you close your eyes after the first bite. The snap of the shell followed by the melt of the sugar is incredibly satisfying. It’s comfort food reimagined for Halloween—lighter, faster, but with the same soul-soothing satisfaction of traditional sweets. It’s perfect for impressing guests without stress, or turning a simple afternoon snack into something memorable.
What Ingredients You Will Need
This recipe uses simple, wholesome ingredients to deliver bold flavor and satisfying texture without the fuss. The magic here is in the ratio of sugar to egg whites, which creates that signature crisp exterior. You don’t need exotic spices or expensive chocolates. Just quality basics and a little bit of care.
- Egg Whites: You will need large egg whites, separated from the yolks. Room temperature egg whites whip up faster and achieve greater volume than cold ones. I recommend using fresh eggs, as older whites tend to be thinner and harder to whip stiff. You can separate them fresh or use frozen egg whites you’ve thawed in the fridge overnight.
- Granulated Sugar: Standard white granulated sugar is key here. It dissolves completely into the egg whites to create a smooth, glossy meringue. I recommend Domino brand for its consistent grain size, which helps prevent a gritty texture. Do not substitute with powdered sugar, as the cornstarch will interfere with the whipping process.
- Cream of Tartar: This is the secret weapon for stability. A small amount of cream of tartar helps stabilize the egg white foam, preventing it from collapsing. It also helps achieve that crisp, dry texture rather than a chewy one. If you don’t have this, you can use a teaspoon of lemon juice, but the cream of tartar is more reliable for long drying times.
- Vanilla Extract: A splash of pure vanilla extract adds a subtle warmth that balances the pure sweetness of the sugar. Make sure it’s real vanilla, not imitation, as the flavor is more pronounced in these light cookies.
- Mini Chocolate Chips: For the eyes, mini chocolate chips are ideal because they are small enough to look like eyes on a tiny ghost. Standard chips are too big and can weigh down the delicate meringue. You can use semi-sweet or milk chocolate depending on your preference for sweetness.
- Optional: White Food Coloring Gel: If you want your ghosts to be extra stark white, a tiny drop of white gel food coloring can help. However, high-quality egg whites and sugar usually turn out bright enough on their own. Skip this if you want to keep the ingredient list minimal.
If you have dietary restrictions, note that this recipe is naturally gluten-free and dairy-free (assuming your chocolate chips are dairy-free). For a sugar-free option, you can use a baking-friendly erythritol blend, but be aware that the texture may be slightly different and the drying time might vary.
Equipment Needed
You don’t need a fancy kitchen to make these. Here is what you’ll need to get started.
- Mixing Bowl: A large glass or metal bowl is best. It must be completely clean and grease-free. Even a tiny drop of egg yolk or oil can prevent the whites from whipping up properly. I prefer glass because I can visually inspect it for any residue.
- Electric Mixer: A hand mixer or a stand mixer with a whisk attachment is highly recommended. While you *can* whip egg whites by hand, it takes a long time and a lot of arm strength. An electric mixer gets you to stiff peaks in minutes.
- Baking Sheets: Standard half-sheet pans. Make sure they are flat and not warped, so the cookies dry evenly.
- Parchment Paper: Line your baking sheets with parchment paper. This prevents sticking and makes cleanup a breeze. Silicone mats work too, but parchment gives a slightly crisper bottom.
- Spatula: A rubber spatula for folding in the sugar gently. You want to incorporate the sugar without deflating the air you’ve whipped into the eggs.
- Small Spoon or Piping Bag: For shaping the ghosts. A small teaspoon works fine for rustic shapes, but a piping bag with a round tip gives you more control over the size and shape.
If you don’t have an electric mixer, a whisk and a lot of patience will work, but it will take about 10-15 minutes of continuous whisking. Budget-friendly tip: A basic hand mixer from a discount store works just as well as the expensive ones for this recipe.
Preparation Method
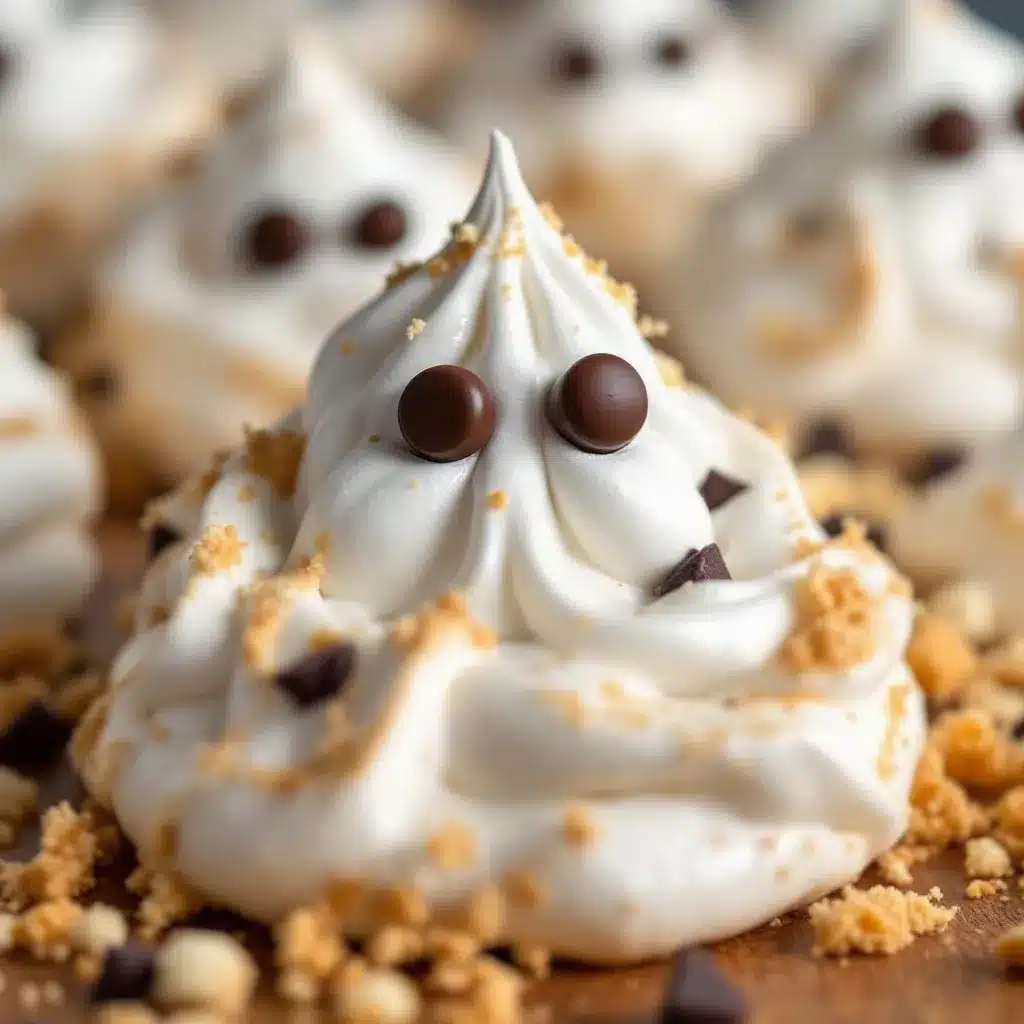
Making these crispy ghost meringue cookies with chocolate chip eyes is straightforward if you follow these steps carefully. The key is patience during the drying phase.
- Prep Your Station: Preheat your oven to the lowest possible setting, usually between 175°F and 200°F (80°C – 95°C). If your oven doesn’t go that low, use 200°F. Line two baking sheets with parchment paper. Make sure your mixing bowl and beaters are spotless. Wipe them down with a little vinegar or lemon juice to remove any grease. This step is non-negotiable for success.
- Whip the Egg Whites: Place the egg whites in your clean mixing bowl. Add the cream of tartar. Using your electric mixer on medium-high speed, beat the egg whites until they become foamy and opaque. This usually takes about 1-2 minutes. You are looking for soft peaks, where the peaks form but curl over when you lift the beater.
- Add the Sugar: While the mixer is running on medium speed, slowly pour in the granulated sugar. Add it in a slow, steady stream down the side of the bowl. Do not dump it all in at once. Continue beating for about 5-7 minutes. The mixture should become thick, glossy, and stiff. When you lift the beater, the peaks should stand straight up without curling. This is called “stiff peaks.” The meringue should feel smooth and creamy between your fingers, with no grittiness from undissolved sugar. If it feels gritty, keep beating.
- Add Flavor: Turn off the mixer and add the vanilla extract. Fold it in gently with a rubber spatula. Use a cutting motion, going from the bottom to the top, just until the vanilla is incorporated. Be careful not to overmix, or you’ll lose the air you’ve whipped in.
- Shape the Ghosts: Transfer the meringue to a piping bag fitted with a large round tip, or use two spoons. If using a piping bag, hold it perpendicular to the baking sheet and pipe mounds about 2 inches wide. To make them look like ghosts, pipe a round base and then a smaller, slightly irregular mound on top. If using spoons, scoop a dollop and shape it into a teardrop or cloud shape. Leave space between them, as they don’t spread much but you don’t want them touching.
- Add the Eyes: This is the fun part. While the meringues are still warm and soft (right after piping), press two mini chocolate chips onto each one to form eyes. Press them in gently so they stick. If you wait too long, the meringue will harden and the chips won’t adhere. Work quickly through the batch.
- Dry the Cookies: Place the baking sheets in the preheated oven. Prop the oven door open slightly with a wooden spoon to allow moisture to escape. This is crucial for crispiness. Bake for 1 to 1.5 hours. The cookies are done when they are dry to the touch and lift easily off the parchment. They should not bend or feel squishy. If they feel soft, bake for another 15 minutes.
- Cool Completely: Turn off the oven and leave the cookies inside with the door still propped open for another 30 minutes. This gradual cooling helps prevent cracking and ensures they dry out completely. Once cool, they will be crisp throughout.
Cooking Tips & Techniques
Making meringue can feel like a science experiment, but here are some tips from my own kitchen failures and successes to help you get it right the first time.
- Room Temperature Matters: Always use room temperature egg whites. Cold egg whites take longer to whip and don’t reach the same volume. Take your eggs out of the fridge about 30 minutes before you start. If you’re short on time, you can place the separated whites in a bowl of warm water for 5 minutes.
- No Yolk Allowed: When separating eggs, be meticulous. Even a tiny speck of yolk can ruin the batch. If you accidentally get yolk in the whites, try to fish it out with your finger. If there’s too much, you may need to start over. It’s frustrating, but it’s the only way to guarantee stiff peaks.
- The Sugar Test: Before you add vanilla or pipe, rub a little meringue between your fingers. If it feels gritty, keep beating. The sugar needs to fully dissolve. This is the most common reason for meringues that don’t crisp up properly. They stay chewy or sticky instead of becoming crisp.
- Oven Temperature Control: Ovens vary wildly. Use an oven thermometer to check your actual temperature. If your oven runs hot, your meringues might brown too quickly on the outside while staying soft inside. If they brown too much, lower the temperature and extend the baking time. Low and slow is the mantra for crisp meringue.
- Humidity is the Enemy: Meringue hates humidity. If it’s a rainy or humid day, meringues can take longer to dry or might not crisp up at all. On humid days, I sometimes leave them in the turned-off oven with the door ajar for several hours or overnight. The dry air of the cooling oven helps finish the job.
- Don’t Open the Door Too Much: Once the cookies are in the oven, try not to open the door frequently. Sudden temperature drops can cause the meringues to crack or collapse. Check them only when you think they might be done.
Variations & Adaptations
While the classic ghost look is charming, there are plenty of ways to twist this recipe to suit your mood or dietary needs.
- Colorful Ghosts: Add a few drops of gel food coloring to the egg whites before whipping. Pastel pink, light blue, or lavender make for cute, non-scary ghosts. Just add the color after the sugar is incorporated, and fold it in gently.
- Chocolate Dipped Feet: After the meringues are completely cool, melt some white or dark chocolate and dip the bottom edge of each ghost. This adds a “dripping” effect and a nice crunch. You can also dip the entire cookie for a chocolate-covered version.
- Edible Glitter: For a festive touch, lightly dust the cooled meringues with edible silver or gold glitter. It adds a magical sparkle that looks great in photos and feels special to eat.
- Gluten-Free & Dairy-Free: This recipe is naturally gluten-free. To make it dairy-free, ensure your chocolate chips are dairy-free. Most mini chips are, but always check the label. The meringue itself contains no gluten or dairy.
- Sugar-Free Option: For a lower-sugar version, use a granulated erythritol or monk fruit sweetener that measures 1:1 like sugar. Note that the texture may be slightly less crisp, and the volume might be a bit lower. It’s a good option for those watching their sugar intake, though the result is different from the traditional recipe.
I once tried making these with brown sugar, and the result was too chewy and dense. Stick to white granulated sugar for that signature airy snap.
Serving & Storage Suggestions
These crispy ghost meringue cookies with chocolate chip eyes are best served at room temperature. They don’t need to be chilled, as cold can make them sticky if the humidity is high.
- Storage: Store the cookies in an airtight container at room temperature. They will stay crisp for up to two weeks. If your kitchen is humid, add a packet of silica gel or a few pieces of bread to the container to absorb moisture. The bread will harden, but it helps keep the meringues crisp.
- Freezing: You can freeze these cookies for up to three months. Place them in a single layer in a freezer-safe container, separated by parchment paper. Thaw them at room temperature in their container to prevent condensation from forming on the cookies.
- Pairing: These light cookies pair beautifully with a hot cup of coffee or tea. The sweetness of the meringue complements the bitterness of coffee, and the light texture doesn’t weigh down your stomach. They are also a fun addition to a Halloween dessert board alongside heavier treats like pumpkin bars or brownies.
- Flavors Over Time: The flavor of meringue doesn’t change much over time, but the texture can if not stored properly. Ensure your container is truly airtight. If they start to soften, you can refresh them in a low oven for 10 minutes to crisp them back up.
Nutritional Information & Benefits
While these cookies are a treat, they are lighter than many traditional baked goods. Here is a general overview of the nutritional profile per cookie (approximate):
- Calories: 15-20 calories per small ghost.
- Carbohydrates: 4-5 grams, mostly from sugar.
- Protein: 0.5 grams from the egg whites.
- Fat: 1 gram from the chocolate chips.
The main benefit here is the low calorie count compared to cake or cookie dough. Egg whites are a great source of pure protein, though the amount in one cookie is small. These cookies are naturally gluten-free, making them a safe option for those with celiac disease or gluten sensitivity. However, they are high in sugar, so enjoy them in moderation. They are a fun, light indulgence that fits into a balanced diet as an occasional treat. Personally, I love that they satisfy a sweet tooth without leaving me feeling sluggish afterward.
Conclusion
Making crispy ghost meringue cookies with chocolate chip eyes is a delightful way to embrace the Halloween spirit without spending hours in the kitchen. It’s a recipe that balances simplicity with charm, offering a treat that is as fun to look at as it is to eat. I love these cookies because they remind me that baking doesn’t have to be complicated to be special. A few egg whites, some sugar, and a bit of creativity are all you need to make something magical.
I encourage you to try this recipe and customize it to your liking. Add some color, dip them in chocolate, or just enjoy them as plain white ghosts. The beauty of this recipe is its flexibility. Share your creations with friends and family, and don’t be afraid to experiment with different decorations. I’d love to hear how they turned out for you in the comments below. Did your ghosts stay crisp? Did the kids love them? Let me know!
Happy baking, and may your Halloween be filled with sweet, spooky fun.
Frequently Asked Questions
Why are my meringues sticky instead of crisp?
This usually happens if the meringues weren’t baked long enough or if your oven temperature was too high. Low and slow is key. If they are sticky, leave them in the turned-off oven with the door propped open for a few more hours to dry out.
Can I use egg whites from a carton?
Yes, you can use pasteurized liquid egg whites from a carton. However, they may not whip up to the same volume as fresh eggs. You might need to add a bit more cream of tartar for stability, and the drying time might be slightly longer.
How do I store meringues in humid weather?
In humid weather, meringues can absorb moisture from the air. Store them in an airtight container with a desiccant packet or a slice of bread. If they soften, you can crisp them up again in a 200°F oven for 10-15 minutes.
Can I make these ahead of time?
Absolutely. These cookies can be made up to two weeks in advance. They actually benefit from sitting for a day or two, as the flavors meld and the texture stabilizes. Just keep them in an airtight container until you are ready to serve.
What if I don’t have mini chocolate chips?
If you don’t have mini chips, you can use regular chocolate chips cut in half, or even small chocolate buttons. The key is to use something small enough to look like eyes on the tiny meringue ghosts. Regular chips might look too large, but they will still work.
Pin This Recipe!
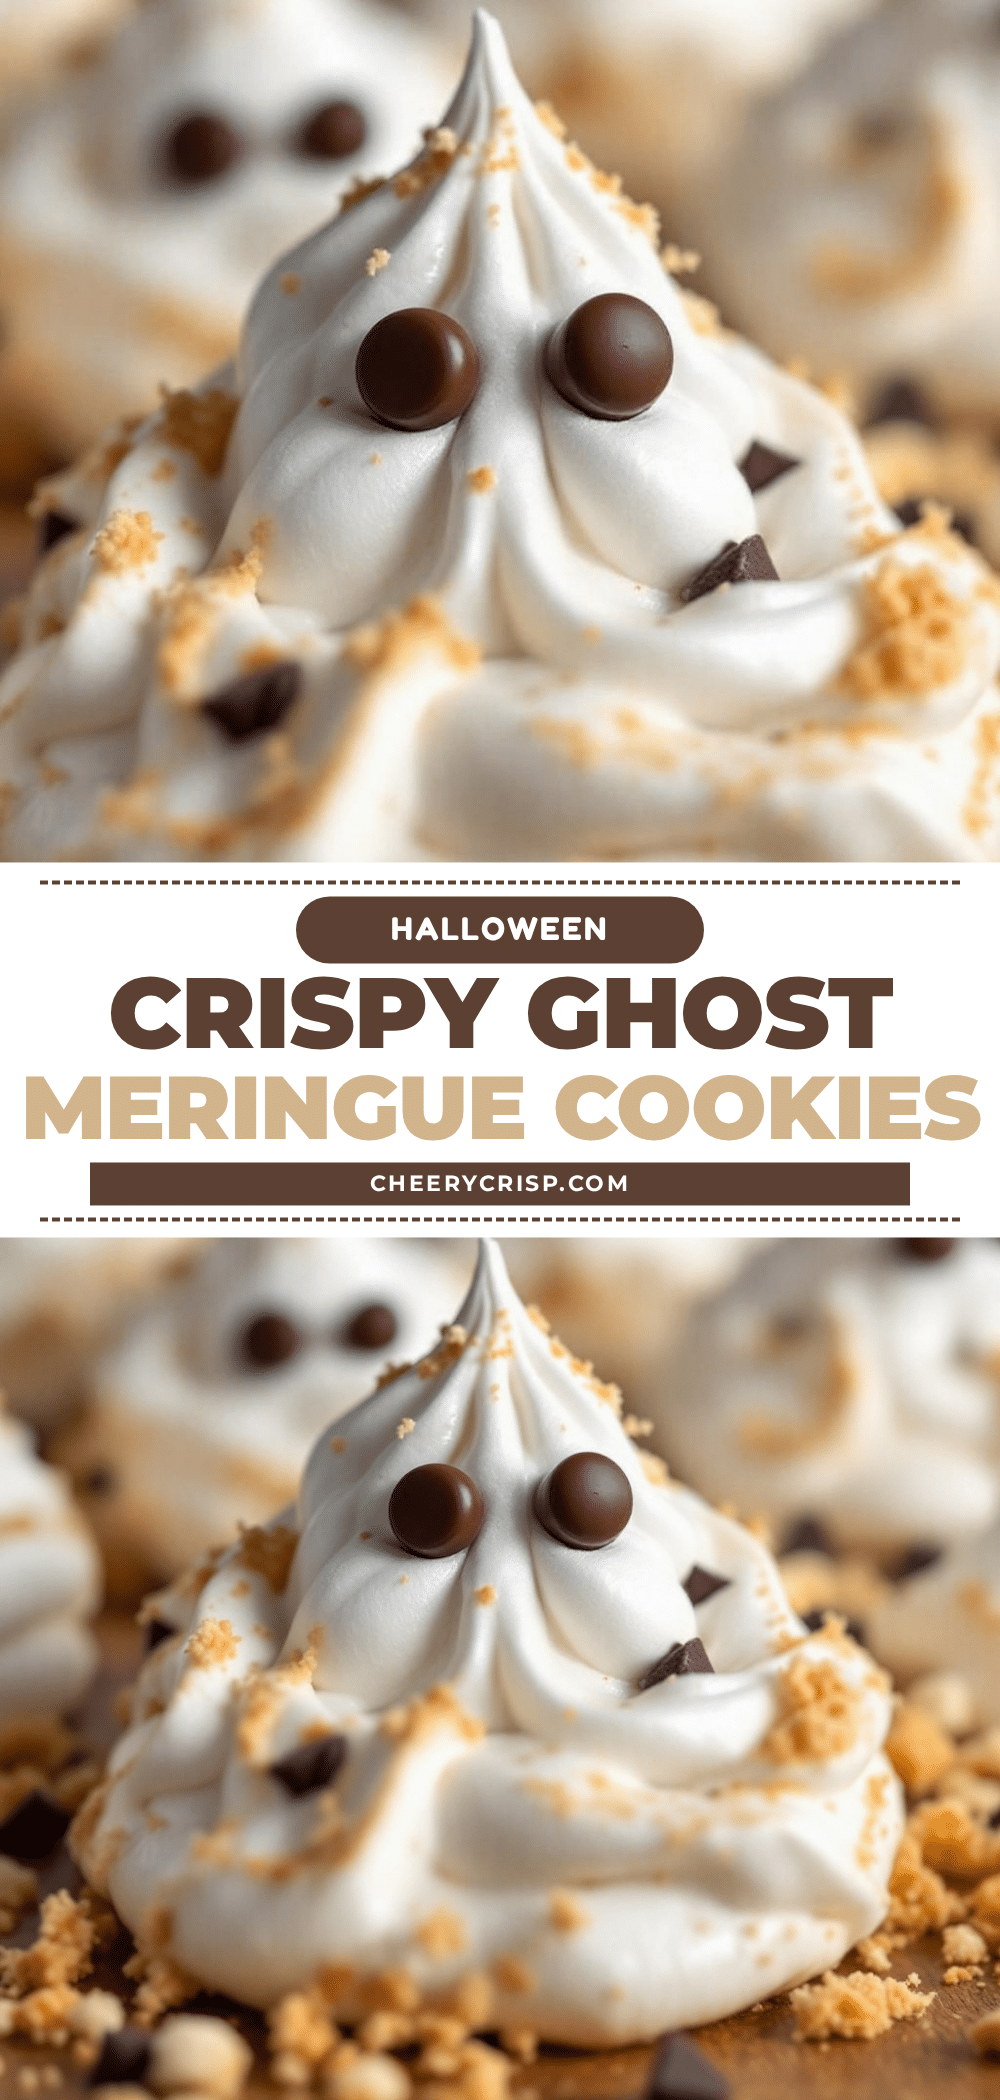
Crispy Ghost Meringue Cookies: Easy Halloween Treat
These whimsical Halloween meringue cookies are crisp, airy, and easy to make. Using just egg whites, sugar, and mini chocolate chips for eyes, they offer a fun, gluten-free treat that looks like spooky ghosts without the stress of complex piping.
- Prep Time: 15 minutes
- Cook Time: 1 hour 30 minutes
- Total Time: 1 hour 45 minutes
- Yield: Approximately 20-24 cookies
- Category: Dessert
- Cuisine: American
Ingredients
- Large egg whites, separated and at room temperature
- Granulated sugar (e.g., Domino brand)
- Cream of tartar
- Pure vanilla extract
- Mini chocolate chips (semi-sweet or milk)
- Optional: White food coloring gel
Instructions
- Preheat oven to the lowest setting (175°F-200°F / 80°C-95°C). Line two baking sheets with parchment paper.
- Ensure mixing bowl and beaters are completely clean and grease-free.
- Place egg whites and cream of tartar in the bowl. Beat on medium-high speed until foamy and opaque (soft peaks).
- With mixer running on medium speed, slowly stream in granulated sugar. Continue beating for 5-7 minutes until stiff, glossy peaks form and sugar is fully dissolved (no grittiness).
- Turn off mixer and gently fold in vanilla extract with a rubber spatula.
- Pipe meringue into ghost shapes (round base with a smaller mound on top) or spoon into cloud shapes onto prepared sheets.
- While meringues are still warm, press two mini chocolate chips onto each to form eyes.
- Bake for 1 to 1.5 hours with the oven door propped open slightly to allow moisture to escape.
- Cookies are done when dry to the touch and lift easily off parchment.
- Turn off oven and leave cookies inside with door propped open for another 30 minutes to cool completely.
Notes
Ensure egg whites are room temperature and free of any yolk. Sugar must be fully dissolved to avoid grittiness. Humidity can affect crispness; store in airtight containers with silica gel or bread if needed. For dairy-free, ensure chocolate chips are dairy-free.
Nutrition
- Serving Size: 1 cookie
- Calories: 18
- Sugar: 4
- Sodium: 5
- Fat: 1
- Saturated Fat: 0.5
- Carbohydrates: 4.5
- Protein: 0.5
Keywords: Halloween cookies, meringue recipe, ghost cookies, gluten-free dessert, easy baking, chocolate chip eyes, party treats



