Love this? Save it for later!
Share the inspiration with your friends
Flipping chicken thighs in a hot skillet when the smoke alarm went off. That was the moment I knew there had to be a better way. I was trying to get that perfect crispy skin, you know the kind that shatters when you bite into it, but my kitchen looked like a war zone. Oil splatters everywhere, the stovetop a mess, and honestly, I was one burnt finger away from ordering takeout.
So I stepped back. I thought about what I actually wanted — that sticky-sweet, salty, garlicky glaze wrapped around juicy dark meat, but with skin so crisp it practically crunches. Without the deep fryer. Without the mess. Without babysitting a pan of hot oil.
That’s when these crispy baked chicken thighs with honey garlic glaze became my weeknight salvation. They came out of the oven looking like something from a fancy restaurant menu, but I barely broke a sweat making them. The skin was golden and blistered in all the right places. The glaze caramelized into this gorgeous glossy coating that smelled like the best thing you’ve ever put in your mouth. And the meat? Fall-apart tender.
I served them with a simple side salad that first night, but honestly, I could have eaten the whole batch standing at the counter. My husband walked in and asked what restaurant I ordered from. That’s when I knew this recipe was a keeper.
These crispy baked honey garlic chicken thighs are the kind of recipe you’ll make on a Tuesday and then crave on a Thursday. They’re simple enough for a rushed weeknight but impressive enough for company. And the best part? No smoke alarm required.
Why You’ll Love This Recipe
I’ve tested this recipe more times than I care to admit. Some batches came out soggy. Some had burnt glaze. One memorable disaster involved parchment paper that stuck so badly I had to scrape chicken skin off with a spatula. But this version? This is the one that works every single time.
- Perfectly Crispy Skin Without Frying : The secret is in the technique — a hot oven, a wire rack, and a little patience. You get that satisfying crunch without standing over a sputtering pan.
- Sticky-Sweet Honey Garlic Glaze : It caramelizes beautifully in the oven, creating layers of flavor that cling to every bite. Sweet, savory, and just a little tangy.
- Juicy, Never Dry Meat : Chicken thighs are naturally forgiving, but this method locks in moisture while the skin gets crispy. No dry chicken here.
- Simple Pantry Ingredients : You probably have everything in your kitchen right now. Honey, soy sauce, garlic, chicken thighs — that’s basically it.
- One Pan, Minimal Mess : The wire rack over a baking sheet catches all the drippings. Cleanup takes about two minutes.
- Weeknight Friendly : Active prep time is maybe 15 minutes. The oven does the heavy lifting while you make a side dish or, let’s be honest, scroll your phone.
- Crowd-Pleaser Approved : I’ve served these at dinner parties, family gatherings, and quiet weeknight dinners. They disappear fast every time.
This isn’t just another chicken thigh recipe. The combination of the crispiest skin and that glossy, finger-licking glaze makes it something special. It’s the kind of dish that makes you close your eyes after the first bite and just… enjoy it.
What Ingredients You Will Need
This recipe uses simple, everyday ingredients to create something that tastes anything but ordinary. Most of these are probably already in your fridge and pantry, which makes this perfect for those nights when you need dinner on the table without a grocery run.
For the Chicken
- Bone-in, skin-on chicken thighs (6 to 8 thighs, about 2.5 to 3 pounds total) — The bone keeps the meat juicy during the longer bake time, and the skin is what gets that gorgeous crispiness. I prefer thighs over breasts here because dark meat stays tender and flavorful even if you accidentally leave them in a few extra minutes.
- Kosher salt (1 teaspoon) — I use Diamond Crystal. If you’re using table salt, cut the amount in half or your chicken will be too salty.
- Black pepper (½ teaspoon, freshly ground) — Freshly ground makes a difference here. Don’t use the pre-ground stuff if you can help it.
- Garlic powder (1 teaspoon) — Not granulated garlic. Garlic powder dissolves into the skin better and gives more even flavor.
- Paprika (1 teaspoon) — Regular sweet paprika works great. It adds color and a subtle earthiness that pairs beautifully with the honey glaze.
For the Honey Garlic Glaze
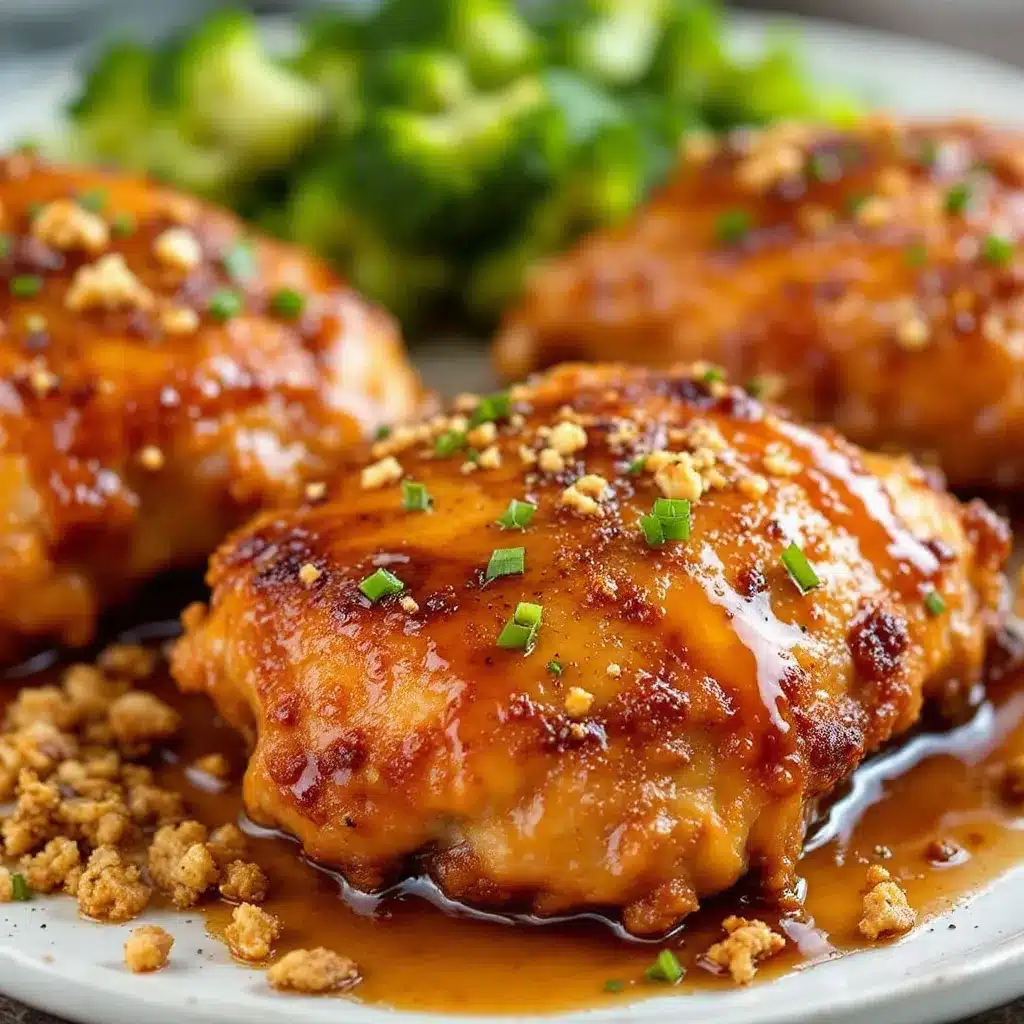
- Honey (⅓ cup) — Use a good quality honey. The flavor really comes through in the finished dish. I like a mild wildflower honey, but anything works.
- Soy sauce (3 tablespoons) — Low-sodium is best here. Full-sodium can make the glaze too salty after it reduces. Tamari or coconut aminos work great for gluten-free options.
- Minced garlic (4 cloves, or about 2 teaspoons) — Fresh garlic matters in this glaze. The jarred stuff has a different flavor that doesn’t caramelize the same way. Take the extra 30 seconds to chop fresh cloves.
- Rice vinegar (1 tablespoon) — This brightens everything up and cuts through the sweetness. Apple cider vinegar works in a pinch.
- Sesame oil (1 teaspoon) — Optional, but highly recommended. It adds a nutty depth that makes the glaze taste more complex.
- Cornstarch (1 teaspoon) — For the final glaze brush. This helps the glaze thicken and stick to the chicken instead of sliding off.
For Garnish (Optional But Recommended)
- Sesame seeds (1 tablespoon, toasted)
- Green onions (2 to 3, thinly sliced)
- Fresh parsley or cilantro (a small handful, chopped)
I recommend using a brand like Golden Blossom honey for the glaze — it has a clean, floral taste that doesn’t overpower the garlic. And for soy sauce, Kikkoman is my go-to. It’s consistent and widely available. If you’re looking for a gluten-free option, San-J tamari works beautifully here.
One thing I learned the hard way — don’t skip patting the chicken dry. I know it seems like an extra step, but wet skin won’t crisp up. It’ll steam instead, and you’ll end up with sad, flabby skin. Nobody wants that.
Equipment Needed
You don’t need fancy equipment for this recipe, which is part of why I love it. Here’s what you’ll need:
- Baking sheet (half-sheet pan, about 13×18 inches) — A rimmed baking sheet catches the drippings and prevents a mess in your oven. I use Nordic Ware because they don’t warp at high heat.
- Wire rack that fits inside your baking sheet — This is the key to crispy skin. It elevates the chicken so air circulates underneath and the bottom doesn’t get soggy. A cooling rack works perfectly.
- Small saucepan (1 to 2 quart) — For simmering the glaze. Nothing fancy needed.
- Mixing bowl (medium size) — For seasoning the chicken.
- Tongs — For flipping and moving hot chicken. Silicone-tipped ones won’t scratch your pans.
- Pastry brush (silicone recommended) — For applying the glaze. Silicone brushes don’t shed bristles into your food like some natural ones do.
- Instant-read thermometer — This is non-negotiable for perfectly cooked chicken. Trust me, I’ve undercooked and overcooked enough chicken to know. A Thermapen is pricey but worth it. An inexpensive digital one from Amazon works fine too.
- Paper towels — For drying the chicken skin. This step matters more than you think.
If you don’t have a wire rack, you can try placing the chicken directly on the baking sheet. The skin won’t be quite as crispy on the bottom, but it’ll still work. Just flip the thighs halfway through cooking and expect slightly softer skin underneath.
I’ve also made these in a cast iron skillet with great results. The skillet holds heat beautifully and gives extra crispy edges. Just be careful with the glaze — it can burn in the pan if you’re not paying attention.
Preparation Method
Let me walk you through this step by step. I’ve included all the little details I wish someone had told me the first time I made these.
- Preheat your oven to 400°F (200°C). Position the rack in the center of the oven. Getting the oven fully hot before the chicken goes in is crucial for crispy skin.
- Pat the chicken thighs completely dry with paper towels. This is the most important step. I cannot stress this enough. Wet skin = soggy skin. Take your time here. Use multiple paper towels if needed. The skin should feel dry to the touch, not damp.
- Season the chicken. In a small bowl, mix together the kosher salt, black pepper, garlic powder, and paprika. Sprinkle this mixture evenly over both sides of the chicken thighs. Rub it in gently with your fingers. Don’t be shy with the seasoning — the skin is where all the flavor lives.
- Arrange the chicken on the wire rack. Place the wire rack inside your baking sheet. Lay the chicken thighs skin-side up on the rack, leaving a little space between each piece. Crowding them will trap steam and prevent crisping.
- Bake for 35 minutes. Put the baking sheet in the oven and let the chicken do its thing. During this time, the fat renders out of the skin and it starts getting golden and crispy. Don’t open the oven door. Let that heat do its work.
- While the chicken bakes, make the glaze. In a small saucepan, combine the honey, soy sauce, minced garlic, rice vinegar, and sesame oil. Whisk everything together. Bring it to a gentle simmer over medium heat, then reduce the heat to low. Let it bubble gently for 5 to 7 minutes, stirring occasionally. The glaze will thicken slightly. In a small bowl, mix the cornstarch with 1 tablespoon of cold water to make a slurry. Whisk this into the simmering glaze. Cook for another minute until the glaze is glossy and thick enough to coat the back of a spoon. Remove from heat.
- Flip the chicken and brush with glaze. After 35 minutes, carefully remove the baking sheet from the oven. Use tongs to flip each chicken thigh over so the skin side is down. Brush the skin side generously with the honey garlic glaze. Don’t skimp here — this is where the magic happens.
- Bake for another 10 minutes. Return the baking sheet to the oven. The glaze will caramelize and create that beautiful sticky coating.
- Flip and glaze again. After 10 minutes, remove the sheet from the oven. Flip the chicken back to skin-side up. Brush another generous layer of glaze on top. Reserve any remaining glaze for serving.
- Bake for a final 5 to 10 minutes. Put the chicken back in the oven. The skin should be deep golden brown and crispy. The glaze should be bubbling and glossy. Total bake time is about 50 to 55 minutes.
- Check the temperature. Insert an instant-read thermometer into the thickest part of a thigh, avoiding the bone. You’re looking for 165°F (74°C) at minimum. I personally take them to 170°F to 175°F — the meat stays juicy because thighs have more fat, and the higher temp breaks down connective tissue for that fall-apart texture.
- Rest for 5 minutes. Let the chicken rest on the rack. This lets the juices redistribute so every bite is moist. Don’t skip this step. I know you’re hungry, but patience pays off here.
- Garnish and serve. Transfer the chicken thighs to a serving platter. Drizzle any remaining glaze over the top. Sprinkle with sesame seeds, sliced green onions, and fresh parsley or cilantro if you’re using them.
One thing I want to mention — your oven might run hot or cool. The first time I made these, my old apartment oven took almost 60 minutes to get the skin properly crispy. Now I have a convection oven that does it in 45. Trust your thermometer more than the timer. When the skin is golden and crackling and the internal temp is right, they’re done.
Also, if you notice the glaze starting to burn on the edges of the pan during the last 10 minutes, that’s normal. The sugars caramelize and can darken. Just don’t let it go too far — burnt honey tastes bitter and acrid. If it starts smoking, pull the pan out immediately.
Cooking Tips & Techniques
I’ve made this recipe at least two dozen times, and I’ve learned a few things along the way. Here are the tips that make the biggest difference.
Dry the skin thoroughly. I said it before, but it bears repeating. The number one mistake people make with crispy baked chicken is not drying the skin well enough. I use three or four paper towels per batch and really press them into the skin to absorb moisture. Some people even leave the seasoned chicken uncovered in the fridge for an hour to dry out the skin further. I’ve done that too, and it works beautifully.
Use a wire rack. This is non-negotiable for truly crispy skin. When chicken sits directly on a baking sheet, the bottom steams in the rendered fat. A wire rack lets air circulate all around each piece. The bottom gets almost as crispy as the top. If you don’t have a wire rack, you can buy one for like eight bucks at any grocery store. Best kitchen investment you’ll make.
Don’t rush the glaze. Let it simmer gently. High heat will burn the honey and garlic before the flavors have a chance to meld. Low and slow is the way to go. And taste it before you brush it on the chicken — you want a balance of sweet, salty, and garlicky. Adjust with more honey or soy sauce if needed.
Layer the glaze. Applying the glaze in two layers gives you that thick, sticky coating that makes these thighs so irresistible. The first layer bakes into the skin. The second layer stays glossy on top. If you just brush it on once at the end, it won’t have the same depth of flavor.
Watch the sugar. Honey burns faster than you think. If your oven runs hot, check the chicken at the 45-minute mark instead of 50. I’ve had a batch go from perfectly caramelized to blackened in about three minutes. Set a timer and check early.
Let it rest. I know it’s tempting to dig in right away, but resting is crucial. The juices need time to settle back into the meat. If you cut into a thigh immediately, all those flavorful juices will run out onto the plate instead of staying in the meat. Five minutes is all it takes.
Save the drippings. After you remove the chicken from the rack, pour the pan drippings into a small bowl. Let the fat separate, then spoon off the fat and use the flavorful liquid underneath as a sauce. It’s liquid gold. I drizzle it over rice or roasted vegetables.
I once forgot to put the wire rack in the pan and just put the chicken directly on the baking sheet. The bottoms were soggy and sad. I ate them anyway because I was hungry, but I learned my lesson. The rack matters.
Variations & Adaptations
This recipe is flexible, and I’ve tried several variations depending on what I have on hand or who I’m cooking for.
Spicy Honey Garlic Chicken — Add ½ teaspoon of red pepper flakes or a tablespoon of sriracha to the glaze while it simmers. The heat balances the sweetness beautifully. My husband loves this version. I make it when I want something with a little kick.
Garlic Lovers Version — Double the garlic in the glaze and add 4 whole garlic cloves (peeled) to the baking sheet during the last 20 minutes of cooking. They roast and soften and become sweet and spreadable. Mash them into the glaze before serving for an extra punch.
Lemon Herb Twist — Add the zest of one lemon and 2 tablespoons of fresh thyme leaves to the glaze. Swap the sesame oil for olive oil. Finish with fresh lemon juice squeezed over the top before serving. This version is brighter and feels lighter, perfect for spring or summer dinners.
Air Fryer Method — Preheat your air fryer to 375°F (190°C). Season the chicken as directed. Place thighs skin-side down in the air fryer basket, leaving space between each. Cook for 15 minutes. Flip, brush with glaze, and cook for another 8 to 10 minutes until the skin is crispy and the internal temp reaches 165°F. The air fryer version is faster and gives incredibly crispy skin, but you’ll need to work in batches depending on the size of your basket.
Boneless Thighs — If you only have boneless, skin-on thighs, reduce the cooking time by about 10 to 15 minutes. Start checking the temperature at the 35-minute mark. Boneless thighs cook faster and can dry out if overcooked.
Gluten-Free — Use tamari or coconut aminos instead of soy sauce. Everything else in the recipe is naturally gluten-free. I’ve made this for friends with celiac disease and they loved it.
Keto/Low-Carb — Swap the honey for a sugar-free honey substitute or use 2 tablespoons of monk fruit sweetener mixed with 2 tablespoons of water. The glaze won’t caramelize quite the same way, but the flavor is still delicious.
I tried a version with maple syrup instead of honey once, thinking it would be similar. It was good, but the maple flavor was too strong and clashed with the garlic. Stick with honey for this one. Trust me on that.
Serving & Storage Suggestions
These crispy baked honey garlic chicken thighs are versatile enough to pair with almost anything. Here’s how I like to serve them and what to do with leftovers.
Serving Temperature — Serve these hot, straight from the oven. The glaze is at its stickiest and most flavorful when warm. If they sit too long, the glaze can harden slightly. A quick 30-second zap in the microwave or a few minutes in a hot oven brings it back to life.
Side Dishes — I love serving these with steamed jasmine rice or coconut rice to soak up the extra glaze. Roasted broccoli or asparagus with a squeeze of lemon balances the richness. A simple cucumber salad with rice vinegar and sesame seeds adds freshness and crunch. For something heartier, try them alongside loaded baked potato salad — the creamy potatoes and crispy chicken are a match made in heaven.
Presentation — Arrange the thighs on a large platter. Drizzle any remaining glaze over the top. Sprinkle with sesame seeds and green onions for color and texture. A few fresh cilantro sprigs scattered around the platter make it look restaurant-worthy.
Storage — Store leftover chicken in an airtight container in the refrigerator for up to 4 days. The skin will lose its crispiness as it sits, but the flavor will actually deepen. I sometimes make a double batch just for leftovers — the cold chicken is amazing sliced over a salad the next day.
Reheating — The best way to reheat these is in a 350°F (175°C) oven for about 10 minutes. Place the thighs on a wire rack over a baking sheet to help the skin re-crisp. The microwave works in a pinch, but the skin will be soft. If you have an air fryer, reheat at 350°F for 3 to 4 minutes — the skin comes back almost as crispy as fresh.
Freezing — These freeze well for up to 3 months. Let the chicken cool completely, then wrap each thigh individually in plastic wrap and place them in a freezer bag. To reheat, thaw overnight in the refrigerator, then reheat in a 350°F oven until warmed through. The glaze might be a little less glossy after freezing, but the flavor holds up beautifully.
How Flavors Develop — The honey garlic glaze actually gets better after a day in the fridge. The flavors meld together and mellow out. I’ve had leftover chicken that tasted even better the next day. The garlic becomes less sharp and the honey sweetness blends more evenly with the soy sauce.
If you’re planning a party or game day spread, these chicken thighs are fantastic alongside crispy baked chicken wings for a complete wing-and-thigh bar. Your guests will go crazy for both.
Nutritional Information & Benefits
Here’s a rough estimate of the nutritional content per serving (based on 6 servings, using bone-in skin-on chicken thighs and the full glaze recipe).
- Calories: Approximately 380 to 420 per thigh
- Protein: 28 to 32 grams
- Fat: 22 to 26 grams (including skin)
- Carbohydrates: 18 to 22 grams (mostly from honey)
- Fiber: 0 grams
- Sugar: 16 to 18 grams (natural honey sugars)
- Sodium: 650 to 750 mg (varies based on soy sauce brand)
Health Benefits — Chicken thighs are a good source of high-quality protein, which supports muscle health and keeps you feeling full. They also provide B vitamins, particularly B6 and B12, which help with energy metabolism. The dark meat contains more iron and zinc than chicken breast, which is great for immune function. Garlic has anti-inflammatory properties and may support heart health. Honey provides antioxidants and can help soothe sore throats — bonus!
Dietary Considerations — This recipe is naturally dairy-free and nut-free. For gluten-free, use tamari instead of soy sauce. For low-carb or keto, substitute the honey with a sugar-free alternative. The recipe is not suitable for vegan or vegetarian diets, but you could try the glaze on tofu or cauliflower for a plant-based option.
Potential Allergens — Soy (from soy sauce). If you have a soy allergy, use coconut aminos instead. Sesame (from sesame oil, which is optional).
I’m not a nutritionist, just someone who likes to know what’s in my food. These numbers are estimates. If you need precise nutritional information, plug the ingredients into your favorite calculator. But honestly, this is comfort food. It’s meant to be enjoyed, not over-analyzed.
Conclusion
These crispy baked honey garlic chicken thighs have become a staple in my kitchen for good reason. They deliver that perfect combination of crunchy skin and juicy, flavorful meat with a sweet and savory glaze that’s absolutely addictive. And they do it without the mess and hassle of frying.
What I love most about this recipe is how adaptable it is. Need a quick weeknight dinner? Done. Hosting a small gathering? These look impressive on a platter. Craving something comforting but don’t want to spend hours in the kitchen? This is your answer.
I encourage you to make this recipe your own. Adjust the sweetness, add more garlic, throw in some heat — whatever makes your taste buds happy. Cooking should be fun, not rigid. The best meals come from experimenting and trusting your instincts.
If you try these crispy baked honey garlic chicken thighs, I’d love to hear how they turn out. Drop a comment below and let me know if you made any tweaks or if they became a regular in your dinner rotation. And if you’re looking for another easy weeknight chicken dinner, check out my 15-minute garlic butter chicken thighs — they’re just as delicious and even faster.
Happy cooking, friends. Your kitchen is about to smell amazing.
Frequently Asked Questions
Can I use chicken breasts instead of thighs?
You can, but the results won’t be the same. Chicken breasts are leaner and can dry out during the longer bake time needed for crispy skin. If you want to try it, use bone-in, skin-on breasts and reduce the cooking time by about 10 minutes. Check the internal temperature early and often. You’re looking for 165°F.
Why is my chicken skin not getting crispy?
Most likely, the skin wasn’t dry enough before seasoning. Moisture is the enemy of crispiness. Pat the skin thoroughly with paper towels before adding any seasoning. Also, make sure your oven is fully preheated and you’re using a wire rack. If the chicken sits in its own rendered fat, the bottom will steam instead of crisp.
Can I make the glaze ahead of time?
Absolutely. You can make the glaze up to a week in advance and store it in an airtight container in the refrigerator. When you’re ready to use it, gently reheat it on the stovetop or in the microwave. If it has thickened too much, stir in a teaspoon of warm water to loosen it up.
How do I prevent the glaze from burning?
Keep an eye on the chicken during the last 10 to 15 minutes of baking. Honey burns quickly because of its high sugar content. If you notice the edges of the glaze darkening too fast, tent the baking sheet loosely with foil. Also, make sure your oven temperature is accurate — an oven thermometer can help.
Can I cook these in a convection oven?
Yes, and they’ll get even crispier! Convection ovens circulate hot air, which helps the skin crisp up beautifully. Reduce the temperature by 25°F (about 15°C) and start checking for doneness about 10 minutes earlier than the recipe suggests. The glaze may caramelize faster, so watch it closely.
Pin This Recipe!
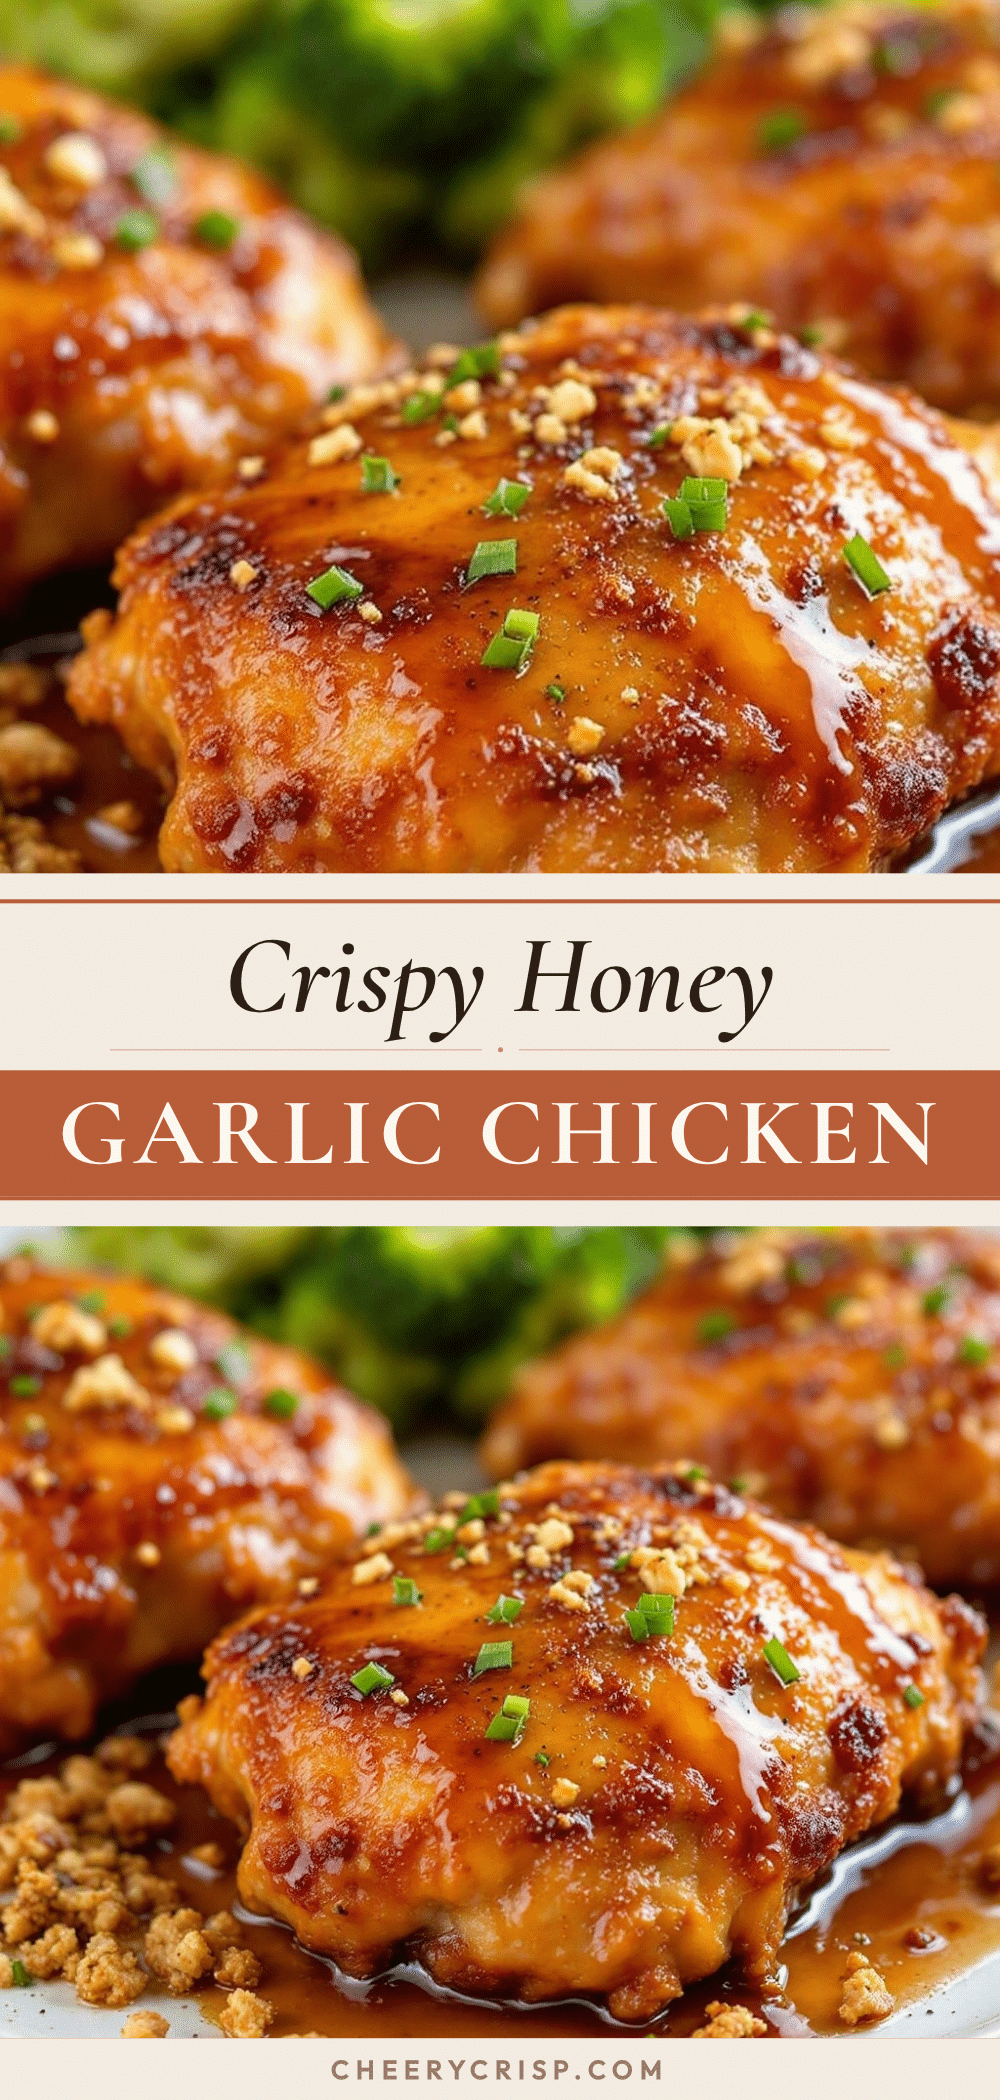
Crispy Baked Honey Garlic Chicken Thighs

These crispy baked honey garlic chicken thighs deliver perfectly crunchy skin and juicy, flavorful meat with a sweet and savory glaze that’s absolutely addictive. Made with simple pantry ingredients and minimal mess, they’re perfect for weeknight dinners or impressive enough for company.
- Prep Time: 15 minutes
- Cook Time: 50 to 55 minutes
- Total Time: 1 hour 5 to 10 minutes
- Yield: 6 servings 1x
- Category: Main Course
- Cuisine: American
Ingredients
- 6 to 8 bone-in, skin-on chicken thighs (about 2.5 to 3 pounds total)
- 1 teaspoon kosher salt (use 1/2 teaspoon if using table salt)
- 1/2 teaspoon freshly ground black pepper
- 1 teaspoon garlic powder
- 1 teaspoon sweet paprika
- 1/3 cup honey
- 3 tablespoons low-sodium soy sauce (or tamari/coconut aminos for gluten-free)
- 4 cloves garlic, minced (about 2 teaspoons)
- 1 tablespoon rice vinegar (apple cider vinegar works in a pinch)
- 1 teaspoon sesame oil (optional)
- 1 teaspoon cornstarch
- 1 tablespoon sesame seeds (toasted, for garnish)
- 2 to 3 green onions (thinly sliced, for garnish)
- Fresh parsley or cilantro (chopped, for garnish)
Instructions
- Preheat your oven to 400°F (200°C). Position the rack in the center of the oven.
- Pat the chicken thighs completely dry with paper towels. This is crucial for crispy skin.
- In a small bowl, mix together the kosher salt, black pepper, garlic powder, and paprika. Sprinkle this mixture evenly over both sides of the chicken thighs and rub in gently.
- Place a wire rack inside a rimmed baking sheet. Arrange the chicken thighs skin-side up on the rack, leaving space between each piece.
- Bake for 35 minutes. Do not open the oven door during this time.
- While the chicken bakes, make the glaze: In a small saucepan, combine the honey, soy sauce, minced garlic, rice vinegar, and sesame oil. Whisk together and bring to a gentle simmer over medium heat, then reduce heat to low. Let bubble gently for 5 to 7 minutes, stirring occasionally.
- In a small bowl, mix the cornstarch with 1 tablespoon cold water to make a slurry. Whisk this into the simmering glaze. Cook for another minute until the glaze is glossy and thickened. Remove from heat.
- After 35 minutes, remove the baking sheet from the oven. Use tongs to flip each chicken thigh skin-side down. Brush the skin side generously with the honey garlic glaze.
- Return to the oven and bake for another 10 minutes.
- After 10 minutes, remove the sheet from the oven. Flip the chicken back to skin-side up. Brush another generous layer of glaze on top. Reserve any remaining glaze for serving.
- Bake for a final 5 to 10 minutes, until the skin is deep golden brown and crispy and the glaze is bubbling and glossy. Total bake time is about 50 to 55 minutes.
- Check the internal temperature: Insert an instant-read thermometer into the thickest part of a thigh, avoiding the bone. It should read at least 165°F (74°C); 170°F to 175°F is ideal for fall-apart texture.
- Let the chicken rest on the rack for 5 minutes to allow juices to redistribute.
- Transfer to a serving platter. Drizzle any remaining glaze over the top. Garnish with sesame seeds, sliced green onions, and fresh parsley or cilantro if desired.
Notes
Pat the chicken skin thoroughly dry for maximum crispiness. Use a wire rack to allow air circulation. Apply glaze in two layers for a thick, sticky coating. Watch the glaze during the last 10 minutes as honey can burn quickly. Let the chicken rest for 5 minutes before serving. Save pan drippings for extra sauce.
Nutrition
- Serving Size: 1 chicken thigh
- Calories: 380420
- Sugar: 1618
- Sodium: 650750
- Fat: 2226
- Saturated Fat: 68
- Carbohydrates: 1822
- Protein: 2832
Keywords: crispy baked chicken thighs, honey garlic chicken, baked chicken thighs, honey garlic glaze, easy chicken dinner, weeknight chicken recipe



