Love this? Save it for later!
Share the inspiration with your friends
The first platter was gone before the second quarter even started. My brother-in-law, who never compliments food, had buffalo sauce on his chin and asked if there was more in the kitchen. That was the moment I knew these crispy baked chicken wings for football Sunday were not just good—they were the kind of good that makes people forget about the game for a second.
I had spent years trying to nail that perfect crunch without a deep fryer. Air fryers were okay, but they couldn’t handle the volume we needed for a crowd. Baking felt healthier but always left me with sad, flabby skin. Honestly, I had almost given up on homemade wings altogether. Then I stumbled onto a technique that changed everything—a simple trick involving baking powder and a long, slow start in the oven. The first time I tried it, I pulled out a tray of wings that looked like they came from a sports bar. The crunch was real. The meat was juicy. And I didn’t have to babysit a pot of hot oil.
These wings have become the unofficial start to every game day at our house. They are the first thing people ask about when they text about coming over. I am not a professional chef or a food scientist—I am just someone who loves a good snack and hates greasy fingers. This recipe works because it is simple, reliable, and honestly a little bit genius. Let me show you how it is done.
Why You’ll Love This Recipe
I have tested this method more times than I care to count. Some batches were disasters—flabby, soggy, or just plain sad. But this version? It is the one I keep coming back to. Here is why it stands out from every other wing recipe you have tried.
- Perfectly Crispy Without Frying: The baking powder trick creates a surface so crunchy you will swear it was fried. No oil splatter, no deep fryer to clean.
- Simple Pantry Ingredients: You likely have everything in your kitchen right now. No weird specialty items or trips to three different stores.
- Perfect for Game Day Crowds: This recipe scales beautifully. You can make wings for four people or forty without breaking a sweat.
- Customizable Heat Level: I keep the base wings mild, then toss them in whatever sauce you want. Everyone can have their favorite.
- Hands-Off Cooking: Most of the work happens in the oven. You can prep the rest of your game day spread while these cook.
What makes these different from the rest is the two-temperature roasting method. Most recipes just blast the wings at high heat and hope for the best. I start them low and slow to render the fat, then crank the temperature to crisp the skin. It is a small extra step that makes a massive difference. The result is wings that are crunchy on the outside, tender on the inside, and absolutely impossible to stop eating.
These wings are the kind of snack that makes you close your eyes after the first bite. They are comfort food at its finest—satisfying, messy, and perfect for sharing. Whether you are hosting a big watch party or just craving something crunchy for yourself, this recipe delivers every single time.
What Ingredients You Will Need
This recipe uses simple, honest ingredients to create wings that taste anything but basic. Most of these are probably already in your fridge and pantry.
For the Wings
- Chicken Wings: 3 pounds (about 1.4 kg), separated into drumettes and flats. I prefer fresh wings over frozen for better texture, but thawed frozen work fine. Look for wings that are plump and not bruised.
- Baking Powder: 2 teaspoons (NOT baking soda—this is crucial). Use aluminum-free baking powder if you want to avoid any metallic aftertaste. This is the secret to crispy skin.
- Kosher Salt: 1½ teaspoons. I use Diamond Crystal brand because it is less salty by volume. If you use fine table salt, reduce to 1 teaspoon.
- Black Pepper: 1 teaspoon, freshly ground.
- Garlic Powder: 1 teaspoon. Not garlic salt—we are controlling the salt separately.
- Onion Powder: ½ teaspoon. Adds a subtle savory depth.
- Paprika: 1 teaspoon. I use sweet paprika, but smoked paprika works beautifully for a different flavor profile.
For the Buffalo Sauce (Classic Version)
- Hot Sauce: ½ cup. Frank’s RedHot is the gold standard here. It has the perfect balance of heat and tang.
- Unsalted Butter: ¼ cup (4 tablespoons), melted. This mellows the heat and adds richness.
- Worcestershire Sauce: 1 teaspoon. Adds umami depth you cannot quite identify but will miss if it is not there.
- Honey: 1 tablespoon. Optional, but it balances the heat and helps the sauce cling to the wings.
For Serving (Optional but Recommended)
- Blue Cheese or Ranch Dressing: For dipping. I am team blue cheese, but no judgment here.
- Celery and Carrot Sticks: The classic cool, crunchy accompaniment.
- Fresh Chives or Parsley: For garnish, because we eat with our eyes first.
For the chicken, I recommend picking up whole wings and cutting them yourself. It is cheaper, and you can save the wing tips for stock. If you are short on time, pre-cut party wings from the store work perfectly. Just pat them very dry before seasoning—moisture is the enemy of crispy skin.
Equipment Needed
You do not need a lot of fancy gear for this recipe, which is part of the appeal.
- Baking Sheet: A rimmed half-sheet pan (18×13 inches) works best. The rim catches any drips and prevents a smoky oven.
- Wire Rack: This is important. A cooling rack set inside the baking sheet allows air to circulate around the wings, ensuring even crisping on all sides. If you do not have one, you can flip the wings halfway through, but the rack makes a big difference.
- Large Bowl: For tossing the wings with the dry rub. A stainless steel or glass bowl works better than plastic, which can absorb flavors.
- Paper Towels: Lots of them. You need to dry the wings thoroughly before seasoning.
- Tongs: For flipping and transferring hot wings.
- Saucepan: Small one for making the buffalo sauce.
- Instant-Read Thermometer: Optional but helpful. Chicken wings are safe at 165°F, but I pull them at around 175°F for more tender meat.
If you do not have a wire rack, do not panic. You can flip the wings halfway through the cooking process and they will still get crispy—just not quite as evenly. I have done it both ways, and while the rack is better, the no-rack version is still miles ahead of any frozen wing you can buy.
Preparation Method
This method looks long, but it is mostly hands-off time. The actual work is about 15 minutes.
Step 1: Prep the Wings
Start by patting the wings completely dry with paper towels. This is the most important step in the entire recipe. Wet skin will steam instead of crisp, and nobody wants that. If you have time, leave the wings uncovered in the fridge for an hour or two to dry out further. I have done this overnight with excellent results.
If your wings are whole, cut them at the joints. You should get three pieces per wing: the drumette (the little drumstick), the flat (the two-bone piece), and the tip. Discard the tips or save them for stock.
Step 2: Season the Wings
In a large bowl, combine the baking powder, salt, pepper, garlic powder, onion powder, and paprika. Whisk to combine. Add the dried wings and toss thoroughly with your hands. Make sure every piece is coated evenly. The mixture will look like a dry rub, and that is exactly what you want.
Step 3: Set Up for Baking
Preheat your oven to 250°F (120°C). Place a wire rack inside a rimmed baking sheet and spray it lightly with nonstick cooking spray. Arrange the wings in a single layer on the rack, making sure they are not touching. Crowding the pan will trap steam and ruin your crispiness.
Step 4: The Low-Temperature Phase
Bake the wings at 250°F for 30 minutes. This low heat renders the fat under the skin without cooking the meat too quickly. You will see little beads of fat forming on the surface. This is good—it means the skin is drying out and preparing to get crispy.
Step 5: The High-Temperature Phase
After 30 minutes, increase the oven temperature to 425°F (220°C). Do not remove the wings during this temperature change—just crank it up and let them keep cooking. Bake for another 40-50 minutes, rotating the pan halfway through. The wings are done when they are deep golden brown and the skin looks blistered and crispy. An instant-read thermometer inserted into the thickest part of a drumette should read at least 175°F.
Step 6: Make the Sauce
While the wings bake, make your sauce. In a small saucepan over low heat, combine the hot sauce, melted butter, Worcestershire sauce, and honey if using. Whisk until smooth and warm. Do not let it boil—you just want everything melted and combined. Keep it warm until the wings are ready.
Step 7: Toss and Serve
Remove the wings from the oven and let them rest on the rack for 2-3 minutes. Transfer them to a large bowl, pour the warm sauce over the top, and toss gently until every wing is coated. Serve immediately with blue cheese or ranch dressing, celery sticks, and carrot sticks.
Cooking Tips & Techniques
I have made plenty of mistakes with wings over the years, so you do not have to. Here is what I have learned.
Patience with the low temperature is non-negotiable. The first time I tried this method, I got impatient and skipped the 250°F step. I went straight to 425°F. The wings were edible, but the skin was tough and chewy instead of crispy. That low-heat phase is what renders the fat and dries out the skin. Do not skip it.
Do not use too much baking powder. I once got heavy-handed and used a tablespoon per pound. The wings had a weird, bitter aftertaste. Stick to the ratio in the recipe—about 2 teaspoons for 3 pounds of wings. And make sure it is baking powder, not baking soda. Baking soda will make your wings taste like soap.
Let the wings rest after saucing. If you are serving a crowd, toss the wings in sauce and then let them sit on the wire rack for 5 minutes before transferring to a platter. This lets the sauce set slightly so it does not all slide off onto the plate. I learned this one the hard way after serving a puddle of buffalo sauce with sad, naked wings floating in it.
Multitask wisely. While the wings are in the oven, use that time to prep your other game day snacks. I usually whip up a batch of creamy buffalo chicken dip stuffed bread bowl or a pot of smoky chipotle football chili while the wings bake. It makes the whole spread come together without last-minute chaos.
For extra-crispy wings, try the fridge trick. After patting the wings dry and seasoning them, arrange them on the wire rack and refrigerate uncovered for 2-24 hours. This dries the skin out even further. The result is the crispiest wings you have ever made at home. It is a game changer for big game days when you want to prep ahead.
Variations & Adaptations
These wings are a blank canvas. Here are some of my favorite ways to change them up.
Honey Garlic Wings: Skip the buffalo sauce and toss the baked wings in a mixture of ¼ cup honey, 3 tablespoons soy sauce, 2 minced garlic cloves, and a splash of rice vinegar. Simmer it on the stove until slightly thickened, then toss. These are sweet, sticky, and dangerously addictive.
Lemon Pepper Wings: This is my go-to for people who do not like spicy food. After baking, toss the wings in melted butter (about 3 tablespoons) and a generous coating of lemon pepper seasoning. I use a store-bought blend, but you can make your own with lemon zest, black pepper, and a pinch of salt. Finish with fresh lemon juice and chopped parsley.
BBQ Wings: Toss the baked wings in your favorite barbecue sauce. I like a smoky, slightly sweet Kansas City-style sauce. For extra depth, brush the wings with sauce during the last 10 minutes of baking instead of tossing after. This caramelizes the sauce onto the skin beautifully.
Dry Rub Wings: If you want wings without any sauce, double the dry rub mixture and add ½ teaspoon of cayenne pepper for heat. After baking, toss them in a little melted butter and then another coating of the dry rub. These are perfect for people who want the crunch without the mess.
Air Fryer Adaptation: If you are making a smaller batch, the air fryer works great. Preheat to 400°F (200°C). Cook the seasoned wings in a single layer for 12 minutes, flip, and cook another 10-12 minutes until crispy. No need for the two-temperature method in the air fryer—it gets hot enough on its own. I have used this method for quick weeknight snacks and it works perfectly.
Serving & Storage Suggestions
These wings are best served immediately, straight from the toss bowl to the platter. The crispy skin starts to soften as soon as the sauce hits it, so timing matters. I recommend saucing the wings right before you plan to serve them.
For a game day spread, arrange the wings on a large platter with celery and carrot sticks on one side and a bowl of blue cheese or ranch dressing in the center. Sprinkle with fresh chives or parsley for color. I like to serve them alongside other finger foods like easy slow cooker pulled pork sliders for a complete spread.
Storage: Leftover wings (if you have any) can be stored in an airtight container in the refrigerator for up to 4 days. The texture will soften, but the flavor will still be great.
Reheating: The best way to reheat wings is in the oven or air fryer. Preheat your oven to 400°F (200°C). Place the wings on a wire rack over a baking sheet and reheat for 8-10 minutes until hot and crispy again. The microwave will make them soggy, so avoid it if you can. In the air fryer, reheat at 375°F for 4-5 minutes.
Freezing: You can freeze the baked (but unsauced) wings for up to 3 months. Let them cool completely, then arrange them in a single layer on a baking sheet and freeze until solid. Transfer to a freezer bag. To serve, reheat directly from frozen at 400°F for 15-18 minutes, then toss in sauce.
These wings actually taste better the next day in some ways. The flavors meld together overnight, and if you reheat them properly, you get a slightly more intense flavor. I have been known to make a double batch just so I have leftovers for lunch the next day.
Nutritional Information & Benefits
These wings are a protein-packed snack that fits into most diets. Here is the approximate nutritional breakdown per serving (about 6 wings, without sauce):
| Nutrient | Amount |
|---|---|
| Calories | 380 |
| Protein | 32g |
| Fat | 26g |
| Saturated Fat | 8g |
| Carbohydrates | 1g |
| Fiber | 0g |
| Sugar | 0g |
| Sodium | 680mg |
Chicken wings are an excellent source of protein, which helps keep you full and supports muscle health. They also contain selenium, phosphorus, and B vitamins. The skin does add fat, but baking instead of frying significantly reduces the overall fat content compared to traditional wings.
For those watching their carb intake, these wings are naturally low-carb and keto-friendly if you skip the honey in the sauce. They are also gluten-free as written. The main allergens to be aware of are dairy (if you use butter in the sauce) and the potential for cross-contamination in pre-cut wings.
I personally love that I can serve these wings to friends with different dietary needs. They are naturally low-carb, and swapping the butter for a dairy-free alternative makes them work for almost everyone. It is nice to have one recipe that pleases the whole crowd without making anyone feel left out.
Conclusion
These crispy baked chicken wings for football Sunday have become a tradition in my house for a reason. They deliver the crunch of fried wings without the hassle and mess of a deep fryer. The two-temperature method is a small extra step that pays off in a big way—crispy skin, tender meat, and zero greasy fingers.
I love that this recipe is flexible enough to work for a crowd or just a quiet night in. You can keep them classic with buffalo sauce, or get creative with honey garlic, lemon pepper, or any flavor you dream up. The base wings are so good on their own that the sauce is really just a bonus.
If you try these wings, I would love to hear how they turn out. Drop a comment below and let me know your favorite sauce combination, or tag me in your photos if you share them online. Game day is better when we are all snacking together, and these wings are the perfect way to start the party.
Now go preheat that oven. The game is about to start, and the best wings are waiting.
Frequently Asked Questions
Can I use frozen wings for this recipe?
Yes, but you need to thaw them completely first. Pat them very dry after thawing—frozen wings release a lot of moisture as they defrost. If you try to use them frozen, the skin will steam instead of crisp, and you will end up with sad, soggy wings.
Why did my wings turn out soggy?
The most common reason is not drying the wings thoroughly before seasoning. Moisture is the enemy of crispy skin. Other culprits include crowding the pan (which traps steam), using too little baking powder, or skipping the low-temperature phase. Make sure your wings are in a single layer with space between each piece.
Can I make these wings ahead of time for a party?
Absolutely. You can bake the wings completely, let them cool, and refrigerate them unsauced for up to 2 days. When you are ready to serve, reheat them at 400°F for 8-10 minutes until hot and crispy, then toss in sauce. This is my preferred method for game day—it takes the stress out of timing everything perfectly.
Is baking powder really necessary?
Yes, it is the secret to crispy baked wings. The baking powder raises the pH of the skin, which helps it brown and crisp more efficiently. It also creates tiny bubbles on the surface that increase the surface area for crunch. Do not skip it, and do not substitute baking soda—they are not the same thing.
How do I get the sauce to stick to the wings?
The key is to toss the wings while both the wings and the sauce are warm. Cold sauce will slide right off. Also, make sure your wings are well-coated in the dry rub before baking—the baking powder creates a slightly rough surface that helps the sauce cling. If your sauce is still sliding off, try adding a tablespoon of honey or cornstarch slurry to thicken it slightly.
Pin This Recipe!
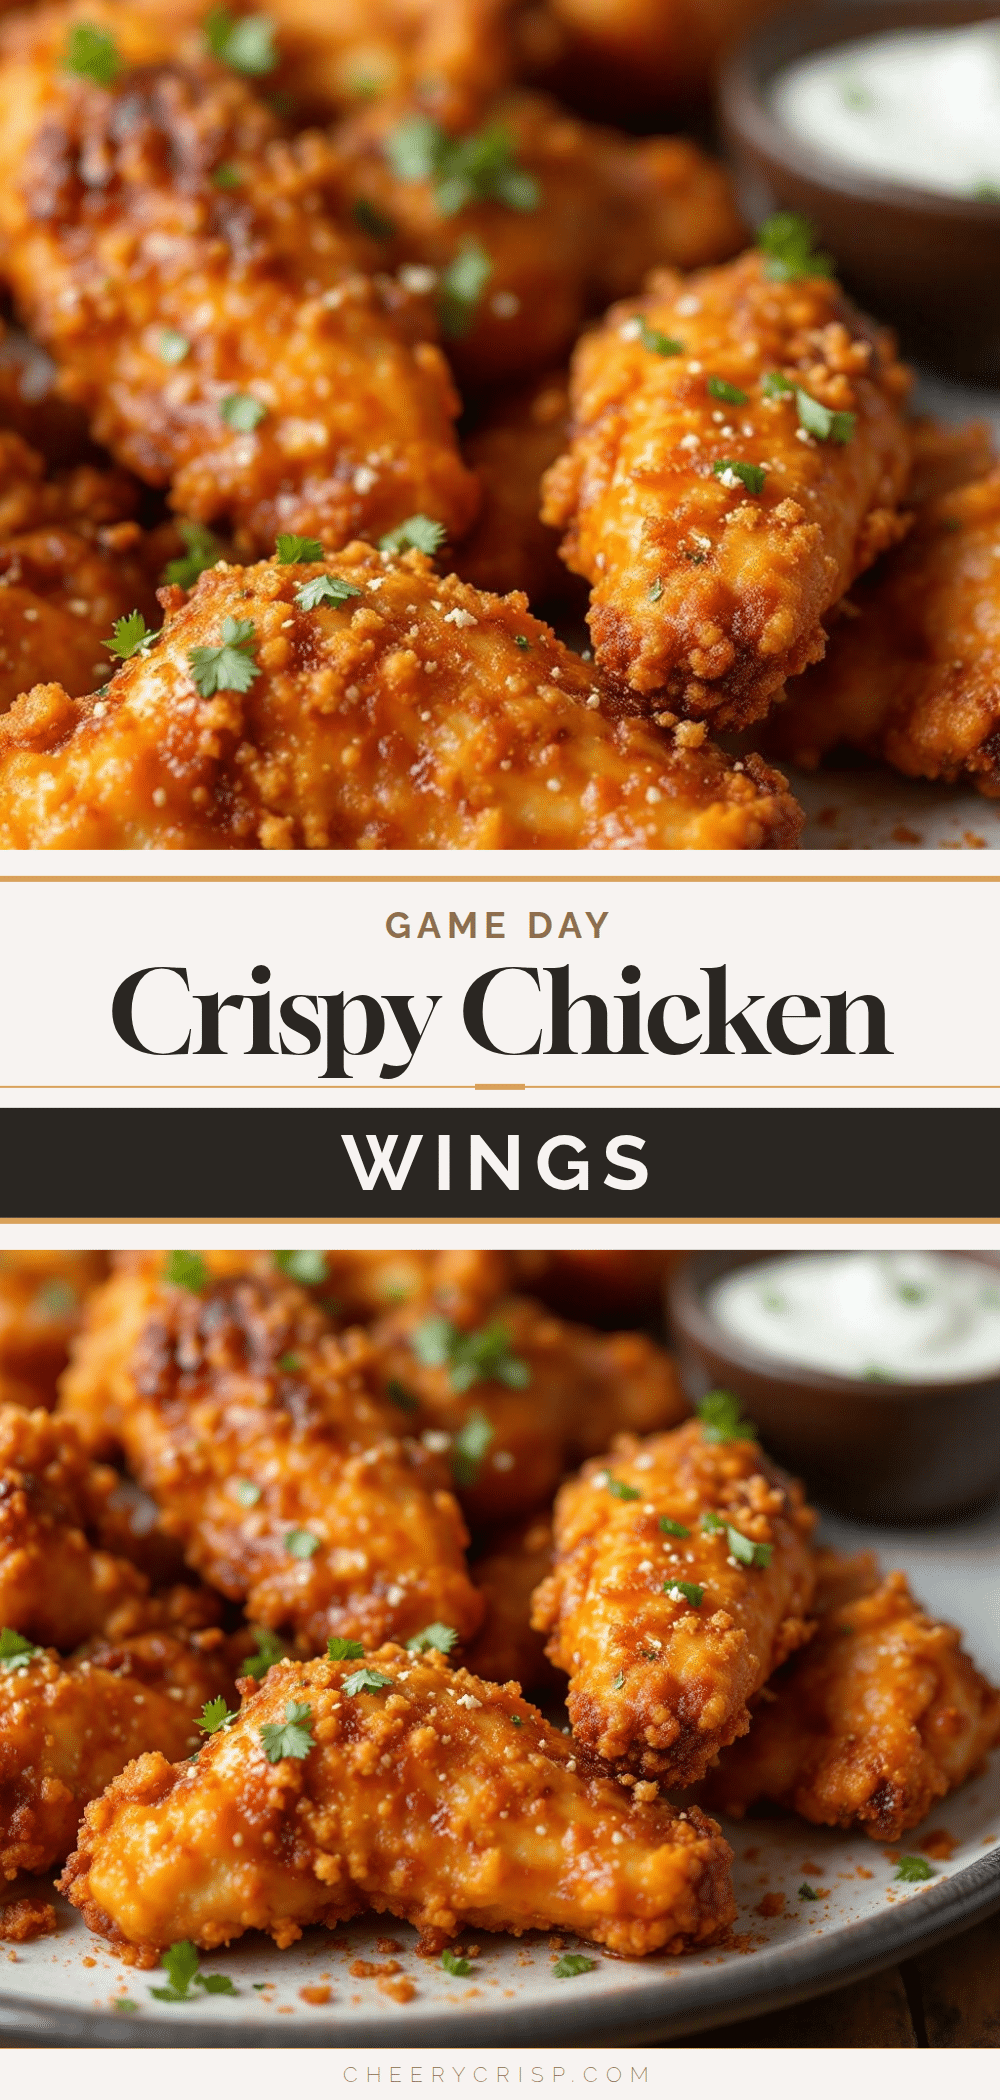
Crispy Baked Chicken Wings: Easy Game Day Perfect Snack

These crispy baked chicken wings are the perfect game day snack, featuring a simple baking powder trick for a crunchy, golden skin without deep frying. The two-temperature roasting method ensures tender, juicy meat every time.
- Prep Time: 15 minutes
- Cook Time: 1 hour 10 minutes
- Total Time: 1 hour 25 minutes
- Yield: 4 servings 1x
- Category: Appetizer
- Cuisine: American
Ingredients
- 3 pounds chicken wings, separated into drumettes and flats
- 2 teaspoons baking powder (aluminum-free preferred)
- 1½ teaspoons kosher salt (or 1 teaspoon fine table salt)
- 1 teaspoon black pepper, freshly ground
- 1 teaspoon garlic powder
- ½ teaspoon onion powder
- 1 teaspoon paprika (sweet or smoked)
- ½ cup hot sauce (Frank’s RedHot recommended)
- ¼ cup unsalted butter, melted
- 1 teaspoon Worcestershire sauce
- 1 tablespoon honey (optional)
- Blue cheese or ranch dressing for dipping (optional)
- Celery and carrot sticks for serving (optional)
- Fresh chives or parsley for garnish (optional)
Instructions
- Pat the wings completely dry with paper towels. If whole, cut at the joints into drumettes, flats, and tips; discard tips or save for stock.
- In a large bowl, combine baking powder, salt, pepper, garlic powder, onion powder, and paprika. Add dried wings and toss thoroughly to coat evenly.
- Preheat oven to 250°F (120°C). Place a wire rack inside a rimmed baking sheet and spray lightly with nonstick cooking spray. Arrange wings in a single layer on the rack, not touching.
- Bake at 250°F for 30 minutes to render fat and dry the skin.
- Increase oven temperature to 425°F (220°C) without removing wings. Bake for another 40-50 minutes, rotating the pan halfway, until deep golden brown and crispy. Internal temperature should reach at least 175°F.
- While wings bake, make the sauce: In a small saucepan over low heat, combine hot sauce, melted butter, Worcestershire sauce, and honey (if using). Whisk until smooth and warm; do not boil.
- Remove wings from oven and let rest on rack for 2-3 minutes. Transfer to a large bowl, pour warm sauce over top, and toss gently to coat. Serve immediately with dressing, celery, carrot sticks, and garnish.
Notes
Pat wings very dry for maximum crispiness. Do not skip the low-temperature phase. Use aluminum-free baking powder to avoid metallic aftertaste. For extra-crispy wings, refrigerate seasoned wings uncovered on the rack for 2-24 hours before baking. Leftover unsauced wings can be frozen for up to 3 months.
Nutrition
- Serving Size: About 6 wings
- Calories: 380
- Sodium: 680
- Fat: 26
- Saturated Fat: 8
- Carbohydrates: 1
- Protein: 32
Keywords: crispy baked chicken wings, game day wings, buffalo wings, baked chicken wings, easy wings recipe



