Love this? Save it for later!
Share the inspiration with your friends
I didn’t set out to reinvent breakfast. Honestly, I just wanted something that wouldn’t feel like cardboard in my stomach at 10 a.m. The first time I tried making these, I rushed it. I used steel-cut oats and baked them for the standard time. What came out of the oven was a dense, chewy brick. I took one bite and realized I was eating a savory sponge. It was edible, sure, but it lacked that specific, yielding softness that makes morning food actually enjoyable.
That’s when I stopped treating them like muffins. Muffins are meant to have a crumb. They are meant to break apart. These cups are different. They are meant to be spooned, not bitten. The goal here is a texture so tender it practically melts on your tongue, similar to the way creamy high-fiber overnight oats feel, but with the warm, comforting structure of a baked good.
I spent weeks tweaking the liquid-to-oat ratio. You know how some recipes call for equal parts? That’s where the brick comes from. I found that soaking the oats overnight in a slightly higher ratio of milk creates that gelatinous, pudding-like consistency we crave. It’s not just about convenience; it’s about texture engineering. When you wake up, you pull a tin from the fridge, pop it in the microwave or oven, and suddenly you have a warm, custardy breakfast that feels indulgent but isn’t heavy.
The beauty of the creamy overnight baked oatmeal cups is that they respect your morning routine. You don’t have to stand over a stove stirring. You don’t have to worry about burning your fingers on a hot pan. You just mix, chill, and reheat. It’s quiet cooking. It’s the kind of meal prep that doesn’t feel like work because the hard part happens while you’re asleep. And once you get that soft, custard-like center right, you’ll never go back to dry, crumbly oatmeal again.
Why You’ll Love This Recipe
Let’s be real for a second. Most breakfast recipes promise convenience but deliver stress. You have to chop fruit while the pan heats up. You have to watch the stove so the milk doesn’t boil over. This recipe flips that script entirely. I developed this specific batch of creamy overnight baked oatmeal cups after years of testing different oat types and liquid ratios. The result is a dish that feels like it came from a high-end bakery but requires zero skill to make.
Here is why these cups have become a staple in my kitchen:
- Quick & Easy Prep: The entire assembly takes less than ten minutes. You dump everything in a bowl, stir, and divide. That’s it. You can have breakfast prepped for the entire week before you even brush your teeth.
- Simple Ingredients: No fancy grocery trips needed. You likely already have rolled oats, milk, eggs, and a sweetener in your kitchen. It relies on pantry staples that you probably won’t run out of.
- Perfect for Meal Prep: These are the ultimate Sunday prep food. They store beautifully in the fridge for up to five days, making them ideal for busy workweeks or early morning commutes.
- Crowd-Pleaser: I’ve served these to picky eaters and health nuts alike. The texture is universally loved because it’s soft and comforting, not gritty or dry.
- Unbelievably Delicious: The combination of soaked oats and baked eggs creates a rich, custard-like mouthfeel. It’s next-level comfort food that doesn’t leave you feeling sluggish.
What makes this recipe different from the rest is the soaking process. Most baked oatmeal recipes skip the overnight rest. By letting the oats sit in the milk overnight, they absorb the liquid fully before they ever hit the heat. This prevents that tough, chewy edge and ensures every bite is uniformly soft. It’s a small step, but it changes everything.
This isn’t just good oatmeal; it’s the kind of breakfast that makes you actually want to wake up early. It’s comfort food reimagined—healthy, fast, but with the same soul-soothing satisfaction as a fresh pastry. Perfect for impressing guests without stress, or turning a simple meal into something memorable.
What Ingredients You Will Need
This recipe uses simple, wholesome ingredients to deliver bold flavor and satisfying texture without the fuss. The magic lies in the quality of the oats and the richness of the dairy. You don’t need expensive superfoods, just good basics handled correctly.
- Old-Fashioned Rolled Oats (3 cups / 270g): This is non-negotiable. Do not use quick oats or steel-cut oats. Quick oats turn to mush, and steel-cut oats stay too chewy even after baking. Rolled oats provide the perfect structure while absorbing liquid to become tender.
- Milk (2 cups / 480ml): I prefer whole milk or oat milk for the creamiest result. Dairy adds richness, but plant-based milks work well if you need a vegan option. Avoid skim milk if you want that luxurious mouthfeel.
- Eggs (2 large / room temperature): These act as the binder and help create the custard texture. Room temperature eggs mix more evenly into the batter, preventing lumps.
- Maple Syrup (1/3 cup / 80ml): Use real maple syrup, not pancake syrup. It adds a deep, complex sweetness that balances the earthiness of the oats. Honey works too, but maple is my go-to for this flavor profile.
- Butter (2 tbsp / 30g, melted): Unsalted butter adds richness and helps brown the top slightly. If you are dairy-free, use coconut oil, though it will add a subtle coconut flavor.
- Baking Powder (1 tsp): Just a little bit helps the cups rise slightly and keeps them airy. Don’t skip this, or they might turn out too dense.
- Cinnamon (1 tsp): Ground cinnamon is essential for that warm, cozy breakfast aroma. It ties all the flavors together.
- Salt (1/2 tsp): This is crucial. Salt enhances the sweetness and balances the flavor. Without it, the oatmeal will taste flat.
- Vanilla Extract (1 tsp): A splash of pure vanilla extract adds depth and makes the oats taste like a dessert.
- Chia Seeds (2 tbsp / optional): I add these for extra fiber and to help thicken the mixture. If you don’t have them, you can skip them, but they do help with that pudding-like texture.
For the mix-ins, I usually stick to fresh or frozen berries. Strawberries, blueberries, or raspions work beautifully. If you prefer fruit, diced apples or pears are great too. Just keep in mind that very wet fruits might release juice during baking, which is fine, but don’t overload the cups.
Equipment Needed
You don’t need a lot of fancy gear for this. The main tool you need is a standard 12-cup muffin tin. I recommend a light-colored metal tin. Dark non-stick tins tend to brown the bottoms too quickly, which can make the edges tough. If you don’t have a muffin tin, you can use a standard 9×9 inch baking dish, but you’ll need to adjust the baking time slightly.
A large mixing bowl is essential. I use a bowl with a spout because it makes pouring the oat mixture into the muffin cups much easier and less messy. A silicone spatula is also helpful for scraping the bowl clean so you don’t waste any batter.
If you plan to make these regularly, consider getting silicone muffin liners. They make cleanup a breeze, and the oatmeal doesn’t stick to them. However, I find that greasing the tin well with butter or cooking spray gives a better crispy edge. Just make sure to grease every nook and cranny.
For storage, airtight containers are your best friend. Glass containers are nice because they don’t retain odors, but plastic works fine too. If you are baking in a dish instead of individual cups, you’ll need a knife or spatula to portion them out later. Keep your equipment clean and ready; the whole process should take less than fifteen minutes from start to finish.
Preparation Method
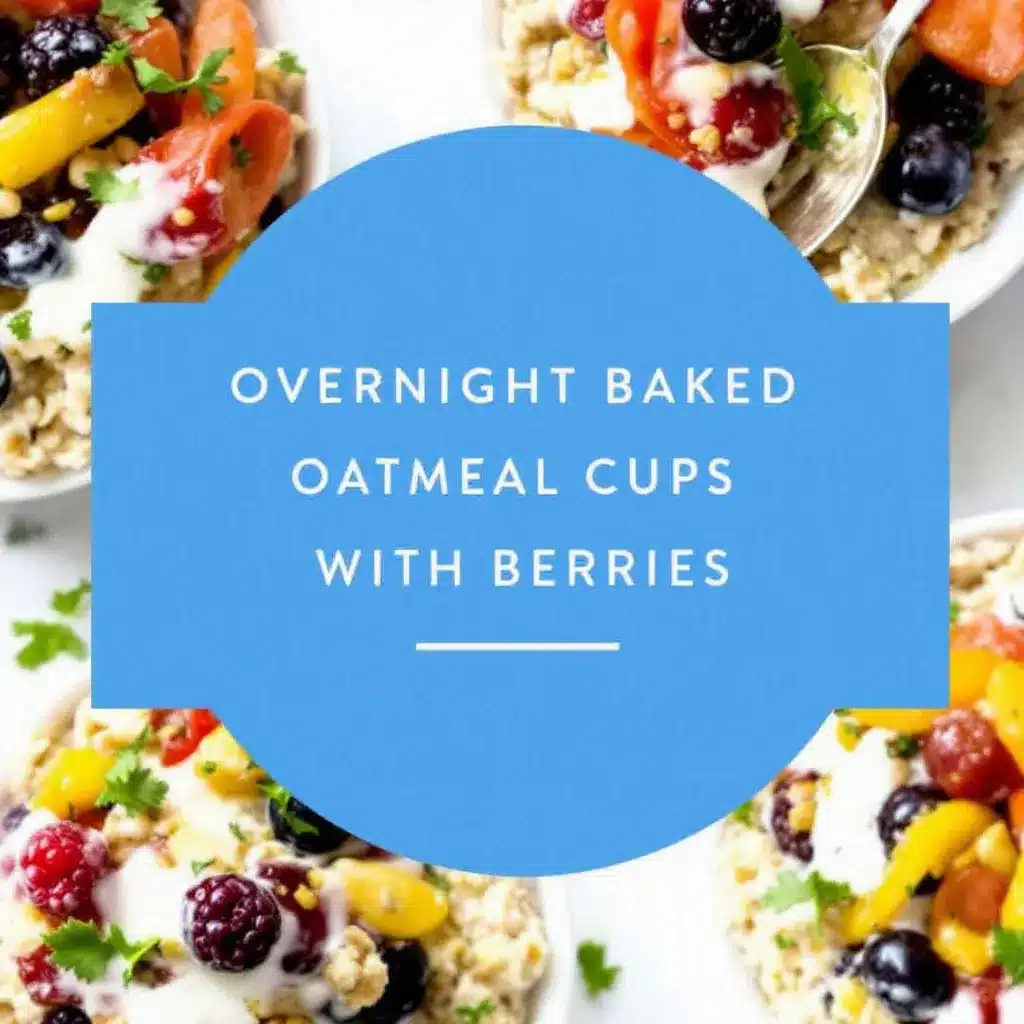
The process is straightforward, but timing matters. Here is exactly how to make these creamy overnight baked oatmeal cups without any hassle.
- Mix the Wet Ingredients (2 minutes): In a large bowl, whisk together the eggs, melted butter, maple syrup, vanilla extract, and milk. Whisk until the mixture is smooth and fully combined. You want no streaks of egg or butter left. This creates the base for your custard.
- Add Dry Ingredients (1 minute): To the wet mixture, add the rolled oats, baking powder, cinnamon, salt, and chia seeds if using. Stir well with a spoon or spatula. Make sure every oat is coated. This step is quick, so don’t overmix. Just combine until no dry patches remain.
- The Soak (Crucial Step): Let the mixture sit in the bowl for at least 10 minutes, but ideally overnight. If you are in a rush, let it sit for 10 minutes. This allows the oats to absorb the liquid. If you skip this, your oatmeal will be chewy. If you soak it, it becomes tender. I usually mix this the night before and leave it in the fridge.
- Preheat the Oven (5 minutes): Preheat your oven to 350°F (175°C). Grease your muffin tin generously with butter or cooking spray. If using silicone liners, you still might want to spray them lightly to ensure easy release.
- Divide the Batter (3 minutes): Stir the soaked oat mixture again. It will look thick and porridge-like. Divide the mixture evenly among the 12 muffin cups. Use about 1/3 cup of mixture per cup. Press down gently with the back of a spoon to flatten the top slightly. This ensures even baking.
- Add Mix-ins (2 minutes): If you are using berries or fruit, press a few pieces into the top of each cup. Don’t bury them too deep; you want some fruit visible on top for that nice presentation.
- Bake (20-25 minutes): Place the tin in the oven. Bake for 20-25 minutes. You are looking for the tops to be set and slightly golden brown. The centers should still be slightly jiggly, like a custard. If they are firm all the way through, you might have overbaked them.
- Cool and Serve (5 minutes): Let the cups cool in the tin for 5 minutes. They will firm up as they cool. Then, remove them from the tin and enjoy warm. They can be stored and reheated later.
Troubleshooting Tip: If the tops are browning too fast but the centers are still wet, cover the tin loosely with aluminum foil for the last 5-10 minutes of baking.
Cooking Tips & Techniques
I’ve made enough oatmeal to know where people go wrong. The biggest mistake is using the wrong oats. Stick to old-fashioned rolled oats. They have the right thickness to hold up to baking while still becoming soft. Quick oats will disintegrate into a paste.
Another common error is not letting the oats soak. I know it’s tempting to skip this step when you’re hungry, but the texture difference is night and day. Soaking hydrates the beta-glucan fiber in the oats, which creates that creamy, pudding-like consistency. If you are short on time, you can soak them for just 10 minutes, but overnight is best.
When it comes to baking, trust your eyes, not just the timer. Ovens vary. My oven runs hot, so I often check at 20 minutes. Look for a set center. It should look like a firm custard, not a solid cake. If you bake it until it’s firm like a muffin, you’ve lost the “creamy” part of the name.
Multitasking is easy here because the active time is so low. You can mix the oats while your coffee brews. The only thing you need to watch is the oven. Set a timer and go grab your keys.
For consistency, use a measuring cup or a small scale to divide the batter. Uneven portions mean some cups will be undercooked and others dry. I usually fill the cups one by one to ensure they are all the same height.
Also, don’t skimp on the salt. It sounds counterintuitive in a sweet dish, but salt is a flavor enhancer. It makes the maple syrup taste sweeter and the cinnamon taste more aromatic. It’s the secret ingredient that makes homemade taste better than store-bought.
Variations & Adaptations
One of the best things about this recipe is how flexible it is. You can change it up based on what you have or what you’re craving.
- Fruit Variations: While berries are classic, try adding diced apples or pears. For a fall vibe, use spiced apples with a dash of nutmeg. In the summer, fresh peaches or blackberries work wonderfully. Just chop them small so they distribute evenly.
- Nut Butter Swirl: Add a teaspoon of peanut butter or almond butter to the center of each cup before baking. It creates a gooey, protein-rich center that pairs perfectly with the oatmeal. This is my personal favorite variation.
- Chocolate Chip: For a dessert-like breakfast, add a handful of dark chocolate chips to each cup. The chocolate melts into the oats, creating little pockets of sweetness. This pairs well with a strong black coffee.
- Gluten-Free: Simply swap the rolled oats for certified gluten-free rolled oats. The rest of the ingredients are naturally gluten-free, so this is an easy swap for those with sensitivities.
- Vegan Option: Use plant-based milk and maple syrup. For the binder, you can use a “flax egg” (1 tbsp ground flaxseed mixed with 3 tbsp water per egg) instead of regular eggs. The texture will be slightly different but still delicious.
I’ve also tried adding protein powder to these. It works, but it can make the mixture thicker. If you add protein powder, you may need to add an extra splash of milk to keep the consistency creamy. Start with a quarter cup and adjust from there.
Serving & Storage Suggestions
These oatmeal cups are best served warm. If you are eating them fresh out of the oven, let them cool for a minute so they aren’t too hot to handle. You can top them with a dollop of Greek yogurt, a drizzle of extra maple syrup, or a sprinkle of granola for crunch.
For storage, let the cups cool completely before placing them in an airtight container. They will keep in the refrigerator for up to 5 days. You can also freeze them for up to 3 months. To freeze, place them on a baking sheet in the freezer until solid, then transfer to a freezer bag. This prevents them from sticking together.
To reheat, microwave a cup for 60-90 seconds. If you are reheating from frozen, add another 30 seconds. You can also reheat them in the oven at 350°F for 10-15 minutes if you prefer a crispier edge.
The flavors actually develop over time. The oats continue to absorb the liquid in the fridge, making them even softer and more cohesive after a day or two. This is why meal prepping works so well for this recipe. It gets better with age.
Pair these with a strong cup of coffee or a glass of orange juice. They are light enough that you won’t feel weighed down, but filling enough to last you until lunch.
Nutritional Information & Benefits
These oatmeal cups are a nutritious start to the day. Oats are a great source of soluble fiber, specifically beta-glucan, which helps lower cholesterol and keep you full longer. The eggs provide high-quality protein, which is essential for muscle repair and satiety.
Using maple syrup instead of refined sugar adds trace minerals and antioxidants. If you add nuts or seeds, you get healthy fats and additional vitamins. This recipe is naturally low in fat unless you add extra butter or nut butters.
For those watching their calorie intake, each cup is roughly 150-180 calories, depending on the mix-ins. It’s a balanced meal that provides complex carbohydrates for energy and protein for sustained fullness. It’s a far better option than a sugary pastry or a granola bar.
If you have allergies, remember to check your oat packaging for gluten-free certification, as oats are often processed in facilities with wheat. The eggs can be substituted for vegan alternatives if needed. Overall, this is a wholesome, nutrient-dense breakfast that supports your health goals without sacrificing taste.
Conclusion
These creamy overnight baked oatmeal cups are more than just a recipe; they are a solution for busy mornings. They offer the comfort of a baked good with the ease of grab-and-go convenience. I love that I can prep them on Sunday and feel accomplished all week long. The texture is soft, the flavor is warm, and the effort is minimal.
I encourage you to try this recipe and customize it to your liking. Add your favorite fruits, nuts, or spices. Make it your own. I’ve found that once you master this base, you’ll never go back to dry, boring oatmeal again. It’s a game-changer for my morning routine, and I hope it becomes one for yours too.
Please leave a comment below if you try this recipe. I’d love to hear what mix-ins you tried or how you liked the texture. Share your photos on social media and tag me—I love seeing your creations. Happy baking!
FAQs
Can I use steel-cut oats for this recipe?
No, steel-cut oats are too hard and chewy for this recipe. They won’t soften enough even after baking. Stick to old-fashioned rolled oats for the best creamy texture.
How do I store these oatmeal cups?
Store them in an airtight container in the refrigerator for up to 5 days. You can also freeze them for up to 3 months. Place them in a freezer bag once they are frozen solid to prevent sticking.
Can I make these vegan?
Yes! Use plant-based milk and maple syrup. Replace the eggs with a flax egg (1 tbsp ground flaxseed mixed with 3 tbsp water per egg). The texture will be slightly different but still delicious.
Do I have to soak the oats overnight?
For the best creamy texture, yes. Soaking allows the oats to absorb the liquid and soften. If you are short on time, you can soak them for 10-15 minutes, but overnight is ideal.
Can I add protein powder?
Yes, you can add about 1/4 cup of protein powder. Keep in mind that protein powder can absorb more liquid, so you may need to add an extra splash of milk to keep the mixture creamy.
PrintCreamy Overnight Baked Oatmeal Cups

These creamy overnight baked oatmeal cups offer a soft, custard-like texture that melts in your mouth. They are easy to make-ahead, perfect for meal prep, and provide a comforting, healthy breakfast option.
- Prep Time: 10 minutes
- Cook Time: 25 minutes
- Total Time: 35 minutes
- Yield: 12 servings 1x
- Category: Breakfast
- Cuisine: American
Ingredients
- 3 cups old-fashioned rolled oats
- 2 cups milk (whole milk or oat milk recommended)
- 2 large eggs, room temperature
- 1/3 cup maple syrup
- 2 tbsp unsalted butter, melted
- 1 tsp baking powder
- 1 tsp ground cinnamon
- 1/2 tsp salt
- 1 tsp vanilla extract
- 2 tbsp chia seeds (optional)
- Fresh or frozen berries, diced apples, or pears for mix-ins
Instructions
- In a large bowl, whisk together the eggs, melted butter, maple syrup, vanilla extract, and milk until smooth.
- Add the rolled oats, baking powder, cinnamon, salt, and chia seeds to the wet mixture. Stir well to coat the oats evenly.
- Let the mixture sit for at least 10 minutes, or ideally overnight in the refrigerator, to allow the oats to absorb the liquid.
- Preheat the oven to 350°F (175°C) and grease a 12-cup muffin tin generously with butter or cooking spray.
- Stir the soaked oat mixture again and divide it evenly among the 12 muffin cups, using about 1/3 cup per cup. Press down gently to flatten the top.
- Press fresh or frozen fruit mix-ins into the top of each cup.
- Bake for 20-25 minutes until the tops are set and slightly golden brown, but the centers remain slightly jiggly.
- Let the cups cool in the tin for 5 minutes before removing and serving warm.
Notes
Do not use quick oats or steel-cut oats as they will not achieve the desired creamy texture. Soaking the oats is crucial for the pudding-like consistency. If the tops brown too quickly, cover loosely with aluminum foil for the last 5-10 minutes of baking. These store well in the fridge for up to 5 days or can be frozen for up to 3 months.
Nutrition
- Serving Size: 1 cup
- Calories: 165
- Sugar: 12
- Sodium: 180
- Fat: 6
- Saturated Fat: 3
- Carbohydrates: 28
- Fiber: 4
- Protein: 6
Keywords: overnight baked oatmeal, creamy oatmeal cups, make-ahead breakfast, meal prep, healthy breakfast, gluten-free option, vegan option



