Love this? Save it for later!
Share the inspiration with your friends
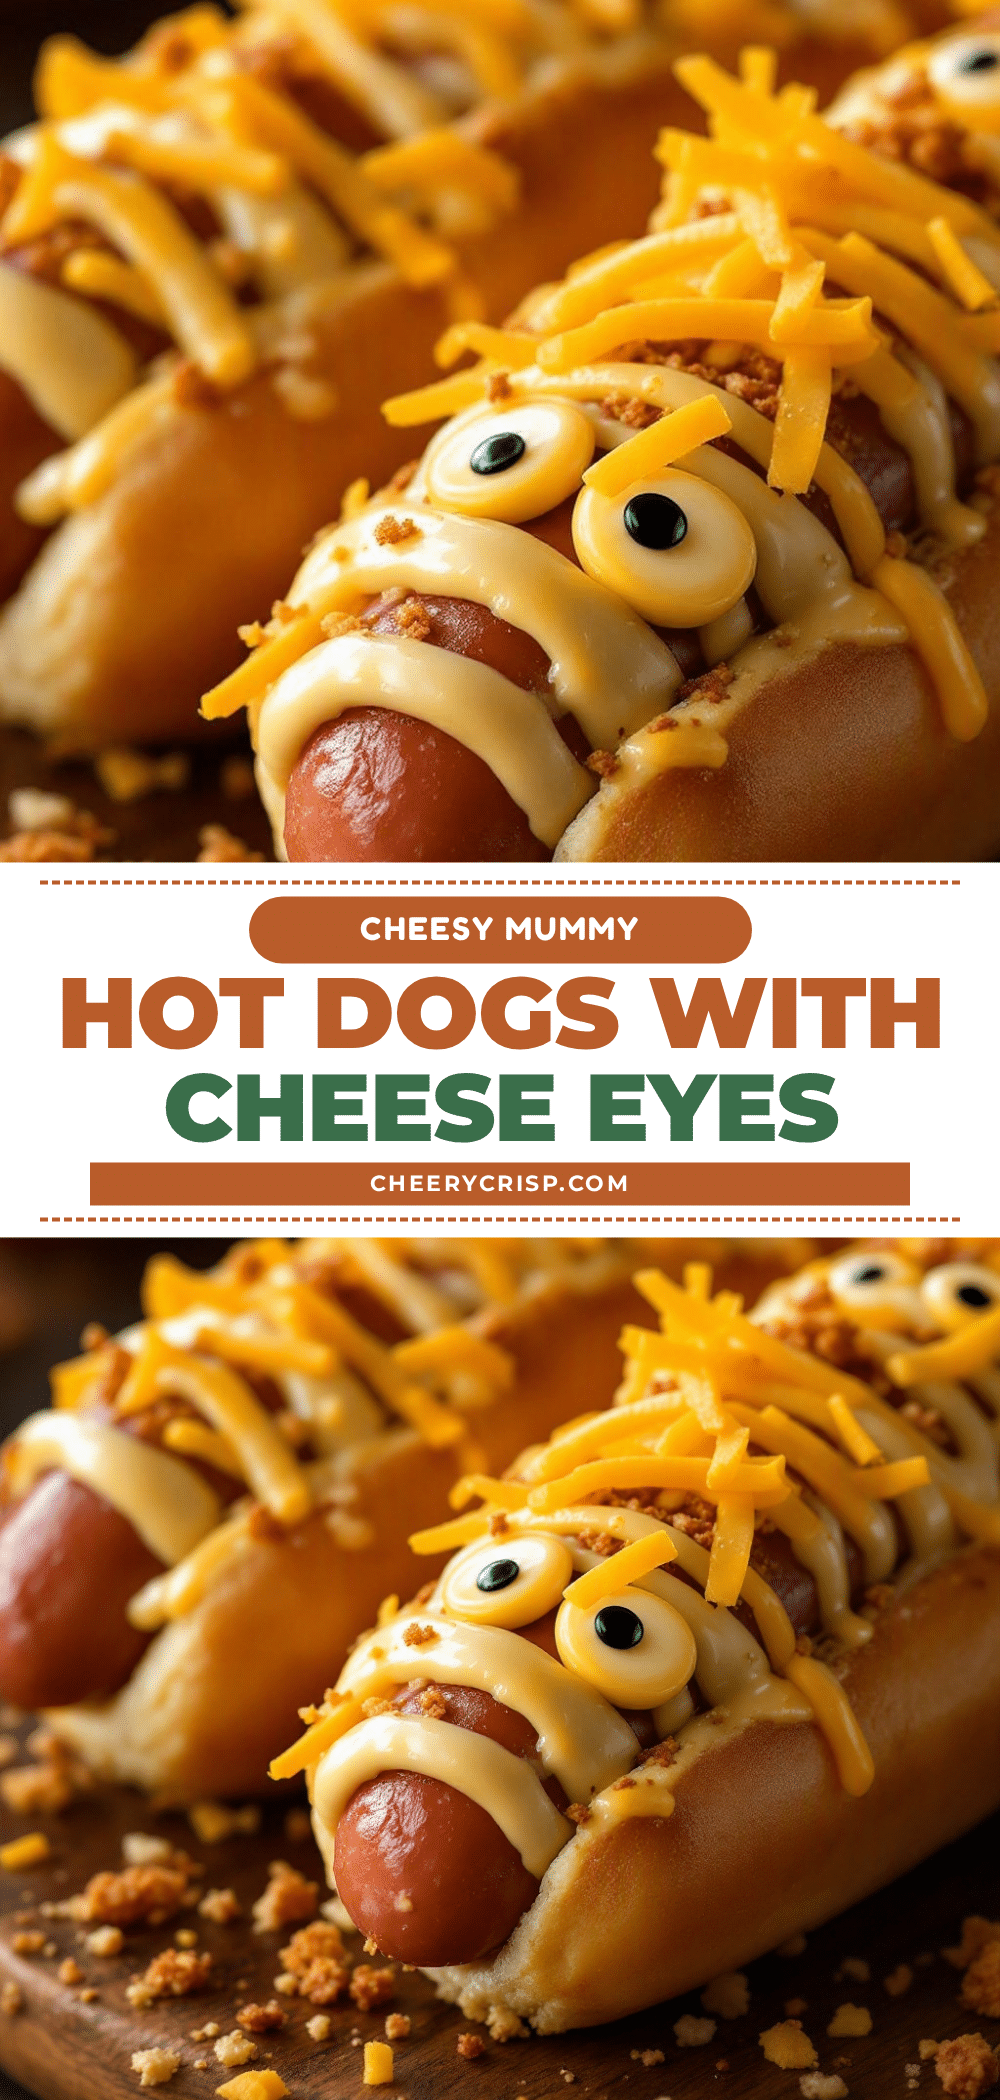
I need something for the Halloween party that isn’t just another bowl of candy. That’s the thought that hit me standing in the grocery aisle, staring at a package of hot dogs and a tube of crescent rolls. My brain immediately went to mummies—because honestly, what else are you going to wrap around a hot dog? I grabbed the cheese, too, because everything is better with cheese eyes. This is the kind of recipe that feels like a win before you even start cooking. It’s simple, it’s silly, and it’s the one thing both kids and adults will actually fight over at the snack table.
These mummy hot dogs are exactly what you need for a Halloween that doesn’t require a culinary degree. They’re fun to make, even more fun to eat, and they disappear faster than you’d expect. I’ve made them for three Halloweens in a row now, and they’ve never failed to get a laugh or a happy groan. I remember the first time I made them, my nephew took one look and said, “They look like angry little ghosts with hot dog bodies.” He wasn’t wrong. And honestly, that’s the charm. They’re not perfect—they’re supposed to look a little messy, a little wrapped-up, like a mummy that just rolled out of bed. That’s the point, and that’s what makes them so lovable.
So if you’re looking for a Halloween treat that’s more savory than sweet, and way more fun than a bag of chips, you’ve come to the right place. These mummy hot dogs with cheese eyes are the kind of recipe you’ll make year after year, not because you have to, but because they’re just that good.
Why You’ll Love This Recipe
Let me tell you why these little guys have become a staple in my Halloween rotation. It’s not just because they’re cute, though that certainly helps. It’s because they check every box you could want for a party snack, and they do it without any fuss.
- Quick & Easy: From start to finish, you’re looking at about 20 minutes. That’s it. No marinating, no complicated steps, no sweating over a hot stove for hours. Perfect for when you’re juggling costumes, decorations, and a dozen other things.
- Simple Ingredients: You probably already have everything in your fridge and pantry. Hot dogs, crescent roll dough, and cheese. That’s the entire grocery list. No fancy trips to a specialty store needed.
- Perfect for Halloween Parties: These are the ultimate party food. They’re portable, easy to grab, and they fit right in with the spooky theme. They’re also a huge hit at school parties, potlucks, or even just a fun family movie night.
- Crowd-Pleaser: I have yet to meet a kid who doesn’t love these. And the adults? They love them just as much. There’s something about the combination of salty hot dog, flaky pastry, and melty cheese that appeals to everyone.
- Unbelievably Delicious: Let’s be real—wrapping anything in buttery, flaky crescent roll dough is a guaranteed win. The hot dog gets perfectly warm, the cheese gets gooey, and the dough bakes up golden and irresistible. It’s comfort food in a fun, spooky package.
What makes this recipe different from the dozens of other mummy hot dog recipes out there? It’s the cheese eyes. Most recipes just use mustard or ketchup dots for eyes, which can get messy or just taste like condiments. Using small slices of cheese gives you a real, melty, gooey eye that looks creepy and tastes amazing. It’s a small detail, but it makes a big difference. Plus, I’ve tested the baking time and temperature to ensure the dough is perfectly golden and flaky, not doughy or burnt. This isn’t just another version—it’s the best version.
This recipe is the kind that makes you close your eyes after the first bite. It’s nostalgic, it’s fun, and it’s exactly what Halloween snacking should be: easy, delicious, and a little bit silly.
What Ingredients You Will Need
This recipe uses simple, everyday ingredients to create something that feels special. You don’t need anything fancy, just a few staples that you probably already have on hand. Here’s what you’ll need to bring these mummies to life.
- Hot Dogs (1 package, 8 count): Use your favorite brand. I personally like beef hot dogs for their richer flavor, but turkey or chicken hot dogs work great too. You can also use cocktail sausages for mini mummies, just adjust the baking time slightly.
- Refrigerated Crescent Roll Dough (1 can, 8 oz): This is the secret weapon. The dough is already buttery, flaky, and perfectly portioned. I recommend the Pillsbury brand for consistent results. You’ll be cutting the dough into thin strips to wrap around the hot dogs.
- Cheese Slices (4 slices, any variety): This is for the eyes. I use mild cheddar or provolone because they melt well and have a nice color that contrasts with the dough. You can also use mozzarella for a more subtle flavor. Cut each slice into 4 small squares or circles—you’ll need two per mummy.
- Mustard or Ketchup (optional, for pupils): If you want to add pupils to the cheese eyes, a tiny dot of mustard or ketchup works perfectly. It’s not necessary, but it adds an extra layer of detail that kids love.
- Non-Stick Cooking Spray or Parchment Paper: To prevent the mummies from sticking to the baking sheet. I prefer parchment paper for easy cleanup, but a light spray works just as well.
That’s it. Six ingredients (if you count the optional mustard) and you’re ready to go. The beauty of this recipe is its simplicity. You don’t need to hunt down obscure spices or specialty items. Everything is available at your local grocery store, and you probably have most of it already.
One quick tip: make sure your crescent roll dough is cold when you start working with it. If it gets too warm, it becomes sticky and hard to cut cleanly. Keep it in the fridge until you’re ready to use it, and work quickly once you open the can.
Equipment Needed
You don’t need a lot of fancy equipment to make these mummy hot dogs. In fact, you probably have everything you need already sitting in your kitchen drawers. Here’s the short list:
- Baking Sheet: A standard half-sheet pan works perfectly. You’ll need one that fits all eight mummies without them touching each other.
- Parchment Paper or Silicone Baking Mat: This makes cleanup a breeze and prevents the dough from sticking. I’ve used both, and they work equally well.
- Sharp Knife or Pizza Cutter: For cutting the crescent roll dough into thin strips. A pizza cutter is actually easier and gives you cleaner, more even strips. A sharp chef’s knife works fine too.
- Cutting Board: To protect your countertop when cutting the dough.
- Small Bowl (optional): For holding the cheese eye pieces and mustard dots before assembly.
That’s really all you need. No mixer, no special pans, no complicated gadgets. This is a recipe that’s meant to be made with whatever you have on hand. If you don’t have a pizza cutter, a knife works perfectly. If you don’t have parchment paper, just spray your baking sheet well with non-stick spray. The recipe is forgiving, and the equipment is minimal.
Preparation Method

Okay, let’s get to the fun part. Making these mummy hot dogs is almost as enjoyable as eating them. The process is straightforward, but I’ll walk you through each step with some tips I’ve learned along the way.
- Preheat your oven to 375°F (190°C). Line a baking sheet with parchment paper or lightly spray it with non-stick cooking spray. Getting the oven hot before you start is key—you want that dough to start baking immediately for the best flaky texture.
- Prepare your cheese eyes. Take your 4 slices of cheese and cut each one into 4 small squares or circles. You’ll need 2 per mummy, so 16 total. If you’re using a round cookie cutter (like a tiny bottle cap), that works great. Otherwise, just cut them into rough squares—the mummies aren’t supposed to be perfect. Set them aside on a small plate.
- Open the crescent roll dough. Carefully unroll the can of crescent rolls. You’ll have 8 pre-cut triangles. Separate them along the perforated lines. If you’re using the seamless sheet version, just unroll it into a rectangle.
- Cut the dough into strips. Using a sharp knife or pizza cutter, cut each triangle lengthwise into 3-4 thin strips. The strips should be about 1/2 inch wide. Don’t worry if they’re not perfectly even—the mummies look better when they’re a little messy. You want them to look wrapped, not machine-made.
- Wrap the hot dogs. Take one hot dog and start wrapping a strip of dough around it, starting at one end and working your way to the other. Leave a small gap near the top (about 1 inch) where the eyes will go. Don’t wrap too tightly—leave a little room so the dough can expand as it bakes. Overlapping the strips slightly is fine; it adds to the “mummy” look. Repeat with the remaining hot dogs and dough strips. You’ll have enough dough to wrap all 8 hot dogs.
- Place on the baking sheet. Arrange the wrapped hot dogs on the prepared baking sheet, leaving about 1 inch of space between each one. They don’t spread much, but you want a little room for air circulation.
- Bake for 10-12 minutes. Place the baking sheet in the preheated oven and bake until the dough is golden brown and flaky, and the hot dogs are heated through. Keep an eye on them after 10 minutes—ovens vary, and you don’t want the dough to burn. The cheese eyes will be added after baking, so don’t worry about them yet.
- Add the cheese eyes. Remove the baking sheet from the oven and let the mummies cool for 1-2 minutes. While they’re still warm, place two cheese squares on each mummy in the gap you left at the top. The residual heat will soften the cheese and help it stick. If you want, add a tiny dot of mustard or ketchup to each cheese square to create pupils. This step is optional, but it really brings the mummies to life.
- Serve immediately. These are best enjoyed warm, while the cheese is still soft and the dough is at its flakiest. Arrange them on a platter and watch them disappear.
One thing I’ve learned from making these a few times: don’t overthink the wrapping. The mummies are supposed to look a little haphazard. If the dough strips are uneven or overlapping, that’s actually better. It gives them that “just rolled out of a tomb” look. Also, if you find the dough is getting too sticky to work with, pop it in the fridge for 5 minutes to firm up. Cold dough is much easier to handle.
Cooking Tips & Techniques
Over the years, I’ve made my share of mistakes with these mummy hot dogs. I’ve had dough that was too sticky, eyes that fell off, and mummies that looked more like sad blobs than spooky snacks. But each failure taught me something, and now I can share those lessons with you.
Keep the dough cold. This is the number one tip. Crescent roll dough gets soft and sticky very quickly at room temperature. If it’s too warm, it will tear when you try to wrap it. Keep the can in the fridge until the last possible moment, and work quickly. If the dough starts to feel tacky, put it back in the fridge for 5 minutes.
Don’t wrap too tightly. The dough needs room to expand as it bakes. If you wrap it too tightly, it can tear or become dense and doughy. Leave a little slack between the strips. Think of it like wrapping a gift—you want it snug, but not so tight that the paper rips.
Leave the eye gap. This is a mistake I made the first time. I wrapped the dough all the way to the top of the hot dog, and then I had nowhere to put the cheese eyes. Leave about an inch of exposed hot dog at the top. That’s where the eyes go.
Add the eyes after baking. I know it’s tempting to put the cheese on before baking, but don’t do it. The cheese will melt, slide off, and burn on the baking sheet. Adding it after the mummies come out of the oven ensures the cheese stays soft and in place. The residual heat from the hot dog is enough to melt it slightly.
Use a pizza cutter for the dough strips. A pizza cutter gives you much cleaner, more even strips than a knife. It also makes the job faster, which means the dough stays cold longer. If you don’t have one, a sharp chef’s knife works, but a pizza cutter is worth the small investment if you make these often.
Multitask wisely. While the mummies are baking, you can prep the cheese eyes and set up your serving platter. This saves time and keeps everything moving smoothly. Just don’t get so caught up in prep that you forget to set a timer for the oven.
Variations & Adaptations
One of the best things about this recipe is how easy it is to adapt. You can change it up based on what you have on hand, dietary needs, or just for fun. Here are some variations I’ve tried and loved.
Mini Mummy Bites: Use cocktail sausages or lil’ smokies instead of full-sized hot dogs. Cut the crescent roll dough into even thinner strips (about 1/4 inch wide) and wrap each mini sausage. Bake for 8-10 minutes instead of 10-12. These are perfect for parties where you want a smaller, more pop-able option.
Vegetarian Mummies: Swap the hot dogs for vegetarian or vegan hot dogs. Most brands work well, though some can be a bit softer, so handle them gently when wrapping. You can also use cheese sticks or pre-cooked veggie sausages.
Cheese-Stuffed Mummies: Before wrapping, use a sharp knife to cut a slit lengthwise down the center of each hot dog, being careful not to cut all the way through. Insert a thin strip of cheddar or mozzarella cheese into the slit, then wrap with dough as usual. The cheese melts inside, creating a gooey, delicious center.
Spicy Mummies: Use spicy hot dogs or add a sprinkle of red pepper flakes to the dough before wrapping. You can also use pepper jack cheese for the eyes for an extra kick. This is a great option if you’re serving adults who want a little heat.
Gluten-Free Mummies: Use gluten-free crescent roll dough or puff pastry. Many brands are available now, and they work just as well. Just follow the package directions for baking time, as gluten-free doughs can vary.
I’ve personally tried the cheese-stuffed version, and it was a game-changer. The melted cheese inside the hot dog adds a whole new level of richness. It’s a little messier to eat, but totally worth it. If you’re feeling adventurous, give it a try.
Serving & Storage Suggestions
These mummy hot dogs are best served warm, right out of the oven. The dough is at its flakiest, the hot dog is perfectly heated, and the cheese eyes are soft and gooey. Arrange them on a platter with some spooky decorations—think fake spider webs, plastic spiders, or a sign that says “Mummy’s Kitchen.” They’re the star of any Halloween spread.
For a complete Halloween party menu, pair these mummies with other game-day favorites. I love serving them alongside a bowl of best buffalo chicken tailgate dip for dipping, or a plate of crispy baked chicken wings for a full savory lineup. They also go great with a warm bowl of easy slow cooker football Sunday chili for a cozy Halloween dinner. And for dessert, you can’t go wrong with a batch of perfect black velvet cupcakes to keep the spooky theme going.
If you have leftovers (which is rare, but it happens), store them in an airtight container in the refrigerator for up to 3 days. The dough will soften slightly, but they’re still tasty. To reheat, pop them in a 350°F oven for 5-7 minutes, or until warmed through. You can also use an air fryer at 350°F for 3-4 minutes, which helps restore some of the crispiness. Avoid microwaving, as it makes the dough soggy and the hot dog rubbery.
These mummies don’t freeze well, unfortunately. The dough becomes soggy when thawed, and the texture just isn’t the same. I recommend making them fresh the day you plan to serve them. They come together so quickly that it’s really not a hassle.
One last tip: the flavors actually improve slightly after a few hours. The dough absorbs some of the hot dog’s savory flavor, and the cheese sets into a nice, soft layer. So if you make them ahead of time, they’re still delicious at room temperature for a party.
Nutritional Information & Benefits
Let’s be honest—these mummy hot dogs are a treat, not a health food. But that doesn’t mean they can’t fit into a balanced diet, especially when enjoyed in moderation as part of a fun celebration. Here’s a rough breakdown of what you’re looking at per mummy (based on standard ingredients):
- Calories: Approximately 220-250 calories per mummy
- Protein: 8-10 grams (thanks to the hot dog and cheese)
- Fat: 15-18 grams (mostly from the dough and hot dog)
- Carbohydrates: 12-15 grams (from the crescent roll dough)
- Sodium: 600-700 mg (hot dogs and dough are both high in sodium)
While this isn’t a recipe you’d eat every day, it does have some redeeming qualities. The hot dogs provide protein, which helps keep you full. The cheese adds calcium, which is good for bone health. And honestly, the joy and fun these bring to a Halloween party has its own mental health benefits—there’s something to be said for food that makes you smile.
If you’re looking to lighten things up, you can use turkey or chicken hot dogs, which are lower in fat and calories. You can also use reduced-fat crescent roll dough and low-fat cheese. These swaps will cut the calories and fat significantly without sacrificing too much flavor. I’ve tried the turkey hot dog version, and it’s still delicious—just a little less indulgent.
Potential allergens to note: this recipe contains wheat (gluten), dairy (cheese), and soy (often found in hot dogs and processed dough). If you have allergies, be sure to check labels and use appropriate substitutions. Gluten-free dough and dairy-free cheese are both available and work well in this recipe.
Conclusion
These easy mummy hot dogs with cheese eyes are the kind of recipe that makes Halloween feel special without any stress. They’re fun to make, they look adorable, and they taste absolutely delicious. I’ve made them for family parties, school events, and even just for a spooky movie night at home, and they never fail to bring a smile to everyone’s face.
The best part? You can customize them however you want. Add different cheeses, try spicy hot dogs, or make them mini for a party platter. The possibilities are endless, and the recipe is forgiving enough that even a beginner cook can nail it on the first try. It’s the kind of food that brings people together, and that’s what Halloween is all about.
I’d love to hear how your mummies turn out! Did you try a fun variation? Did your kids help with the wrapping? Drop a comment below and let me know. And if you loved this recipe, don’t forget to share it with your friends and family—after all, the more mummies, the merrier. Happy Halloween, and happy cooking!
Frequently Asked Questions
Can I make these mummy hot dogs ahead of time?
Yes, you can assemble them up to 24 hours in advance. Wrap the hot dogs with the dough strips, place them on the baking sheet, cover tightly with plastic wrap, and refrigerate. When you’re ready to bake, just pop them in the oven straight from the fridge—you may need to add 1-2 minutes to the baking time.
What if I don’t have crescent roll dough?
No problem! You can use puff pastry, pizza dough, or even biscuit dough. Just roll it out thin and cut it into strips. Each dough will give a slightly different texture—puff pastry is extra flaky, while pizza dough is more chewy. Adjust the baking time as needed based on the dough you choose.
How do I keep the cheese eyes from falling off?
Make sure you add the cheese eyes immediately after the mummies come out of the oven, while they’re still hot. The residual heat will soften the cheese and help it stick. If the cheese still isn’t sticking, you can use a tiny dab of mustard or ketchup as “glue” to hold it in place.
Can I use an air fryer instead of an oven?
Absolutely! Preheat your air fryer to 350°F (175°C). Place the wrapped mummies in the air fryer basket in a single layer, leaving space between them. Cook for 6-8 minutes, or until the dough is golden and the hot dogs are heated through. Add the cheese eyes after cooking. The air fryer gives an even crispier texture.
What other dips go well with these mummies?
These are great with a variety of dips. Ketchup and mustard are classics, but they also pair well with honey mustard, barbecue sauce, ranch dressing, or even a spicy sriracha mayo. For a Halloween-themed dip, try a “blood” dip made from marinara sauce or a “slime” dip made from green salsa mixed with sour cream.
Pin This Recipe!
Easy Mummy Hot Dogs with Cheese Eyes Best Halloween Recipe

These mummy hot dogs are a fun, savory Halloween treat made with hot dogs wrapped in crescent roll dough and topped with cheese eyes. They’re quick to make, kid-friendly, and perfect for parties.
- Prep Time: 10 minutes
- Cook Time: 12 minutes
- Total Time: 22 minutes
- Yield: 8 servings 1x
- Category: Appetizer
- Cuisine: American
Ingredients
- 1 package (8 count) hot dogs
- 1 can (8 oz) refrigerated crescent roll dough
- 4 slices cheese (mild cheddar or provolone)
- Mustard or ketchup (optional, for pupils)
- Non-stick cooking spray or parchment paper
Instructions
- Preheat oven to 375°F (190°C). Line a baking sheet with parchment paper or lightly spray with non-stick cooking spray.
- Prepare cheese eyes: Cut each cheese slice into 4 small squares or circles (16 total). Set aside.
- Open crescent roll dough and separate into 8 triangles. Cut each triangle lengthwise into 3-4 thin strips (about 1/2 inch wide).
- Wrap each hot dog with dough strips, starting at one end and leaving a 1-inch gap at the top for eyes. Overlap strips slightly for a mummy look.
- Place wrapped hot dogs on prepared baking sheet, spacing them about 1 inch apart.
- Bake for 10-12 minutes, until dough is golden brown and flaky.
- Remove from oven and let cool 1-2 minutes. Place 2 cheese squares on each mummy in the eye gap. Add a tiny dot of mustard or ketchup for pupils if desired.
- Serve immediately while warm.
Notes
Keep dough cold for easier handling. Don’t wrap too tightly; leave room for expansion. Add cheese eyes after baking to prevent melting. For mini mummies, use cocktail sausages and adjust baking time to 8-10 minutes. Leftovers can be stored in an airtight container in the refrigerator for up to 3 days; reheat in a 350°F oven for 5-7 minutes or in an air fryer at 350°F for 3-4 minutes. Avoid microwaving.
Nutrition
- Serving Size: 1 mummy
- Calories: 235
- Sugar: 3
- Sodium: 650
- Fat: 16
- Saturated Fat: 6
- Carbohydrates: 13
- Protein: 9
Keywords: Halloween, mummy hot dogs, crescent roll, hot dog, cheese eyes, party snack, easy recipe



