Love this? Save it for later!
Share the inspiration with your friends
My brother-in-law, Mark, swore he hated nachos. For years. The man would side-eye a basket of chips at a restaurant like it had personally offended him. “Too messy,” he’d say. “Never enough cheese on the bottom ones.” I mean, valid complaints, honestly. But still — hating nachos felt like a personality flaw I couldn’t ignore.
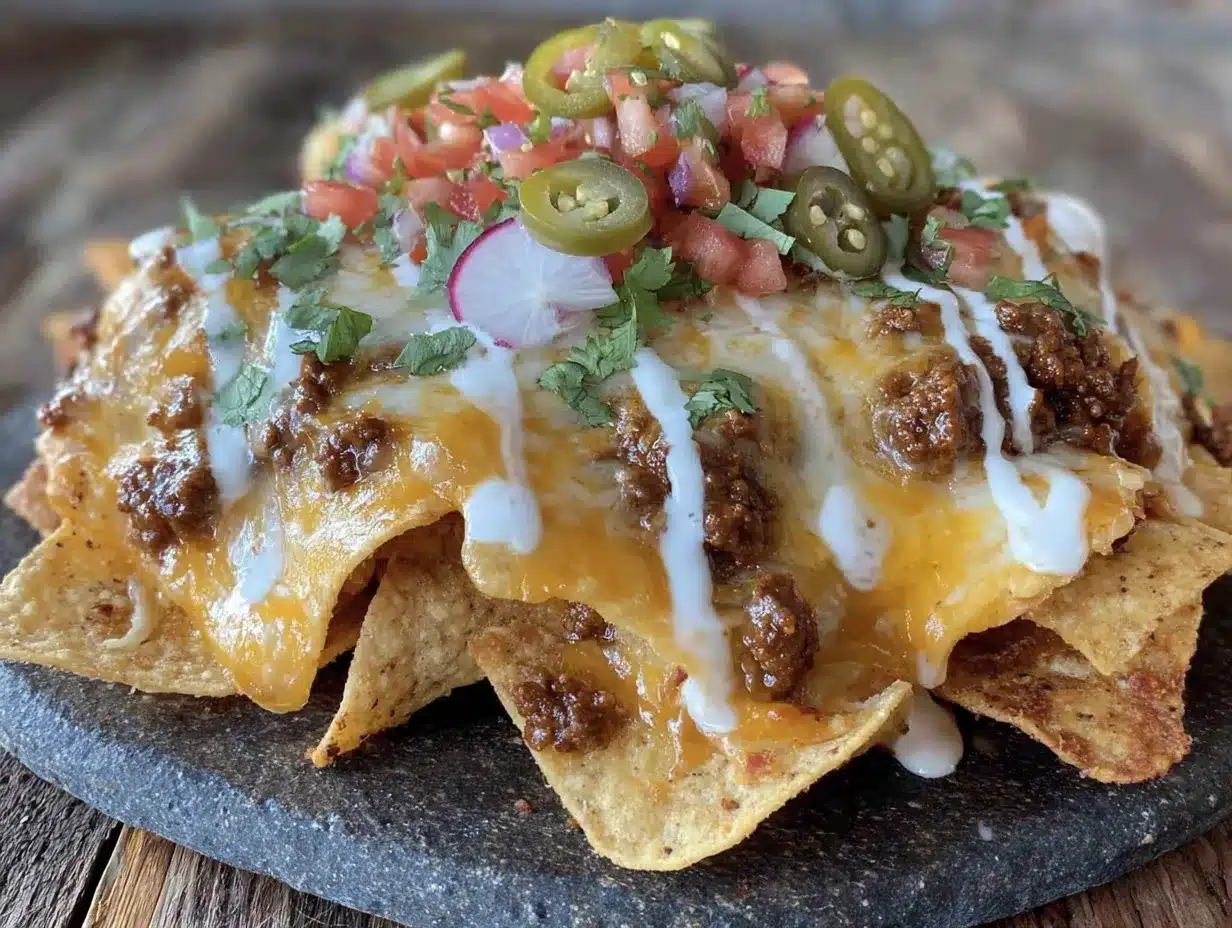
Then came Super Bowl Sunday last year. I was testing this loaded nacho bar with ground beef and queso, mostly for myself and a few friends who appreciate a good food project. Mark stopped by to grab something from the garage and wandered into the kitchen. I saw him eyeing the setup — the bubbling queso, the seasoned beef, the little bowls of jalapeños and black olives.
He stood there for a solid minute. Then he asked for a plate.
Three helpings later, he finally looked up and said, “Okay, these are different.” Different. That’s the word he used. But we all knew what he meant — he’d been wrong this whole time, and this version of a loaded nacho bar had just rewritten his entire food history. I didn’t say a word. I just handed him a napkin and smiled.
The thing about a really good nacho bar is that it solves every problem Mark ever complained about. Every single chip gets love. The cheese doesn’t congeal into a sad, rubbery blanket. And the toppings? They’re not an afterthought — they’re the whole point. Maybe you’ve been there, standing over a sad plate of nachos wondering why you bothered. I get it. Let me show you how to do it right.
Why You’ll Love This Recipe
This isn’t just another nacho recipe you find floating around the internet. I’ve tested this loaded nacho bar about a dozen times — through game days, birthday parties, and one particularly chaotic Tuesday night when I needed dinner to feel like a celebration. It works every single time.
Here’s what makes it stand out:
- Completely Customizable : Everyone builds their own plate, which means no fighting over toppings and no one getting stuck with the olives they don’t want. It’s the ultimate crowd-pleaser.
- Restaurant-Quality Queso at Home : We’re not using canned cheese sauce here. This queso is smooth, creamy, and actually tastes like real cheese because — surprise — it’s made with real cheese.
- Perfectly Seasoned Ground Beef : No bland, dry crumbles. The beef gets cooked with a blend of spices that makes every bite pop. Think chili-adjacent but nacho-specific.
- Great for Any Occasion : Game day, movie night, casual dinner with friends, or even a fun birthday dinner for the kids. It scales up or down effortlessly.
- Make-Ahead Friendly : You can prep almost everything in advance and just assemble when you’re ready to eat. The queso reheats beautifully.
Honestly, this loaded nacho bar has become my secret weapon for entertaining. It looks impressive, tastes incredible, and requires almost zero actual hosting stress. People gather around the table, build their plates, and suddenly everyone’s having a good time. That’s the kind of energy every recipe should bring.
What Ingredients You Will Need
This recipe uses straightforward, grocery-store-friendly ingredients. Nothing fancy, nothing hard to find — just good stuff that works together. Here’s what you need and why each one matters.
For the Seasoned Ground Beef
- 1 pound ground beef (80/20) : The 80/20 blend gives you enough fat for flavor without being greasy. Drain off excess after cooking for best results.
- 1 tablespoon olive oil : Just a little to help the onions soften before the beef goes in.
- 1 small yellow onion, diced : Adds sweetness and depth. White onion works fine too.
- 3 cloves garlic, minced : Fresh garlic makes a noticeable difference here. Don’t skip it.
- 1 tablespoon chili powder : The backbone of the seasoning. I prefer McCormick for consistent heat.
- 1 teaspoon ground cumin : Adds that warm, earthy note that makes taco-seasoned beef taste authentic.
- 1 teaspoon smoked paprika : Gives the beef a subtle smokiness that regular paprika just can’t match.
- 1/2 teaspoon garlic powder : Double the garlic action? Yes, please.
- 1/2 teaspoon onion powder : Rounds out the savory profile.
- 1/2 teaspoon salt : Adjust to taste, but don’t skip it entirely.
- 1/4 teaspoon black pepper : Freshly ground if you can.
- 1/2 cup beef broth or water : Helps the seasoning distribute and keeps the meat from drying out.
For the Queso
- 2 tablespoons unsalted butter : The base for the roux. Salted butter works too — just reduce added salt slightly.
- 2 tablespoons all-purpose flour : Thickens the queso without making it gluey. Use gluten-free flour blend if needed.
- 1 cup whole milk : Full-fat gives the creamiest result. 2% works in a pinch, but avoid skim.
- 8 ounces block-style white American cheese, shredded or cubed : This is the secret to ultra-smooth queso. Brands like Land O’Lakes or Boar’s Head melt beautifully. Pre-shredded cheese has anti-caking agents that can make the queso grainy — buy the block.
- 4 ounces sharp cheddar cheese, shredded : Adds flavor depth. Yellow or white cheddar both work.
- 1 (4-ounce) can diced green chiles, drained : Mild heat and tangy flavor. Use jalapeños if you want more kick.
- 1/4 teaspoon cayenne pepper (optional) : For those who like it spicy.
- Salt to taste : The cheeses are salty already, so taste before adding more.
For the Nacho Bar Toppings
- 1 large bag (13-16 ounces) restaurant-style tortilla chips : Go with sturdy chips that can hold up to toppings. I like On the Border or Juanita’s.
- 1 cup canned black beans, drained and rinsed : Adds fiber and heartiness.
- 1 cup pico de gallo or fresh salsa : Freshness cuts through the richness.
- 1/2 cup pickled jalapeños : Tangy heat that brightens every bite.
- 1/2 cup black olives, sliced : Salty, briny pops of flavor.
- 1 cup shredded lettuce : Iceberg or romaine for crunch.
- 1/2 cup sour cream : Cooling contrast to the warm queso and beef.
- 1/2 cup fresh cilantro, chopped : Bright, herbal finish.
- 1 avocado, diced, or 1/2 cup guacamole : Creamy richness that ties everything together.
- 1 lime, cut into wedges : A squeeze of lime right before eating makes a huge difference.
Equipment Needed
You don’t need a fully stocked professional kitchen for this loaded nacho bar, but having the right tools makes the process smoother. Here’s what I use:
- Large skillet or cast-iron pan : For browning the ground beef. Cast iron gives you even heat and nice browning.
- Medium saucepan : For making the queso. A heavy-bottomed pan prevents scorching.
- Whisk : Essential for smooth queso. A wooden spoon works but the whisk is better.
- Cutting board and sharp knife : For dicing onions, mincing garlic, and prepping toppings.
- Small bowls or ramekins : For arranging toppings on the bar. I use a mix of ceramic and small glass bowls.
- Large serving platter or sheet pan : For laying out the chips. A rimmed baking sheet works great and catches any drips.
- Cheese grater : Shred your own cheese — it really does melt better.
- Measuring spoons and cups : For accurate seasoning.
- Slotted spoon : For draining the beef fat.
If you don’t have a whisk, a fork works in a pinch — just be prepared to work a little harder. And if you’re short on small bowls, use muffin tin cups or even paper cups. I’ve done it. No judgment here.
Preparation Method
Let’s get cooking. This loaded nacho bar comes together in about 40 minutes, and most of that is hands-off simmering. Here’s the step-by-step.
Step 1: Season and Cook the Ground Beef (15 minutes)
Heat the olive oil in a large skillet over medium-high heat. Add the diced onion and cook for 3-4 minutes until it starts to turn translucent. Add the minced garlic and cook for 30 seconds — just until fragrant. Don’t let it burn.
Add the ground beef to the skillet. Break it up with a wooden spoon and let it brown without stirring too much for the first 2-3 minutes. You want some caramelization, not just gray meat. Once it’s mostly browned, drain off the excess fat using a slotted spoon or by carefully tilting the pan. Leave about a tablespoon of fat in the pan for flavor.
Reduce heat to medium. Add the chili powder, cumin, smoked paprika, garlic powder, onion powder, salt, and pepper. Stir to coat the meat evenly. Pour in the beef broth and let it simmer for 5-7 minutes, stirring occasionally, until the liquid reduces and the meat is coated in a thick, flavorful sauce. The kitchen should smell incredible at this point. Set the beef aside and keep warm.
Step 2: Make the Queso (15 minutes)
In a medium saucepan, melt the butter over medium heat. Whisk in the flour and cook for 1-2 minutes, stirring constantly. This is your roux — it should look like a thick paste and smell slightly nutty.
Slowly pour in the milk while whisking continuously. Keep whisking until the mixture thickens, about 2-3 minutes. It should coat the back of a spoon.
Reduce heat to low. Add the shredded American cheese and cheddar cheese a handful at a time, whisking after each addition until fully melted. This gradual approach prevents the cheese from seizing or turning grainy.
Once all the cheese is melted and smooth, stir in the drained green chiles and cayenne if using. Taste and add salt if needed — remember the cheeses are already salty. Keep the queso warm over very low heat, stirring occasionally. If it thickens too much, whisk in a splash of warm milk.
Step 3: Prep the Toppings (10 minutes)
While the beef and queso cook, prep all your toppings. Dice the avocado (or make guacamole), chop the cilantro, slice the olives, shred the lettuce, and set out the pico de gallo, sour cream, and pickled jalapeños in small bowls. This is the part where you can get creative — arrange everything on a tray or cutting board so people can see what’s available.
Step 4: Assemble the Nacho Bar (5 minutes)
Spread a generous layer of tortilla chips on your serving platter or sheet pan. Don’t pile them too high — you want each chip to be accessible. Spoon the seasoned ground beef evenly over the chips. Drizzle the warm queso over everything. Let people add their own cold toppings — that way the lettuce stays crisp and the sour cream stays cool.
Serve immediately with lime wedges on the side. The magic happens when everyone builds their own plate.
Cooking Tips & Techniques
I’ve made this loaded nacho bar enough times to know where things can go wrong. Here are the lessons I learned the hard way so you don’t have to.
Don’t skip the roux. I tried making queso without it once — just melted cheese and milk — and ended up with a greasy, separated mess. The flour and butter base stabilizes the cheese sauce and gives it that velvety texture that clings to every chip.
Shred your own cheese. I know it’s tempting to buy the bagged shredded cheese. I’ve been there. But those anti-caking powders really do mess with melting. Block cheese melts into a smooth, cohesive sauce. Bagged cheese can turn gritty. Trust me on this one.
Layer your chips strategically. If you pile all the chips in one mountain, the ones on the bottom will get soggy before you even start eating. Spread them in a single-ish layer on a large platter or use two smaller platters for bigger crowds. Every chip deserves queso coverage.
Keep the queso warm. Queso thickens as it cools. If you’re serving this at a party, keep the saucepan on a warming tray or reheat gently in 30-second intervals in the microwave, stirring between each. A splash of warm milk brings it back to life.
Season the beef generously. Nacho chips are salty and the queso is rich, so the beef needs enough seasoning to stand up to everything else. Taste it before you finish cooking and adjust if needed. It should be boldly flavored on its own.
Variations & Adaptations
One of the best things about a loaded nacho bar is how flexible it is. Here are some ways to make it your own.
Vegetarian Version : Skip the ground beef and double up on black beans and pinto beans. Add sautéed bell peppers and onions for texture. You can also use crumbled tofu or plant-based ground meat — just season it the same way.
Spicy Upgrade : Add a finely chopped jalapeño to the beef while it cooks. Stir in a tablespoon of hot sauce to the queso. Top with fresh serrano slices and a drizzle of spicy crema (mix sour cream with hot sauce).
Chicken Nacho Bar : Swap the ground beef for shredded rotisserie chicken. Toss the chicken with the same spice blend and a little chicken broth. It’s lighter but just as satisfying.
Breakfast Nachos : Yes, this is a thing. Use the same setup but add scrambled eggs, breakfast sausage, and a drizzle of salsa verde. It’s ridiculous in the best way.
Low-Carb Option : Replace tortilla chips with pork rinds or baked cheese crisps. Load them up with the beef, queso, and all the usual toppings. You won’t miss the chips as much as you think.
Serving & Storage Suggestions
This loaded nacho bar is best served immediately while the chips are crunchy and the queso is warm and pourable. Set everything out on a large table or counter and let people build their own plates. It’s interactive, fun, and keeps everyone happy.
For drinks, I love pairing this with cold Mexican beer like Modelo or a bright, citrusy margarita. For non-alcoholic options, horchata or a limeade with sparkling water works beautifully.
Storage : Leftovers are a little tricky because the chips get soft. Store the beef, queso, and toppings separately in airtight containers in the refrigerator. The beef keeps for 3-4 days. The queso keeps for about 3 days — reheat it gently on the stovetop with a splash of milk, whisking until smooth.
Reheating : The beef reheats well in a skillet over medium heat with a splash of water or broth. The queso needs low, slow heat — microwave in 30-second bursts, stirring between each, or use a small saucepan over low heat. Don’t rush it or it will separate.
Honestly, the flavors get even better the next day. The spices meld together and the beef becomes even more flavorful. Just make fresh chips.
Nutritional Information & Benefits
Here’s an approximate nutritional breakdown per serving (based on 6 servings, including chips and toppings):
| Nutrient | Amount per Serving |
|---|---|
| Calories | 520 |
| Protein | 28g |
| Fat | 32g |
| Carbohydrates | 35g |
| Fiber | 5g |
| Sugar | 6g |
| Sodium | 890mg |
This loaded nacho bar is a good source of protein from the beef and cheese. The black beans add fiber and plant-based protein, while the fresh toppings like pico de gallo and avocado provide vitamins and healthy fats. If you’re watching sodium, use low-sodium broth and go easy on the added salt — the cheese and chips bring plenty.
It’s not a health food, but it’s real food made from real ingredients. That counts for something.
Frequently Asked Questions
Can I make the queso ahead of time?
Yes! Make the queso up to 2 days in advance. Let it cool completely, then store it in an airtight container in the refrigerator. Reheat gently on the stovetop with a splash of warm milk, whisking until smooth.
What’s the best chip for nachos?
Look for thick, sturdy restaurant-style chips. Thin chips will break under the weight of the toppings. I like On the Border or Juanita’s — they hold up well and have good saltiness.
Can I use pre-shredded cheese for the queso?
You can, but the texture won’t be as smooth. Pre-shredded cheese contains anti-caking agents that prevent it from melting into a silky sauce. Block cheese really is worth the extra minute of shredding.
How do I keep the nachos from getting soggy?
Serve the warm toppings (beef and queso) over the chips and let everyone add their own cold toppings. This way the lettuce, sour cream, and pico de gallo stay fresh and crisp instead of wilting under the heat.
Can I freeze the seasoned ground beef?
Absolutely. Cook and cool the beef completely, then freeze it in a zip-top bag or airtight container for up to 3 months. Thaw in the refrigerator overnight and reheat in a skillet with a splash of broth.
Conclusion
This loaded nacho bar with ground beef and queso is the kind of recipe that turns a regular night into something worth gathering around. It’s forgiving, flexible, and ridiculously satisfying. Whether you’re feeding a crowd or just treating yourself on a Tuesday, it delivers every single time.
I love this recipe because it reminds me that cooking doesn’t have to be complicated to be memorable. Sometimes the best meals are the ones where everyone builds their own plate, reaches for the same bowl of jalapeños, and argues over who gets the last crispy chip. That’s the good stuff.
Try it for your next game day, movie night, or just because. And when you do, come back and tell me how it went. Did you add something unexpected? Did someone in your house finally admit they were wrong about nachos? I want to hear about it. Drop a comment below or tag me in your photos — let’s keep this nacho conversation going.
Now go make some queso. You’ve earned it.
Pin This Recipe!
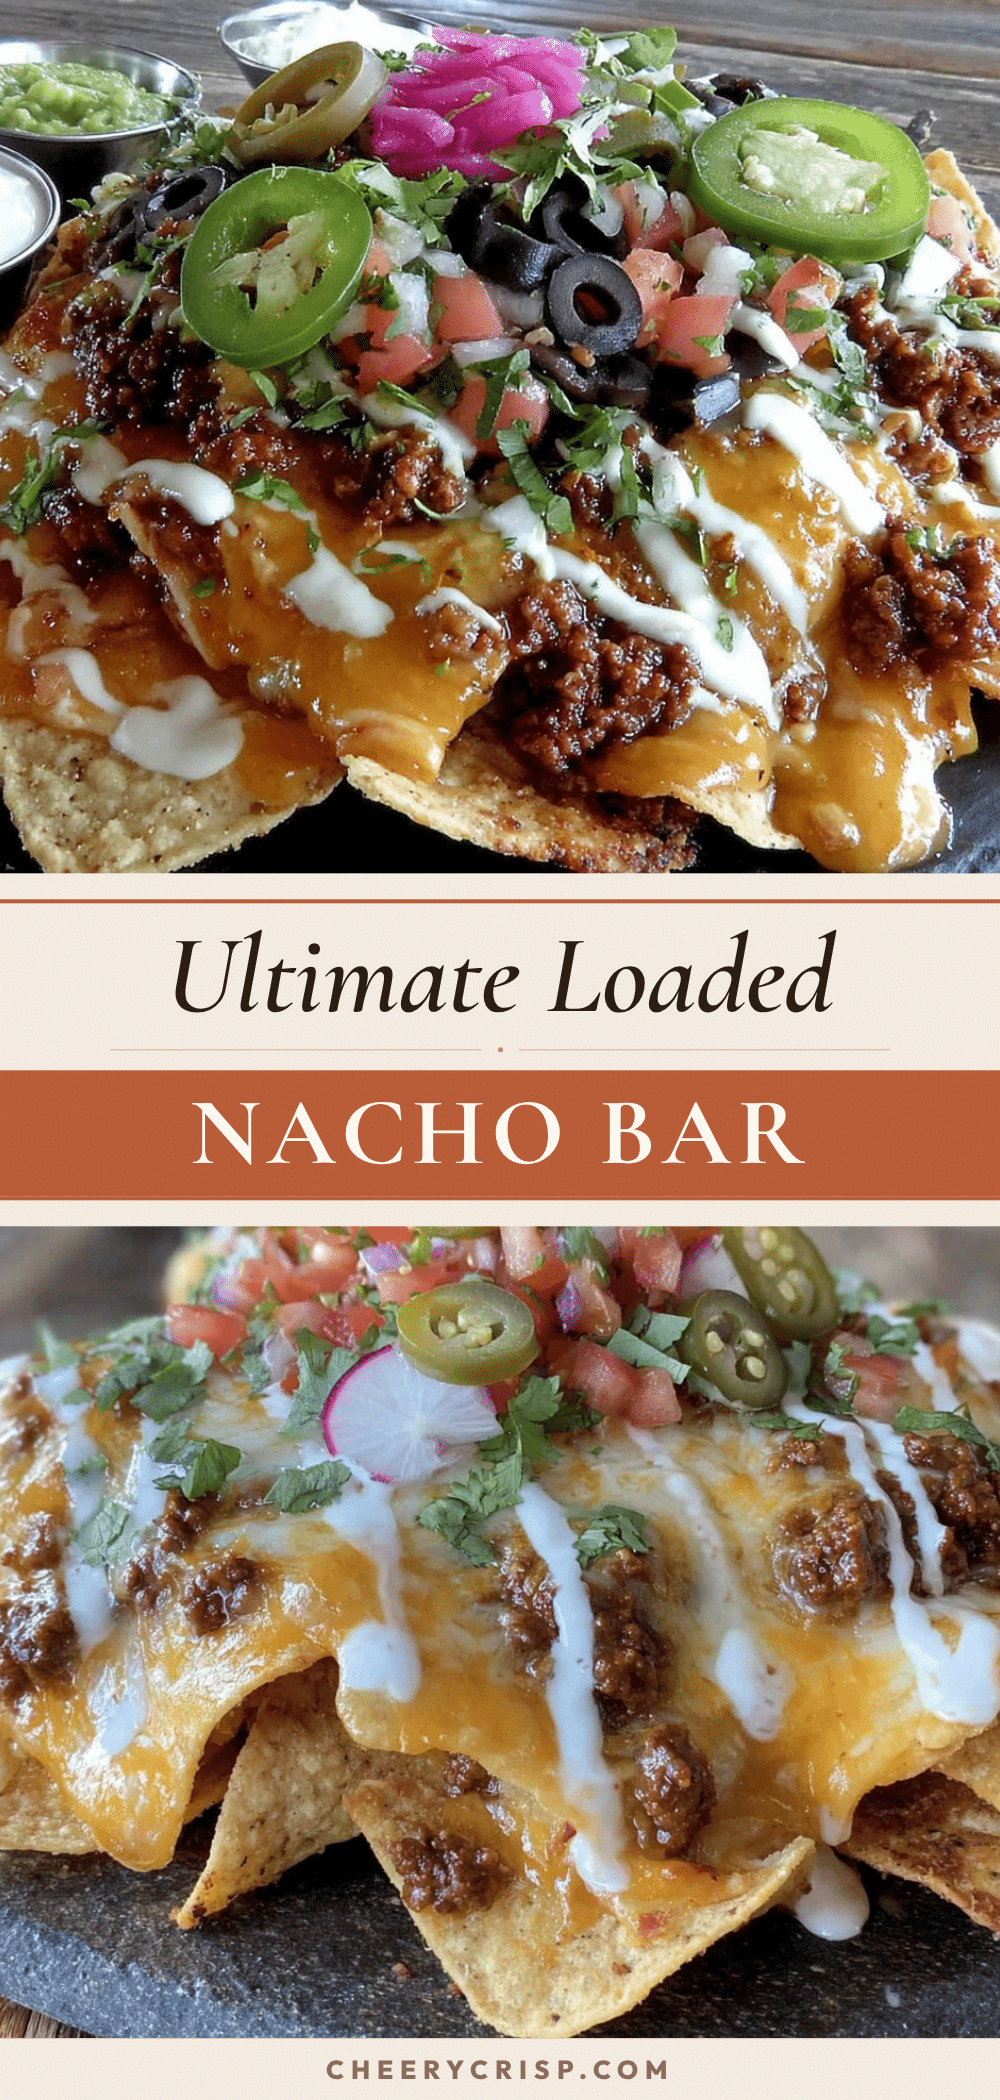
Ultimate Loaded Nacho Bar: Easy Ground Beef Queso Recipe
This loaded nacho bar features perfectly seasoned ground beef, smooth homemade queso, and a customizable array of toppings. It’s the ultimate crowd-pleaser for game days, parties, or any casual gathering.
- Prep Time: 15 minutes
- Cook Time: 25 minutes
- Total Time: 40 minutes
- Yield: 6 servings 1x
- Category: Main Course
- Cuisine: Mexican
Ingredients
- 1 pound ground beef (80/20)
- 1 tablespoon olive oil
- 1 small yellow onion, diced
- 3 cloves garlic, minced
- 1 tablespoon chili powder
- 1 teaspoon ground cumin
- 1 teaspoon smoked paprika
- 1/2 teaspoon garlic powder
- 1/2 teaspoon onion powder
- 1/2 teaspoon salt
- 1/4 teaspoon black pepper
- 1/2 cup beef broth or water
- 2 tablespoons unsalted butter
- 2 tablespoons all-purpose flour
- 1 cup whole milk
- 8 ounces block-style white American cheese, shredded or cubed
- 4 ounces sharp cheddar cheese, shredded
- 1 (4-ounce) can diced green chiles, drained
- 1/4 teaspoon cayenne pepper (optional)
- Salt to taste
- 1 large bag (13–16 ounces) restaurant-style tortilla chips
- 1 cup canned black beans, drained and rinsed
- 1 cup pico de gallo or fresh salsa
- 1/2 cup pickled jalapeños
- 1/2 cup black olives, sliced
- 1 cup shredded lettuce
- 1/2 cup sour cream
- 1/2 cup fresh cilantro, chopped
- 1 avocado, diced, or 1/2 cup guacamole
- 1 lime, cut into wedges
Instructions
- Heat olive oil in a large skillet over medium-high heat. Add diced onion and cook for 3-4 minutes until translucent. Add minced garlic and cook for 30 seconds until fragrant.
- Add ground beef to the skillet. Break it up and let it brown without stirring too much for the first 2-3 minutes. Drain excess fat, leaving about 1 tablespoon.
- Reduce heat to medium. Add chili powder, cumin, smoked paprika, garlic powder, onion powder, salt, and pepper. Stir to coat. Pour in beef broth and simmer for 5-7 minutes until liquid reduces and meat is coated. Set aside and keep warm.
- In a medium saucepan, melt butter over medium heat. Whisk in flour and cook for 1-2 minutes, stirring constantly, to make a roux.
- Slowly pour in milk while whisking continuously. Whisk until mixture thickens, about 2-3 minutes.
- Reduce heat to low. Add shredded American cheese and cheddar cheese a handful at a time, whisking after each addition until fully melted and smooth.
- Stir in drained green chiles and cayenne if using. Taste and add salt if needed. Keep warm over very low heat, stirring occasionally.
- While beef and queso cook, prep all toppings: dice avocado, chop cilantro, slice olives, shred lettuce, and arrange pico de gallo, sour cream, and pickled jalapeños in small bowls.
- Spread a generous layer of tortilla chips on a serving platter or sheet pan. Spoon seasoned ground beef evenly over chips. Drizzle warm queso over everything.
- Serve immediately with lime wedges on the side. Let everyone add their own cold toppings.
Notes
Shred your own cheese for the smoothest queso. Keep queso warm on a warming tray or reheat gently. Serve warm toppings over chips and let everyone add cold toppings to prevent sogginess. Leftover beef and queso can be stored separately in the refrigerator for 3-4 days.
Nutrition
- Serving Size: 1 serving (about 1/6
- Calories: 520
- Sugar: 6
- Sodium: 890
- Fat: 32
- Saturated Fat: 12
- Carbohydrates: 35
- Fiber: 5
- Protein: 28
Keywords: nachos, loaded nachos, ground beef nachos, queso, game day food, party food, Mexican appetizer



