Love this? Save it for later!
Share the inspiration with your friends
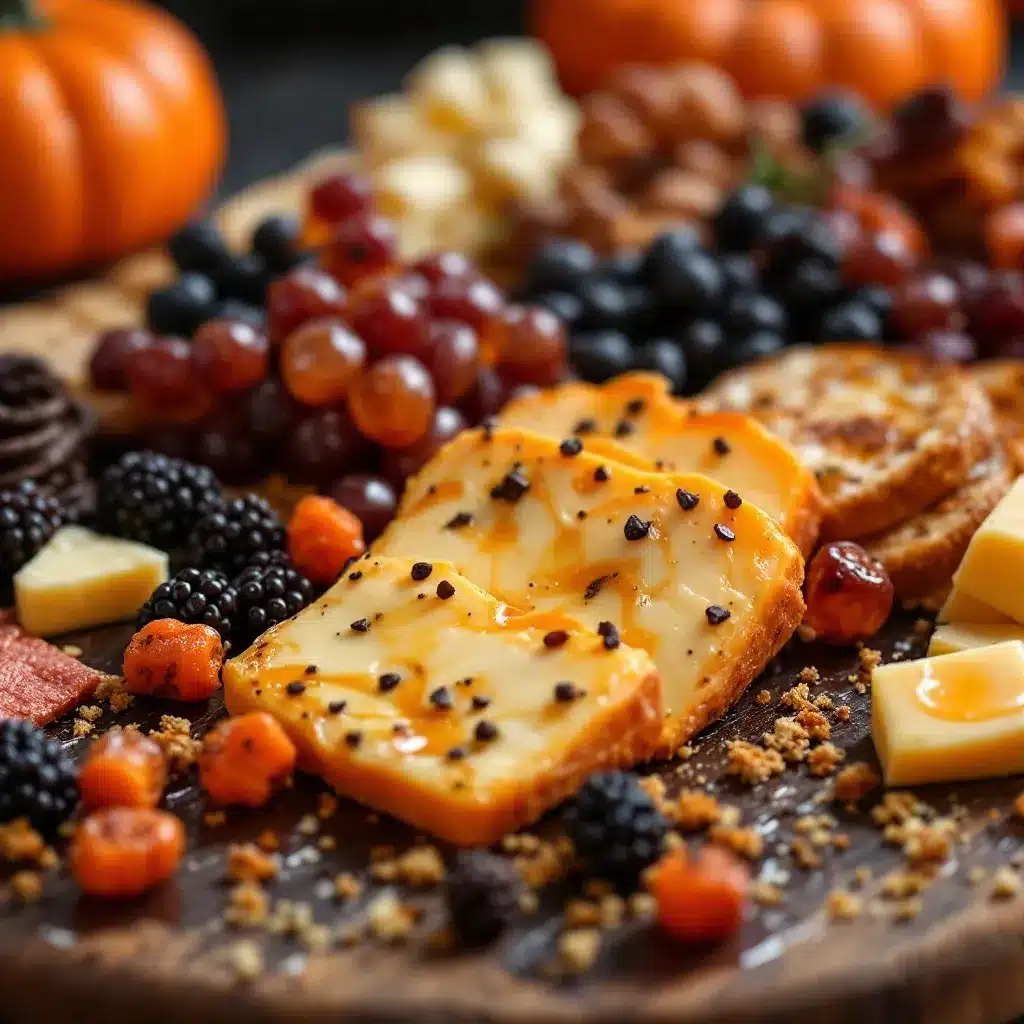
Third Halloween in a row I’ve made this board, and this time the candy corn didn’t even make it onto the platter before someone snagged a handful. That’s the thing about this Ultimate Halloween Candy and Cheese Charcuterie Board — it disappears before you’ve finished arranging it. I started making these a few years back when I realized Halloween treats were either all sugar (which my kids bounced off the walls from) or all cheese (which felt too grown-up for a night of trick-or-treating). So I smashed them together. Literally. The first version was a haphazard pile of cheddar cubes and fun-size Snickers on a cutting board, and somehow that chaos worked.
But this board? It’s the polished version of that happy accident. I’ve dialed in the ratios, figured out which cheeses actually stand up to sticky caramel, and found a way to make it look spooky without trying too hard. The saltiness of aged gouda next to the crunch of a pretzel stick dipped in chocolate? That’s the kind of flavor combo that makes you close your eyes mid-chew. And honestly, the best part is watching people’s faces when they realize they can eat candy AND cheese on the same plate without judgment.
This isn’t just a snack board. It’s the centerpiece of your Halloween party that actually gets eaten. No sad leftover candy bowls here. Just a board that brings out the kid in everyone while keeping the adults happy with good cheese and better pairings. Trust me on this one.
Why You’ll Love This Recipe
This board hits that sweet spot between indulgent and practical. Here’s why it works:
- Quick & Easy: Comes together in under 20 minutes. No cooking, no baking, no stress. Just arrange and serve.
- Simple Ingredients: Everything is store-bought. You don’t need to make candy from scratch or hunt down fancy cheese. Grab, unwrap, arrange.
- Perfect for Halloween Parties: It’s the main event at any gathering — from kid-friendly school parties to adults-only costume nights.
- Crowd-Pleaser: Kids go for the candy, adults hover around the cheese, and everybody fights over the chocolate-covered pretzels.
- Unbelievably Delicious: The salty-sweet-creamy-crunchy thing is next-level. It’s the kind of board that has people coming back for “one more bite” until it’s gone.
What makes this different from every other Halloween snack board? The pairing logic. I’ve tested which candies work with which cheeses — and which combinations are genuinely gross (looking at you, orange circus peanuts next to brie). This board is curated, not just thrown together. It’s designed so every bite feels intentional, even if you’re just grabbing a handful on your way to answer the door for trick-or-treaters.
This is the kind of board that makes you feel like a host who has it together — even if you’re still in your costume from last year and the kids ate all the good candy before the party started.
What Ingredients You Will Need
This recipe uses simple, grab-and-go ingredients that deliver big flavor without any actual cooking. Everything is designed to be unwrapped, sliced, or dumped onto a board. Here’s what you’ll need:
The Cheese (Pick 3-4 varieties)
- Aged Cheddar – Sharp, crumbly, cuts through sweetness. I like Cabot Seriously Sharp. Pre-sliced or block — either works.
- Brie – Soft, buttery, pairs shockingly well with dark chocolate. Get a whole wheel, leave the rind on.
- Aged Gouda – Nutty, caramel notes. This one disappears fastest. I’ve found Boar’s Head has great texture.
- Goat Cheese Log – Tangy, creamy, cuts the sugar overload. Roll it in crushed pretzels for a spooky “dirt” effect.
- Smoked Gouda – Adds that campfire vibe. Great with peanut butter cups. Trust me.
The Candy (Mix your favorites, but include these)
- Snickers Minis – Salty, chocolatey, nougat-y. The ultimate cheese companion.
- Reese’s Peanut Butter Cups (Mini or Fun Size) – Peanut butter + chocolate + cheese = weirdly perfect.
- Kit Kat Minis – Crunch factor. Break them up for texture contrast.
- Twix Minis – Cookie crunch + caramel + chocolate. Great with aged gouda.
- Candy Corn – Controversial, I know. But it adds color and a hit of pure sugar. Some people love it.
- M&Ms (Halloween colors) – For pops of orange and purple. Use peanut or pretzel M&Ms for extra crunch.
- Chocolate-Covered Pretzels – Salty-crunchy-sweet. Non-negotiable. I buy Snyder’s of Hanover.
The Savory Add-Ons
- Pretzel Sticks – For dipping, scooping, and crunching. The salt balances the sweet.
- Apple Slices – Granny Smith. The tartness cuts through everything. Toss in lemon juice to keep from browning.
- Dried Apricots or Figs – Chewy, sweet, pairs with both cheese and candy.
- Roasted & Salted Almonds or Pecans – Adds protein and crunch. Buy the good ones — it matters.
- Dark Chocolate Bar (70%+ cacao) – Break into pieces. Pairs with brie like a dream.
The Spooky Decor (Optional but Fun)
- Marzipan Ghosts – Buy pre-made or make your own. They look adorable next to the cheese.
- Black Olives – For “spider” vibes. Arrange a few on the board like creepy crawlies.
- Pomegranate Seeds – Look like little jewels. Scatter for color.
- Fresh Rosemary Sprigs – Looks like tiny pine trees. Adds a savory note if people brush against it.
Equipment Needed
You don’t need fancy tools here. Just a few basics:
- Large Wooden Cutting Board or Slate Board – At least 18×12 inches. A wooden board gives that rustic feel. Slate looks spookier. Either works.
- Small Bowls or Ramekins – For holding sticky candy like candy corn or M&Ms. Keeps them from rolling off the board.
- Cheese Knives or Spreaders – One for soft cheese, one for hard. A butter knife works in a pinch.
- Small Spatula or Offset Spatula – For moving soft cheese without smashing it.
- Kitchen Shears – For snipping rosemary or opening stubborn candy wrappers.
- Parchment Paper – Line the board if you’re worried about sticky candy residue. Makes cleanup a breeze.
I’ve used everything from a cheap IKEA cutting board to a fancy marble slab. Honestly? The wooden one works best — it doesn’t slide around, and it doesn’t make your knives sound like nails on a chalkboard.
Preparation Method
This comes together in about 15-20 minutes. No cooking, just arranging. Here’s how I do it:
- Set out your cheeses 30 minutes before serving. Cold cheese has no flavor. Let it come to room temperature. I usually pull it out while I’m setting up the rest of the party.
- Unwrap all your candy. Trust me, do this before you start arranging. Nothing kills the vibe like stopping to peel a Twix wrapper mid-assembly. Dump everything into separate bowls.
- Slice your hard cheeses. Cut cheddar and gouda into thin triangles or cubes. Keep pieces roughly the same size so the board looks intentional. I aim for bite-sized — about 1-inch cubes.
- Place the brie whole. Leave the rind on. Put it in the center or slightly off-center — it’s your anchor cheese. If you want to get fancy, score the top in a crosshatch pattern and drizzle with honey.
- Put the goat cheese in a small bowl. Roll it in crushed pretzels or black sesame seeds first for that spooky “dirt” look. Place the bowl on the board.
- Fill ramekins with sticky or small candies. Candy corn, M&Ms, pomegranate seeds — anything that would roll away. Place these around the board first. They act as anchors.
- Arrange the remaining candy in clusters. Group similar candies together — don’t scatter them randomly. Snickers in one corner, Reese’s in another, Kit Kats in the middle. This makes it easier for people to grab what they want without digging.
- Add the chocolate-covered pretzels in a line or curve. They create visual flow and lead the eye around the board. I like to make a zigzag pattern.
- Fill gaps with apple slices, dried fruit, and nuts. Tuck them into empty spaces. The apples add freshness, the dried fruit adds chew, and the nuts add crunch.
- Tuck rosemary sprigs here and there. They look like little trees and add a pop of green. Plus, they smell amazing when people brush past them.
- Add your spooky decorations. Place marzipan ghosts near the brie. Arrange a few black olives to look like spiders. Scatter pomegranate seeds like little jewels.
- Step back and check the balance. Is there enough cheese? Enough candy? Does it look full? Fill any empty spots with extra pretzels or nuts. A full board looks more inviting.
- Serve immediately. Or let it sit out for up to 2 hours. Candy and cheese are both fine at room temperature for a party.
Pro tip: If you’re making this for a party, set it out right before guests arrive. The candy will start to soften and the cheese will be at peak flavor. Don’t refrigerate once assembled — the condensation will make the pretzels soggy and the candy sticky.
Cooking Tips & Techniques
I’ve made this board at least a dozen times, and here’s what I’ve learned the hard way:
- Don’t overthink the cheese-to-candy ratio. Aim for about 60% candy, 40% cheese. People will eat more candy than you think, especially kids. Adults will hover around the cheese.
- Keep the candy in clusters. If you scatter everything, it looks messy and people have to hunt for what they want. Grouping makes it look intentional and easier to grab.
- Use the “rule of three” for placement. Put three of something together — three cheese cubes, three pretzel sticks, three apple slices. Odd numbers look more natural than even ones.
- Beware of sticky candy. Candy corn and caramel-based candies will stick to everything. Put them in ramekins or small bowls. Your board will thank you later.
- Add the chocolate last. Chocolate-covered pretzels and M&Ms will start to soften if they sit out too long. Add them right before serving.
- Make it ahead (sort of). You can slice the cheese and unwrap the candy the night before. Store them separately in the fridge. Assemble the board 30 minutes before guests arrive.
- Don’t forget the dipping options. A small bowl of honey or caramel sauce next to the brie is a game-changer. People will dip everything in it.
I once made the mistake of putting the brie out straight from the fridge. Nobody touched it for an hour. Now I always set it out first and let it breathe. Room temperature cheese is the secret to a good board.
Variations & Adaptations
This board is endlessly customizable. Here are some ways to switch it up:
- Gluten-Free Version: Swap pretzels for gluten-free crackers or rice cakes. Use gluten-free chocolate-covered pretzels if you can find them. Most candy is naturally gluten-free, but check labels on Twix and Kit Kat.
- Dairy-Free Version: Use vegan cheese alternatives (I like Miyoko’s for brie-style and Violife for cheddar). Most dark chocolate is dairy-free. Skip the brie and goat cheese entirely and load up on fruit, nuts, and dairy-free chocolate.
- Nut-Free Version: Skip the almonds and pecans. Use sunflower seeds or pumpkin seeds instead. Check candy labels — Reese’s and Snickers contain peanuts. Use nut-free chocolate like Enjoy Life.
- Vegan Version: Use vegan cheese, dark chocolate, and fruit-based candies like Skittles or Starburst. Skip the honey drizzle and use maple syrup instead.
- Spicy Version: Add chili-lime seasoning to the mango slices. Use spicy candies like chili-covered mango or hot chocolate. Add a small bowl of sriracha honey for dipping.
- Breakfast Board: Swap candy for mini donuts, cinnamon rolls, and chocolate chips. Use cream cheese and brie. Add fresh berries and granola.
I once made a “leftover Halloween candy” version with nothing but the rejects nobody wanted — candy corn, Tootsie Rolls, and those weird orange peanut things. It was… not great. Stick with the good stuff. Your guests deserve it.
Serving & Storage Suggestions
This board is best served at room temperature, right when guests arrive. Here’s how to handle leftovers (if there are any):
Serving: Place the board in the center of the table. Put small plates and napkins nearby. Don’t forget a small bowl for discarded wrappers. If you’re serving it as a meal, add a side of easy slow cooker pumpkin butter for spreading on crackers or apple slices — it’s a cozy fall touch.
Storage: Separate the cheese and candy after serving. Cheese goes in an airtight container in the fridge for up to 5 days. Candy can be stored in a cool, dry place for up to 2 weeks. Chocolate-covered pretzels will get soft if refrigerated — eat those first.
Reheating: You don’t really “reheat” this board. But if you have leftover brie, pop it in the oven at 350°F for 5-7 minutes until warm and gooey. Serve with crackers or apple slices. It’s a whole second snack.
Flavor development: The cheese actually gets better after a day in the fridge. The flavors mellow and meld. The candy? Not so much. Chocolate will bloom (get white streaks) if it gets too cold. Eat the candy within a few days for best texture.
Nutritional Information & Benefits
Let’s be real — this isn’t health food. But it’s not junk food either. It’s a treat board, and there’s nothing wrong with that. Here’s the breakdown per serving (about 1/8 of the board):
- Calories: Roughly 350-450 per serving (depends on how much candy you grab)
- Protein: 8-10g (from cheese and nuts)
- Fat: 20-25g (mostly from cheese and chocolate)
- Carbohydrates: 35-45g (from candy, fruit, and pretzels)
- Sugar: 25-30g (yep, it’s Halloween)
Health benefits: Cheese is a good source of calcium and protein. Dark chocolate has antioxidants. Nuts provide healthy fats and fiber. Apples add vitamin C and fiber. So it’s not all bad — there’s some redeeming nutritional value in there.
Dietary considerations: This board contains dairy, gluten (pretzels), and nuts. It can be adapted for gluten-free, dairy-free, nut-free, and vegan diets (see variations above). Always check labels for hidden allergens.
My take: Halloween is one night. Eat the candy. Enjoy the cheese. Don’t stress about the numbers. Balance comes from the rest of your week, not one board.
Conclusion
This Ultimate Halloween Candy and Cheese Charcuterie Board is the kind of recipe that makes you look like a hero with almost zero effort. It’s fun, it’s festive, and it actually gets eaten — no sad leftovers sitting in the fridge for weeks. Whether you’re hosting a costume party, a family movie night, or just want to treat yourself after handing out candy to a hundred tiny superheroes, this board delivers.
The best part? You can tweak it endlessly. Swap in your favorite candy, try a different cheese, or go full spooky with decorations. There’s no wrong way to build it — just make sure there’s enough for everyone (and maybe a little extra for yourself).
I’d love to hear how yours turns out. Drop a comment below and tell me which candy-cheese combo was your favorite. Did anyone try the brie with candy corn? (I’m genuinely curious.) Share your board photos on Pinterest and tag me — I want to see your spooky creations!
Now go build that board. Your Halloween party is about to get a whole lot tastier.
Frequently Asked Questions
Can I make this board ahead of time?
Yes, partially. You can slice the cheese and unwrap the candy the night before. Store them separately in the fridge. Assemble the board 30 minutes before serving so the cheese comes to room temperature.
How long can this board sit out?
About 2 hours at room temperature. After that, the cheese starts to sweat and the chocolate may soften too much. If you’re serving it at a party, refresh it halfway through by adding more candy or cheese from your stash.
What if I don’t have a wooden board?
No problem! Use a large baking sheet, a marble slab, or even a clean pizza pan. Line it with parchment paper for easy cleanup. The board doesn’t have to be fancy — it just needs to be big enough to hold everything.
Can I use leftover Halloween candy?
Absolutely. This is a great way to use up the candy you didn’t hand out. Just avoid anything too sticky or gooey (like caramel apples or gummy worms) — they’ll make a mess on the board. Stick with chocolate, pretzels, and hard candies.
What’s the best cheese for a sweet board?
Aged gouda and brie are the top picks. The gouda has caramel notes that pair perfectly with chocolate, and the brie’s creaminess balances the sugar. Sharp cheddar is a close third — it cuts through the sweetness like a dream.
Pin This Recipe!
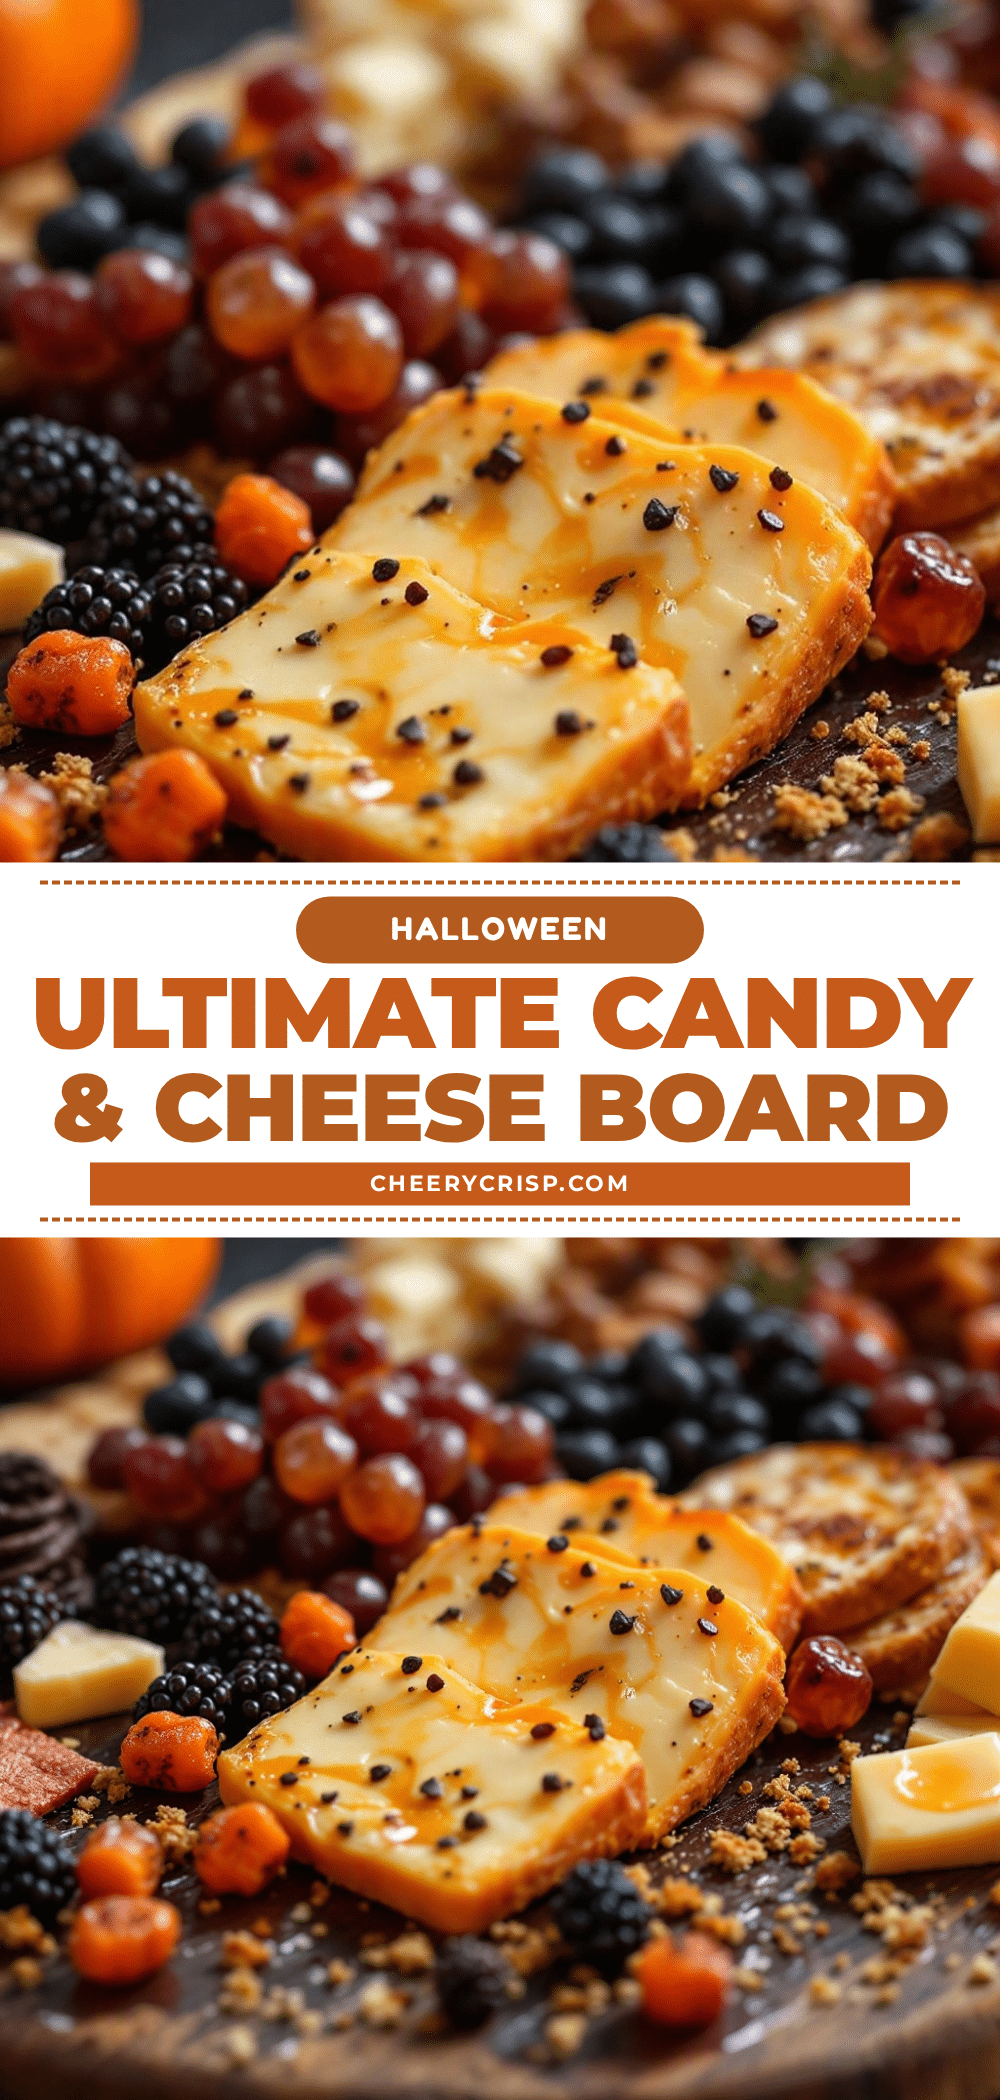
Ultimate Halloween Candy and Cheese Charcuterie Board

A perfect blend of sweet and savory for Halloween parties. This easy, no-cook board features a curated selection of cheeses and candies that disappear before you finish arranging it.
- Prep Time: 15 minutes
- Cook Time: 0 minutes
- Total Time: 15 minutes
- Yield: 8 servings
- Category: Appetizer
- Cuisine: American
Ingredients
- Aged Cheddar (e.g., Cabot Seriously Sharp)
- Brie (whole wheel)
- Aged Gouda (e.g., Boar’s Head)
- Goat Cheese Log
- Smoked Gouda
- Snickers Minis
- Reese’s Peanut Butter Cups (Mini or Fun Size)
- Kit Kat Minis
- Twix Minis
- Candy Corn
- M&Ms (Halloween colors)
- Chocolate-Covered Pretzels (e.g., Snyder’s of Hanover)
- Pretzel Sticks
- Apple Slices (Granny Smith)
- Dried Apricots or Figs
- Roasted & Salted Almonds or Pecans
- Dark Chocolate Bar (70%+ cacao)
- Marzipan Ghosts (optional)
- Black Olives (optional)
- Pomegranate Seeds (optional)
- Fresh Rosemary Sprigs (optional)
Instructions
- Set out your cheeses 30 minutes before serving to bring to room temperature.
- Unwrap all your candy and dump into separate bowls.
- Slice hard cheeses (cheddar and gouda) into thin triangles or 1-inch cubes.
- Place the brie whole on the board, rind on, in the center or slightly off-center.
- Put the goat cheese in a small bowl, roll in crushed pretzels or black sesame seeds for a spooky effect, and place on the board.
- Fill ramekins with sticky or small candies (candy corn, M&Ms, pomegranate seeds) and place around the board as anchors.
- Arrange remaining candy in clusters (Snickers in one corner, Reese’s in another, Kit Kats in the middle).
- Add chocolate-covered pretzels in a line or zigzag pattern for visual flow.
- Fill gaps with apple slices, dried fruit, and nuts.
- Tuck rosemary sprigs here and there for greenery and aroma.
- Add spooky decorations (marzipan ghosts near brie, black olives as spiders, scatter pomegranate seeds).
- Step back and check balance; fill empty spots with extra pretzels or nuts.
- Serve immediately or let sit out for up to 2 hours.
Notes
Let cheese come to room temperature for best flavor. Keep candy in clusters for easy grabbing. Add chocolate last to prevent softening. Can prep cheese slicing and candy unwrapping the night before. Board can sit out for up to 2 hours. For leftover brie, reheat at 350°F for 5-7 minutes.
Nutrition
- Serving Size: 1/8 of board
- Calories: 350450
- Sugar: 2530
- Sodium: 300400
- Fat: 2025
- Saturated Fat: 1012
- Carbohydrates: 3545
- Fiber: 23
- Protein: 810
Keywords: Halloween charcuterie board, candy and cheese board, Halloween appetizer, easy Halloween recipe, no-cook appetizer, party snack board



