Love this? Save it for later!
Share the inspiration with your friends
I am staring at a block of cream cheese and wondering if I can carve a ghost into it without it looking like a melted candle. It is 4:00 PM on a Tuesday, and the Halloween decorations are already up in my head. I want a centerpiece that screams festive but doesn’t require me to wear an apron for three hours. Let’s face it, I don’t want to bake. I want to assemble. I want something that looks impressive enough to make my neighbors ask how I did it, but simple enough that I can still watch the game.
Honestly, the idea of making cheese ghosts started because I bought too much Brie. Again. I have a habit of buying fancy cheese and letting it sit there until it becomes sad and soft. This time, I decided to turn that mistake into a feature. The goal was simple: spooky, cute, and edible. No baking required. Just a little bit of patience and some toothpicks.
The first attempt was a disaster. The ghosts looked more like blobs. But then I realized the trick isn’t in the shape; it’s in the presentation. It’s about the contrast between the white cheese and the dark olives. It’s about the little plastic eyes that make everything feel like a party.
I sat down with a glass of wine and a cutting board, and suddenly, it clicked. The cheese ghosts weren’t just a snack; they were a conversation starter. They are the kind of thing that makes people smile before they even take a bite. And that is why I keep making them. It’s not just about the cheese. It’s about the little moments of fun in a busy week.
Why You’ll Love This Recipe
This spooky Halloween charcuterie board with cheese ghosts isn’t just another snack platter. It’s a project that feels like play. I’ve tested this method over the last few years, and it has become a staple in my October rotation. Here is why it works so well for you, too.
- Quick & Easy: You can assemble this entire board in under 20 minutes. It is perfect for those last-minute Halloween parties or when you just need a fun snack to keep the kids busy.
- Simple Ingredients: You likely have most of these items in your fridge right now. Cream cheese, Brie, olives, and crackers. No fancy grocery trips needed. It’s pantry-friendly and stress-free.
- Perfect for Parties: Whether it’s a trick-or-treat gathering, a classroom party, or a cozy night in, this board fits every occasion. It’s visually striking and easy to graze on.
- Crowd-Pleaser: Kids love the ghosts. Adults love the cheese. It bridges the gap between sweet and savory without any conflict. Everyone wins.
- Unbelievably Delicious: The texture combination is next-level. The creamy Brie with the salty olives and crunchy crackers creates a flavor profile that is comforting yet exciting.
What makes this recipe different from the rest is the technique for shaping the ghosts. Most people just slice the cheese. I use a specific method that involves softening the cheese just right to get that smooth, rounded look. It’s a small detail, but it makes all the difference. It’s not just another version; it’s the best version.
This recipe isn’t just good—it is the kind that makes you close your eyes after the first bite. It’s comfort food reimagined for the season. It’s the kind of dish that turns a simple Tuesday night into something memorable. Plus, it’s great for impressing guests without the stress of cooking a full meal. If you love charcuterie, you might also enjoy my football charcuterie board for game day, as the principles of arrangement are quite similar.
What Ingredients You Will Need
This recipe uses simple, wholesome ingredients to deliver bold flavor and satisfying texture without the fuss. The magic here is in the contrast. You need soft cheeses to hold their shape, salty elements to balance the creaminess, and crunchy bases to add texture. Most of these are pantry staples or easy-to-find fridge items.
Here is what you will need to build your spooky spread:
- Cream Cheese: One 8-ounce block, softened to room temperature. This is the base for your ghosts. I recommend using a high-quality brand like Philadelphia for the smoothest texture. If you are dairy-free, a coconut-based cream cheese works too, though the shape might hold less firmly.
- Brie or Camembert: One small wheel (about 8 ounces). This adds a sophisticated, earthy flavor to the board. Look for a cheese that is soft and ripe. In the summer, you might swap this for a goat cheese log for a tangier twist.
- Black Olives: One small jar of pitted black olives. These are crucial for the eyes and mouths of the ghosts. The dark color contrasts perfectly with the white cheese. If you can’t find black olives, kalamata olives work, but the look isn’t as spooky.
- Plastic Candy Eyes: A small bag of edible plastic eyes. You can find these at any craft store or grocery aisle near Halloween decorations. They are essential for giving the ghosts personality. Without them, they are just blobs.
- Crackers: A variety of plain and seeded crackers. Water crackers, wheat thins, or pretzel crisps all work well. They provide the sturdy base for the cheese. Avoid overly sweet crackers, as they will clash with the savory cheese.
- Prosciutto or Salami: A few slices of cured meat. The curly edges of prosciutto look like spider webs or ghostly drapes. It adds a salty, umami element that balances the mild cheese. If you prefer vegetarian options, try thick-cut avocado slices for a creamy green contrast.
- Apples or Grapes: Sliced apples or a bunch of red grapes. These add a fresh, juicy crunch and a pop of color. Red grapes look like blood drops, which is a fun touch for Halloween. In autumn, swap these for pear slices for a more seasonal feel.
- Pretzel Sticks: A handful of twisted pretzels. These are perfect for creating “spider legs” around the board. They add a salty crunch and help fill in empty spaces on the platter.
- Fig Jam or Honey: A small ramekin of jam or honey. This adds a sweet element that pairs beautifully with the salty meats and cheeses. It’s a nice surprise for guests who like a sweet-and-savory mix.
I always buy extra ingredients because it’s better to have too much than too little. You can easily substitute ingredients based on what you have on hand, but try to keep the balance of salty, sweet, and creamy.
Equipment Needed
You don’t need much to make this board, but having the right tools makes the process smoother.
- Large Cutting Board or Platter: A wooden board or a large ceramic platter works best. I prefer wood because it looks rustic and warm, which contrasts nicely with the spooky theme. If you don’t have a large board, use two medium boards side-by-side.
- Small Knife: A paring knife is essential for shaping the cheese ghosts. You need something sharp enough to slice through the cream cheese but safe to handle. A butter knife can work in a pinch, but it won’t give you clean edges.
- Spoon or Pastry Tip: To scoop out the cream cheese for the ghosts, a small spoon or a piping bag with a round tip works well. I usually just use a teaspoon for simplicity.
- Toothpicks: You will need toothpicks to attach the olive eyes to the cheese ghosts. Wooden toothpicks are best because they are sturdy. If you are serving this to young children, consider using plastic skewers for safety.
- Small Ramekins: For the jam or honey, small ramekins keep the board organized and prevent spills. They also add height to the arrangement, making it look more professional.
I’ve tried using plastic platters, but they don’t hold the cheese as well and look less elegant. A wooden board is worth the investment. Just remember to oil it occasionally to keep it from cracking. For a budget-friendly option, a large slate tile from a hardware store works great and is very durable.
Preparation Method
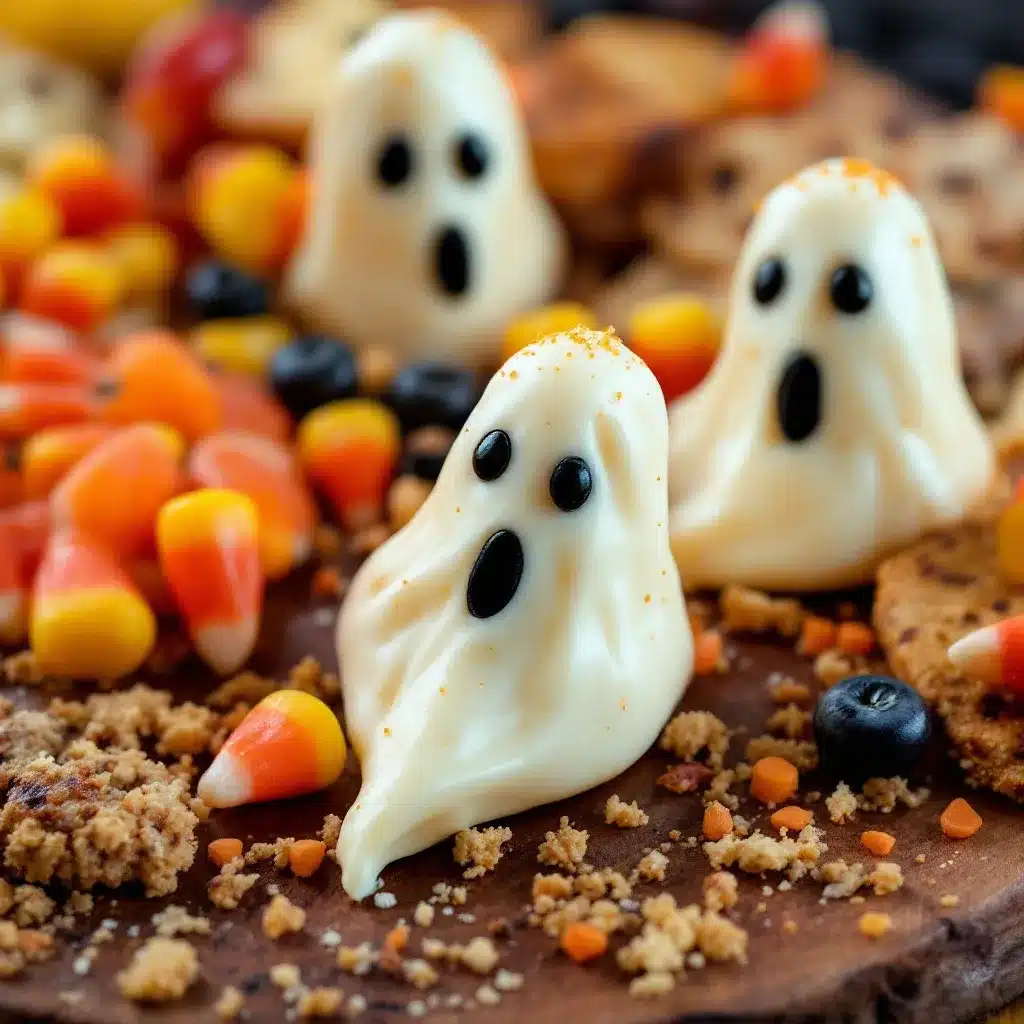
Making the cheese ghosts is easier than it looks, but you need to follow the steps carefully to get the right shape. Here is how to do it.
- Soften the Cheese: Take the block of cream cheese out of the fridge about 30 minutes before you start. It needs to be soft enough to scoop but firm enough to hold its shape. If it’s too warm, it will melt. If it’s too cold, it will be crumbly. Test it by pressing your finger into it; it should leave a slight indent.
- Shape the Ghosts: Scoop out a ball of cream cheese, about the size of a golf ball. Roll it in your hands to make it smooth. Then, shape it into a rounded rectangle or a teardrop shape. The top should be rounded, and the bottom should be slightly jagged to look like a flowing sheet. Place each ghost on a piece of parchment paper while you work.
- Add the Eyes: Take two small slices of black olive. Place them on the top half of the cheese ghost where the eyes should be. Press them in gently so they stick. You can use a toothpick to help position them if they are slippery. Make sure the eyes are spaced apart for a cute, not creepy, look.
- Make the Mouth: Cut a tiny triangle or crescent shape from another olive slice. Place it below the eyes to form a mouth. You can make it smile or frown, depending on the mood you want. For a more detailed look, cut a small slit in the olive to create teeth.
- Chill the Ghosts: Once all the ghosts are assembled, place the parchment paper with the ghosts in the refrigerator for 15 minutes. This helps the cheese firm up and keeps the eyes in place. This step is crucial if you are making the board ahead of time.
- Prepare the Brie: While the ghosts are chilling, cut the Brie wheel into wedges or cubes. You can leave the rind on for a rustic look, or remove it for a milder flavor. Arrange the Brie on your board in a cluster.
- Assemble the Board: Start by placing the larger items on the board, like the Brie, crackers, and ramekins. Then, add the meats and fruits. Finally, place the chilled cheese ghosts in the center or scattered around the board. Use the pretzel sticks to create spider webs between the items.
- Final Touches: Add the fig jam or honey to the ramekins. Garnish with a few extra olive slices or pretzel sticks. Step back and admire your work. It’s spooky, it’s cute, and it’s ready to eat.
If the cheese starts to get too soft while you are shaping, just pop it back in the fridge for a few minutes. Don’t rush the shaping process; take your time to make each ghost unique.
Cooking Tips & Techniques
There are a few tricks I’ve learned over the years to make this board look professional. First, room temperature cheese is key. Cold cheese is hard to shape and doesn’t taste as good. Let everything come to room temperature before serving.
Second, don’t overcrowd the board. Leave some empty space. It looks more elegant and makes it easier for guests to grab items. I often make the mistake of filling every inch, which makes the board look messy.
Third, use height to your advantage. Stack the crackers or place the ramekins on small stacks of books (clean, of course) to create levels. This makes the board more visually interesting.
I once tried to make the ghosts out of cheddar cheese, and it was a disaster. The cheese was too hard to shape. Stick to soft cheeses for the ghosts. Hard cheeses are better for the board’s base.
Also, if you are serving this to a large group, make extra ghosts. People love them. I usually make at least 10-12 ghosts for a party of 10. It’s better to have leftovers than to run out.
Finally, clean your knife between cuts. If you are cutting multiple types of cheese, wipe the knife with a paper towel to prevent flavors from mixing. It’s a small detail, but it matters.
Variations & Adaptations
You can easily adapt this recipe to suit different tastes or dietary needs. Here are a few ideas:
- Vegan Version: Use vegan cream cheese and vegan Brie. Many brands now make excellent plant-based cheeses that hold their shape well. For the eyes, you can use black sesame seeds or small pieces of black olive.
- Gluten-Free: Swap regular crackers for gluten-free alternatives. There are many delicious rice crackers or almond flour crackers that work well. Make sure to check the labels for hidden gluten.
- Sweet Twist: Add a layer of sweet jam or Nutella under the cream cheese ghosts. This turns the snack into a dessert. You can also dip the pretzel sticks in chocolate for a sweeter touch.
- Spicy Option: Add some jalapeño slices or hot sauce to the board for guests who like heat. The spice contrasts nicely with the cool cream cheese.
I tried a variation where I used strawberry jam instead of fig jam, and it was a hit with the kids. The red color looked like blood, which was fun. Don’t be afraid to experiment with flavors.
Serving & Storage Suggestions
Serve this board at room temperature for the best flavor. If the cheese is too cold, it won’t taste as good. Let it sit out for 15-20 minutes before serving.
For storage, keep the leftovers in the refrigerator. The cream cheese ghosts will keep for up to 2 days. Store them in an airtight container to prevent them from drying out. The Brie and meats will also keep for a few days.
To reheat, you can microwave the Brie for a few seconds to soften it, but don’t overheat it or it will melt. The crackers and fruits are best eaten fresh.
The flavors develop over time, especially if the jam soaks into the crackers. But it’s best enjoyed fresh on the day of the party.
Nutritional Information & Benefits
This board is high in protein and calcium from the cheese. It also provides healthy fats from the olives and meats. However, it is also high in sodium, so enjoy in moderation.
For those watching their carb intake, you can skip the crackers and focus on the meats and cheeses. It’s a low-carb friendly option if you choose the right ingredients.
I always try to include fruits and veggies to balance out the rich cheeses. The apples and grapes add fiber and vitamins, making the board more nutritious.
Conclusion
This spooky Halloween charcuterie board with cheese ghosts is a fun, easy, and delicious way to celebrate the season. It’s perfect for parties, gatherings, or just a fun night in. I love making it because it’s creative and interactive.
I encourage you to customize it with your favorite ingredients. Make it your own. And if you try it, I’d love to hear how it goes. Leave a comment below with your thoughts.
Happy Halloween!
FAQs
Can I make the cheese ghosts ahead of time?
Yes, you can make them up to 2 days in advance. Just store them in the refrigerator on a plate covered with plastic wrap. They will hold their shape well.
What kind of cheese is best for the ghosts?
Cream cheese is the best option because it is soft and easy to shape. You can also use mascarpone or a soft goat cheese, but cream cheese holds the shape best.
Can I use regular olives instead of black olives?
You can use green olives, but they won’t look as spooky. Black olives provide the best contrast against the white cheese. If you can’t find black olives, try to find dark purple ones.
How do I keep the eyes from falling off?
Make sure the cream cheese is soft enough to accept the olive slices. Press them in gently, and they will stick. If they are still loose, you can use a tiny dot of cream cheese as glue.
Is this recipe kid-friendly?
Absolutely. Kids love the ghost shape and the candy eyes. Just make sure to use plastic toothpicks if the children are very young. It’s a fun activity to let them help assemble the board.
Pin This Recipe!
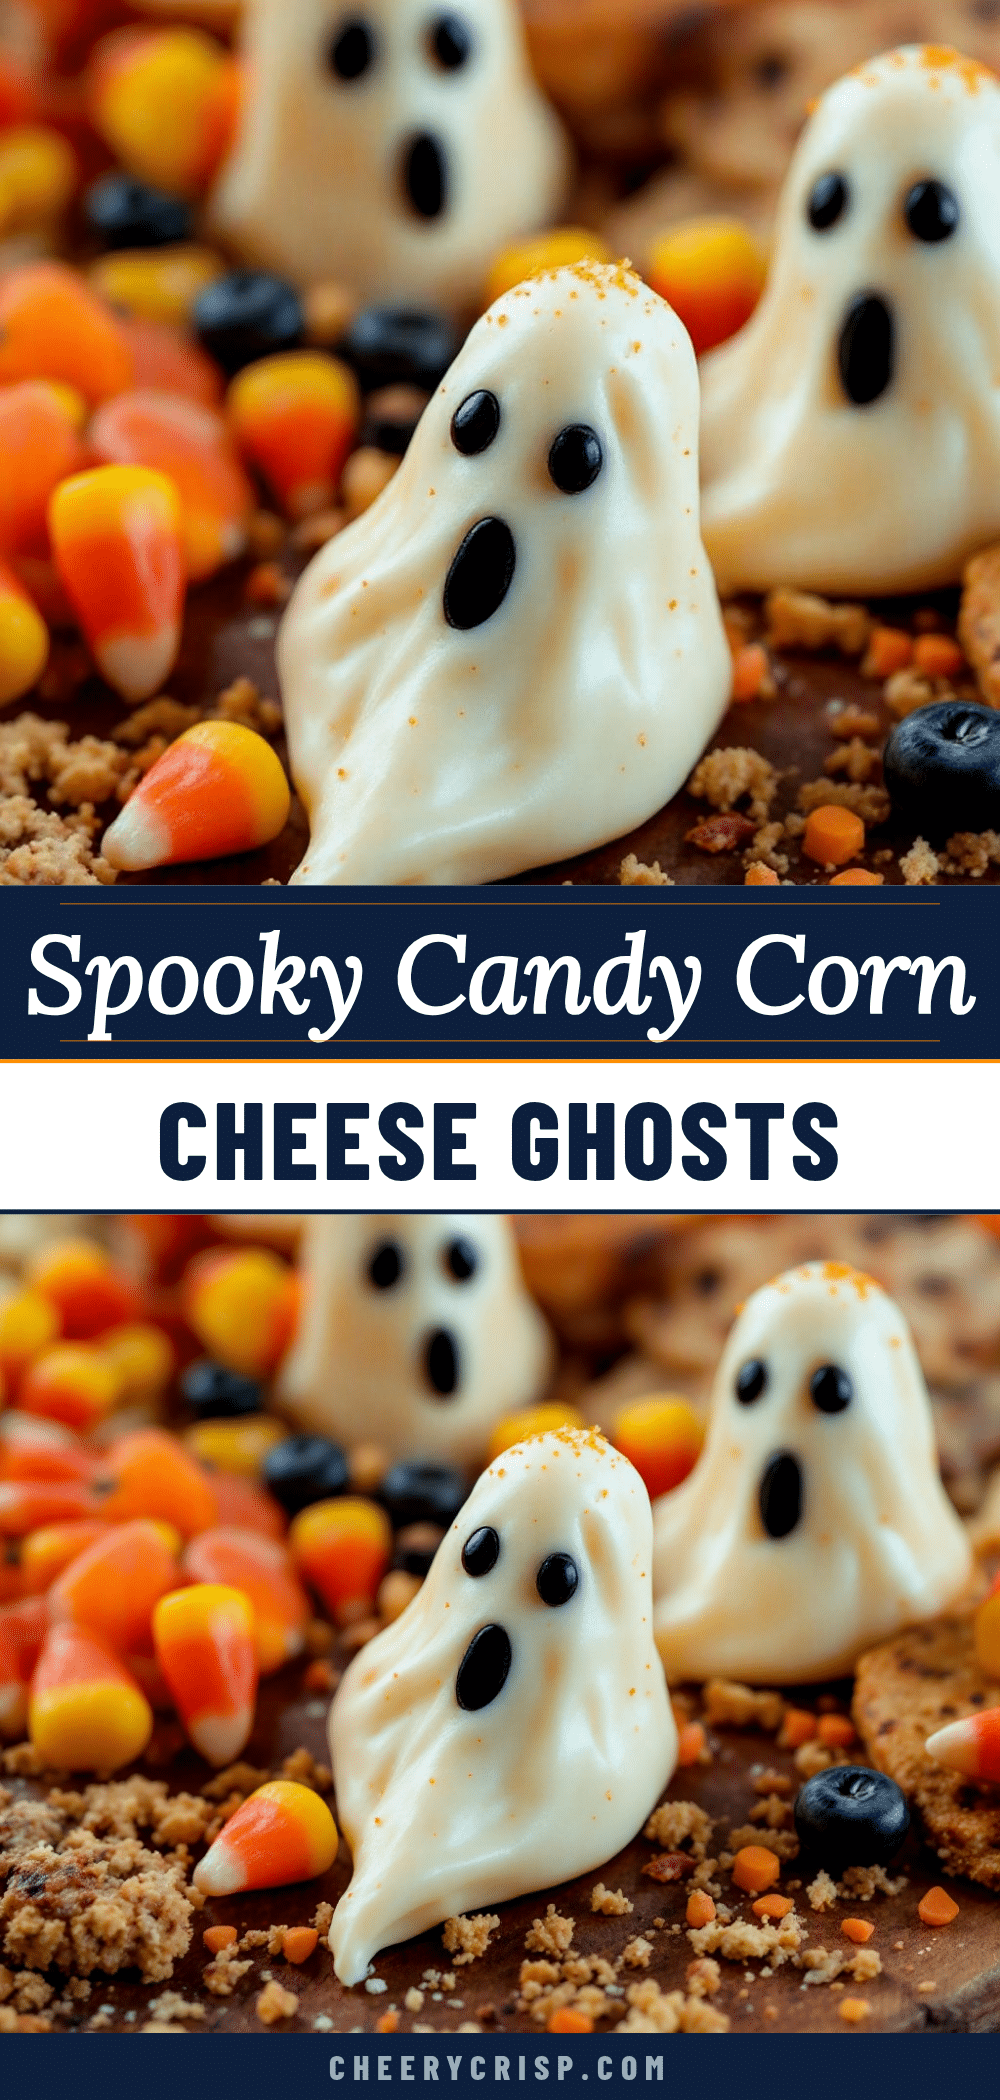
Spooky Halloween Charcuterie Board: 5 Easy Cheese Ghosts
A festive, no-bake Halloween centerpiece featuring easy-to-shape cream cheese ghosts with olive eyes, arranged on a charcuterie board with Brie, meats, and crackers.
- Prep Time: 20 minutes
- Cook Time: 0 minutes
- Total Time: 20 minutes
- Yield: 10-12 servings 1x
- Category: Appetizer
- Cuisine: American
Ingredients
- 1 block (8 oz) cream cheese, softened to room temperature
- 1 small wheel (8 oz) Brie or Camembert, soft and ripe
- 1 small jar pitted black olives
- 1 small bag edible plastic candy eyes
- Assorted plain and seeded crackers (e.g., water crackers, wheat thins, pretzel crisps)
- Slices of prosciutto or salami
- Sliced apples or red grapes
- Twisted pretzel sticks
- Fig jam or honey, in a small ramekin
Instructions
- Soften the cream cheese block at room temperature for 30 minutes until it is soft enough to scoop but firm enough to hold its shape.
- Scoop out a ball of cream cheese (golf ball size) and roll it smooth. Shape into a rounded rectangle or teardrop with a jagged bottom to resemble a ghost. Place on parchment paper.
- Attach two small slices of black olive to the top half of the ghost for eyes using gentle pressure or a toothpick.
- Cut a tiny triangle or crescent from another olive slice and place it below the eyes to form a mouth.
- Chill the assembled ghosts in the refrigerator for 15 minutes to firm up.
- Cut the Brie wheel into wedges or cubes and arrange them on the board.
- Assemble the board by placing larger items (Brie, crackers, ramekins) first, followed by meats and fruits.
- Place the chilled cheese ghosts in the center or scattered around the board.
- Use pretzel sticks to create decorative spider webs between items.
- Add fig jam or honey to ramekins and garnish with extra olives or pretzels.
Notes
Ensure cheese is at room temperature for easier shaping. Do not overcrowd the board; leave space for elegance. Use height (stacking crackers) for visual interest. For vegan versions, use plant-based cream cheese and Brie. For gluten-free, use GF crackers. Store leftovers in the fridge for up to 2 days.
Nutrition
- Serving Size: Varied bites from th
- Calories: 350
- Sugar: 4
- Sodium: 600
- Fat: 25
- Saturated Fat: 12
- Carbohydrates: 15
- Fiber: 1
- Protein: 12
Keywords: Halloween, charcuterie board, cheese ghosts, no bake, easy appetizer, party food, cream cheese, Brie, spooky snacks



