Love this? Save it for later!
Share the inspiration with your friends
My husband swore he hated chocolate chip cookies. For five years of marriage, he’d politely decline every batch I made, claiming they were “too sweet” or “just not his thing.” I’d eat the whole batch myself, feeling vaguely offended and slightly sick. Then last Tuesday, I made this tiny version just for me—a single cookie’s worth of dough, baked in a ramekin, no fuss. I caught him standing over the counter, fork in hand, scraping the last crumb from the dish.
“That’s different,” he mumbled, reaching for another fork.
Honestly, I think the secret is the ratio. When you’re only making two cookies, you can afford to be picky—a little more butter, a little less sugar, a generous pinch of flaky salt. The edges get perfectly crisp while the center stays soft and almost gooey. It’s the kind of cookie that makes you close your eyes after the first bite, even if you’ve never been a cookie person before. And maybe you’ve been there—craving something warm and sweet without committing to a full batch that goes stale before you finish it. This one’s for the two of you, or just for you, and that’s exactly the point.
Why You’ll Love This Recipe
This isn’t just another cookie recipe—it’s the one that finally made my cookie-skeptic husband a convert. Here’s what makes it stand out:
- Quick & Easy: From bowl to plate in under 20 minutes. No chilling, no stand mixer, no complicated steps.
- Simple Ingredients: You probably have everything in your kitchen right now. Butter, sugar, an egg (just the yolk), flour, and chocolate chips.
- Perfect for Two: No more leftover cookies tempting you from the counter. Just two perfect cookies, exactly when you want them.
- Crowd-Pleaser: Seriously—if it won over my husband, it’ll win over anyone. The texture is spot-on: crispy edges, soft center, melty chocolate in every bite.
- Unbelievably Delicious: The buttery flavor is front and center, with just enough sweetness to satisfy without overwhelming. The flaky salt on top? Game-changer.
What makes this version different from the rest is the technique. Using only an egg yolk instead of a whole egg gives the cookies a richer, more tender texture. The butter is browned just slightly for a nutty depth that you don’t get from regular melted butter. And the ratio of brown sugar to white sugar is carefully balanced for that perfect chewy-yet-crisp contrast. It’s comfort food reimagined—smaller, faster, but with the same soul-soothing satisfaction. Perfect for a quiet night in, a lazy Sunday afternoon, or when you just need something sweet without the commitment of a full batch.
What Ingredients You Will Need
This recipe uses simple, pantry-friendly ingredients to deliver big flavor without the fuss. Here’s what you’ll need and why each one matters:
- Unsalted butter, 3 tablespoons (42g) – Adds richness and helps control the salt level. I use Kerrygold for the best flavor, but any good-quality butter works. Cut it into small pieces so it melts evenly.
- Brown sugar, 2 tablespoons (25g), packed – Gives the cookies moisture, chewiness, and that deep caramel-like flavor. Light or dark brown sugar both work—dark adds more molasses flavor.
- Granulated sugar, 1 tablespoon (12g) – Adds sweetness and helps create crispy edges. Don’t skip it—the combination of both sugars is key.
- Large egg yolk, 1 – This is the secret to a tender, rich cookie. The yolk adds fat and emulsifiers without the extra moisture of the white. Save the white for scrambled eggs or an omelet.
- Vanilla extract, ½ teaspoon – Use pure vanilla extract if you have it. It rounds out the sweetness and adds warmth. I like Nielsen-Massey for its intensity.
- All-purpose flour, ¼ cup plus 1 tablespoon (40g) – Provides structure. Spoon and level it into your measuring cup—don’t scoop straight from the bag, or you’ll end up with dry cookies.
- Baking soda, ⅛ teaspoon – Helps the cookies spread just enough. Too much and they’ll flatten; too little and they’ll be puffy. This tiny amount is perfect.
- Salt, ⅛ teaspoon – Balances the sweetness. I use fine sea salt for the dough and flaky Maldon salt for finishing.
- Semi-sweet chocolate chips, 3 tablespoons (about 45g) – Use good-quality chips or chop a chocolate bar into chunks. Ghirardelli or Guittard are my go-tos. You can also use milk or dark chocolate, depending on your preference.
- Flaky sea salt, for sprinkling (optional but highly recommended) – That little crunch of salt on top makes the chocolate sing. Don’t skip it if you have it.
Substitution notes: For a dairy-free version, use vegan butter (I like Miyoko’s) and dairy-free chocolate chips. For a gluten-free option, swap the all-purpose flour with a 1:1 gluten-free baking flour blend. The texture will be slightly different but still delicious.
Equipment Needed
You don’t need much for these small-batch cookies—that’s part of the beauty. Here’s what you’ll need:
- Small mixing bowl – Any bowl works, but a small one makes it easier to mix such a tiny amount of dough. I use a cereal bowl.
- Whisk or fork – For mixing the wet ingredients. A fork works perfectly if you don’t want to dirty a whisk.
- Rubber spatula – For folding in the chocolate chips and scraping every last bit of dough. A small silicone spatula is ideal.
- Baking sheet – A small quarter-sheet pan works great, but a regular half-sheet pan is fine too. Line it with parchment paper or a silicone baking mat for easy cleanup.
- Cookie scoop or spoon – A 1-tablespoon cookie scoop makes uniform cookies, but you can just use a regular spoon.
- Cooling rack – Optional but helpful for cooling the cookies evenly. A plate works in a pinch.
- Small saucepan – For browning the butter. A light-colored pan helps you see the color change. If you don’t have one, you can melt the butter in the microwave and skip the browning.
Budget tip: You don’t need fancy equipment. I’ve made these cookies with a fork, a cereal bowl, and a baking sheet that came with my toaster oven. They turned out just as good.
Preparation Method
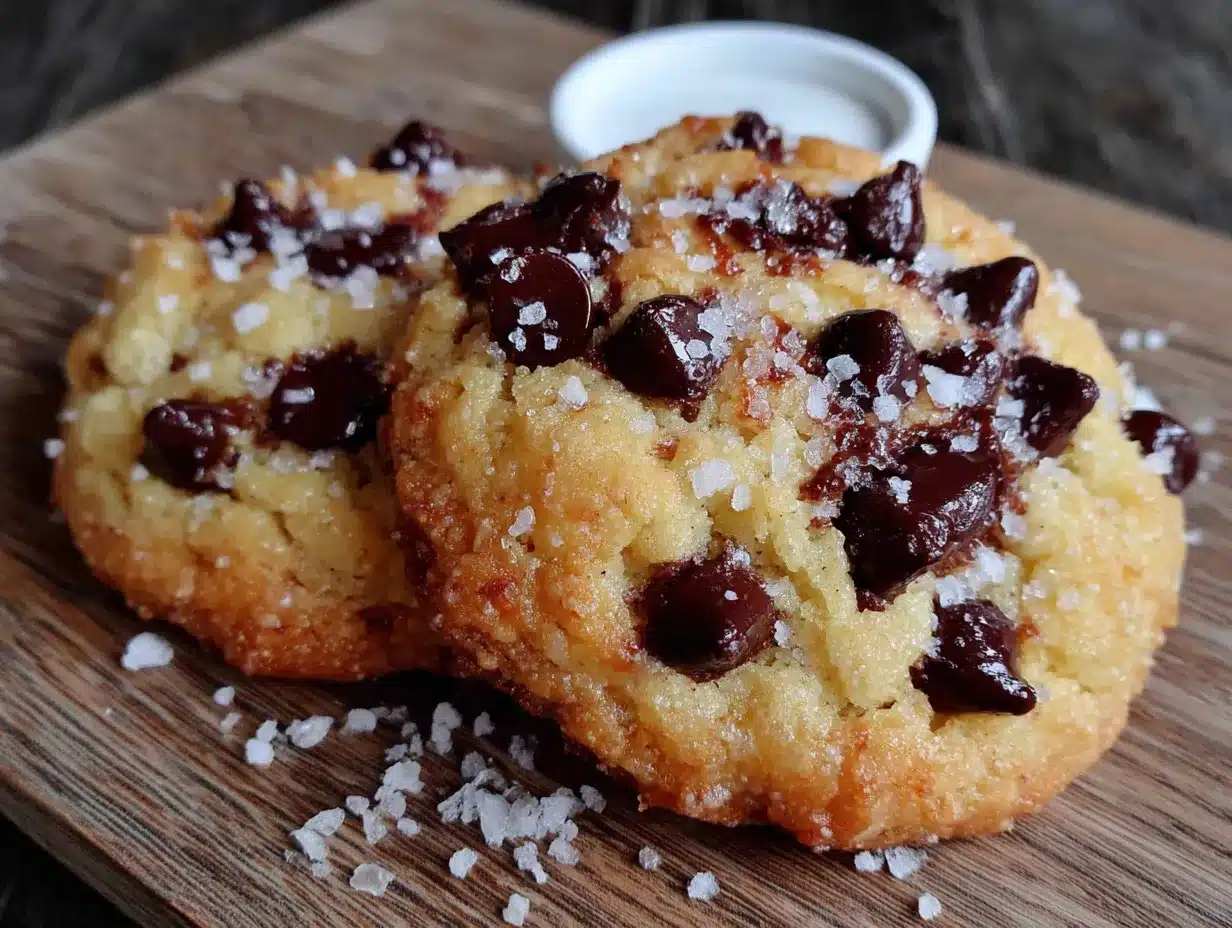
Follow these steps carefully, and you’ll have two perfect cookies in about 20 minutes. I’ve included sensory cues so you know exactly what to look for at each stage.
- Preheat your oven to 350°F (175°C). Line a small baking sheet with parchment paper or a silicone mat. This ensures the cookies don’t stick and makes cleanup effortless.
- Brown the butter if you want extra flavor. Place 3 tablespoons of butter in a small saucepan over medium heat. Swirl the pan occasionally as the butter melts. It will foam up, then start to turn golden. Watch for small brown specks forming at the bottom—that’s the milk solids toasting. The butter should smell nutty and fragrant. This takes about 3-4 minutes. Remove from heat immediately and pour into your mixing bowl to stop the cooking. Let it cool for 2 minutes. If you’re short on time, just melt the butter in the microwave—the cookies will still be delicious, just slightly less complex.
- Add the sugars to the warm butter. Whisk in 2 tablespoons brown sugar and 1 tablespoon granulated sugar until combined. The mixture should look like wet sand and smell amazing. Make sure there are no lumps of brown sugar.
- Add the egg yolk and vanilla. Crack an egg and separate the yolk from the white. Drop the yolk into the sugar-butter mixture. Add ½ teaspoon vanilla extract. Whisk vigorously until the mixture is smooth, thick, and slightly lighter in color—about 30 seconds. It should look like a thick caramel sauce.
- Add the dry ingredients. Sprinkle ¼ cup plus 1 tablespoon flour, ⅛ teaspoon baking soda, and ⅛ teaspoon salt over the wet mixture. Use a rubber spatula to fold everything together gently. Don’t overmix! Stir just until no streaks of flour remain. The dough will be soft and slightly sticky—that’s perfect.
- Fold in the chocolate chips. Add 3 tablespoons chocolate chips and fold them in with a few strokes. Make sure they’re evenly distributed. If the dough feels too soft to scoop, pop it in the fridge for 5 minutes while you finish prepping.
- Scoop the dough. Use a 1-tablespoon cookie scoop or two spoons to portion the dough into two equal mounds. Place them on the prepared baking sheet, spaced at least 3 inches apart—they’ll spread. Gently press a few extra chocolate chips on top for looks, if you want.
- Bake for 10-12 minutes. Place the baking sheet on the middle rack. Bake until the edges are golden brown and the centers look slightly underdone and puffy. The cookies will continue to set as they cool. For softer cookies, pull them at 10 minutes. For crispier edges, go to 12 minutes.
- Cool on the baking sheet for 5 minutes. Sprinkle with flaky sea salt immediately after pulling from the oven. The salt will stick to the warm cookies. Then transfer to a cooling rack (or a plate) to finish cooling. I know it’s tempting, but let them cool for at least 5 more minutes—the texture sets during this time.
Cooking Tips & Techniques
I’ve made this recipe at least a dozen times, and I’ve learned a few things the hard way. Here are my best tips:
- Don’t skip the brown butter. The first time I made these, I just melted the butter. They were good. The second time, I browned it. They were incredible. That nutty flavor takes these from “okay” to “I can’t stop thinking about them.”
- Use a light-colored pan for browning butter. I learned this after burning two batches of butter in my dark nonstick pan. A light-colored saucepan lets you see the color change clearly. When the foam subsides and you see brown specks, pull it off the heat immediately.
- Measure flour correctly. The most common mistake with small-batch cookies is using too much flour. Spoon the flour into your measuring cup, then level it off with a knife. Don’t scoop directly from the bag—that packs the flour and gives you dry, cakey cookies.
- Let the dough rest if it’s too soft. If your kitchen is warm, the dough might be too sticky to scoop. Pop it in the fridge for 5-10 minutes. It’ll firm up just enough to handle easily.
- Watch the oven, not the timer. Ovens vary wildly. Start checking at 9 minutes. You want golden edges and a center that still looks slightly soft and puffy. The cookies will continue to bake on the hot pan after you pull them out.
- Double the recipe if you want more. This recipe scales perfectly. Just use a whole egg instead of one yolk if you double it. I’ve made a batch of four cookies for a small gathering, and they were gone in minutes.
Variations & Adaptations
One of the best things about this recipe is how easily it adapts. Here are some variations I’ve tried and loved:
- Double Chocolate Chip: Replace 1 tablespoon of flour with 1 tablespoon of unsweetened cocoa powder. Use white chocolate chips instead of semi-sweet for a striking contrast. The cookies will be darker, richer, and intensely chocolatey.
- Peanut Butter Swirl: After scooping the dough onto the baking sheet, drop a small teaspoon of creamy peanut butter on top of each cookie and swirl it in with a toothpick. Bake as directed. The peanut butter gets slightly caramelized on the edges—so good.
- Vegan Version: Use 3 tablespoons of vegan butter (melted) and replace the egg yolk with 1 tablespoon of aquafaba (the liquid from a can of chickpeas) mixed with 1 teaspoon of cornstarch. The cookies will be a bit flatter but still delicious. I’ve tested this with my vegan sister-in-law, and she gave them two thumbs up.
- Gluten-Free Option: Swap the all-purpose flour with a 1:1 gluten-free baking flour blend that contains xanthan gum. I like Bob’s Red Mill. The cookies will be slightly more delicate, so let them cool completely on the baking sheet before moving them.
- Add-In Swap: Don’t have chocolate chips? Use chopped nuts, dried cherries, or even broken-up pieces of a chocolate bar. I once used leftover Halloween candy (chopped up peanut butter cups) and it was amazing.
Serving & Storage Suggestions
These cookies are best enjoyed warm, but they’re still fantastic the next day. Here’s how to serve and store them:
- Serving temperature: Serve warm, ideally within 10 minutes of baking. The chocolate should still be melty and the edges crisp. If they’ve cooled, pop them in the microwave for 10 seconds—they’ll taste freshly baked.
- Presentation: Place the cookies on a small plate or napkin. A glass of cold milk is the classic pairing, but they’re also wonderful with a cup of coffee or a scoop of vanilla ice cream sandwiched between them.
- Storage: Store leftover cookies in an airtight container at room temperature for up to 3 days. They’ll soften slightly over time, but that’s not a bad thing. If you want to keep them crisp, add a piece of bread to the container—it absorbs excess moisture.
- Freezing: You can freeze the unbaked dough. Scoop it into balls, place them on a parchment-lined baking sheet, and freeze until solid. Transfer to a freezer bag. Bake from frozen, adding 1-2 minutes to the baking time. This is perfect for when you want a single cookie without any effort.
- Reheating: For that just-baked texture, reheat cookies in a 300°F oven for 3-4 minutes. The microwave works in a pinch, but it won’t restore the crisp edges.
Nutritional Information & Benefits
These cookies are a treat, not a health food, but here’s what you should know:
- Estimated per cookie (based on two cookies total): Approximately 290 calories, 16g fat, 36g carbohydrates, 4g protein, 24g sugar, 1g fiber. These values will vary based on your exact ingredients.
- Health benefits: The butter provides vitamin A and healthy fats. Dark chocolate chips contain antioxidants and can help improve mood (I’m not a doctor, but I stand by this). The small portion size means you get the satisfaction without overindulging.
- Dietary considerations: This recipe is not gluten-free or dairy-free as written, but see the variations section for adaptations. It is nut-free if you use standard chocolate chips.
- Potential allergens: Contains dairy (butter), eggs, and gluten (flour). Check your chocolate chips for potential soy or nut contamination if you have allergies.
- Personal perspective: I love that this recipe lets me enjoy a real, buttery, chocolatey cookie without having a whole batch staring at me from the counter. It’s portion control that doesn’t feel like deprivation. Sometimes the best thing you can do for your wellness is to enjoy exactly what you’re craving, in the right amount.
Conclusion
This small-batch chocolate chip cookie recipe has become a staple in my kitchen, and not just because it finally won over my cookie-hating husband. It’s the perfect solution for those moments when you want something warm, sweet, and satisfying without the commitment of a full batch. The brown butter adds a depth of flavor that feels special, the texture is spot-on, and the portion size means no leftovers to tempt you.
I encourage you to make this recipe your own. Swap the chocolate chips for your favorite add-ins, try the vegan version, or double it when you have friends over. The beauty of a small-batch recipe is that it’s forgiving—you can experiment without wasting ingredients. And honestly, there’s something deeply satisfying about pulling two perfect cookies out of the oven, knowing they’re just for you (or for you and someone you love).
If you try this recipe, I’d love to hear about it! Leave a comment below with your favorite variation, or tag me in your photos on social media. Happy baking!
Frequently Asked Questions
Can I make this recipe with a whole egg instead of just the yolk?
Yes, but the texture will be different. Using a whole egg adds more moisture, which makes the cookies puffier and less tender. If you want to use a whole egg, reduce the butter by 1 tablespoon to compensate. I prefer the yolk-only version for its richer, chewier texture.
Why did my cookies spread too much?
This usually happens for one of three reasons: the butter was too warm, you measured the flour incorrectly, or the baking sheet was hot when you added the dough. Make sure your butter is cool after browning (let it sit for 2-3 minutes), spoon and level your flour, and always use a cool baking sheet. If your kitchen is very warm, chill the dough for 10 minutes before baking.
Can I use margarine or shortening instead of butter?
I don’t recommend it. Butter gives these cookies their signature flavor and texture. Margarine has a higher water content, which can make the cookies spread too much and taste flat. Shortening will make them greasy. Stick with butter for the best results.
How do I make these cookies if I don’t have a kitchen scale?
No problem! The recipe is designed to work with measuring cups and spoons. Just be careful with the flour—spoon it into your measuring cup and level it off. Don’t scoop directly from the bag. For the butter, use the markings on the wrapper (3 tablespoons is about 1.5 ounces).
Can I double this recipe?
Absolutely! To double it, use 6 tablespoons butter, 4 tablespoons brown sugar, 2 tablespoons granulated sugar, 1 whole egg (instead of 2 yolks), 1 teaspoon vanilla, ½ cup plus 2 tablespoons flour, ¼ teaspoon baking soda, ¼ teaspoon salt, and 6 tablespoons chocolate chips. Bake for 11-13 minutes. You’ll get about 4 cookies.
Pin This Recipe!
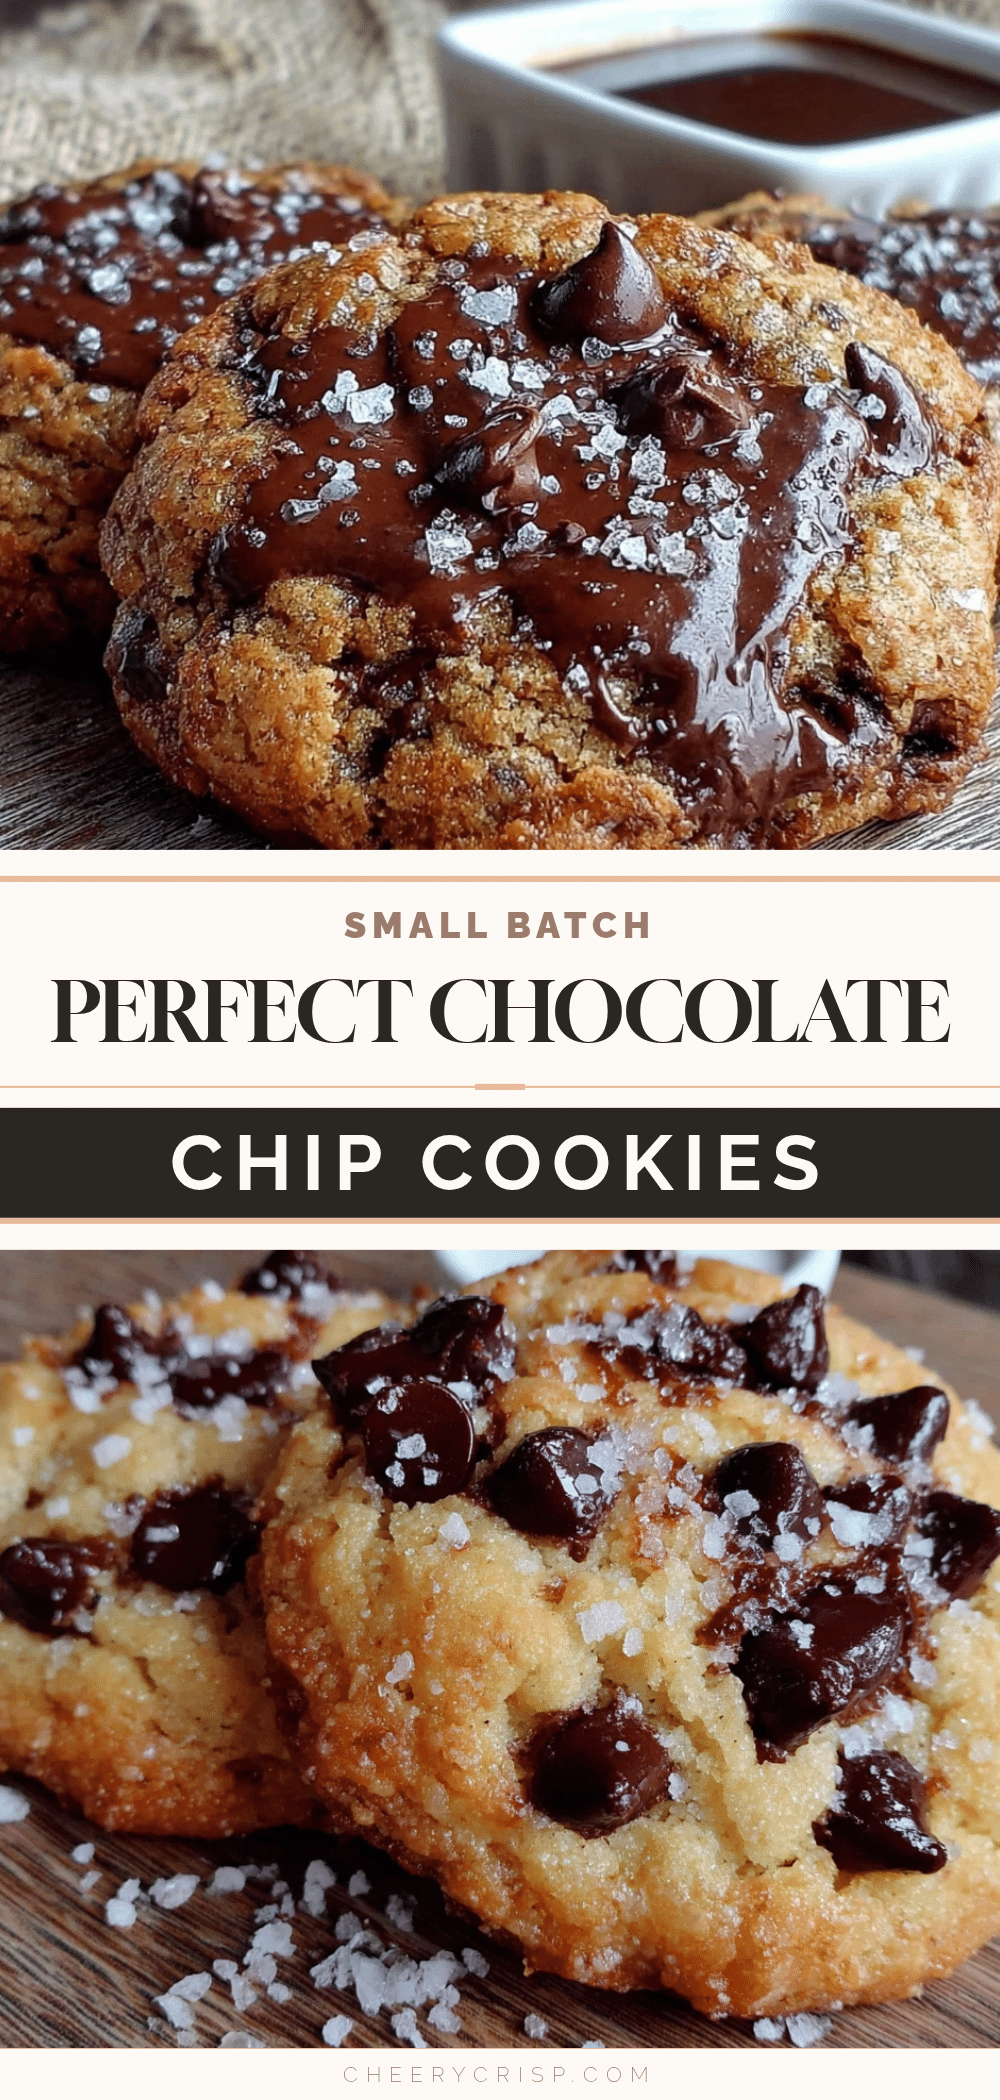
Small-Batch Chocolate Chip Cookies for Two – Easy & Perfect
These small-batch chocolate chip cookies are perfect for two, featuring brown butter for a nutty depth, a tender texture from using only an egg yolk, and a careful balance of sugars for crispy edges and a soft, gooey center. Ready in under 20 minutes, they’re the ideal treat for a quiet night in.
- Prep Time: 10 minutes
- Cook Time: 10-12 minutes
- Total Time: 20-22 minutes
- Yield: 2 cookies 1x
- Category: Dessert
- Cuisine: American
Ingredients
- 3 tablespoons unsalted butter (42g)
- 2 tablespoons brown sugar (25g), packed
- 1 tablespoon granulated sugar (12g)
- 1 large egg yolk
- ½ teaspoon vanilla extract
- ¼ cup plus 1 tablespoon all-purpose flour (40g)
- ⅛ teaspoon baking soda
- ⅛ teaspoon salt
- 3 tablespoons semi-sweet chocolate chips (about 45g)
- Flaky sea salt, for sprinkling (optional)
Instructions
- Preheat your oven to 350°F (175°C). Line a small baking sheet with parchment paper or a silicone mat.
- Brown the butter if you want extra flavor: Place 3 tablespoons of butter in a small saucepan over medium heat. Swirl the pan occasionally as the butter melts. It will foam up, then start to turn golden. Watch for small brown specks forming at the bottom—that’s the milk solids toasting. The butter should smell nutty and fragrant. This takes about 3-4 minutes. Remove from heat immediately and pour into your mixing bowl to stop the cooking. Let it cool for 2 minutes. (If short on time, just melt th…
- Add the sugars to the warm butter: Whisk in 2 tablespoons brown sugar and 1 tablespoon granulated sugar until combined. The mixture should look like wet sand and smell amazing. Make sure there are no lumps of brown sugar.
- Add the egg yolk and vanilla: Crack an egg and separate the yolk from the white. Drop the yolk into the sugar-butter mixture. Add ½ teaspoon vanilla extract. Whisk vigorously until the mixture is smooth, thick, and slightly lighter in color—about 30 seconds. It should look like a thick caramel sauce.
- Add the dry ingredients: Sprinkle ¼ cup plus 1 tablespoon flour, ⅛ teaspoon baking soda, and ⅛ teaspoon salt over the wet mixture. Use a rubber spatula to fold everything together gently. Don’t overmix! Stir just until no streaks of flour remain. The dough will be soft and slightly sticky.
- Fold in the chocolate chips: Add 3 tablespoons chocolate chips and fold them in with a few strokes. Make sure they’re evenly distributed. If the dough feels too soft to scoop, pop it in the fridge for 5 minutes.
- Scoop the dough: Use a 1-tablespoon cookie scoop or two spoons to portion the dough into two equal mounds. Place them on the prepared baking sheet, spaced at least 3 inches apart. Gently press a few extra chocolate chips on top for looks, if you want.
- Bake for 10-12 minutes: Place the baking sheet on the middle rack. Bake until the edges are golden brown and the centers look slightly underdone and puffy. For softer cookies, pull them at 10 minutes. For crispier edges, go to 12 minutes.
- Cool on the baking sheet for 5 minutes: Sprinkle with flaky sea salt immediately after pulling from the oven. Then transfer to a cooling rack (or a plate) to finish cooling. Let them cool for at least 5 more minutes—the texture sets during this time.
Notes
For a dairy-free version, use vegan butter and dairy-free chocolate chips. For a gluten-free option, swap the all-purpose flour with a 1:1 gluten-free baking flour blend. The texture will be slightly different but still delicious. Don’t skip the brown butter if possible—it adds incredible depth. Measure flour correctly by spooning it into the cup and leveling off. If the dough is too soft, chill for 5-10 minutes. Watch the oven, not the timer; start checking at 9 minutes.
Nutrition
- Serving Size: 1 cookie
- Calories: 290
- Sugar: 24
- Sodium: 180
- Fat: 16
- Saturated Fat: 10
- Carbohydrates: 36
- Fiber: 1
- Protein: 4
Keywords: small-batch chocolate chip cookies, cookies for two, brown butter cookies, easy cookie recipe, quick cookies



