Love this? Save it for later!
Share the inspiration with your friends
I was elbow-deep in a mountain of jalapeños last September when my phone buzzed. My neighbor, Rosa, had sent a picture of her garden harvest—buckets of green peppers, tomatoes, and herbs spilling across her counter. “Come take some before I start leaving them on doorsteps,” she texted. I grabbed a grocery bag and walked over, honestly not expecting the sheer volume of jalapeños she’d grown. We stood there chatting about her ridiculous squash vines while I filled my bag, and I remember thinking, what am I going to do with all these? You know that panicked feeling when free produce becomes a responsibility? That was me, standing in Rosa’s driveway with twenty pounds of jalapeños and no plan.
I tried giving them away. I made salsa until my blender smoked. I stuffed them with cheese and grilled them until my eyes watered from the steam. But still, the pile barely shrank. Then I remembered my grandmother’s old canning pot, buried in the back of my pantry, and the quick pickled jalapeños recipe she used to make every fall. She’d line those jars up on the windowsill like little soldiers, and the kitchen would smell like vinegar and garlic for days. I hadn’t thought about that in years—the way she’d pop a jar open for tacos, or how she’d send me home with one tucked into my backpack.
So I called her. She walked me through the process over the phone, her voice crackling with that mix of impatience and love she’s perfected over eighty years. I messed up the brine ratio on my first batch—too much sugar, and the peppers turned out weirdly sweet, like candy with a kick. Rosa got a jar of that mistake and still brings it up. But the second batch? That was it. That was the one. I’ve been making these quick pickled jalapeños for canning ever since, tweaking the spices, adjusting the heat, and honestly, they’ve become my most-requested jar. I keep a stash in my pantry year-round now, and every time I open one, I smell Rosa’s garden and my grandmother’s kitchen all at once.
Why You’ll Love This Recipe
Let me tell you why these quick pickled jalapeños for canning have earned a permanent spot in my kitchen rotation. I’ve tested this recipe at least a dozen times—through jar failures, brine adjustments, and one particularly memorable incident involving a broken canning rack. What I landed on is foolproof, and it delivers that perfect balance of heat, tang, and crunch every single time.
- Quick & Easy : From start to finish, you’re looking at about 45 minutes of active time. No complicated techniques, no special skills required. If you can boil water and slice peppers, you can make this.
- Simple Ingredients : You probably have most of these in your pantry right now. Vinegar, sugar, salt, garlic, and spices. The jalapeños are the star, and they’re easy to find fresh at any grocery store or farmers market.
- Perfect for Gifting : I’m not kidding when I say these jars make the best hostess gifts. People lose their minds over homemade pickled jalapeños. Tie a ribbon around the lid and you look like you planned it for weeks.
- Pantry Staple : Having a shelf of these ready to go means tacos, nachos, sandwiches, and salads are always one jar away from being spectacular. They last for months when canned properly.
- Unbelievably Crunchy : The secret is in the brine ratio and the quick processing time. These peppers stay crisp, never mushy, and that texture makes all the difference.
What sets this recipe apart from the dozens of others floating around the internet? It’s the balance. I spent weeks tweaking the vinegar-to-water ratio, the amount of garlic, the pinch of oregano that makes people say, “What’s in this?” It’s not just another pickled jalapeño recipe—it’s the one I’d grab if my pantry caught fire. The one my friends text me for when they’re hosting taco night. The one that makes you close your eyes after that first crunchy, vinegary bite and think, yeah, that’s exactly right.
This isn’t just about preserving peppers. It’s about having that jar of brightness and heat ready whenever you need it. It’s about opening a taste of summer in the middle of January. And honestly, it’s about the satisfaction of seeing those jars lined up on your shelf, knowing you made something that will make every meal just a little bit better.
What Ingredients You Will Need
This recipe uses simple, wholesome ingredients that work together to create that signature tangy-spicy profile. Most are pantry staples, and the few fresh ingredients are easy to find at any grocery store. Here’s what you’ll need and why each one matters.
For the Brine:
- 1 cup distilled white vinegar (5% acidity) — This is non-negotiable for safe canning. The acidity level is what keeps your pickled jalapeños shelf-stable. I’ve tried apple cider vinegar for a different flavor, but white vinegar gives the cleanest, brightest tang.
- 1 cup water — Filtered water is best if your tap water has a strong chlorine taste. It does make a difference, I promise.
- 1 tablespoon canning salt — Not table salt! Canning salt dissolves cleanly and won’t make your brine cloudy. Table salt has anti-caking agents that turn the liquid murky over time.
- 1 tablespoon granulated sugar — Just enough to round out the sharp edges of the vinegar without making the peppers taste sweet. It’s a balancing act, and this amount hits the sweet spot.
For the Pickled Jalapeños:
- 1 pound fresh jalapeños — Look for firm, glossy peppers with no soft spots or wrinkles. The size doesn’t matter much, but try to pick ones that are roughly the same size so they slice evenly. About 8-10 medium jalapeños will get you a pound.
- 4 cloves garlic, peeled and smashed — Smashing them releases more flavor than slicing. You want the garlic to infuse the brine without floating around in chunks.
- 1 teaspoon black peppercorns — Whole peppercorns add a subtle warmth that complements the heat of the jalapeños. Don’t skip this—it makes a difference.
- 1 teaspoon cumin seeds — This is my secret ingredient. A lot of recipes skip it, but I love the earthy undertone it adds. Toast them lightly in a dry pan first if you want to really wake up the flavor.
- 1 bay leaf — Adds a gentle herbal note that deepens as the jars sit. Remove it before serving if you don’t want someone biting into it.
- Optional: 1-2 dried chiles de árbol — For those of you who want extra heat. I add these when I’m making a batch for my spice-loving friends. They’re not necessary, but they’re fun.
Ingredient Selection Tips:
I’ve learned a few things about picking jalapeños over the years. The brown lines on the skin, called corking, actually indicate a pepper that’s been on the plant longer and will be spicier. If you want milder pickled jalapeños, choose smooth, dark green peppers. For more heat, look for ones with those white or tan stretch marks. Also, the smaller the pepper, the hotter it tends to be—something about the concentration of capsaicin in a smaller package. I learned that from a farmer at my local market, and I’ve found it to be pretty reliable.
Substitution Guidance:
If you can’t find canning salt, use pickling salt or fine sea salt. Just don’t use iodized table salt—it turns the brine cloudy and can affect the flavor. You can swap the cumin seeds for coriander seeds if you prefer a citrusy note, or add a pinch of dried oregano for an Italian twist. For a sweeter brine, bump the sugar up to 2 tablespoons, but honestly, I wouldn’t go higher than that unless you’re making bread-and-butter style pickles. And if you want to skip the garlic, you can, but I’d miss it terribly.
Equipment Needed
You don’t need a fancy kitchen setup for this recipe, but having the right tools makes the process smoother and safer. Here’s what you’ll need.
- 4 half-pint (8 oz) canning jars with lids and bands — Half-pint jars are perfect for gifting and fit neatly in the fridge. You can use pint jars if you prefer, just adjust the processing time slightly. I’ve collected a mix of Ball and Kerr jars over the years, and they all work the same.
- Large stockpot or canning pot with a rack — You need a pot deep enough to cover the jars with at least 1 inch of water. A canning rack keeps the jars off the bottom and prevents them from rattling against each other. No rack? A folded kitchen towel works in a pinch.
- Small saucepan — For making the brine. Any 2-quart saucepan will do.
- Sharp knife and cutting board — A sharp knife is safer than a dull one when slicing peppers. Trust me on this. I’ve had close calls with dull blades slipping off pepper skins.
- Canning funnel and jar lifter — These are worth the small investment. The funnel makes filling jars without spilling brine everywhere a breeze, and the jar lifter saves your fingers from burns. I bought a basic set for under $15 and it’s lasted years.
- Clean dish towels — For drying jars and wiping rims. You want lint-free towels so no fuzz ends up in your brine.
- Magnetic lid wand (optional) — Handy for fishing lids out of hot water without burning yourself. I resisted buying one for years, and now I don’t know why I waited.
Budget-Friendly Options:
If you’re just starting out, you can reuse pasta pots for water bath canning as long as they’re deep enough. Just make sure they’re clean and have a tight-fitting lid. You can also reuse commercial jars like pasta sauce jars, but you’ll need to buy new lids—the ones that come with store-bought jars aren’t designed for home canning seals. I’ve done it in a pinch, and it works, but it’s not something I’d recommend for long-term storage.
Preparation Method
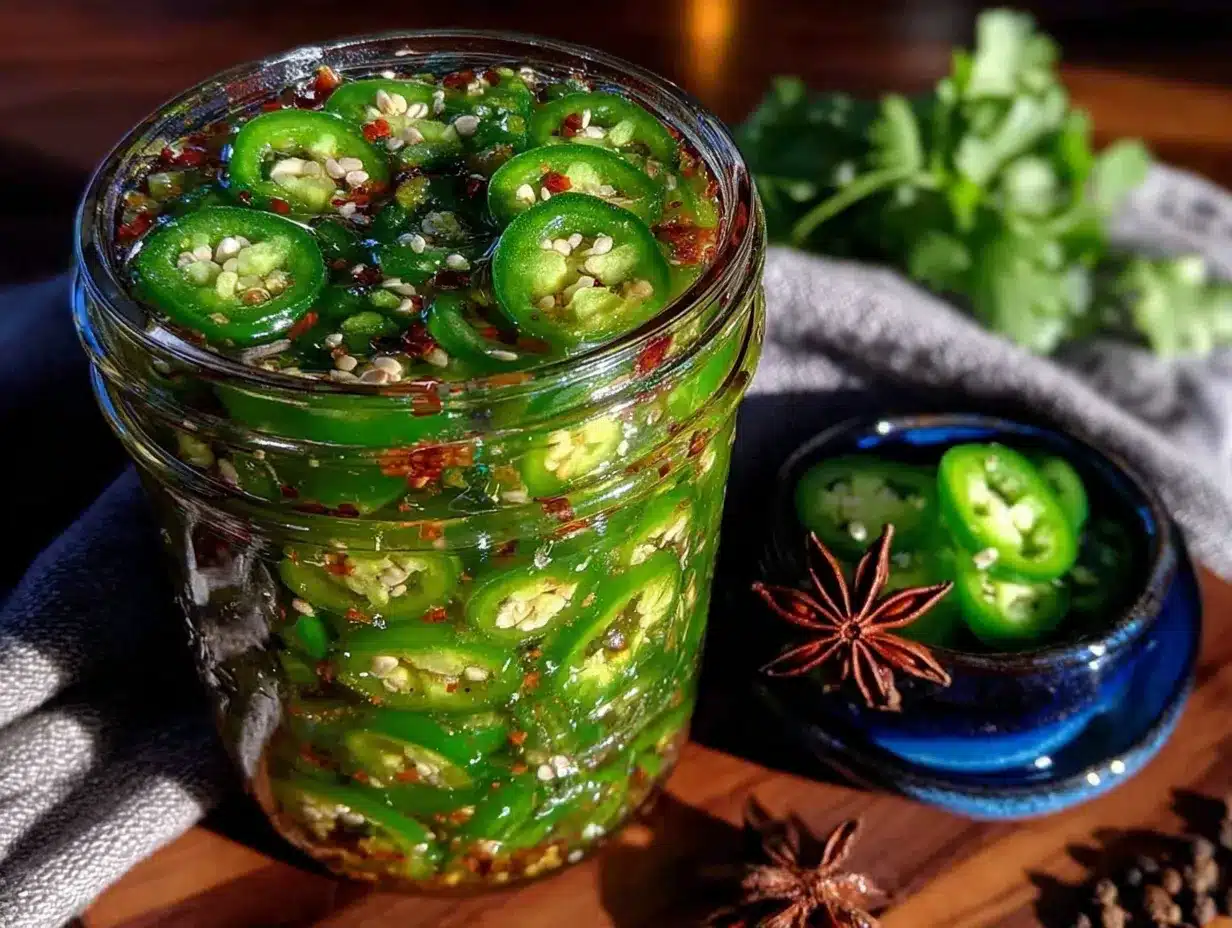
Alright, let’s get into the actual process. I’ve broken this down into clear steps with all the little details I wish someone had told me the first time I tried canning. Take your time, and don’t rush the sterilization step—it’s the most important part.
- Prepare your jars and equipment. Wash your jars, lids, and bands in hot, soapy water. Rinse thoroughly. Place the jars in your canning pot, cover them with water, and bring to a boil. Let them boil for 10 minutes to sterilize. Keep them in the hot water until you’re ready to fill them. Place the lids in a small saucepan of simmering water—don’t boil them, just keep them hot. This softens the sealing compound.
- Prep your jalapeños. While your jars are sterilizing, wash the jalapeños under cold water. Pat them dry. Wearing gloves is not optional here—I learned this the hard way when I rubbed my eye after slicing peppers and spent 20 minutes with my face under the faucet. Slice off the stems and cut the peppers into 1/4-inch rounds. If you want milder pickled jalapeños, scrape out the seeds and white membranes with a small spoon. Leave them in for maximum heat. I usually leave seeds in about half the peppers for a balanced kick.
- Make the brine. In your small saucepan, combine the white vinegar, water, canning salt, and sugar. Bring to a boil over medium-high heat, stirring occasionally until the salt and sugar dissolve completely. This takes about 3-4 minutes. Once it’s boiling, reduce the heat to low and keep it warm while you pack the jars.
- Pack the jars. Remove your hot jars from the canning pot using your jar lifter. Place them on a clean towel. Drop 1 smashed garlic clove, 1/4 teaspoon black peppercorns, 1/4 teaspoon cumin seeds, and a small piece of bay leaf into each jar. Pack the sliced jalapeños into the jars, leaving 1/2 inch of headspace at the top. Don’t cram them in too tight—you want the brine to circulate around the slices.
- Pour the brine. Using your canning funnel, pour the hot brine over the jalapeños, leaving that 1/2 inch headspace. Run a thin spatula or chopstick around the inside of each jar to release any air bubbles. Trust me, those bubbles will mess with your seal if you don’t get them out. Wipe the jar rims with a clean, damp towel—any brine residue can prevent a proper seal.
- Apply the lids. Center a lid on each jar and screw on the band until it’s fingertip-tight. That means tight enough to hold the lid in place, but not so tight that air can’t escape during processing. I always screw them on, then give a quarter-turn back. This took me a few batches to get right, so don’t stress if it feels weird at first.
- Process the jars. Using your jar lifter, lower the filled jars back into the canning pot of boiling water. Make sure they’re covered by at least 1 inch of water. Put the lid on the pot and bring it back to a rolling boil. Process for 10 minutes (adjust for altitude if you’re above 1,000 feet). Start the timer when the water returns to a full boil, not when you put the jars in.
- Cool and check seals. After 10 minutes, turn off the heat and let the jars sit in the water for 5 minutes. Then remove them with your jar lifter and place them on a towel-covered counter. Don’t tighten the bands or touch the lids. Leave them undisturbed for 12-24 hours. You’ll hear the satisfying “pop” as each jar seals. After 24 hours, press the center of each lid—if it doesn’t flex up and down, it’s sealed. Refrigerate any jars that didn’t seal and use them within a month.
Sensory Cues to Watch For:
When the brine hits the peppers, you should see the jalapeño slices turn a slightly brighter green almost instantly. That’s the acid doing its work. During processing, you’ll see bubbles rising from the jars—that’s normal. The brine might look cloudy right after processing, but it’ll clear up as the jars cool. If your brine stays cloudy after 24 hours, you might have used table salt with anti-caking agents. No worries, it’s still safe to eat, just not as pretty.
Cooking Tips & Techniques
I’ve made enough mistakes with this recipe to fill a small notebook, and I’m sharing them so you don’t have to repeat them. Here are the things I wish I’d known from the start.
Don’t skip the hot pack. Packing hot peppers into hot jars with hot brine is called hot packing, and it’s essential for these quick pickled jalapeños for canning. Cold packing can lead to softer peppers and longer processing times. The heat helps the peppers absorb the brine faster and keeps them crunchier. I tried cold packing once out of laziness, and the peppers were limp and sad. Never again.
Watch your headspace. That 1/2 inch of headspace isn’t just a suggestion—it’s important for creating the vacuum seal. Too little headspace and the brine can bubble out during processing, leaving you with sticky jars and potential seal failures. Too much headspace and there’s too much air in the jar, which can lead to spoilage. I use a ruler to measure until I got comfortable eyeballing it.
Timing is everything. Start your timer when the water returns to a full boil after adding the jars, not before. If you start timing too early, you’re under-processing your jars. If you’re like me and tend to get distracted, set a timer on your phone. I’ve forgotten jars in the canner before—they were over-processed and mushy, but still sealed. Not ideal, but not a total loss.
Multitasking strategy. While your jars are sterilizing in the canner, slice your jalapeños and measure your spices. While the brine is coming to a boil, pack your jars. This recipe moves fast once you start, so having everything prepped and within reach makes a huge difference. I learned this after frantically searching for my jar lifter while brine boiled over on the stove.
Consistency tip. For uniform slices, use a mandoline slicer. I resisted buying one for years because I thought it was unnecessary, but now I use it every time I make these pickled jalapeños. The slices come out perfectly even, which means they all process at the same rate. Plus, it’s way faster than using a knife. Just use the guard—I have the scars to prove it’s necessary.
Variations & Adaptations
One of the best things about this recipe is how flexible it is. I’ve experimented with different flavors and methods, and here are some variations that actually work.
Spicy Garlic Pickled Jalapeños: Double the garlic and add 1 teaspoon of red pepper flakes to the brine. This version is for people who want their pickled jalapeños to fight back. I make a batch of these every summer for my brother-in-law, who puts them on everything from eggs to pizza. The garlic gets mellow and sweet after a few weeks, and the extra heat lingers.
Sweet and Spicy Pickled Jalapeños: Increase the sugar to 3 tablespoons and add 1 cinnamon stick to the brine. This sounds weird, I know, but trust me. The cinnamon adds a warmth that doesn’t scream “cinnamon” but makes the peppers taste more complex. These are amazing on pulled pork sandwiches or stirred into barbecue sauce. I accidentally discovered this combo when I grabbed the wrong jar of spices, and now it’s a staple.
Smoky Chipotle Pickled Jalapeños: Replace the cumin seeds with 1 teaspoon of smoked paprika and add 1 dried chipotle pepper to each jar. The smokiness transforms the whole profile and makes these perfect for tacos, burrito bowls, and even bloody marys. This is my personal favorite variation—it tastes like a campfire in a jar.
Refrigerator Pickled Jalapeños (No Canning): If you don’t want to deal with the canning process, skip the water bath step entirely. Just pack the peppers and brine into jars, let them cool to room temperature, then refrigerate. They’ll be ready to eat in 24 hours and will keep for up to 2 months in the fridge. The texture won’t be quite as crunchy, but they’re still delicious and way faster.
Low-Sodium Version: Reduce the canning salt to 1 teaspoon. The brine won’t be as effective at preserving, so these should be refrigerated and eaten within a month. I’ve tested this for a friend on a low-sodium diet, and the flavor is still bright and tangy—just less salty. You can boost the flavor with extra garlic or spices to compensate.
Serving & Storage Suggestions
These quick pickled jalapeños for canning are incredibly versatile, and I’ve found myself reaching for them in ways I never expected. Here’s how to get the most out of your jars.
Serving Temperature: I prefer them cold, straight from the fridge. The chill keeps the crunch intact and the heat feels cleaner. That said, they’re also fantastic at room temperature on tacos or nachos. If you’re adding them to a hot dish like chili or soup, toss them in at the very end so they don’t lose their texture.
Presentation Ideas: For gifting, I tie a piece of twine around the jar neck with a small tag that says “Pickled Jalapeños” and the date. Sometimes I add a handwritten note with serving suggestions. For a party, I arrange the jars on a wooden board with cheese, crackers, and cured meats. The bright green slices against the clear brine look beautiful on a table.
Complementary Dishes: These jalapeños are amazing on tacos, nachos, burgers, hot dogs, sandwiches, and salads. I love them on grilled cheese for an unexpected kick. They’re also fantastic stirred into mac and cheese, scattered over baked potatoes, or chopped into egg salad. My weirdest but most delicious use? Chopped up and mixed into cream cheese for a quick bagel spread. Don’t knock it till you try it.
Storage Instructions: Sealed jars can be stored in a cool, dark place like a pantry or basement for up to 12 months. The flavor actually improves after about 2 weeks as the spices meld. Once opened, refrigerate and use within 2 months. I write the date on the lid with a permanent marker so I know when each jar was opened.
Reheating: You don’t typically reheat pickled jalapeños, but if you’re adding them to a hot dish, just stir them in at the end. The heat from the dish will warm them through without cooking them further. If you want to serve them warm with something like carnitas, you can microwave a small bowl for 15-20 seconds, but honestly, I think they’re better cold.
Flavor Development Over Time: The first week, these pickled jalapeños taste bright and sharp—the vinegar is front and center. After two weeks, the garlic and spices start to mellow the brine, and the heat from the peppers becomes more pronounced. By the one-month mark, they’ve hit their peak: perfectly balanced, crunchy, and complex. I always try to stash a few jars away for at least a month before opening them, but I never succeed.
Nutritional Information & Benefits
Let’s talk about what’s actually in these jars besides deliciousness. A single serving of pickled jalapeños (about 1 ounce or 2 tablespoons) contains roughly:
- Calories: 5-10
- Carbohydrates: 1-2g
- Sodium: 200-300mg (varies based on salt used)
- Vitamin C: 10-15% of daily value
- Vitamin A: 5-8% of daily value
Health Benefits: Jalapeños are actually pretty good for you. They’re rich in capsaicin, the compound that gives them heat, which has been shown to boost metabolism and reduce inflammation. They’re also a good source of vitamin C, which supports immune health, and vitamin A, which is important for eye health. The fermentation-like process of pickling can also introduce beneficial bacteria, though the vinegar brine isn’t as probiotic-rich as fermented pickles.
Dietary Considerations: This recipe is naturally gluten-free, vegan, dairy-free, and nut-free. It’s also low in calories and fat. The main concern for some people is the sodium content, but you can reduce the salt if you’re watching your intake. Just remember that salt is a preservative, so lower-sodium versions should be refrigerated and eaten sooner.
Potential Allergens: None of the standard ingredients are common allergens, but always check your spice blends for hidden additives. Some pre-ground cumin, for example, can contain trace amounts of wheat flour as an anti-caking agent. I buy whole cumin seeds and grind them myself to avoid this, but it’s a personal preference.
My Wellness Perspective: I don’t pretend these are a health food, but I love that they add flavor and heat to dishes without adding a ton of calories or processed ingredients. They’re a way to make vegetables more exciting, and honestly, anything that gets me eating more peppers is a win in my book. Plus, knowing exactly what’s in the jar—no preservatives, no artificial colors—makes me feel good about what I’m putting into my body.
Conclusion
These quick pickled jalapeños for canning have become one of those recipes I make on autopilot now. When I see fresh jalapeños at the market, my brain immediately starts calculating how many jars I can fill. They’re not just a condiment in my kitchen—they’re a solution to bland meals, a gift for friends, and a little piece of summer I can open in the dead of winter. Every time I hear that pop of a sealing lid, I feel a tiny surge of satisfaction.
I hope you’ll try this recipe and make it your own. Maybe you’ll add extra garlic like I do, or throw in a cinnamon stick for that sweet-spicy surprise. Maybe you’ll give jars to your neighbors or hoard them all for yourself—no judgment here. The beauty of this recipe is that it’s forgiving enough for beginners and rewarding enough for experienced canners. There’s nothing quite like the look of those bright green slices suspended in clear brine, knowing you made them with your own hands.
So grab some jalapeños, pull out your canning pot, and give this a try. I’d love to hear how they turn out—drop a comment below and tell me your favorite way to use them. Did you try a variation I haven’t thought of? Did you give a jar to someone who didn’t expect to love pickled jalapeños as much as they did? Share your stories, your successes, and even your happy accidents. That’s what makes this whole cooking thing so wonderful. Happy canning!
Frequently Asked Questions
How long do these pickled jalapeños need to sit before they taste good?
I know it’s hard to wait, but give them at least 2 weeks for the flavors to really develop. The first week they’ll taste mostly like vinegar and heat. By week two, the garlic and spices start to shine through. By week four, they hit their peak—perfectly balanced and complex. I always try to stash a few jars away for a month, but I usually crack one open after two weeks because I can’t resist.
Can I use apple cider vinegar instead of white vinegar?
You can, but the flavor will be different. Apple cider vinegar has a fruitier, more mellow acidity that changes the profile of the pickled jalapeños. Some people love it, but I find it masks the brightness of the peppers. If you want to experiment, try a half-and-half mix of white and apple cider vinegar. Just make sure whatever vinegar you use has 5% acidity for safe canning.
Why did my brine turn cloudy?
Cloudy brine is usually caused by one of three things: using table salt with anti-caking agents, hard water with high mineral content, or over-processing the jars. The good news is that cloudy brine doesn’t mean your pickled jalapeños are unsafe—they’re just not as pretty. If you want clear brine, use canning salt and filtered water, and don’t over-process. I’ve had cloudy batches that tasted just fine.
Can I reuse the brine after the peppers are gone?
Technically yes, but I wouldn’t recommend it for canning. The brine’s acidity level drops after the first use, so it’s not safe for water bath canning. You can use leftover brine to pickle vegetables in the refrigerator—try throwing in sliced carrots, onions, or cauliflower. They’ll pick up the heat and flavor from the jalapeños. I do this all the time, and it’s a great way to get a second use out of the brine.
How do I know if a jar didn’t seal properly?
After 24 hours, press the center of each lid. If it pops up and down when you press it, it didn’t seal. You can also check by removing the band and gently lifting the jar by the lid—if the lid holds, it’s sealed. If a jar doesn’t seal, just refrigerate it and use it within a month. Don’t try to reprocess it with a new lid; the peppers will be over-processed and mushy. I’ve done this, and it’s not worth the effort.
PrintQuick Pickled Jalapenos Recipe for Canning – Best Spicy
These quick pickled jalapeños for canning deliver the perfect balance of heat, tang, and crunch. Made with simple ingredients and a foolproof brine, they’re perfect for tacos, nachos, sandwiches, and gifting.
- Prep Time: 15 minutes
- Cook Time: 10 minutes
- Total Time: 45 minutes
- Yield: 4 half-pint jars 1x
- Category: Condiment
- Cuisine: American
Ingredients
- 1 cup distilled white vinegar (5% acidity)
- 1 cup water (filtered preferred)
- 1 tablespoon canning salt
- 1 tablespoon granulated sugar
- 1 pound fresh jalapeños (about 8–10 medium)
- 4 cloves garlic, peeled and smashed
- 1 teaspoon black peppercorns
- 1 teaspoon cumin seeds
- 1 bay leaf
- Optional: 1-2 dried chiles de árbol
Instructions
- Prepare your jars and equipment. Wash jars, lids, and bands in hot, soapy water. Rinse thoroughly. Place jars in canning pot, cover with water, and bring to a boil. Boil for 10 minutes to sterilize. Keep jars in hot water until ready to fill. Place lids in a small saucepan of simmering water (do not boil).
- Prep your jalapeños. Wash jalapeños under cold water and pat dry. Wear gloves. Slice off stems and cut peppers into 1/4-inch rounds. For milder pickled jalapeños, scrape out seeds and white membranes. Leave seeds in for maximum heat.
- Make the brine. In a small saucepan, combine white vinegar, water, canning salt, and sugar. Bring to a boil over medium-high heat, stirring occasionally until salt and sugar dissolve completely (about 3-4 minutes). Reduce heat to low and keep warm.
- Pack the jars. Remove hot jars from canning pot using jar lifter and place on a clean towel. Drop 1 smashed garlic clove, 1/4 teaspoon black peppercorns, 1/4 teaspoon cumin seeds, and a small piece of bay leaf into each jar. Pack sliced jalapeños into jars, leaving 1/2 inch headspace.
- Pour the brine. Using a canning funnel, pour hot brine over jalapeños, leaving 1/2 inch headspace. Run a thin spatula or chopstick around inside of each jar to release air bubbles. Wipe jar rims with a clean, damp towel.
- Apply the lids. Center a lid on each jar and screw on the band until fingertip-tight (tight enough to hold lid in place, but not so tight that air can’t escape during processing).
- Process the jars. Using jar lifter, lower filled jars into canning pot of boiling water. Ensure jars are covered by at least 1 inch of water. Put lid on pot and bring back to a rolling boil. Process for 10 minutes (adjust for altitude above 1,000 feet). Start timer when water returns to a full boil.
- Cool and check seals. After 10 minutes, turn off heat and let jars sit in water for 5 minutes. Remove with jar lifter and place on a towel-covered counter. Do not tighten bands or touch lids. Leave undisturbed for 12-24 hours. After 24 hours, press center of each lid—if it doesn’t flex up and down, it’s sealed. Refrigerate any jars that didn’t seal and use within a month.
Notes
For best flavor, let jars sit for at least 2 weeks before opening. The flavor peaks at about 1 month. Wear gloves when handling jalapeños to avoid skin irritation. If a jar doesn’t seal, refrigerate and use within a month. For altitude adjustments, add 1 minute of processing time for every 1,000 feet above sea level.
Nutrition
- Serving Size: 1 ounce (about 2 tab
- Calories: 510
- Sugar: 1
- Sodium: 200300
- Carbohydrates: 12
Keywords: pickled jalapeños, canned jalapeños, spicy pickles, homemade pickles, canning recipe, jalapeño recipe, quick pickles



