Love this? Save it for later!
Share the inspiration with your friends
The clock struck 5:30 PM on a Tuesday in October, and my kitchen looked like a crime scene. My toddler’s soccer practice had run late, my partner was stuck in traffic, and I realized with a sinking heart that I had completely forgotten to buy snacks for the neighborhood kids trick-or-treating at 7:00. The pantry was a desert. The freezer held only a bag of frozen peas and some old ice cubes. I was staring into the abyss, knowing that thirty kids were about to descend on my porch looking for sugar, and all I had was… vegetables.
Honestly, I almost just handed out the peas. But then I saw the red bell peppers and the cucumber. They were sitting there, lonely and crisp, mocking my poor planning. I grabbed the black olives from the jar that had been marinating for a week, and the cheddar cheese block that was starting to dry out. It wasn’t the plan. It wasn’t even close to the plan. I was improvising with the desperation of a parent who refuses to let their kids go empty-handed.
I chopped the peppers into jagged, web-like shapes. I sliced the olives into thin, creepy rings. I arranged the celery sticks like legs. It was chaotic. It was messy. It was actually kind of brilliant. When the first group of kids arrived, dressed as vampires and witches, they didn’t ask for candy. They asked if they could take the spiders home. The look on their faces wasn’t disappointment; it was delight. The “Fun Halloween Veggie Tray Spider Platter” wasn’t just a snack; it was a survival tactic that turned out to be a hit.
I still make this tray every year. Not because I’m a saint, but because it reminds me that sometimes the best meals are the ones you throw together when everything goes wrong. It’s resourceful, it’s fun, and it keeps the sugar rush at bay until the real treats come out. You know how it is—sometimes you just have to work with what you’ve got, and somehow, it tastes better that way.
Why You’ll Love This Recipe
Let’s be real for a second. Most veggie trays are boring. They’re just sad sticks of celery and carrots floating in ranch dressing, looking like they belong in a dentist’s waiting room. This spider platter is different. It’s not just about nutrition, though that’s a nice bonus. It’s about the *experience* of eating it. I’ve tested dozens of vegetable arrangements over the years, from the overly complicated fruit skewers to the expensive charcuterie boards, and this one wins because it strikes the perfect balance between spooky and satisfying.
Here is why this recipe earns its place in your Halloween rotation:
* **Quick & Easy:** You can assemble this entire platter in under 15 minutes. I’m talking no-cook, no-fuss, just chop and arrange. Perfect for busy weeknights or last-minute cravings when you realize you forgot to go to the store.
* **Simple Ingredients:** No fancy grocery trips needed. You likely already have black olives, cheddar cheese, bell peppers, and celery in your fridge right now. It uses pantry staples that don’t require a special trip to a specialty shop.
* **Perfect for Halloween Parties:** Whether you’re hosting a trick-or-treat line, a classroom party, or a cozy dinner with friends, this fits the theme perfectly without trying too hard.
* **Crowd-Pleaser:** Always gets rave reviews from kids and adults alike. The kids love the “monster” aspect, and the adults appreciate that it’s actually healthy.
* **Unbelievably Delicious:** The texture and flavor combo is next-level comfort food. The crunch of the celery paired with the salty bite of the olive and the creamy sharpness of the cheddar creates a flavor profile that keeps people coming back for more.
What makes this recipe different from the rest? It’s the technique of using the olives as the body and the pepper strips as the legs. It’s a creative twist on the standard veggie plate. Most people just slice veggies and dump them in a bowl. This method requires a little bit of assembly, but the visual payoff is huge. It’s the kind of recipe that makes you close your eyes after the first bite and think, “Wow, I didn’t know vegetables could be this fun.” It’s comfort food reimagined—healthier, faster, but with the same soul-soothing satisfaction. It’s perfect for impressing guests without stress, or turning a simple meal into something memorable. Plus, it pairs wonderfully with other spooky treats like perfect spiderweb halloween sugar cookies for a full thematic experience.
What Ingredients You Will Need
This recipe uses simple, wholesome ingredients to deliver bold flavor and satisfying texture without the fuss. The beauty of this spider platter is that you can swap out components based on what you have or what your guests prefer. I like to keep it classic, but feel free to get creative.
Here is what you’ll need to build your own creepy crawlies:
* **For the Spider Bodies:**
* **Black Olives:** You’ll need about 12-16 large black olives, preferably the pitted variety. I recommend using *Mission* brand olives because they have a meatier texture and a deeper, earthier flavor that holds up well. If you can’t find large ones, you can use kalamata olives, though they are a bit smaller.
* **Cheddar Cheese:** A block of sharp cheddar cheese, about 1 cup. Sharp cheddar has a stronger flavor that cuts through the saltiness of the olives. Mild cheddar works too, but it might taste a bit bland next to the olives.
* **For the Spider Legs:**
* **Red Bell Peppers:** One large red bell pepper. Red is essential for the Halloween vibe. Green peppers look too much like actual bugs, which is a bit too realistic for my taste. The red adds a vibrant pop of color that looks fantastic on a platter.
* **Celery Sticks:** One bunch of celery, washed and trimmed. The celery provides the sturdy “legs” for the spiders. Make sure they are crisp; limp celery is a tragedy.
* **For the Eyes:**
* **Cream Cheese:** About 2 tablespoons of plain cream cheese, softened. This acts as the glue for the eyes and adds a creamy contrast to the crunchy vegetables.
* **Black Pepper Seeds or Tiny Olive Slices:** For the pupils. I usually just use a tiny bit of black pepper for a minimalist look, but if you want them to look more like spiders, slice a thin piece of olive into tiny circles.
* **For the Web (Optional but Recommended):**
* **White Cheddar Cheese:** Shredded white cheddar or even string cheese pulled apart. This helps create the web effect around the spiders.
* **Oregano or Parsley:** A few sprigs of fresh parsley or dried oregano can be scattered to look like cobwebs or moss.
**Substitution Notes:**
If you are dairy-free, you can swap the cheddar and cream cheese for a high-quality vegan cheese alternative that holds its shape. For the olives, you could use grape tomatoes with a small olive slice on top, though it changes the texture slightly. If you don’t have red bell peppers, orange or yellow peppers work, but red is the most festive. I personally find that using a mandoline slicer for the peppers gives the most uniform strips, but a sharp knife works just fine if you’re careful.
Equipment Needed
You don’t need much to make this, which is part of the appeal. Here is what you’ll need:
* **Sharp Chef’s Knife:** A good knife makes slicing the bell peppers and olives much safer and easier. A dull knife is dangerous. I use my 8-inch chef’s knife for everything here.
* **Cutting Board:** A large plastic or wooden board. Plastic is easier to sanitize if you’re handling raw vegetables for a party.
* **Small Bowl:** For mixing the cream cheese with the pepper for the eyes.
* **Platter or Serving Tray:** A large platter works best. A black platter adds to the spooky theme, but any color works.
* **Mandoline Slicer (Optional):** If you want perfectly thin, uniform strips for the legs, a mandoline is great. Just use the guard! I cut my finger once on a mandoline, and I never want to do that again.
**Budget-Friendly Tip:**
You can buy olives in a jar, but sometimes the brine makes them soggy. If you have time, let the olives drain on a paper towel for 10 minutes before assembling. It keeps the crunch. Also, buying a block of cheese and shredding it yourself is cheaper than pre-shredded, and it melts better if you decide to warm the cheese slightly (though we aren’t doing that here).
Preparation Method
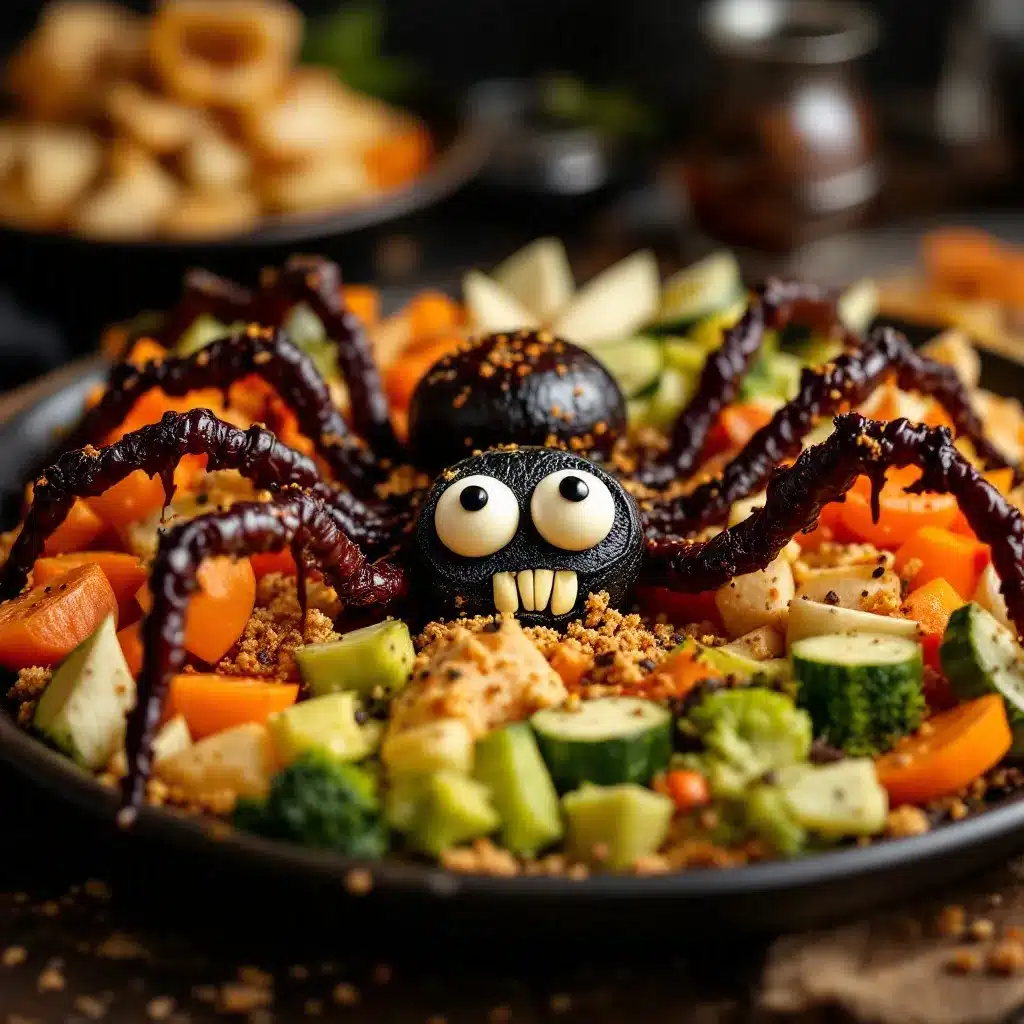
Making the Fun Halloween Veggie Tray Spider Platter is straightforward, but attention to detail matters. Follow these steps to ensure your spiders look scary and taste delicious.
1. **Prep the Vegetables (5 minutes):**
Wash the celery and bell peppers thoroughly. Pat them dry with a paper towel. Moisture is the enemy of crispness. Trim the ends off the celery stalks. Slice the red bell pepper in half, remove the seeds and white membrane, and then slice it into thin, long strips. Aim for strips that are about 6-8 inches long. These will be the legs. If the strips are too wide, the spiders will look chunky. Thin is better.
2. **Prepare the Olive Bodies (3 minutes):**
Drain the black olives. If they are whole, you can leave them as is, or slice them in half horizontally if you want them flatter and more stable. I prefer leaving them whole because they look more like a spider’s abdomen. Place them on your platter in a scattered pattern. Don’t line them up perfectly; random placement looks more natural and less like a factory assembly line.
3. **Attach the Legs (5 minutes):**
Take the red pepper strips and insert one end into the side of each olive. You’ll need 4 strips on each side, for a total of 8 legs per spider. Push them in about an inch or so. If the pepper strips are too thick to pierce easily, you can use a small knife to make a tiny slit in the olive first. Arrange the legs so they splay out like a real spider. Some legs can be longer than others for a dynamic look. This step requires a steady hand, but it’s the most fun part.
4. **Create the Eyes (3 minutes):**
In a small bowl, mix the softened cream cheese with a tiny pinch of black pepper. Using a small spoon or a piping bag (if you have one), place a small dollop of the cream cheese mixture on the front of each olive. This forms the head. Then, add a tiny dot of black pepper or a microscopic slice of olive on top of the cream cheese for the pupil. If you don’t want to use pepper, you can use a toothpick to make a tiny hole and insert a sliver of olive. The eyes should be small; big eyes look cute, not scary.
5. **Add the Web Details (5 minutes):**
Take the shredded white cheddar or string cheese and pull it into thin strands. Arrange these strands on the platter around the spiders to mimic a web. You can also scatter a few parsley leaves or dried oregano sprigs nearby to add texture and color contrast. This step ties the whole presentation together.
6. **Final Assembly and Chill:**
Once everything is arranged, cover the platter with plastic wrap and refrigerate for at least 30 minutes before serving. This helps the cheese firm up and the flavors meld. It also keeps the vegetables crisp. If you’re serving immediately, just make sure the olives aren’t too warm.
Cooking Tips & Techniques
I’ve made this tray a hundred times, and I’ve made a few mistakes along the way. Here is how to avoid them.
* **Don’t Skip the Drying:** After washing your vegetables, dry them completely. Wet peppers slide around and make the platter soggy. I learned this the hard way when a guest’s hand slipped and knocked over the whole tray. Dry veggies stay put.
* **Choose the Right Olives:** Avoid olives that are stuffed with pimentos. They are too soft and messy. You want firm, meaty olives. If you buy them in brine, rinse them well.
* **Pepper Strip Consistency:** Try to make your pepper strips the same length. It makes the spiders look more uniform and professional. If you’re nervous about cutting, use a ruler as a guide.
* **Cream Cheese Texture:** Make sure your cream cheese is truly softened. If it’s cold and stiff, it will tear the olive skin. Let it sit out for 15 minutes before you start.
* **Timing:** Assemble the spiders no more than an hour before serving. Olives can oxidize slightly over time, turning a bit dull, though not as quickly as apples. If you need to prep ahead, keep the components separate and assemble right before guests arrive.
**Common Mistake:**
People often put too much cream cheese on the eyes. Keep it minimal. You want the olive to remain the star, not the cheese. Less is more here.
Variations & Adaptations
While the classic black olive spider is my favorite, there are plenty of ways to twist this recipe.
* **The “Ghost” Spider:** Use green olives and white cheddar cheese. It’s a spookier, paler look that fits the Halloween theme perfectly. You can use white pepper for the eyes to keep it subtle.
* **The “Monster” Spider:** Use cherry tomatoes as the body and broccoli florets as the legs. It’s a different texture profile, with the juicy tomato and crunchy broccoli. This is great for kids who don’t like olives.
* **Gluten-Free & Vegan:** This recipe is naturally gluten-free. For a vegan version, use vegan cream cheese and vegan cheese slices. The olives and veggies are already vegan, so it’s an easy swap.
* **Spicy Kick:** Add a dash of cayenne pepper to the cream cheese for a little heat. It’s a nice surprise for adults who like a bit of spice with their snacks.
* **Seasonal Swap:** In autumn, you can use orange bell peppers for the legs to match the pumpkin theme. It looks stunning on a platter with other orange and green elements.
I once tried using radishes as the body, but they were too watery and the legs kept falling off. Stick to firm vegetables for best results.
Serving & Storage Suggestions
Serve this platter at room temperature for the best flavor. Cold olives can be a bit tough, so let them sit out for 10 minutes before serving. Pair it with a cool ranch or blue cheese dressing on the side. The creamy dip balances the salty olives perfectly.
**Storage:**
If you have leftovers, store them in an airtight container in the refrigerator for up to 2 days. The olives will hold up well, but the pepper strips might soften slightly over time. Re-crisp them by rinsing with cold water and drying before serving again.
**Reheating:**
Do not reheat this platter. It’s meant to be eaten cold or at room temperature. Heating will wilt the peppers and melt the cheese in an unappetizing way.
**Flavor Development:**
Interestingly, the flavors actually improve after a day. The salt from the olives permeates the cream cheese slightly, creating a more cohesive taste. If you’re making this for a party the next day, it might taste even better than when it’s fresh.
Nutritional Information & Benefits
This Fun Halloween Veggie Tray Spider Platter is a guilt-free snack that packs a nutritional punch. Each spider provides a good dose of fiber from the celery and peppers, vitamin A from the red bell peppers, and healthy fats from the olives. The cheddar cheese adds calcium and protein. It’s a balanced snack that keeps energy levels stable, unlike sugary treats that cause a crash.
For those watching their sodium, be mindful of the olives, as they can be salty. Rinsing them helps reduce the sodium content. This recipe is naturally gluten-free and can be made vegan. It’s a great way to get kids to eat their veggies without them even realizing it. Plus, the fun presentation makes it feel like a treat, not a chore.
Conclusion
The Fun Halloween Veggie Tray Spider Platter is more than just a snack; it’s a memory-maker. It’s the kind of recipe that turns a stressful situation into a fun family activity. I love this recipe because it’s flexible, easy, and surprisingly delicious. It proves that you don’t need expensive ingredients to make something special.
I encourage you to try this and make it your own. Add some extra webs, change the colors, or make it for your next game day. It’s versatile enough for any occasion. Share your creations on social media and tag me—I’d love to see your spooky spiders!
If you enjoyed this easy Halloween snack, you might also like my spooky witch finger cookies for a sweet treat to pair with it. Or try the easy adorable halloween mummy sugar cookies for a different kind of creepy-crawly fun.
Happy Halloween, and happy snacking!
Frequently Asked Questions
Can I make this platter ahead of time?
Yes! You can assemble the spiders up to 2 hours in advance. Keep them covered in the fridge to maintain crispness. Assemble the eyes right before serving to prevent the cream cheese from drying out.
What can I use instead of black olives?
You can use green olives, kalamata olives, or even cherry tomatoes for a different look. Just note that tomatoes are softer, so the legs might not stick as well.
Is this recipe gluten-free?
Yes, this recipe is naturally gluten-free. Just ensure your cheese and olives are certified gluten-free if you have celiac disease.
Can I use pre-sliced olives?
It’s better to use whole olives. Pre-sliced olives are often too small and delicate to hold the pepper legs securely. Whole olives provide a sturdier base.
How do I keep the peppers from browning?
Bell peppers don’t brown as quickly as apples, but you can toss them in a little lemon juice after slicing to keep them bright and fresh.
Pin This Recipe!
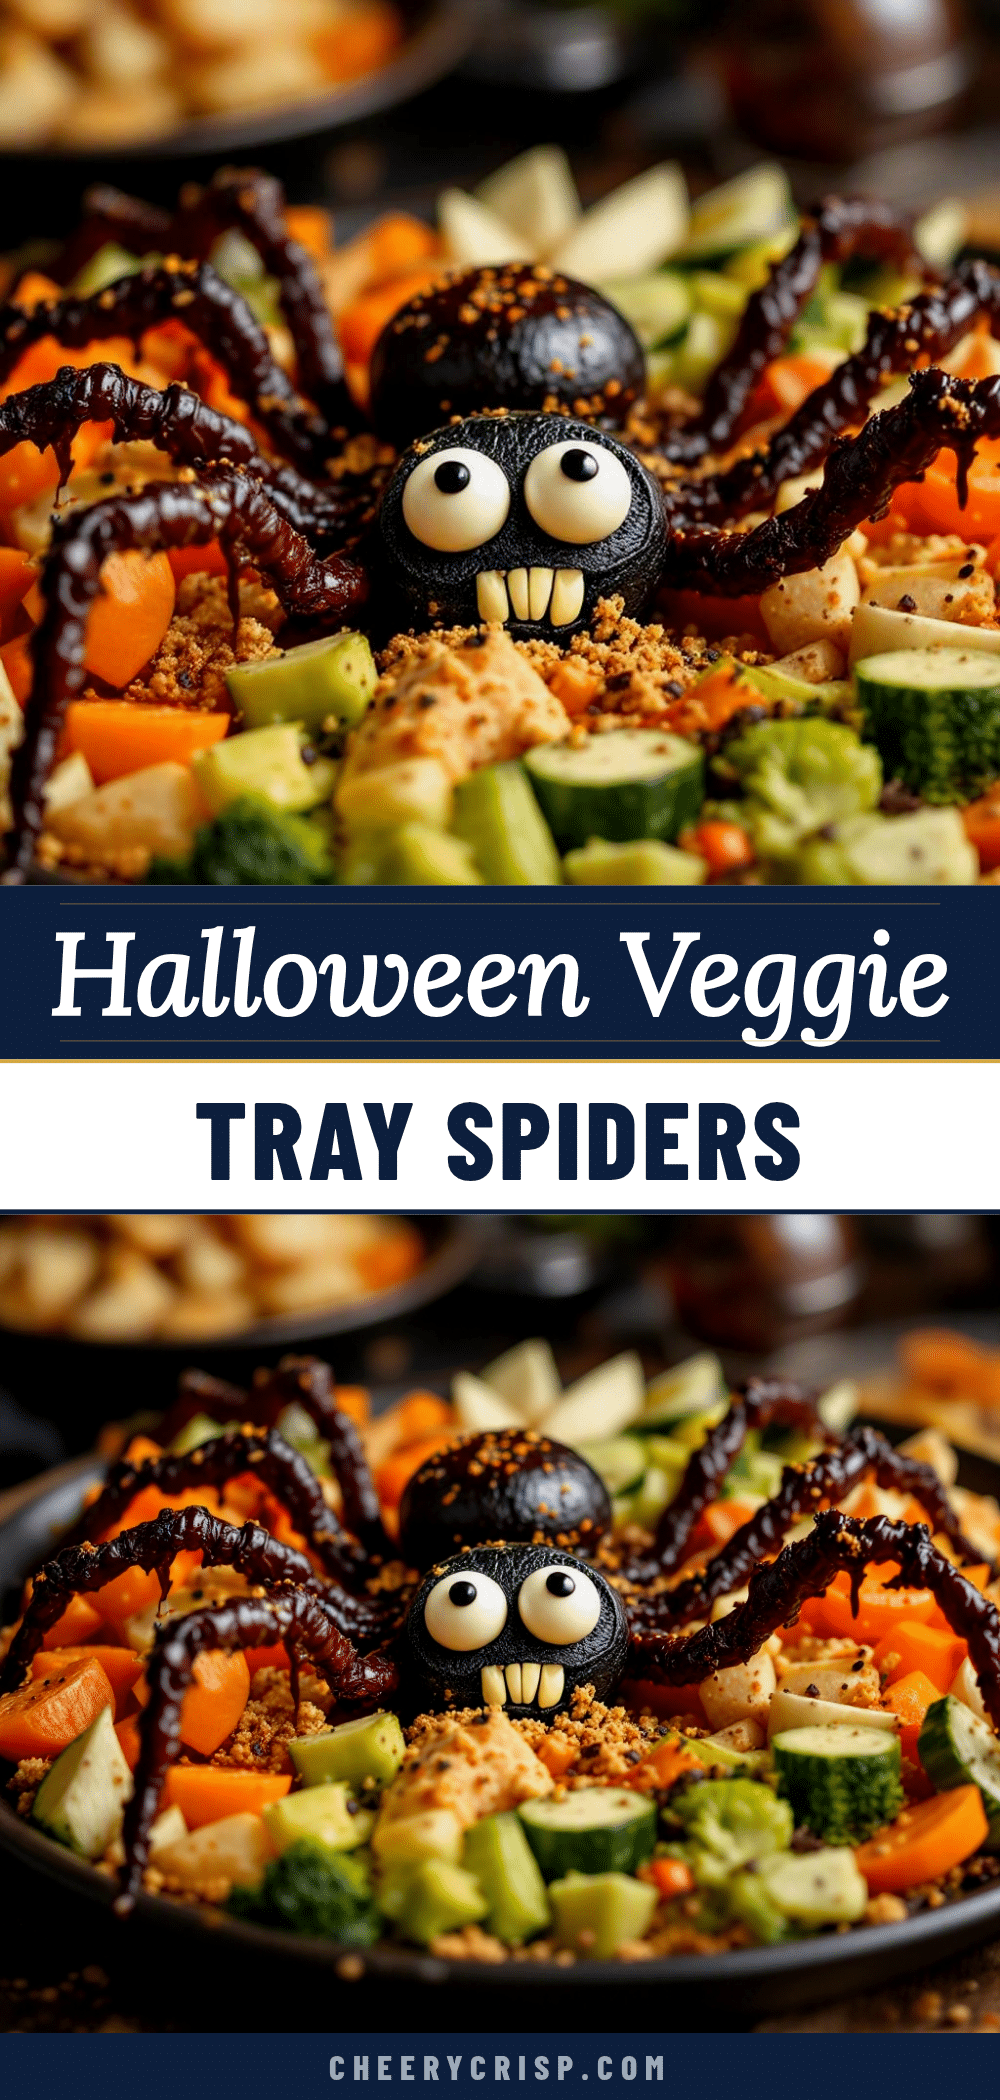
Fun Halloween Veggie Tray Spider Platter
A creative, no-cook Halloween snack featuring black olive spiders with red bell pepper legs and cream cheese eyes. This easy-to-assemble veggie tray is perfect for parties, trick-or-treaters, and keeping sugar intake in check.
- Prep Time: 15 minutes
- Cook Time: 0 minutes
- Total Time: 45 minutes
- Yield: 12-16 servings 1x
- Category: Appetizer
- Cuisine: American
Ingredients
- 12–16 large black olives (pitted, Mission brand recommended)
- 1 large red bell pepper
- 1 bunch celery, washed and trimmed
- 1 cup sharp cheddar cheese, shredded
- 2 tablespoons plain cream cheese, softened
- Black pepper seeds or tiny olive slices for eyes
- Shredded white cheddar or string cheese for webs (optional)
- Fresh parsley or dried oregano for decoration (optional)
Instructions
- Wash and dry the celery and bell peppers thoroughly. Trim celery ends and slice the red bell pepper into thin, 6-8 inch long strips for legs.
- Drain the black olives. Leave them whole or slice horizontally if a flatter base is preferred. Arrange them on a platter in a scattered pattern.
- Insert one end of four red pepper strips into each side of each olive to create eight legs per spider. Push strips in about an inch and splay them out.
- Mix softened cream cheese with a tiny pinch of black pepper. Place a small dollop on the front of each olive to form the head.
- Add a tiny dot of black pepper or a microscopic olive slice on the cream cheese to create the pupils.
- Arrange shredded white cheddar or string cheese strands around the spiders to mimic webs. Scatter parsley or oregano for texture.
- Cover the platter with plastic wrap and refrigerate for at least 30 minutes before serving to firm up the cheese and keep vegetables crisp.
Notes
Ensure vegetables are completely dry before assembly to prevent slipping. Use firm, meaty olives rather than stuffed ones. Assemble no more than an hour before serving for best texture. Do not reheat; serve at room temperature or chilled.
Nutrition
- Serving Size: 1 Spider
- Calories: 45
- Sugar: 1
- Sodium: 120
- Fat: 3
- Saturated Fat: 1.5
- Carbohydrates: 3
- Fiber: 1
- Protein: 2
Keywords: Halloween snack, veggie tray, spider platter, healthy party food, no-cook recipe, kid-friendly snacks, gluten-free appetizer



