Love this? Save it for later!
Share the inspiration with your friends
By the fourth time I made these chicken and rice bowls in a single week, I stopped pretending I was just “testing a recipe” and accepted the truth: I was hooked. The first batch I threw together on a Sunday out of pure desperation—I had a container of leftover rice, two chicken breasts that needed cooking, and absolutely zero energy for another week of sad desk lunches. I figured I’d toss it all in some bowls, call it a win, and move on.
But then I ate one the next day. And the day after that. And by Wednesday, I was actually looking forward to lunch—not just tolerating it. The chicken stayed juicy (which felt like a minor miracle), the rice soaked up all the flavors without getting mushy, and the whole thing came together in about 30 minutes of actual work. I kept tweaking the seasoning, the veggie mix, the sauce ratio—obsessing over details nobody else would notice. But that’s the thing about a good meal prep bowl. When it clicks, it clicks hard.
These Easy Weekly Meal Prep Chicken and Rice Bowls aren’t fancy. They’re not trying to be. What they are is reliable—the kind of recipe that makes you feel like you’ve got your life together, even when you definitely don’t. And honestly? That’s worth more than any complicated dinner I’ve ever made.
Why You’ll Love This Recipe
Let me tell you why this one’s different from every other meal prep bowl you’ve seen floating around Pinterest. I’ve tested this through three different seasons, two different ovens, and one very sad week where I forgot to buy broccoli. Here’s what I learned:
- Quick & Easy: From start to finish, you’re looking at about 30 minutes of active cooking. The oven does most of the work while you chop veggies or (let’s be real) scroll your phone.
- Simple Ingredients: Chicken breast, rice, bell peppers, broccoli, and a few pantry staples. No trips to specialty stores, no hunting down obscure spices.
- Perfect for Busy Weeks: Make these on Sunday, and you’ve got lunch or dinner covered for the next four days. It’s the ultimate set-it-and-forget-it situation.
- Crowd-Pleaser: I’ve brought these to friends who “don’t do meal prep” and watched them text me for the recipe by Tuesday. It’s just that good.
- Unbelievably Delicious: The secret is in the marinade—a simple mix of olive oil, garlic, smoked paprika, and a touch of honey that caramelizes on the chicken and keeps it from drying out. The rice gets a quick toss in the same pan drippings, so nothing goes to waste.
This isn’t just another version of chicken and rice. It’s the version that makes you close your eyes after the first bite and think, “Okay, I can do this week.” It’s comfort food that actually works with your schedule—not against it.
What Ingredients You Will Need
This recipe uses simple, wholesome ingredients to deliver bold flavor and satisfying texture without the fuss. Most of these are probably already sitting in your kitchen, which is exactly the point.
For the Chicken Marinade
- 2 boneless, skinless chicken breasts (about 1.5 lbs total) — Look for even thickness so they cook uniformly. If they’re thick on one end, butterfly them or pound them to about 1-inch thickness.
- 3 tablespoons olive oil — I prefer extra virgin here, but regular works fine too.
- 3 cloves garlic, minced — Fresh is best, but jarred minced garlic works in a pinch (use about 1 teaspoon).
- 1 teaspoon smoked paprika — This gives the chicken that gorgeous color and a subtle smoky depth. Regular paprika works if that’s what you have.
- 1 teaspoon garlic powder — Not the same as fresh garlic! It adds a different, more mellow flavor.
- 1 teaspoon onion powder
- 1/2 teaspoon salt
- 1/4 teaspoon black pepper
- 1 tablespoon honey — Helps with caramelization and balances the savory spices. Maple syrup works as a substitute.
- Juice of 1/2 lemon — Adds brightness and helps tenderize the chicken.
For the Rice Base
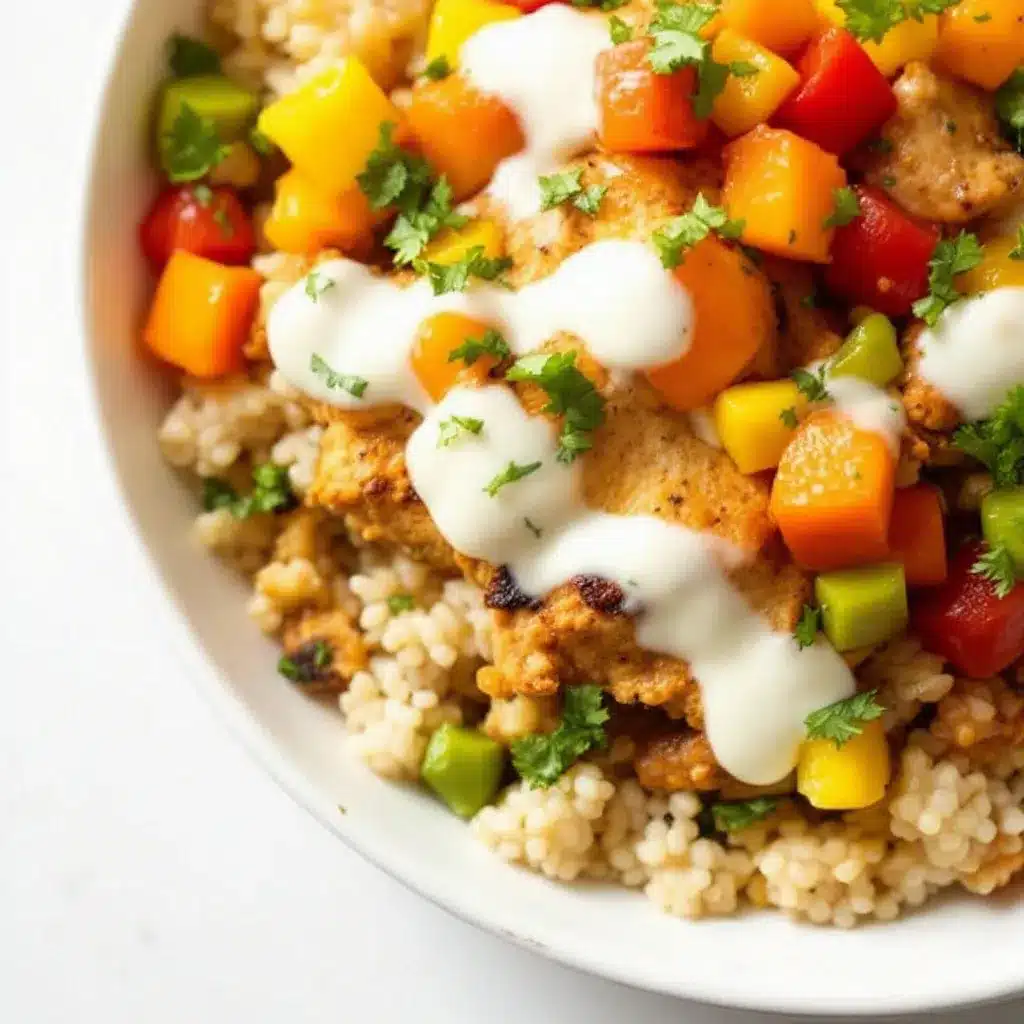
- 1 1/2 cups long-grain white rice — Basmati or jasmine both work beautifully. Brown rice will need a longer cooking time and more liquid.
- 3 cups chicken broth — Low-sodium is best so you can control the salt. Water works, but broth adds so much more flavor.
- 1 tablespoon butter or olive oil
- 1/2 teaspoon salt
For the Roasted Vegetables
- 2 bell peppers (any color) — I like using one red and one orange for color variety. Green peppers are slightly more bitter but still work.
- 2 cups broccoli florets — Fresh or frozen (thawed and patted dry). I recommend fresh for better texture.
- 1 red onion — Cut into 1-inch chunks. They get sweet and jammy when roasted.
- 2 tablespoons olive oil
- 1/2 teaspoon salt
- 1/4 teaspoon black pepper
For the Bowl Assembly
- Optional toppings: Fresh parsley or cilantro, a squeeze of lemon, red pepper flakes, or a dollop of Greek yogurt or hot sauce.
Equipment Needed
You don’t need a fancy kitchen to pull these bowls off. Here’s what I use:
- Baking sheet (half-sheet pan) — For roasting the chicken and veggies. A rimmed baking sheet is ideal to catch any juices.
- Medium saucepan with lid — For cooking the rice. Any pot with a tight-fitting lid will do.
- Mixing bowls — One for the marinade, one for the veggies.
- Sharp knife and cutting board — A good chef’s knife makes chopping veggies so much faster. Trust me on this.
- Tongs — For flipping the chicken halfway through cooking.
- Meat thermometer — Not strictly necessary, but it takes the guesswork out of cooking chicken. I use a simple instant-read one.
- Meal prep containers — Glass or BPA-free plastic with tight-sealing lids. I prefer glass because it doesn’t stain or absorb smells.
If you don’t have a meat thermometer, you can check doneness by cutting into the thickest part of the chicken—the juices should run clear and the meat should no longer be pink. But honestly, a thermometer is like $10 and saves you from dry chicken forever.
Preparation Method
Step 1: Marinate the Chicken (10 minutes + 15 minutes resting)
In a medium mixing bowl, whisk together the olive oil, minced garlic, smoked paprika, garlic powder, onion powder, salt, pepper, honey, and lemon juice. Add the chicken breasts and toss to coat thoroughly. Cover and let rest at room temperature for 15 minutes while you prep everything else. If you have more time, pop it in the fridge for up to 4 hours—just take it out 15 minutes before cooking to take the chill off.
Step 2: Preheat and Prep Veggies (10 minutes)
Preheat your oven to 400°F (200°C). Line a baking sheet with parchment paper or foil for easy cleanup. Chop your bell peppers into 1-inch pieces, cut the broccoli into small florets (about bite-sized), and chop the red onion into 1-inch chunks. Toss the veggies in a bowl with 2 tablespoons olive oil, salt, and pepper until evenly coated.
Step 3: Start the Rice (20 minutes)
Rinse the rice in a fine-mesh strainer under cold water until the water runs clear—this removes excess starch and keeps the rice from getting gummy. In a medium saucepan, melt the butter over medium heat. Add the rice and stir for about 1 minute until it smells nutty. Pour in the chicken broth and salt, bring to a boil, then reduce heat to low, cover, and simmer for 15-18 minutes until the liquid is absorbed. Remove from heat and let it sit covered for 5 minutes, then fluff with a fork.
Step 4: Roast the Chicken and Veggies (20-25 minutes)
Place the marinated chicken breasts on one half of the prepared baking sheet. Spread the seasoned veggies on the other half—try to keep them in a single layer for even roasting. Roast for 20-25 minutes, flipping the chicken halfway through. The chicken is done when it reaches an internal temperature of 165°F (74°C) and the veggies are tender with lightly charred edges. If the chicken finishes before the veggies, remove it to a cutting board and let the veggies roast a few more minutes.
Step 5: Rest and Slice (5 minutes)
Transfer the chicken to a cutting board and let it rest for 5 minutes. This is crucial—if you cut into it immediately, all those juices will run out and you’ll end up with dry chicken. Slice the chicken against the grain into strips or bite-sized cubes.
Step 6: Assemble the Bowls (5 minutes)
Divide the rice evenly among 4 meal prep containers. Top each with sliced chicken and roasted veggies. If you want extra flavor, drizzle any remaining pan juices over the bowls. Add any optional toppings now or pack them separately to add later.
Step 7: Cool and Store (10 minutes)
Let the bowls cool completely before sealing the lids—about 10 minutes at room temperature. Trapping steam inside will make everything soggy. Once cool, refrigerate for up to 4 days.
Cooking Tips & Techniques
After making these bowls more times than I care to admit, here’s what I’ve learned the hard way:
- Don’t skip the rice rinsing. I know it’s an extra step, but unrinsed rice gets sticky and clumpy. Rinsing gives you fluffy, separate grains that hold up better after a few days in the fridge.
- Pat your veggies dry. If you wash your broccoli and peppers right before roasting, they’ll steam instead of roast. Give them a good pat with a clean kitchen towel for those beautiful charred edges.
- Use a meat thermometer. I once overcooked chicken by 10 minutes because I was “sure it was done.” It was dry and sad. A thermometer is foolproof—165°F (74°C) and you’re golden.
- Let the chicken rest. I cannot stress this enough. Resting allows the juices to redistribute. Slice too soon, and your chicken goes from juicy to cardboard in seconds.
- Layer strategically in containers. Put the rice on the bottom, then veggies, then chicken on top. This keeps the rice from getting soggy and makes reheating easier.
- Add fresh elements later. If you’re adding avocado, fresh herbs, or a squeeze of lemon, pack those separately and add them right before eating. Trust me on this—nobody wants brown avocado.
Variations & Adaptations
One of the best things about this recipe is how flexible it is. Here are some ways I’ve adapted it over the months:
- Make it gluten-free: This recipe is naturally gluten-free as written. Just double-check your chicken broth label—some brands add wheat-based ingredients.
- Swap the protein: Chicken thighs work beautifully (they’re even juicier), or try it with ground turkey taco bowls for a different flavor profile entirely. I’ve also used this marinade on tofu for a vegetarian version—press the tofu first, then bake at 400°F for 25 minutes.
- Change up the veggies: Zucchini, snap peas, asparagus, or sweet potatoes all roast beautifully. Just adjust cooking times for denser veggies like sweet potatoes (they’ll need about 5 extra minutes).
- Try different grains: Quinoa, farro, or brown rice all work. Adjust cooking times and liquid ratios according to the grain package instructions.
- Add a sauce: A simple drizzle of tahini dressing, sriracha mayo, or even a dollop of creamy peanut butter sauce takes these bowls to another level.
- Seasonal swap: In summer, I add fresh corn cut off the cob. In fall, roasted butternut squash cubes. It keeps the recipe feeling fresh all year.
Serving & Storage Suggestions
These bowls are designed to be eaten cold or reheated, which makes them perfect for busy days. Here’s how I handle both:
- Serving temperature: I actually love these cold straight from the fridge on hot days. If you’re reheating, microwave for 2-3 minutes, stirring halfway through, or reheat in a skillet over medium heat with a splash of water or broth.
- Storage: Keep in airtight containers in the refrigerator for up to 4 days. The flavors actually get better after a day or two as everything melds together.
- Freezing: You can freeze the fully assembled bowls for up to 3 months. Thaw overnight in the fridge before reheating. Note that the texture of the veggies and rice will be slightly softer after freezing.
- Reheating tip: If you’re meal prepping for the whole week, I recommend storing the chicken and veggies separately from the rice. Reheat the chicken and veggies together, then add the rice. It keeps the texture better.
- Flavor development: The chicken absorbs more of the marinade flavors as it sits. By day 3, it’s almost like a different (and delicious) dish.
Nutritional Information & Benefits
Per serving (1 bowl, assuming 4 servings), here’s the approximate breakdown:
- Calories: ~450-500
- Protein: ~35g
- Carbohydrates: ~45g
- Fat: ~15g
- Fiber: ~5g
These bowls are packed with lean protein from the chicken, complex carbs from the rice, and a solid dose of vitamins A and C from the bell peppers and broccoli. The olive oil provides healthy monounsaturated fats, and the garlic and onions offer anti-inflammatory benefits. It’s a balanced meal that keeps you full and energized without feeling heavy.
If you’re watching your carbs, swap the rice for cauliflower rice or quinoa. For lower fat, reduce the olive oil to 1 tablespoon in both the marinade and the veggies. This recipe is naturally dairy-free and nut-free, making it great for most dietary needs.
Conclusion
Look, I’m not saying these Easy Weekly Meal Prep Chicken and Rice Bowls will change your life. But they might change your relationship with Sunday afternoons. There’s something deeply satisfying about opening your fridge on a Wednesday morning and seeing four perfectly portioned, delicious meals waiting for you. It makes you feel like you’ve got your act together—even if the rest of your life is chaos.
I’ve made these bowls for myself, for friends going through busy seasons, and for my own chaotic work weeks. Every time, they deliver. The chicken stays juicy, the rice is fluffy, and the veggies are perfectly tender. It’s simple, it’s reliable, and it’s genuinely delicious.
I’d love to hear how yours turn out! Drop a comment below with your favorite veggie combo or any tweaks you made. And if you’re looking for another easy weeknight dinner, check out my ground beef and rice skillet for a one-pan twist on this same idea. Happy prepping!
Frequently Asked Questions
Can I use frozen chicken breasts for this recipe?
Yes, but thaw them completely in the refrigerator first (about 24 hours). Cooking frozen chicken directly will result in uneven cooking—the outside will be overdone while the inside is still raw. Pat the thawed chicken dry before marinating for best results.
How do I keep the rice from getting mushy by day 4?
The key is undercooking the rice slightly—aim for al dente rather than fully soft. Also, let the rice cool completely before adding it to the containers, and store it separately from the chicken and veggies if possible. When reheating, add a splash of water or broth to bring back moisture.
Can I make these bowls in an air fryer instead of the oven?
Absolutely! Cook the chicken at 375°F (190°C) for 12-15 minutes, flipping halfway. The veggies can go in at the same temperature for 10-12 minutes, shaking the basket halfway. You might need to work in batches depending on your air fryer size. For a similar approach, my crispy air fryer chicken breast uses a similar technique.
What’s the best way to reheat these bowls without drying them out?
Microwave with a damp paper towel over the bowl for 1-2 minutes. Or reheat in a skillet over medium heat with a tablespoon of water or chicken broth, covered, for 3-4 minutes. The steam helps keep everything moist.
Can I prep these bowls for a full week (5-7 days)?
I recommend 4 days max for optimal freshness. After that, the veggies start to get limp and the chicken can dry out. If you need meals for a full week, prep the components separately (cook chicken and rice on day 1, roast fresh veggies on day 4) and assemble as needed. You could also try my sheet pan sweet potato and chicken sausage dinner for another quick option mid-week.
Pin This Recipe!
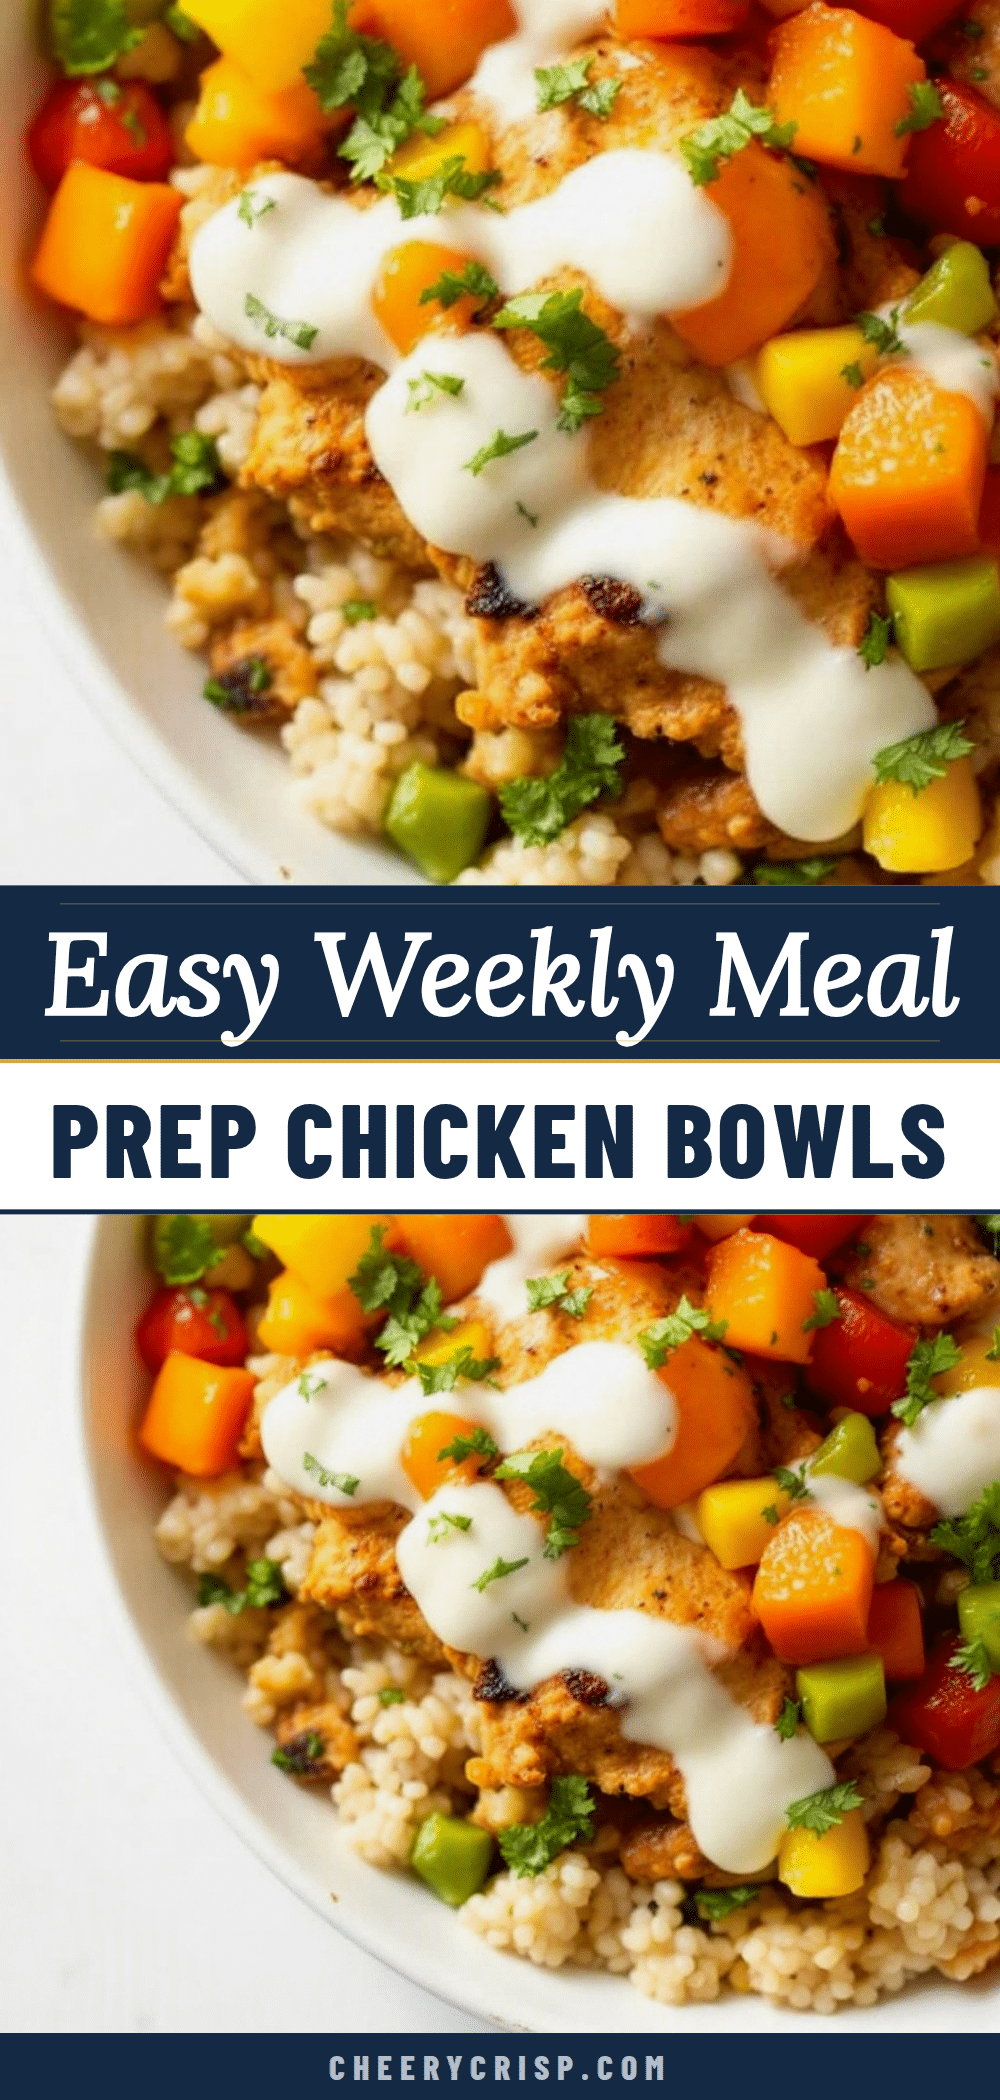
Easy Weekly Meal Prep Chicken and Rice Bowls
These Easy Weekly Meal Prep Chicken and Rice Bowls are reliable, delicious, and perfect for busy weeks. With juicy chicken, fluffy rice, and roasted veggies, they make meal prep a breeze and keep you looking forward to lunch.
- Prep Time: 15 minutes
- Cook Time: 30 minutes
- Total Time: 45 minutes
- Yield: 4 servings 1x
- Category: Main Course
- Cuisine: American
Ingredients
- 2 boneless, skinless chicken breasts (about 1.5 lbs total)
- 3 tablespoons olive oil
- 3 cloves garlic, minced
- 1 teaspoon smoked paprika
- 1 teaspoon garlic powder
- 1 teaspoon onion powder
- 1/2 teaspoon salt
- 1/4 teaspoon black pepper
- 1 tablespoon honey
- Juice of 1/2 lemon
- 1 1/2 cups long-grain white rice
- 3 cups chicken broth, low-sodium
- 1 tablespoon butter or olive oil
- 1/2 teaspoon salt
- 2 bell peppers (any color), chopped into 1-inch pieces
- 2 cups broccoli florets
- 1 red onion, chopped into 1-inch chunks
- 2 tablespoons olive oil
- 1/2 teaspoon salt
- 1/4 teaspoon black pepper
- Optional toppings: fresh parsley or cilantro, lemon squeeze, red pepper flakes, Greek yogurt, or hot sauce
Instructions
- In a medium mixing bowl, whisk together olive oil, minced garlic, smoked paprika, garlic powder, onion powder, salt, pepper, honey, and lemon juice. Add chicken breasts and toss to coat. Cover and let rest at room temperature for 15 minutes (or refrigerate up to 4 hours, then bring to room temperature 15 minutes before cooking).
- Preheat oven to 400°F (200°C). Line a baking sheet with parchment paper or foil. Chop bell peppers into 1-inch pieces, broccoli into bite-sized florets, and red onion into 1-inch chunks. Toss veggies with 2 tablespoons olive oil, salt, and pepper until evenly coated.
- Rinse rice in a fine-mesh strainer under cold water until water runs clear. In a medium saucepan, melt butter over medium heat. Add rice and stir for 1 minute until nutty. Pour in chicken broth and salt, bring to a boil, then reduce heat to low, cover, and simmer for 15-18 minutes until liquid is absorbed. Remove from heat, let sit covered for 5 minutes, then fluff with a fork.
- Place marinated chicken breasts on one half of the prepared baking sheet. Spread seasoned veggies on the other half in a single layer. Roast for 20-25 minutes, flipping chicken halfway through. Chicken is done at internal temperature of 165°F (74°C) and veggies are tender with lightly charred edges.
- Transfer chicken to a cutting board and let rest for 5 minutes. Slice against the grain into strips or bite-sized cubes.
- Divide rice evenly among 4 meal prep containers. Top each with sliced chicken and roasted veggies. Drizzle any remaining pan juices over bowls. Add optional toppings now or pack separately.
- Let bowls cool completely (about 10 minutes) before sealing lids. Refrigerate for up to 4 days.
Notes
Don’t skip rinsing the rice for fluffy grains. Pat veggies dry before roasting for better char. Let chicken rest before slicing to keep it juicy. Layer rice at bottom of containers to prevent sogginess. Add fresh elements like avocado or herbs separately. For best texture, store chicken and veggies separately from rice if prepping for the whole week.
Nutrition
- Serving Size: 1 bowl
- Calories: 475
- Sugar: 8
- Sodium: 800
- Fat: 15
- Saturated Fat: 3
- Carbohydrates: 45
- Fiber: 5
- Protein: 35
Keywords: meal prep, chicken and rice bowls, easy dinner, healthy lunch, roasted vegetables, weekly meal prep



