Love this? Save it for later!
Share the inspiration with your friends
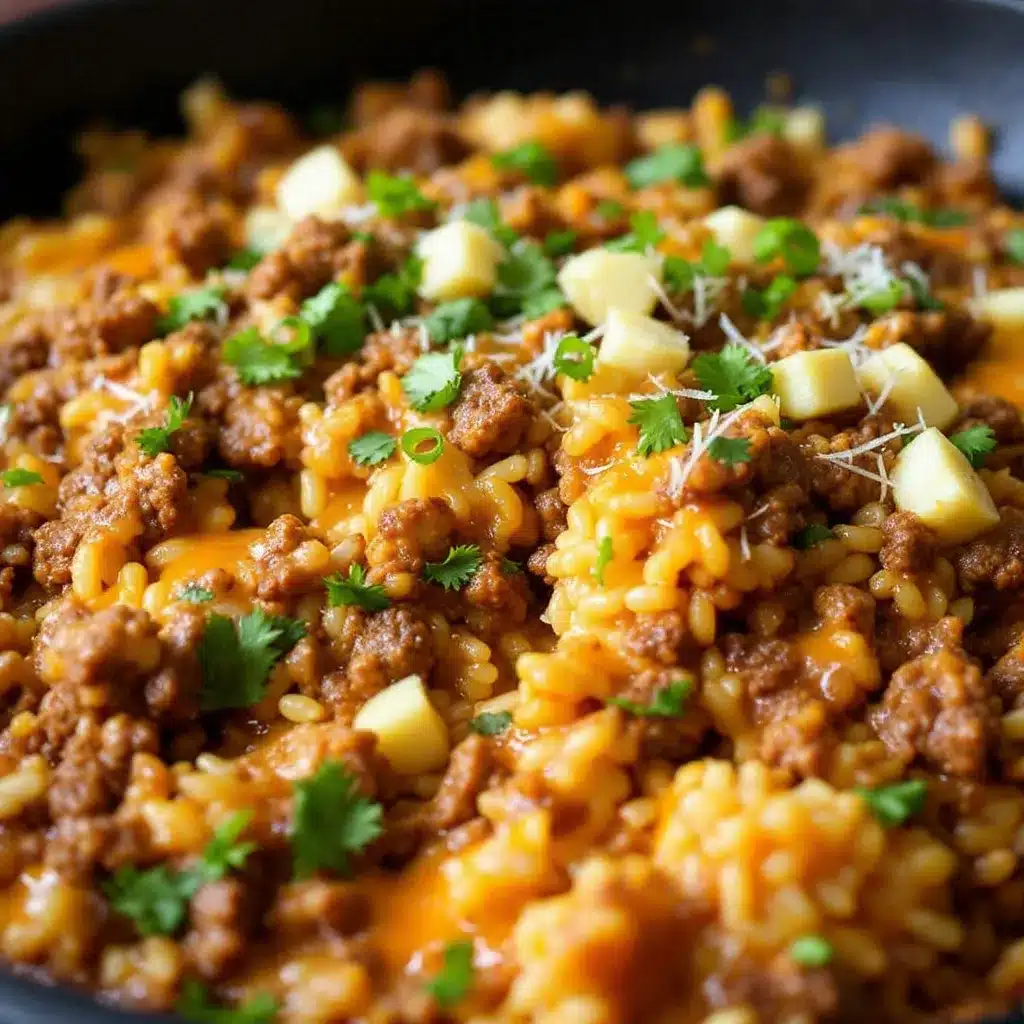
The way the rice soaks up all that seasoned beef juice and melted cheese until it’s almost creamy—that’s the whole point of this easy cheesy ground beef and rice skillet. Everything else is just logistics. I didn’t grow up eating anything like this, honestly. My mom was more of a baked chicken and steamed vegetable type of cook, which I appreciate now but didn’t love as a kid. So when I moved out and started cooking for myself, I went hard in the opposite direction. I wanted things that came together in one pan, that didn’t require fifteen bowls and a sink full of dishes, and that tasted like the kind of food you’d get at a diner at 9 PM on a Tuesday.
This recipe came from a night when I had half a pound of ground beef in the fridge, a bag of long-grain rice, and a block of cheddar that was staring at me from the cheese drawer. I was tired, hungry, and not in the mood for anything complicated. I figured I’d just brown the beef, throw in some rice and broth, and see what happened. What happened was dinner. What happened was me standing over the stove eating straight from the pan with a fork, which is honestly the highest compliment I can give a meal. (I’ve done it with this one more times than I’d like to admit.)
That first version was good, but it took a few more tries to get it right. Too much liquid and you’ve got beef soup. Too little and the rice stays crunchy. But once I nailed the ratio—once I figured out the exact amount of broth and the perfect simmer time—it became my go-to. The kind of recipe you don’t even need to look at anymore because you’ve made it so many times. That’s the version I’m sharing here. It’s forgiving, it’s flexible, and it’s exactly the kind of meal you want on a night when you need something warm and satisfying without a lot of effort.
Why You’ll Love This Recipe
Let me tell you why this easy cheesy ground beef and rice skillet has become a staple in my kitchen and why I think it’ll become one in yours too. First off, it’s a one-pan meal. That means less cleanup, less stress, and more time doing literally anything else. I’ve tested this recipe multiple times to make sure the rice cooks perfectly without needing to be drained or rinsed separately. The starch from the rice actually helps thicken the sauce as it simmers, so you get this creamy, almost risotto-like texture without any heavy cream or fancy techniques.
- Quick & Easy: From start to finish, this takes about 30 minutes. That’s faster than delivery and way more satisfying.
- Simple Ingredients: You probably already have most of these in your pantry. Ground beef, rice, broth, cheese, and a few seasonings. No weird specialty items.
- Perfect for Busy Weeknights: This is the definition of a weeknight hero. It’s filling, it’s comforting, and it doesn’t require any advanced planning.
- Crowd-Pleaser: I’ve served this to picky kids, hungry teenagers, and adults who claim they don’t eat “casserole-type” food. Every single person went back for seconds.
- Unbelievably Delicious: The combination of seasoned beef, tender rice, and melted cheese is pure comfort. It’s the kind of meal that makes you want to curl up on the couch and watch something mindless on TV.
What makes this recipe different from the dozens of other ground beef and rice recipes out there? It’s the technique. Instead of cooking the rice separately and mixing it in at the end, I simmer it right in the pan with the beef and broth. This lets the rice absorb all that savory flavor instead of just being a bland bed for the beef. Plus, I finish it under the broiler for a few minutes to get that bubbly, golden cheese crust on top. That little extra step makes a huge difference. It’s not just cheesy—it’s crispy-cheesy, which is a whole other level of delicious.
This recipe isn’t just good—it’s the kind that makes you close your eyes after the first bite. It’s comfort food reimagined—hearty, satisfying, but with the same soul-soothing warmth that makes you feel like everything’s going to be okay. Perfect for those nights when you need a hug in a bowl (or in a skillet, as the case may be).
What Ingredients You Will Need
This recipe uses simple, wholesome ingredients to deliver bold flavor and satisfying texture without the fuss. Most of these are pantry staples, which is exactly what you want in a weeknight dinner.
- Ground beef (1 lb / 450g): I use 80/20 ground beef for the best balance of flavor and moisture. The fat renders out as it browns and adds richness to the whole dish. If you use leaner beef (like 93/7), you might need to add a tablespoon of oil to prevent sticking.
- Long-grain white rice (1 cup / 200g): I prefer long-grain rice like basmati or jasmine for this recipe. It holds its shape well and doesn’t get mushy. Do not use instant rice or minute rice—the cooking times won’t work. I’ve tested this with brown rice too, but you’ll need to add about 15 minutes to the simmering time and increase the broth by ¼ cup.
- Beef broth (2 cups / 480ml): Use low-sodium broth if you can. It gives you more control over the salt level. I like Better Than Bouillon roasted beef base mixed with water—it has a deeper, more complex flavor than most boxed broths.
- Shredded cheddar cheese (1½ cups / 170g): Sharp cheddar is my go-to for this recipe. It melts beautifully and has enough flavor to stand up to the seasoned beef. Pre-shredded cheese works in a pinch, but it has anti-caking agents that can make the sauce slightly grainy. Shredding your own from a block is worth the extra minute.
- Yellow onion (1 medium, diced): Onion adds sweetness and depth. I dice it pretty small so it almost melts into the sauce. If you’re not an onion person, you can leave it out, but you’ll lose some flavor.
- Garlic (3 cloves, minced): Fresh garlic is non-negotiable here. The jarred stuff has a different flavor that’s more sharp and less sweet. Trust me on this one.
- Tomato paste (2 tablespoons): This adds a subtle tanginess and helps thicken the sauce. It also gives the dish a nice rich color. If you don’t have tomato paste, you can substitute ¼ cup of crushed tomatoes, but reduce the broth by 2 tablespoons.
- Worcestershire sauce (1 tablespoon): This is my secret weapon for adding umami depth to ground beef dishes. It’s not optional in my book. If you need a substitute, try soy sauce or coconut aminos.
- Paprika (1 teaspoon): Smoked paprika adds a lovely warmth, but regular paprika works too. I’ve used both and honestly, they’re both great.
- Dried oregano (½ teaspoon): Just a little bit for an herby background note. Don’t go overboard—oregano can get overpowering fast.
- Salt and black pepper: To taste. I usually add about 1 teaspoon of salt and ½ teaspoon of pepper, but this depends on your broth and cheese.
- Olive oil (1 tablespoon): For browning the beef and sautéing the onion. You can use any neutral oil.
- Fresh parsley (optional, for garnish): A sprinkle of fresh parsley at the end adds color and a fresh note that cuts through the richness. It’s not necessary, but it makes the dish look prettier.
Equipment Needed
You don’t need a lot of fancy equipment for this recipe, which is part of its charm. Here’s what you’ll need:
- A large skillet with a lid (12-inch / 30cm): This is the most important piece of equipment. I use a cast-iron skillet because it holds heat evenly and goes from stovetop to broiler without any issues. A stainless steel or non-stick skillet with an oven-safe handle will also work. If your skillet doesn’t have a lid, use a large piece of aluminum foil tightly crimped around the edges.
- A wooden spoon or spatula: For breaking up the ground beef as it browns. I prefer a wooden spoon because it won’t scratch your pan.
- A chef’s knife and cutting board: For dicing the onion and mincing the garlic. A sharp knife makes this go much faster.
- Measuring cups and spoons: For accurate measurements. I know some people like to eyeball it, but for the rice-to-liquid ratio, precision matters.
- A box grater (optional): If you’re shredding your own cheese, a box grater is faster than a microplane. I use the large holes.
If you don’t have a broiler-safe skillet, you can transfer the mixture to a baking dish before adding the cheese and broiling. Or you can just cover the skillet and let the cheese melt on the stovetop over low heat. It won’t get that golden crust, but it’ll still be delicious.
Preparation Method
- Brown the beef (5 minutes): Heat the olive oil in your large skillet over medium-high heat. Add the ground beef and break it up with your wooden spoon. Let it cook undisturbed for about 2 minutes to get a nice sear, then start breaking it into smaller pieces. Cook until no longer pink, about 3-4 minutes total. Don’t drain the fat unless there’s more than 2 tablespoons—you want some of it for flavor.
- Sauté the aromatics (3 minutes): Reduce the heat to medium. Add the diced onion to the skillet with the beef and cook for 2 minutes, stirring occasionally, until it starts to soften. Add the minced garlic and cook for another 30 seconds until fragrant. Stir in the tomato paste and cook for 1 minute, stirring constantly. This step removes the raw flavor from the tomato paste and deepens its sweetness.
- Add the seasonings and rice (1 minute): Sprinkle the paprika, dried oregano, salt, and pepper over the beef mixture. Stir to combine. Add the Worcestershire sauce and stir again. Then add the uncooked rice and stir until every grain is coated in the seasoned fat. This toasts the rice slightly and helps it stay separate as it cooks.
- Add the broth and simmer (20 minutes): Pour in the beef broth and stir to combine, scraping up any browned bits from the bottom of the pan. Bring the mixture to a boil, then reduce the heat to low, cover the skillet with the lid, and let it simmer for 18-20 minutes. Do not lift the lid during this time—the steam is what cooks the rice. After 18 minutes, check the rice. It should be tender and most of the liquid should be absorbed. If the rice is still crunchy, add ¼ cup more broth or water, cover, and cook for another 5 minutes.
- Add the cheese and broil (3 minutes): Once the rice is tender, remove the lid and sprinkle the shredded cheddar cheese evenly over the top. If your skillet is broiler-safe, transfer it to the oven and broil on high for 2-3 minutes until the cheese is melted and bubbly with golden brown spots. If not, cover the skillet and let it sit over low heat for 3-4 minutes until the cheese melts.
- Rest and serve (5 minutes): Let the skillet rest for 5 minutes before serving. This allows the rice to absorb any remaining liquid and the cheese to set slightly. Garnish with fresh parsley if desired and serve straight from the skillet.
Cooking Tips & Techniques
I’ve made this easy cheesy ground beef and rice skillet more times than I can count, and I’ve definitely made my share of mistakes along the way. Here are the things I wish someone had told me before my first attempt:
Don’t rush the browning. I know it’s tempting to just cook the beef until it’s no longer pink and move on, but taking the extra minute to get a good sear adds so much flavor. Let the beef sit in the pan without stirring for the first 2 minutes. That browning, called the Maillard reaction, is where the deep, savory flavor comes from. If you stir constantly, you’re steaming the meat instead of browning it.
Toast the rice. This is a step I used to skip, and my rice always turned out mushy. Stirring the raw rice in the hot pan with the beef and seasonings for about a minute coats each grain in fat and lightly toasts it. This helps the rice stay separate and fluffy instead of clumping together. It also adds a subtle nutty flavor that you don’t get from just boiling the rice in broth.
Resist the urge to peek. I know it’s hard, but do not lift the lid while the rice is simmering. Every time you lift the lid, you release steam, and that steam is what cooks the rice. If you’re worried about it burning, make sure your heat is on low and your pan has a tight-fitting lid. If your lid is loose, you might need to add an extra ¼ cup of broth to compensate for evaporation.
Let it rest. This is the hardest lesson I’ve learned. The first few times I made this, I served it immediately, and the rice was always a little wet and the cheese was runny. Letting it rest for 5 minutes after cooking allows the rice to absorb any remaining liquid and the cheese to set into a cohesive layer. It makes a huge difference in the final texture.
One of my biggest failures with this recipe happened when I tried to double it in a pan that was too small. The rice didn’t cook evenly, and the bottom burned while the top was still crunchy. Use a pan that’s big enough—a 12-inch skillet is perfect for a single batch. If you’re doubling it, use a larger pan or split it between two skillets.
Variations & Adaptations
One of the best things about this easy cheesy ground beef and rice skillet is how adaptable it is. I’ve experimented with several variations, and they’ve all been delicious in their own way. Here are some of my favorites:
Mexican-inspired version: Swap the oregano and paprika for 1 teaspoon of cumin and ½ teaspoon of chili powder. Add a 4-ounce can of diced green chiles along with the broth. Use a Mexican cheese blend instead of cheddar, and top with fresh cilantro and a squeeze of lime juice before serving. This version is great if you’re in the mood for something with a little more kick.
Vegetable-loaded version: Add 1 cup of frozen peas and carrots along with the broth. You can also stir in a handful of fresh spinach right before adding the cheese—it wilts down into the rice and adds a boost of nutrients without changing the flavor much. I’ve also added diced bell peppers with the onion, and it works beautifully.
Low-carb adaptation: Swap the rice for cauliflower rice. Use 3 cups of frozen cauliflower rice and reduce the broth to 1 cup. Cook for about 10 minutes instead of 20, since cauliflower rice cooks much faster. The texture won’t be exactly the same, but it’s still creamy and satisfying. I’ve made this version when I was trying to cut back on carbs, and it hit the spot.
Spicy version: Add ½ teaspoon of red pepper flakes along with the paprika, or stir in a diced jalapeño with the onion. For extra heat, use pepper jack cheese instead of cheddar. I made this version for a game day gathering once, and it disappeared faster than the loaded nacho bar I set up next to it.
Dairy-free version: Use a dairy-free cheese alternative or omit the cheese entirely and stir in 2 tablespoons of nutritional yeast for a cheesy flavor without the dairy. Coconut aminos can replace the Worcestershire sauce to keep it gluten-free and soy-free.
Serving & Storage Suggestions
This easy cheesy ground beef and rice skillet is best served hot, straight from the pan. I like to scoop it into bowls and top it with a dollop of sour cream or Greek yogurt for a little tanginess. A sprinkle of fresh parsley or green onions adds color and freshness. If you want to round out the meal, serve it with a simple side salad dressed with lemon vinaigrette or some steamed broccoli on the side.
For a complete weeknight dinner, I sometimes pair this with a bowl of creamy chicken and wild rice soup on the side—it might sound like a carb overload, but trust me, it’s cozy perfection on a cold night.
Storage: Leftovers keep well in an airtight container in the refrigerator for up to 4 days. The rice will absorb more liquid as it sits, so the texture will be slightly softer the next day, but the flavor actually gets better. I like making a double batch on Sunday and eating it for lunch throughout the week.
Freezing: This recipe freezes surprisingly well. Let it cool completely, then transfer it to a freezer-safe container. It will keep for up to 3 months. To reheat, thaw it in the refrigerator overnight, then reheat in a skillet over medium-low heat with a splash of broth or water to loosen it up. You can also microwave individual portions.
Reheating: The best way to reheat this is in a skillet over medium-low heat. Add a tablespoon of water or broth, cover, and let it steam for 3-4 minutes. This helps rehydrate the rice without drying it out. If you’re using the microwave, cover the bowl with a damp paper towel to trap steam.
One thing I’ve noticed is that the flavors meld together even more after a day in the fridge. The second-day leftovers are honestly better than the first-day version. The cheese sort of melts into the rice, and everything becomes more cohesive. It’s the kind of meal that tastes like it took way more effort than it actually did.
Nutritional Information & Benefits
Here’s the nutritional breakdown for one serving (based on 6 servings) of this easy cheesy ground beef and rice skillet:
| Nutrient | Amount per Serving |
|---|---|
| Calories | 485 |
| Protein | 28g |
| Carbohydrates | 38g |
| Fat | 24g |
| Saturated Fat | 11g |
| Fiber | 2g |
| Sodium | 680mg |
This recipe provides a good balance of protein, carbohydrates, and fat, making it a satisfying meal on its own. The ground beef is an excellent source of iron and B vitamins, especially B12, which is important for energy production. The cheese adds calcium for bone health, and the onion and garlic provide prebiotic fiber that supports gut health. If you use brown rice instead of white rice, you’ll get more fiber and magnesium.
If you’re watching your sodium intake, use low-sodium broth and reduce the added salt. You can also use a lower-fat cheese to cut down on saturated fat. This recipe is naturally gluten-free (just double-check your Worcestershire sauce and broth labels), and it can be made dairy-free with the substitutions mentioned earlier.
I personally love that this meal feels indulgent but is actually pretty balanced. It’s not diet food by any stretch, but it’s real food made from real ingredients, and that counts for a lot in my book.
Conclusion
This easy cheesy ground beef and rice skillet is one of those recipes that proves you don’t need fancy ingredients or complicated techniques to make something truly satisfying. It’s the kind of meal that feels like a warm hug after a long day, and it comes together in about 30 minutes with minimal cleanup. I’ve made it for myself on quiet weeknights, for friends who needed a comforting meal, and for family gatherings where I needed to feed a crowd without spending hours in the kitchen.
What I love most about this recipe is how forgiving it is. You can swap in different vegetables, use a different type of cheese, adjust the seasonings to your taste—it’s hard to mess up. And even if you do, it’ll still be delicious. That’s the beauty of simple, honest cooking.
I’d love to hear how this turns out for you. Did you add any fun variations? Did your family go back for seconds? Drop a comment below and let me know. And if you’re looking for another one-pan weeknight dinner, check out this easy crockpot ground turkey taco bowls recipe—it’s another one of my favorites for busy nights. Happy cooking!
Frequently Asked Questions
Can I use ground turkey instead of ground beef?
Absolutely! Ground turkey works great in this recipe. Since turkey is leaner, you might want to add a tablespoon of olive oil when browning it to prevent sticking. The flavor will be slightly milder, so consider adding an extra pinch of paprika or a dash of soy sauce to boost the savory notes.
Why is my rice still crunchy after 20 minutes?
This usually happens for one of three reasons: your heat was too high and the liquid evaporated too quickly, your lid didn’t fit tightly enough and steam escaped, or you lifted the lid during cooking. To fix it, add ¼ cup more broth or water, cover tightly, and cook for another 5 minutes on low heat.
Can I make this in advance for meal prep?
Yes, this is a great meal prep recipe. Cook it completely, let it cool, and store it in individual containers in the refrigerator. It will keep for up to 4 days. Reheat in the microwave or in a skillet with a splash of water to rehydrate the rice.
Can I use instant rice or minute rice?
I don’t recommend it. Instant rice is pre-cooked and dehydrated, so it cooks much faster and absorbs less liquid. If you use it in this recipe, reduce the broth to 1¼ cups and the cooking time to about 5 minutes. The texture won’t be quite the same, but it’ll still be edible.
How do I prevent the cheese from becoming greasy?
Use freshly shredded cheese instead of pre-shredded. Pre-shredded cheese is coated with anti-caking agents that can make it separate and become greasy when melted. Also, avoid overheating the cheese—broil it just until it melts and bubbles, not until it starts to brown excessively.
Pin This Recipe!

Easy Cheesy Ground Beef and Rice Skillet Recipe

A quick and comforting one-pan meal featuring seasoned ground beef, tender rice, and melted cheddar cheese. Perfect for busy weeknights, this recipe comes together in about 30 minutes with minimal cleanup.
- Prep Time: 10 minutes
- Cook Time: 25 minutes
- Total Time: 35 minutes
- Yield: 6 servings 1x
- Category: Main Course
- Cuisine: American
Ingredients
- 1 lb (450g) ground beef (80/20)
- 1 cup (200g) long-grain white rice (e.g., basmati or jasmine)
- 2 cups (480ml) beef broth (low-sodium preferred)
- 1½ cups (170g) shredded cheddar cheese (sharp cheddar recommended)
- 1 medium yellow onion, diced
- 3 cloves garlic, minced
- 2 tablespoons tomato paste
- 1 tablespoon Worcestershire sauce
- 1 teaspoon paprika (smoked or regular)
- ½ teaspoon dried oregano
- 1 teaspoon salt (or to taste)
- ½ teaspoon black pepper (or to taste)
- 1 tablespoon olive oil
- Fresh parsley (optional, for garnish)
Instructions
- Brown the beef: Heat olive oil in a large 12-inch skillet over medium-high heat. Add ground beef and break it up with a wooden spoon. Cook undisturbed for 2 minutes to sear, then break into smaller pieces. Cook until no longer pink, about 3-4 minutes total. Do not drain fat unless more than 2 tablespoons.
- Sauté the aromatics: Reduce heat to medium. Add diced onion and cook for 2 minutes until softened. Add minced garlic and cook for 30 seconds until fragrant. Stir in tomato paste and cook for 1 minute, stirring constantly.
- Add seasonings and rice: Sprinkle paprika, oregano, salt, and pepper over the mixture. Stir to combine. Add Worcestershire sauce and stir. Add uncooked rice and stir until every grain is coated in the seasoned fat, about 1 minute.
- Add broth and simmer: Pour in beef broth and stir, scraping up browned bits from the bottom. Bring to a boil, then reduce heat to low, cover, and simmer for 18-20 minutes. Do not lift the lid during this time. Check rice after 18 minutes; if still crunchy, add ¼ cup more broth or water, cover, and cook for another 5 minutes.
- Add cheese and broil: Once rice is tender, remove lid and sprinkle shredded cheddar evenly over the top. If skillet is broiler-safe, broil on high for 2-3 minutes until cheese is melted and bubbly with golden spots. If not, cover and let sit over low heat for 3-4 minutes until cheese melts.
- Rest and serve: Let skillet rest for 5 minutes before serving. Garnish with fresh parsley if desired and serve straight from the skillet.
Notes
For best results, use freshly shredded cheese to avoid greasiness. Do not lift the lid while rice simmers. Let the dish rest for 5 minutes before serving to allow rice to absorb remaining liquid and cheese to set. If doubling the recipe, use a larger pan or split between two skillets.
Nutrition
- Serving Size: 1 serving (based on
- Calories: 485
- Sugar: 2
- Sodium: 680
- Fat: 24
- Saturated Fat: 11
- Carbohydrates: 38
- Fiber: 2
- Protein: 28
Keywords: ground beef, rice, cheddar, one-pan, weeknight dinner, comfort food, cheesy, skillet



