Love this? Save it for later!
Share the inspiration with your friends
It wasn’t even a special occasion. It was just a random Tuesday afternoon, and I had spent the better part of an hour scraping seeds out of a leftover sugar pumpkin from last week’s roast. I tossed them with a little oil, cinnamon, and sugar, then threw them in the oven while I distracted myself with laundry. The smell that drifted into the living room was the first clue that something was different.
My seven-year-old, who usually turns his nose up at anything that isn’t breaded chicken nuggets, wandered in. He sniffed the air, looked at the baking sheet cooling on the counter, and took a tentative bite. He didn’t say anything at first, which is usually a bad sign. Then he went back for a second handful. And a third. By dinner time, the bowl was empty, and he looked at me with this serious expression and asked if we could do it again tomorrow.
I’ve made a lot of snacks over the years. I’ve tried those store-bought roasted nuts that cost too much, and I’ve made elaborate dips that ended up in the trash. But this simple batch of Crispy Baked Pumpkin Seeds with Cinnamon Sugar hit a nerve. It’s funny how the best recipes often come from accident or leftover ingredients rather than careful planning. These seeds are salty, sweet, and incredibly crunchy, with a flavor profile that feels like autumn in a bowl.
What stuck with me wasn’t just that he liked them, but that he asked for them repeatedly. It’s rare to find a snack that satisfies that specific craving for texture and sugar without feeling like a cheat meal. I started paying attention to how much time I spent on them versus how much joy they brought. It’s a small thing, really. Just seeds from a squash, but it turned a mundane afternoon into a little win. Now, whenever I carve a pumpkin, I make sure to save every single seed, because I know exactly what’s coming next.
Why You’ll Love This Recipe
There is a specific kind of magic that happens when you stop buying expensive, pre-packaged snacks and start making your own from scratch. I know, I know, roasting seeds sounds like a chore. But let me tell you, once you taste the difference between these and the bagged stuff, you’ll never go back. The texture is completely different. Store-bought seeds are often too hard, or too salty, or just bland. These are perfectly crisp, with that warm, comforting kick of cinnamon and just enough sugar to keep you coming back for more.
I’ve tested this recipe more times than I care to admit. I’ve tried different oils, different sugars, and even different oven temperatures. Here is what actually works, based on trial, error, and a lot of eaten snacks:
- Quick & Easy: This comes together in under 30 minutes from start to finish. You don’t need to preheat the oven for long, and the cooking time is short. It’s perfect for busy weeknights or when you need a last-minute treat for the kids.
- Simple Ingredients: You likely already have everything in your kitchen. Pumpkin seeds (or pepitas), butter or oil, cinnamon, and sugar. No fancy grocery trips needed. It’s pantry-friendly cooking at its best.
- Perfect for Fall Entertaining: These are great for potlucks, game day snacks, or just cozying up on the couch with a movie. They pair wonderfully with other fall flavors, like the perfect pumpkin cheesecake bars if you’re feeling extra festive.
- Crowd-Pleaser: Always gets rave reviews from kids and adults alike. My picky eater approved, which is the highest honor in our house.
- Unbelievably Delicious: The texture and flavor combo is next-level comfort food. The crunch is addictive, and the cinnamon-sugar coating sticks just right without being messy.
What makes this recipe different from the rest is the preparation method. Most people just toss wet seeds in sugar and bake them, which leads to clumpy, soggy results. I use a specific technique of drying the seeds thoroughly and toasting them in two stages. This ensures every single seed is crisp all the way through. It’s a small detail, but it makes all the difference. This isn’t just another version—it’s your best version.
Connect emotionally by tapping into the why: This recipe isn’t just good—it is the kind that makes you close your eyes after the first bite. It’s comfort food reimagined—healthier, faster, but with the same soul-soothing satisfaction. Perfect for impressing guests without stress, or turning a simple meal into something memorable. Plus, it’s a great way to use up those pumpkins you bought for decoration that are now slowly rotting in the corner.
What Ingredients You Will Need
This recipe uses simple, wholesome ingredients to deliver bold flavor and satisfying texture without the fuss. You don’t need a lot to make this work, and most of these items are staples you probably already have lying around. The key is quality. Since there are only a few ingredients, each one needs to do its job well.
Here is what you will need to get started:
- Fresh Pumpkin Seeds: About 1 to 2 cups of cleaned, raw seeds. If you are using a large sugar pumpkin, you might get closer to two cups. If you are using a smaller decorative pumpkin, one cup is likely enough. Look for seeds that are plump and white, not shriveled or gray.
- Unsalted Butter: 2 tablespoons, melted. I prefer butter over oil here because it adds a rich, creamy flavor that pairs beautifully with the cinnamon. However, you can use olive oil or coconut oil if you need a dairy-free option. Just make sure it is melted and liquid.
- Vegetable Oil: 1 tablespoon. I add a little oil along with the butter to help prevent burning. Butter burns easily, so this little bit of oil raises the smoke point slightly and helps the seeds crisp up evenly.
- Cinnamon: 1 teaspoon of ground cinnamon. Use a good quality cinnamon if you can. The flavor of the seeds will be defined by this spice. Cheap cinnamon can taste dusty or bitter, so take a sniff before you add it.
- Granulated Sugar: 2 tablespoons. White sugar works best here because it creates that classic crunch. Brown sugar can work, but it might make the seeds stick together more due to the molasses content. If you want a less sweet version, drop it down to 1 tablespoon.
- Salt: ½ teaspoon of fine sea salt. Even though these are sweet, the salt is crucial. It balances the sugar and brings out the natural nutty flavor of the pumpkin seeds. Do not skip this step.
- Optional: Vanilla Extract: A few drops. If you want to make them taste more like a dessert, add a teaspoon of vanilla. It adds a nice depth, especially if you are serving these with coffee or hot cocoa.
One tip on sourcing: If you don’t have a pumpkin to carve, you can buy raw pepitas (shelled pumpkin seeds) at most grocery stores. They are often in the baking aisle or the bulk foods section. They work just fine, though you won’t get the fun experience of cleaning them from the pumpkin pulp. I recommend Trader Joe’s brand for raw seeds if you can find them, as they are usually fresh and clean.
Equipment Needed
You don’t need a lot of fancy gear for this recipe. In fact, the beauty of it is that it uses basic kitchen tools. Here is what you’ll need:
- Baking Sheet: A standard half-sheet pan is perfect. Make sure it is flat and not warped, so the seeds cook evenly. If you don’t have a baking sheet, you can use a cake pan, but you’ll need to stir them more frequently.
- Parchment Paper: Line your baking sheet with parchment paper. This is non-negotiable for me. The sugar will caramelize and stick to the pan if you don’t, and then you’ll have a mess to scrub. Parchment makes cleanup a breeze.
- Mixing Bowls: You’ll need one medium bowl to toss the seeds in oil and butter, and one small bowl or jar for mixing the cinnamon and sugar.
- Spatula: A silicone spatula is helpful for scraping the butter and oil mixture onto the seeds to ensure they are fully coated.
- Whisk: Just a small whisk to mix the dry ingredients together so there are no clumps of cinnamon.
If you don’t have parchment paper, you can use aluminum foil, but lightly grease it first. Some people prefer silicone baking mats, which work well too, but parchment is cheaper and easier to dispose of. Avoid using a non-stick pan without lining it, as the sugar will burn onto the surface and ruin the pan.
Preparation Method
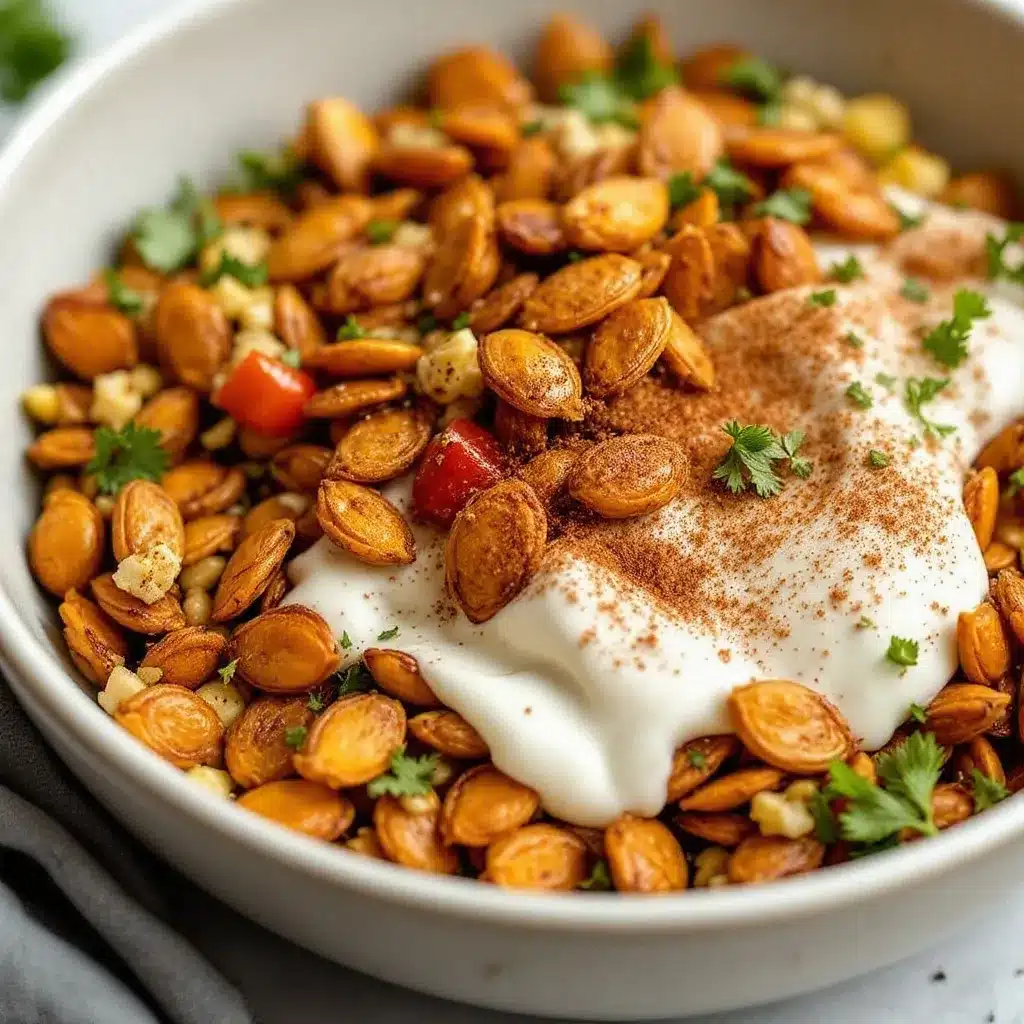
Getting the seeds ready is the most important part of this recipe. If you rush this step, your seeds will be soggy. Here is how to do it right, step by step.
Step 1: Extract and Clean the Seeds
First, preheat your oven to 325°F (165°C). This is a lower temperature than you might think, and it’s crucial for drying them out without burning the sugar later. While the oven heats, scoop the seeds out of the pumpkin. Use a large spoon to get as much pulp away as possible.
Place the seeds in a large bowl of warm water. Swirl them around with your hands. The loose pulp and strings will float to the top or separate from the seeds. Pick out the good, plump seeds and discard the mush. You can use a slotted spoon to help. This might take 10-15 minutes, but do not skip it. If you leave the pulp on, the seeds will steam instead of roast.
Step 2: Dry the Seeds Thoroughly
This is the secret weapon. Spread the cleaned seeds out on paper towels or clean kitchen towels. Pat them dry. Then, let them sit for about 20-30 minutes. You want them to be as dry as possible. If they are wet, the oil won’t stick, and the sugar will slide off. I often just leave them on the counter while I chop vegetables for dinner to save time.
Step 3: Coat with Fat
Once the oven is hot and the seeds are dry, line your baking sheet with parchment paper. In a medium bowl, combine the melted butter and vegetable oil. Add the dry seeds to the bowl. Toss them well with a spatula until every single seed is coated. You want them to look glossy, not swimming in oil. If there is excess oil pooling at the bottom of the bowl, drain it off.
Spread the coated seeds in a single layer on the baking sheet. Do not overcrowd them. If they are piled on top of each other, they won’t get crispy. It’s better to do two batches if you have a lot of seeds.
Step 4: First Roast
Bake the seeds for 10-12 minutes. You will start to hear a slight popping sound. This is a good sign. It means the moisture is evaporating. Take them out and give them a stir. You’ll notice they are starting to turn golden. This first roast dries them out and cooks the seed itself.
Step 5: Add Cinnamon Sugar
While the first roast is happening, mix the sugar and cinnamon in a small bowl. Once the 10-12 minutes are up, take the seeds out of the oven. Sprinkle the cinnamon-sugar mixture evenly over the hot seeds. Toss them quickly to coat. The heat from the seeds will help the sugar stick.
Step 6: Second Roast
Return the baking sheet to the oven. Bake for another 5-7 minutes. Watch them closely here. Sugar burns very fast. You want the sugar to be fragrant and slightly darkened, but not black. The seeds should smell like cinnamon rolls. Remove them from the oven immediately when they reach this point.
Step 7: Cool Completely
This is the hardest part. Let the seeds cool on the baking sheet. They will continue to crisp up as they cool. If you try to eat them while they are hot, they will still be soft. Wait at least 15-20 minutes. Once cool, they should be crunchy. If they are still chewy, they need more time in the oven next time.
Cooking Tips & Techniques
I’ve made a few mistakes along the way, so you don’t have to. Here are some professional tips to ensure your pumpkin seeds turn out perfectly every time.
Dryness is Key: I cannot stress this enough. The wetter the seeds, the less crispy they will be. If you are short on time, you can spread them on a baking sheet and put them in the oven at 200°F for 10 minutes to dry them out before adding the oil. This is a great hack.
Low and Slow: Don’t crank up the heat. High heat will burn the sugar before the seeds are cooked through. 325°F is the sweet spot. It allows the inside of the seed to become tender and crunchy without scorching the outside.
Stir Frequently: Pumpkin seeds vary in size. Some are big, some are small. They cook at slightly different rates. Stirring them halfway through ensures even browning. If you ignore them, you’ll end up with a mix of burnt bits and raw seeds.
Sugar Clumping: If your sugar and cinnamon clump up, whisk them well before adding. You can also rub the sugar between your fingers to break up any lumps. Wet sugar sticks to seeds in chunks, which looks messy and tastes uneven.
Cooling on the Pan: Never transfer hot seeds to a container. They will trap steam and become soggy. Let them cool completely on the pan. This residual heat continues the drying process.
Storage: Once completely cool, store them in an airtight container. They will stay crispy for up to a week at room temperature. If your kitchen is humid, they might soften faster, so keep them in a cool, dry place.
Variations & Adaptations
While the cinnamon sugar version is my favorite, these seeds are a blank canvas. Here are a few ways to change them up:
- Spicy Kick: Skip the sugar and cinnamon. Instead, mix the seeds with chili powder, cumin, garlic powder, and a little cayenne pepper. This is great for game day and pairs well with beer or spicy margaritas.
- Maple Glaze: Replace the sugar with maple syrup and add a pinch of nutmeg. The maple flavor is incredible and feels very autumnal. Be careful not to burn the syrup, as it burns faster than sugar.
- Herb & Parmesan: For a savory snack, toss the seeds with olive oil, dried rosemary, garlic powder, and grated Parmesan cheese. These are amazing with soup, like my creamy tomato soup.
- Gluten-Free: This recipe is naturally gluten-free. Just ensure your cinnamon and sugar are certified gluten-free if you have celiac disease, as cross-contamination can happen in processing plants.
- Low Sugar: Use a sugar substitute like erythritol or monk fruit sweetener. It works just as well for coating, though it doesn’t caramelize the same way. The texture will be slightly different, but still crunchy.
I once tried making them with brown butter instead of melted butter, and the flavor was nutty and deep. It was a bit risky because brown butter burns easily, but if you watch it closely, it’s worth it for the extra flavor complexity.
Serving & Storage Suggestions
These seeds are best served at room temperature. Cold seeds can sometimes lose their crunch, and hot seeds are too soft. I love to serve them in a small glass bowl on the coffee table. They look elegant and feel like a treat.
They pair wonderfully with hot beverages. Try them with a warm cup of coffee, or alongside a mug of hot chocolate. If you’re making a snack board, include these with some cheese cubes and apple slices. They add a nice textural contrast to soft fruits and cheeses.
Storage: Store in an airtight container at room temperature for up to 5-7 days. Do not refrigerate them, as the humidity will make them soft. If you want to keep them longer, you can freeze them in a freezer-safe bag for up to 3 months. Thaw them at room temperature before eating.
Reheating: If they do get soft, you can crisp them back up by spreading them on a baking sheet and heating them in the oven at 300°F for 5 minutes. Let them cool again, and they’ll be good as new.
The flavors actually meld nicely over the first 24 hours. The cinnamon soaks into the seed slightly, making the flavor more intense. So if you make them a day ahead, they might actually taste better than day one.
Nutritional Information & Benefits
Pumpkin seeds are a nutritional powerhouse. They are packed with magnesium, zinc, and protein. A single serving provides a good amount of fiber, which helps with digestion. They are also a great source of healthy fats, specifically omega-3 and omega-6 fatty acids.
While this recipe does add sugar, the portion size is small. A serving is about ¼ cup, which keeps the sugar intake in check. Compared to chips or crackers, these are a much healthier alternative. They provide sustained energy without the sugar crash.
For those watching their calorie intake, keep in mind that seeds are calorie-dense. A little goes a long way. They are satisfying because of the crunch and the fat content, which helps you feel full faster. I often eat a small handful when I need a mid-afternoon pick-me-up instead of reaching for a candy bar.
They are also naturally gluten-free and vegan (if you use oil instead of butter), making them accessible for many dietary restrictions. Just check your labels to ensure no cross-contamination if you have severe allergies.
Conclusion
Making Crispy Baked Pumpkin Seeds with Cinnamon Sugar is a simple task, but the results are incredibly rewarding. It’s a recipe that turns waste into a treasure, taking something we usually throw away and turning it into a snack everyone fights over. The crunch, the sweetness, and the warmth of the cinnamon make it a perfect fall treat.
I encourage you to try this recipe with whatever pumpkin you have on hand. Whether it’s a giant carving pumpkin or a small sugar pumpkin, the seeds are worth saving. Feel free to experiment with the spices and find your own favorite flavor profile. Maybe you’ll add more cinnamon, or maybe you’ll go savory. Either way, you’ll be glad you made them.
If you try this recipe, please let me know how it turns out. I love hearing from readers who have tried their hand at roasting seeds. Share your variations or your favorite ways to eat them in the comments below. And if you have extra time, check out my easy baked pumpkin donuts for another cinnamon-sugar fix. Happy snacking!
Frequently Asked Questions
Can I use store-bought pepitas for this recipe?
Yes, absolutely. Shelled pumpkin seeds (pepitas) work just fine. You will skip the cleaning and drying steps, so just toss them directly in the oil and butter. The cooking time might be slightly shorter, so watch them closely around the 8-minute mark.
Why are my seeds still chewy after cooling?
If they are chewy, they likely didn’t dry out enough before roasting, or they weren’t baked long enough. Make sure to pat them very dry with paper towels. Also, ensure you are baking them at the correct temperature. If they are still soft after cooling, put them back in the oven for another 5 minutes.
Can I make these ahead of time?
Yes, these keep well for up to a week in an airtight container. In fact, they often taste better the next day as the flavors meld. Just make sure they are completely cool before sealing the container to prevent moisture buildup.
How do I clean the pumpkin seeds efficiently?
The best way is to soak them in a bowl of water and swirl them around. The good seeds sink, and the pulp floats. You can also rub them between your hands under running water to remove the strings, but the soaking method is faster for large batches.
Can I use brown sugar instead of white sugar?
You can, but brown sugar contains molasses, which makes it stickier. This can cause the seeds to clump together and burn more easily. If you use brown sugar, keep a close eye on the oven and stir more frequently to ensure even coating and browning.
Pin This Recipe!
Crispy Baked Pumpkin Seeds with Cinnamon Sugar

A simple, crunchy snack made from roasted pumpkin seeds coated in butter, oil, cinnamon, and sugar. This recipe uses a two-stage roasting method to ensure maximum crispiness and flavor.
- Prep Time: 30 minutes
- Cook Time: 20 minutes
- Total Time: 50 minutes
- Yield: 4 servings 1x
- Category: Snack
- Cuisine: American
Ingredients
- 1 to 2 cups fresh pumpkin seeds (cleaned and raw)
- 2 tablespoons unsalted butter, melted
- 1 tablespoon vegetable oil
- 1 teaspoon ground cinnamon
- 2 tablespoons granulated sugar
- 1/2 teaspoon fine sea salt
- 1 teaspoon vanilla extract (optional)
Instructions
- Preheat oven to 325°F (165°C).
- Scoop seeds from pumpkin and place in a bowl of warm water. Swirl to separate pulp from seeds, then pick out the plump seeds and discard the mush.
- Spread cleaned seeds on paper towels and pat dry. Let sit for 20-30 minutes until completely dry.
- Line a baking sheet with parchment paper.
- In a medium bowl, combine melted butter and vegetable oil. Add dry seeds and toss with a spatula until fully coated. Drain any excess oil.
- Spread seeds in a single layer on the baking sheet.
- Bake for 10-12 minutes until seeds start to pop and turn golden. Remove and stir.
- While seeds roast, mix sugar, cinnamon, and salt in a small bowl.
- Remove seeds from oven, sprinkle cinnamon-sugar mixture evenly over them, and toss quickly to coat.
- Return to oven and bake for another 5-7 minutes, watching closely to prevent burning.
- Remove from oven and let cool completely on the baking sheet (15-20 minutes) until crisp.
Notes
Ensure seeds are completely dry before roasting to prevent sogginess. Do not overcrowd the baking sheet. Cool completely on the pan to ensure crispiness. Store in an airtight container at room temperature for up to a week.
Nutrition
- Serving Size: 1/4 cup
- Calories: 150
- Sugar: 8
- Sodium: 150
- Fat: 10
- Saturated Fat: 3
- Carbohydrates: 12
- Fiber: 2
- Protein: 5
Keywords: pumpkin seeds, cinnamon sugar, roasted seeds, fall snack, healthy snack, gluten-free, vegan option, pumpkin recipe



