Love this? Save it for later!
Share the inspiration with your friends
I assumed that a no-bake cheesecake would be a lightweight, airy thing that melted on the tongue. It took about ten minutes of mixing for that assumption to collapse under the weight of reality. I was standing over my stand mixer, watching the cream cheese and butter blend into something that looked less like a dessert and more like drywall paste. It was dense. It was heavy. It was going to be a brick.
I had read too many recipes promising “cloud-like” textures without explaining how to avoid the dense, rubbery outcome that usually happens when you don’t bake the structure. I almost scraped it all into the trash and ordered takeout instead. But then I added the Biscoff spread. Just a big, generous dollop of that spiced cookie butter. The mixture changed color, gaining a warm, caramel hue that looked promising. I kept mixing, slowly adding heavy cream, and watched the transformation happen right in front of my eyes.
The texture shifted from paste to a glossy, stable mousse. It wasn’t just edible; it was actually beautiful. I spread it over the crust and popped it in the fridge, half-expecting it to weep or separate by morning. Instead, it set up with a firmness that held its shape perfectly when sliced. The first bite was cool, rich, and deeply spiced, with that distinct crunch of the cookie crust providing necessary contrast.
I realized then that I had been overcomplicating things. You don’t need a water bath or a thermometer for this. You just need to respect the fat content in your ingredients and let time do the work. This creamy Biscoff cheesecake bars recipe became my go-to when I wanted something impressive but didn’t want to turn my kitchen into a sauna. It’s the kind of dessert that feels luxurious but is actually quite forgiving.
Why You’ll Love This Recipe
It’s the Ultimate Comfort Food Shortcut
There is something deeply satisfying about a dessert that delivers bakery-quality results without the hassle of baking. This recipe isn’t just good—it is the kind that makes you close your eyes after the first bite. The combination of spiced cookie butter and tangy cream cheese hits that perfect note between sweet and savory. It’s comfort food reimagined—richer and faster, but with the same soul-soothing satisfaction as a warm slice of apple pie.
Zero Baking Required
Let’s face it, sometimes you just don’t want to turn on the oven. Whether it’s a humid summer evening or you’re just tired after work, this no-bake method saves you from heating up the house. It comes together in under 30 minutes of active time, making it perfect for busy weeknights or last-minute cravings. You mix, you press, you chill, and you eat. Simple.
Simple Ingredients, Complex Flavor
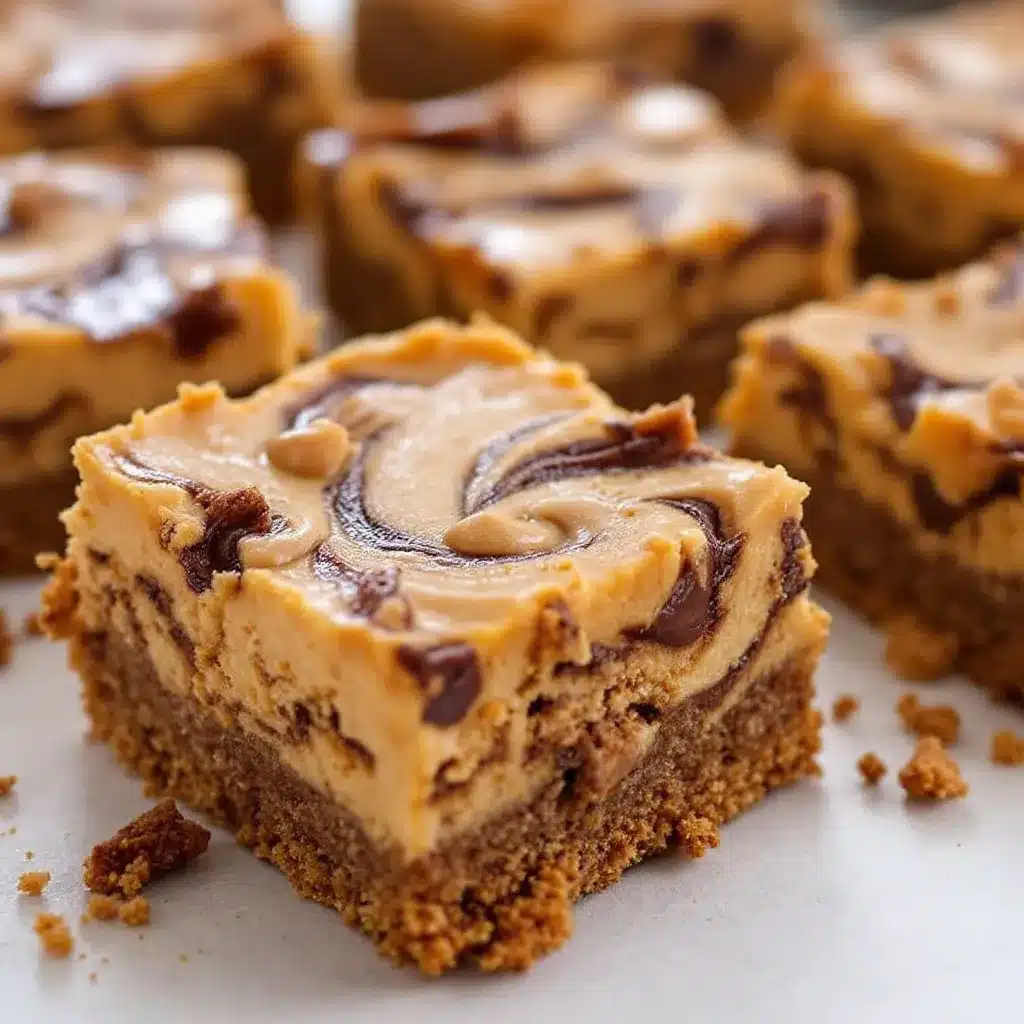
You likely already have everything in your kitchen for the crust and the filling, except maybe the Biscoff spread if you don’t keep it stocked. But honestly, buying it for this recipe is worth every penny. The flavor profile is unique and sophisticated, yet the ingredient list is short enough to memorize. No fancy grocery trips needed.
Perfect for Entertaining
This recipe isn’t just for you. It’s a crowd-pleaser that always gets rave reviews from kids and adults alike. The visual appeal of the golden-brown crust against the creamy filling is stunning on a plate. It’s perfect for impressing guests without stress, or turning a simple dinner into something memorable. Plus, because it’s made in a pan, it slices cleanly and serves beautifully.
Make-Ahead Friendly
One of the best parts is that it tastes even better the next day. The flavors meld together overnight, creating a deeper, more cohesive taste. You can make this the day before your party, and it will actually improve in quality while sitting in the fridge.
What Ingredients You Will Need
This recipe uses simple, wholesome ingredients to deliver bold flavor and satisfying texture without the fuss. The key to success here is quality. Since there are so few components, each one needs to shine. I’ve found that using full-fat dairy products is non-negotiable for that luxurious mouthfeel.
For the Crust
- Biscoff Cookies (1 ½ cups): I recommend using the original Lotus Biscoff cookies. They have the perfect balance of spice and sweetness. You can crush them in a food processor or put them in a bag and smash them with a rolling pin.
- Unsalted Butter (6 tablespoons): Melted. This binds the crumbs together. Using unsalted lets you control the saltiness of the final bar.
- Granulated Sugar (1 tablespoon): Just a touch to help the crust crisp up slightly as it chills.
For the Filling
- Cream Cheese (16 ounces): Full-fat, brick-style cream cheese is essential. Do not use the whipped kind in a tub. It needs to be softened to room temperature before mixing, or you will end up with lumpy bars.
- Biscoff Spread (1 cup): This is the star of the show. Make sure it’s well-stirred before measuring. I prefer the original spread for its classic gingerbread notes.
- Heavy Cream (1 ½ cups): Must be cold. This is what gives the filling its airy, stable structure when whipped.
- Confectioners’ Sugar (½ cup): Adds sweetness and helps stabilize the whipped cream slightly.
- Vanilla Extract (1 teaspoon): Pure vanilla adds depth and balances the sweetness of the sugar.
For the Topping (Optional)
- Extra Biscoff Spread (2-3 tablespoons): Warmed slightly to drizzle over the top.
- Crushed Biscoff Cookies (2 tablespoons): For garnish and extra crunch.
If you need a dairy-free option, you can substitute the cream cheese with a high-quality vegan cream cheese alternative, though the texture might be slightly softer. For the crust, you can use gluten-free Biscoff cookies if needed, but check the label as some brands may contain wheat.
Equipment Needed
You don’t need a lot of fancy gadgets for this, but having the right tools makes the process smoother.
- 9×13 Inch Baking Pan: This is the standard size for these bars. Line it with parchment paper, leaving an overhang on the sides. This is crucial for lifting the entire block out of the pan later for easier slicing.
- Food Processor: This is the fastest way to get fine, even cookie crumbs for the crust. If you don’t have one, a zip-top bag and a rolling pin work fine, but it takes more arm strength.
- Stand Mixer or Hand Mixer: A mixer is highly recommended for whipping the cream cheese and heavy cream. Doing this by hand is possible but will take significant effort and might not get the same volume.
- Spatula: A silicone spatula is useful for scraping down the sides of the bowl and folding in the whipped cream gently.
- Measuring Cups and Spoons: Precision matters in baking, even no-bake baking.
If you don’t have a food processor, just be patient with the rolling pin. For the pan, if you don’t have parchment paper, you can grease it heavily with butter, but parchment makes cleanup effortless.
Preparation Method
Step 1: Prepare the Crust
Start by crushing your Biscoff cookies. If using a food processor, pulse until you have fine crumbs. If doing it by hand, put the cookies in a sturdy zip-top bag and crush them until they resemble coarse sand. (Time: 2-3 minutes)
In a medium bowl, combine the cookie crumbs, melted butter, and granulated sugar. Stir until the mixture looks like wet sand. It should hold together when you pinch it. (Time: 1 minute)
Pour the mixture into your prepared 9×13 inch pan. Use the bottom of a measuring cup or a flat spatula to press the crumbs down firmly and evenly. You want a tight, compact layer. If it’s loose, the bars will crumble when sliced. (Time: 2 minutes)
Step 2: Whip the Cream Cheese Mixture
In the bowl of your stand mixer fitted with the paddle attachment (or using a hand mixer), beat the softened cream cheese and Biscoff spread on medium speed until completely smooth and creamy. (Time: 2-3 minutes)
Scrape down the sides and bottom of the bowl to ensure there are no lumps. Add the confectioners’ sugar and vanilla extract. Continue beating until combined. The mixture should be thick and glossy. (Time: 1 minute)
Step 3: Whip the Heavy Cream
In a separate large, cold bowl, whip the heavy cream on high speed until stiff peaks form. This means when you lift the beaters, the cream stands up straight without drooping. Be careful not to over-whip it into butter, but it needs to be firm enough to hold the cheesecake mixture. (Time: 2-3 minutes)
Step 4: Combine and Fold
Add about one-third of the whipped cream to the cream cheese mixture and beat it in on low speed to lighten the base. Then, gently fold in the remaining whipped cream using a spatula. Use a cutting motion, going from the bottom up and over the top. You want to retain as much air as possible. (Time: 2 minutes)
Stop mixing as soon as the white streaks disappear. Overmixing at this stage can deflate the cream and make the bars dense. (Time: 1 minute)
Step 5: Assemble and Chill
Pour the filling over the crust in the pan. Use an offset spatula to spread it evenly, reaching the corners. Tap the pan gently on the counter to remove any air bubbles. (Time: 2 minutes)
Cover the pan with plastic wrap or a lid and refrigerate for at least 6 hours, preferably overnight. The longer it chills, the firmer and better it will taste. (Time: 6+ hours)
Step 6: Slice and Serve
Before slicing, run a sharp knife under hot water and dry it. This helps get clean cuts. Lift the bars out of the pan using the parchment paper overhang. Slice into 12-16 squares. Drizzle with warmed Biscoff spread and sprinkle with crushed cookies if desired. (Time: 5 minutes)
Cooking Tips & Techniques
Room Temperature Ingredients are Key
The biggest mistake people make with no-bake cheesecakes is using cold cream cheese. If it’s cold, it won’t blend smoothly with the Biscoff spread, and you’ll end up with a lumpy, grainy texture. Take your cream cheese out of the fridge at least an hour before you start. If you’re short on time, you can microwave it in 5-second bursts, but watch it closely so it doesn’t melt.
Don’t Skimp on the Chilling Time
I know it’s tempting to dig in after an hour. Resist the urge. The structure of the bars relies on the fat in the cream cheese and the whipped cream solidifying. If you cut it too soon, it will be soft and messy. Overnight is best. If you must serve it sooner, aim for at least 4 hours, but 6-8 is ideal for that perfect sliceable firmness.
Keep Your Bowl Cold
When whipping the heavy cream, make sure your bowl and beaters are cold. If you live in a warm climate, you can even chill the bowl in the freezer for 10 minutes before whipping. This helps the cream reach stiff peaks faster and stay stable.
Fold, Don’t Stir
When combining the whipped cream with the cream cheese mixture, use a gentle folding motion. Stirring vigorously will deflate the air you worked so hard to incorporate, resulting in a dense, heavy bar. You want it light and airy.
Variations & Adaptations
Chocolate Lover’s Version
Add ½ cup of mini chocolate chips to the filling before folding in the whipped cream. The bitterness of the chocolate pairs beautifully with the sweet, spiced Biscoff flavor. It’s a nice twist that adds texture.
Fruit Swirl
For a seasonal twist, swirl in some raspberry or strawberry preserves. Heat up ½ cup of jam slightly to make it runny, then drizzle it over the filling before chilling. Use a knife to create a marbled effect. This adds a tart contrast to the rich bars.
Gluten-Free Option
Use certified gluten-free Biscoff cookies for the crust. Most standard Biscoff cookies are naturally gluten-free, but always check the label to be sure. The rest of the ingredients are naturally gluten-free, so this is an easy swap.
Dairy-Free Adaptation
Substitute the cream cheese with a vegan cream cheese brand like Kite Hill or Miyoko’s. Use coconut cream (the solid part from a can of full-fat coconut milk) instead of heavy cream. Whip it with a little powdered sugar and vanilla until stiff. The flavor will be slightly more coconut-forward, but it still works well.
Serving & Storage Suggestions
How to Serve
These bars are best served chilled. They can be served plain, or you can garnish them with a dollop of whipped cream and a Biscoff cookie on top. They pair wonderfully with a hot cup of coffee or tea, as the spices in the Biscoff complement the warmth of the beverage. For a more decadent presentation, add a drizzle of salted caramel sauce.
Storage Instructions
Store the bars in an airtight container in the refrigerator for up to 5 days. If you slice them all, place parchment paper between layers to prevent sticking. They will firm up further in the fridge, so let them sit at room temperature for 10 minutes before eating if you prefer a softer texture.
Freezing
You can freeze these bars for up to 2 months. Wrap the entire block tightly in plastic wrap and then in aluminum foil. Thaw overnight in the refrigerator before slicing. Note that the texture may change slightly after freezing, becoming a bit softer, but the flavor remains excellent.
Reheating
No-bake cheesecake bars are not meant to be reheated. Serve them cold or at room temperature. Heating them will cause the structure to break down and the filling to become runny.
Nutritional Information & Benefits
Each serving of these bars is rich in calories and fat due to the cream cheese and butter, but they also provide a good amount of calcium from the dairy. Biscoff cookies contain iron and some fiber, though the sugar content is high. For those watching their sugar intake, consider using a sugar-free Biscoff spread if available, or reduce the confectioners’ sugar in the filling.
The recipe is naturally gluten-free if you use gluten-free cookies, making it accessible for many people with dietary restrictions. However, it is not suitable for vegans or those with dairy allergies unless substitutions are made. As with any dessert, moderation is key. Enjoy these bars as a special treat rather than an everyday snack. They are indulgent, rich, and meant to be savored slowly.
Conclusion
This creamy Biscoff cheesecake bars recipe is a testament to the power of simple ingredients and patience. It’s a dessert that feels fancy but is incredibly easy to make. I still remember that first batch, and how surprised I was by how good it turned out. It’s become a staple in my rotation, especially when I need a crowd-pleaser without the stress.
I encourage you to try it and make it your own. Add chocolate chips, swirl in fruit, or change up the garnish. The base recipe is flexible and forgiving. Once you make it, you’ll see why it’s become so popular. It’s the perfect balance of spice, sweetness, and creaminess.
If you make this recipe, I’d love to hear how it turns out. Leave a comment below with your thoughts, or tag me on social media if you post a photo. Sharing your creations helps build our little baking community. Thanks for reading, and happy baking!
FAQs
Can I use whipped cream cheese instead of block cream cheese?
No. Whipped cream cheese contains air and stabilizers that will prevent the filling from setting properly. You must use full-fat, brick-style cream cheese for the right texture.
How long do these bars last in the fridge?
They last for up to 5 days in an airtight container in the refrigerator. After that, they may start to lose their firmness and become too soft.
Can I make these in a different size pan?
Yes, but the thickness will change. If you use a 9×9 inch pan, the bars will be thicker and may need more chilling time. If you use a larger pan, they will be thinner and set faster. Adjust the chilling time accordingly.
Why are my bars too soft?
This usually happens if the cream cheese wasn’t soft enough before mixing, leading to lumps, or if the heavy cream wasn’t whipped to stiff peaks. Also, ensure you chilled the bars for at least 6 hours.
Can I freeze Biscoff spread?
Yes, you can freeze Biscoff spread, but it may separate when thawed. Stir it well before using. It’s best to buy fresh spread for the best texture and flavor in this recipe.
Pin This Recipe!
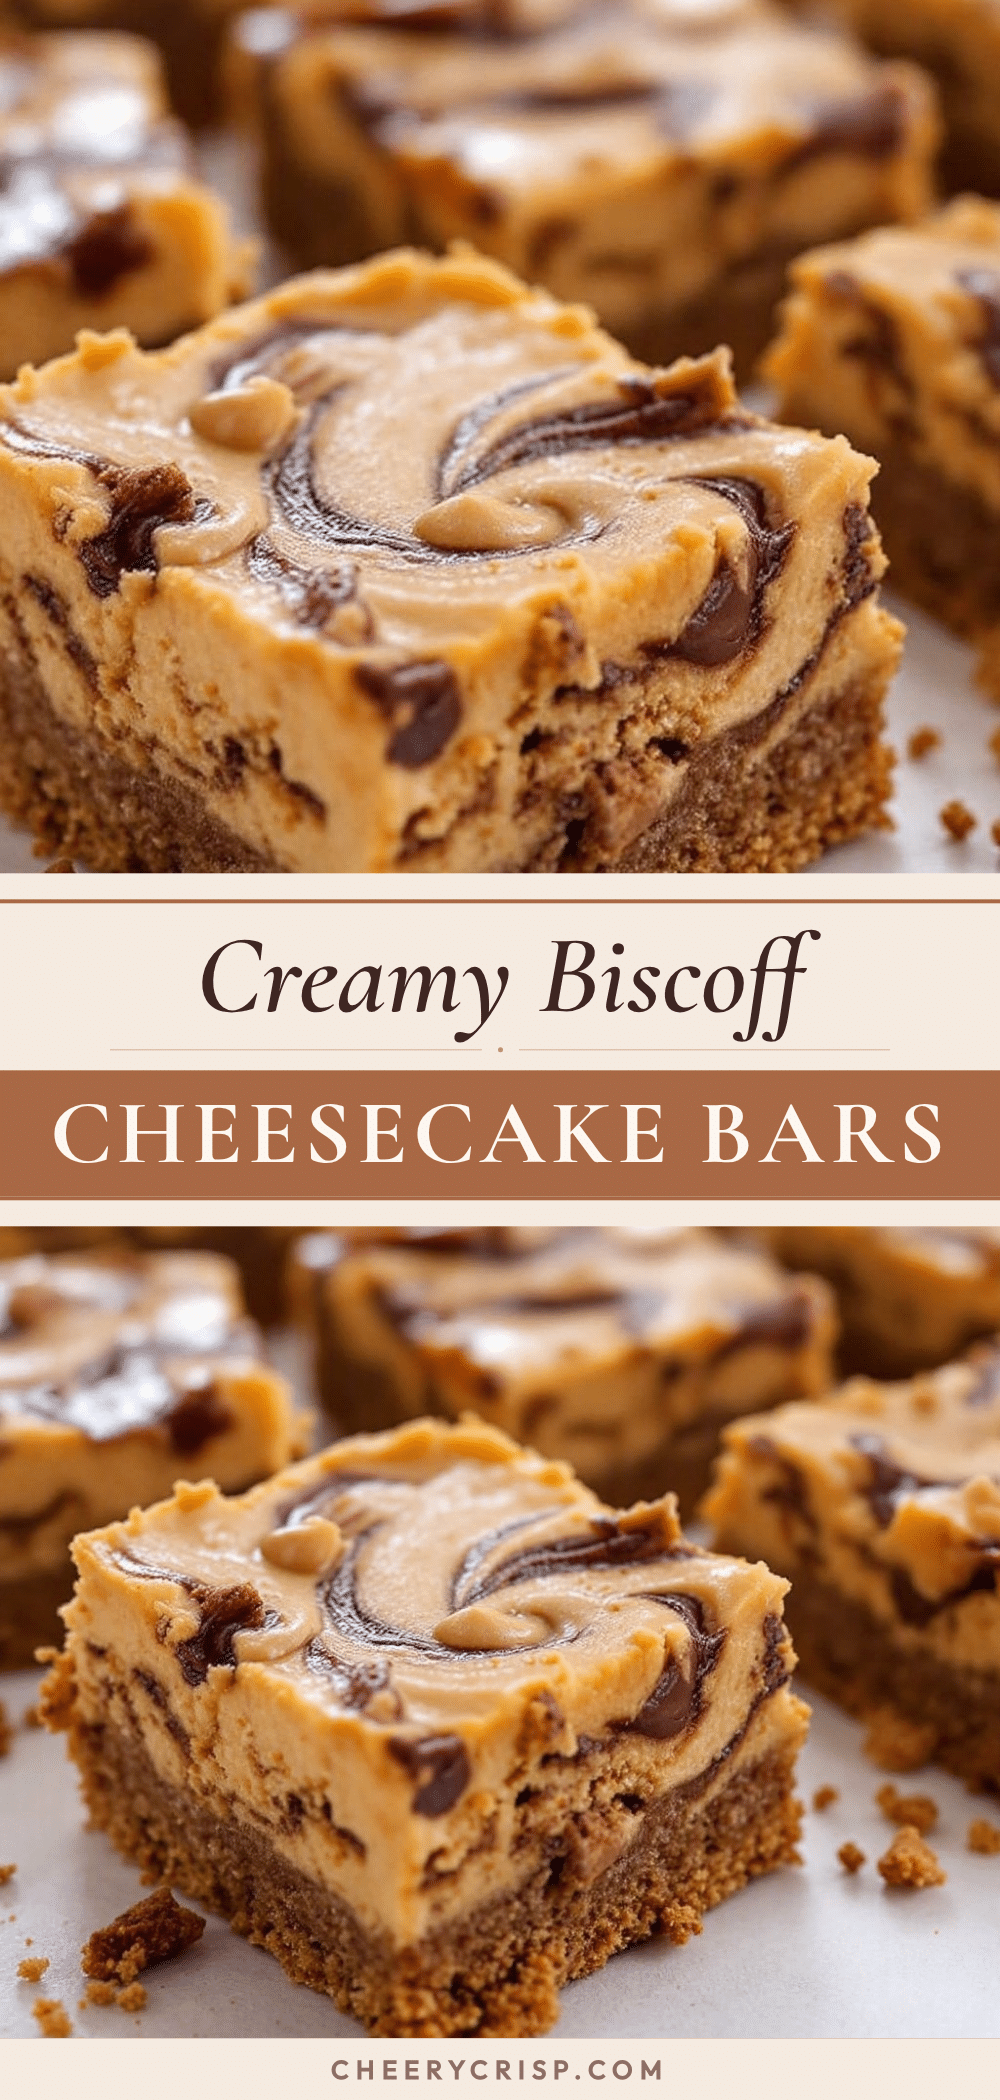
Creamy Biscoff Cheesecake Bars: Best Easy No-Bake Recipe
These no-bake Biscoff cheesecake bars offer a luxurious, creamy texture with a spiced cookie crust. They are easy to make, require no oven, and taste even better the next day, making them perfect for entertaining or make-ahead desserts.
- Prep Time: 30 minutes
- Cook Time: 0 minutes
- Total Time: 6 hours 30 minutes
- Yield: 12-16 servings 1x
- Category: Dessert
- Cuisine: American
Ingredients
- 1 ½ cups Biscoff Cookies (crushed)
- 6 tablespoons Unsalted Butter (melted)
- 1 tablespoon Granulated Sugar
- 16 ounces Cream Cheese (full-fat, brick-style, softened)
- 1 cup Biscoff Spread (well-stirred)
- 1 ½ cups Heavy Cream (cold)
- ½ cup Confectioners’ Sugar
- 1 teaspoon Vanilla Extract
- 2–3 tablespoons Extra Biscoff Spread (for topping, optional)
- 2 tablespoons Crushed Biscoff Cookies (for garnish, optional)
Instructions
- Crush the Biscoff cookies into fine crumbs using a food processor or a zip-top bag and rolling pin.
- In a medium bowl, combine the cookie crumbs, melted butter, and granulated sugar. Stir until the mixture resembles wet sand.
- Press the crust mixture firmly and evenly into the bottom of a 9×13 inch baking pan lined with parchment paper.
- In a stand mixer or using a hand mixer, beat the softened cream cheese and Biscoff spread on medium speed until smooth and creamy.
- Add the confectioners’ sugar and vanilla extract to the cream cheese mixture and beat until combined and glossy.
- In a separate cold bowl, whip the heavy cream on high speed until stiff peaks form.
- Lighten the cream cheese mixture by beating in one-third of the whipped cream on low speed.
- Gently fold in the remaining whipped cream using a spatula until just combined, being careful not to deflate the mixture.
- Pour the filling over the crust and spread evenly. Tap the pan to remove air bubbles.
- Cover and refrigerate for at least 6 hours, preferably overnight, until firm.
- Before slicing, run a sharp knife under hot water and dry it. Lift the bars out of the pan and slice into 12-16 squares.
- Drizzle with warmed Biscoff spread and sprinkle with crushed cookies if desired.
Notes
Ensure cream cheese is full-fat and softened to room temperature to avoid lumps. Use cold heavy cream and a cold bowl for whipping to ensure stiff peaks. Do not use whipped cream cheese in a tub. For gluten-free options, use certified gluten-free Biscoff cookies. For dairy-free, substitute with vegan cream cheese and coconut cream. Bars can be stored in the fridge for up to 5 days or frozen for up to 2 months.
Nutrition
- Serving Size: 1 bar
- Calories: 450
- Sugar: 28
- Sodium: 250
- Fat: 32
- Saturated Fat: 18
- Carbohydrates: 35
- Fiber: 1
- Protein: 5
Keywords: Biscoff, cheesecake bars, no-bake dessert, cookie butter, easy dessert, make-ahead dessert, Lotus Biscoff, creamy cheesecake



