Love this? Save it for later!
Share the inspiration with your friends
I burned the first batch of gingerbread cheesecake bars so badly that the smoke alarm started singing along with me. It was a dark December evening, and I was trying to prove that I could handle both dairy and spices in the same pan. The kitchen smelled like regret and scorched sugar. I had watched a video where the baker flipped the bars with a flourish, and I thought, how hard can it be? The answer was very hard.
My crust turned into charcoal bricks. The cheesecake layer was a soupy mess that refused to set. I ate the edge pieces anyway because throwing away food feels like a sin. Those charred edges actually tasted pretty good, though. There was a smoky depth from the burnt molasses that I didn’t expect. I kept going back to those little crispy bits while the rest of the pan sat in the fridge, cold and unappealing.
I realized I was treating the gingerbread like a cookie and the cheesecake like a cake. They need each other. The crust needs to be sturdy but soft, not crunchy like a graham cracker. The filling needs to be dense enough to hold the spice without weeping water. I adjusted the ratios three more times after that first disaster. Now, the bars are perfect. They are chewy, tangy, and warm all at once.
This recipe isn’t about fancy techniques or expensive ingredients. It is about getting the balance right between the heat of the ginger and the creaminess of the cheese. Once you get this one right, you will make it every holiday season. It brings a specific kind of comfort that feels like a hug in dessert form.
Why You’ll Love This Recipe
Why These Bars Are Special
You know how some desserts feel too heavy after two bites? These bars are different. The molasses crust provides a chewy foundation that holds up to the rich filling without weighing you down. I tested this recipe during a busy holiday party, and they disappeared in minutes. People kept asking for the recipe, thinking it was some complicated French pastry. It’s not. It’s honest, home-style baking.
Here is why you will love making these cozy gingerbread cheesecake bars with molasses crust:
- Quick & Easy Prep: You don’t need a stand mixer. A hand mixer or even a sturdy whisk is enough. The whole process takes less than an hour before baking.
- Pantry Staples: You likely already have molasses, ginger, and cream cheese in your kitchen. No special grocery trips needed for this one.
- Perfect for the Holidays: These are ideal for Christmas Eve, office parties, or just a quiet Tuesday night when you need something sweet.
- Crowd-Pleaser: Even people who usually avoid gingerbread will eat these. The cheesecake balances the spice perfectly.
- Unbelievably Delicious: The texture is the star. It is creamy, dense, and slightly chewy all at the same time.
What makes this recipe stand out from the rest is the molasses crust. Most gingerbread recipes use just brown sugar, which is fine. But using actual molasses gives it a deeper, more complex flavor. It adds a slight stickiness that binds the crust together better than butter alone. I learned this the hard way when my first crusts crumbled apart. The molasses acts like a glue.
This isn’t just another holiday dessert. It is the kind of treat that makes you close your eyes after the first bite. It’s comfort food reimagined for the modern baker. You get the warmth of chewy pumpkin snickerdoodle cookies in a bar form. It’s perfect for impressing guests without stressing over a whole cake.
What Ingredients You Will Need
The Molasses Crust
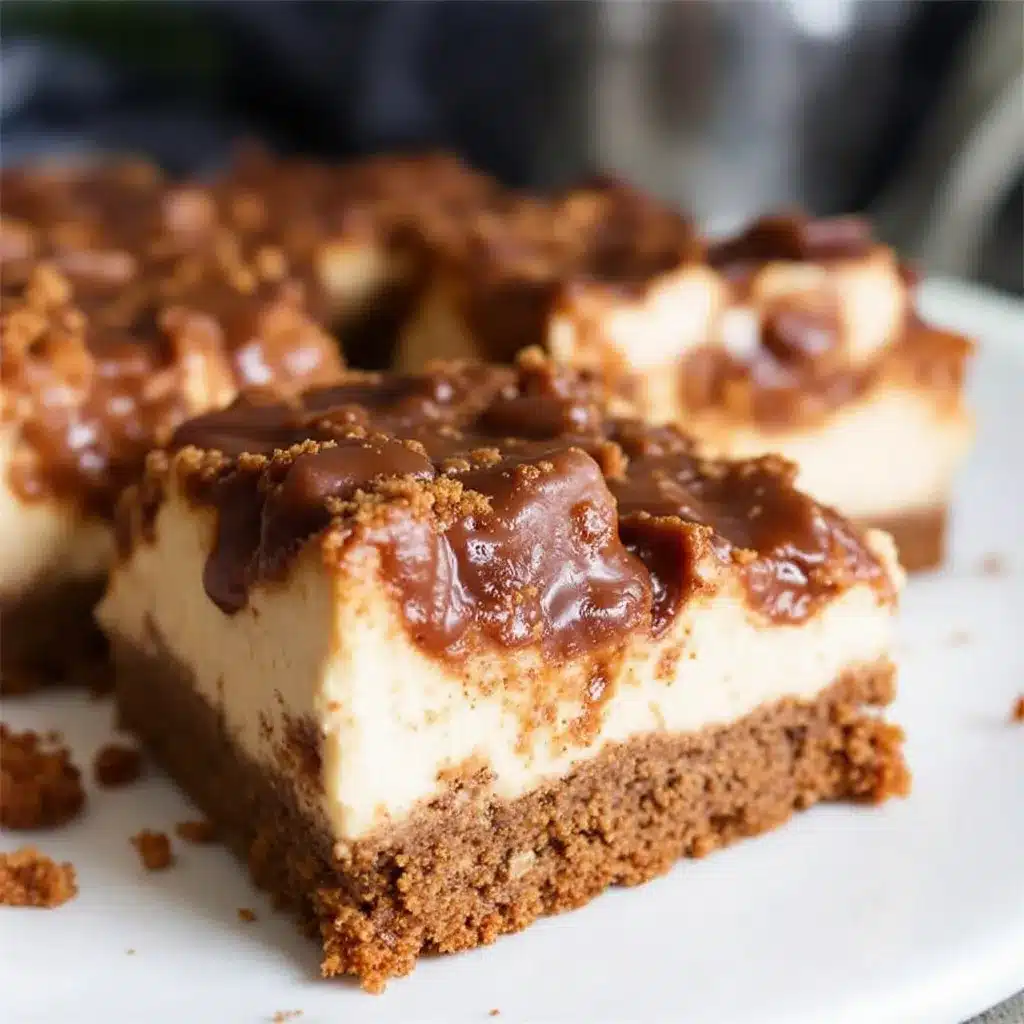
The crust is the foundation of these bars. It needs to be sturdy enough to support the cheesecake but soft enough to bite through easily. We use a mix of flours and fats to get that perfect chew.
- 1 ½ cups All-purpose flour: This is your base. Don’t swap this for cake flour unless you want a crumbly mess. All-purpose gives the right structure.
- ½ cup Unsalted butter, softened: Softened butter mixes easier into the flour. If it’s too cold, you’ll get clumps. If it’s melted, the crust won’t be chewy.
- ½ cup Brown sugar, packed: This adds moisture and a hint of caramel. Light or dark brown sugar both work fine.
- ¼ cup Molasses: This is the secret weapon. Use blackstrap or regular dark molasses. It adds that deep, bittersweet flavor that defines gingerbread.
- 1 tsp Ground ginger: Freshly ground is best, but ground works too. It provides the initial warmth.
- ½ tsp Ground cinnamon: Just a little bit to round out the spice profile.
- ½ tsp Baking soda: This helps the crust rise slightly and become tender.
- ¼ tsp Salt: Salt is crucial to balance the sweetness of the molasses.
The Cheesecake Filling
The filling is where the magic happens. It needs to be smooth, tangy, and rich. We keep the ingredients simple to let the spices shine.
- 16 oz Cream cheese, room temperature: This is non-negotiable. Cold cream cheese will leave lumps. Let it sit out for at least an hour before you start.
- ½ cup Granulated sugar: This sweetens the filling without overpowering the ginger.
- 2 Large eggs, room temperature: Room temp eggs emulsify better. They also help the cheesecake set evenly.
- 1 tsp Vanilla extract: Good quality vanilla makes a difference here. It adds a floral note that pairs well with the spices.
- 1 tsp Ground ginger: We add more ginger here to tie the filling to the crust.
- 1 tsp Ground cinnamon: Again, just a touch to keep the flavor profile consistent.
- ½ tsp Ground nutmeg: Nutmeg adds a warm, earthy background note. Don’t skip it.
- ¼ tsp Cloves: Just a pinch. Cloves are strong, so a little goes a long way.
I recommend using a block of cream cheese rather than the tub kind. The tub stuff has more air and water, which can make your cheesecake grainy. For the molasses, I like cozy salted caramel apple crisp vibes, so a robust molasses works best. If you are making this for kids, you can reduce the ginger slightly.
Equipment Needed
You don’t need a lot of fancy gear for this recipe. A standard 9×13 inch baking dish is all you really need. I prefer glass or ceramic dishes because they heat evenly. Metal pans can sometimes get hot spots, leading to burnt edges. If you don’t have a 9×13, you can use two 8×8 pans, but you’ll need to adjust the baking time slightly.
A rubber spatula is your best friend here. You need to scrape the sides of the bowl to get all the cream cheese mixed in. A whisk is also helpful for the eggs. Make sure your whisk is clean and dry. Any water in the bowl can ruin the emulsion.
For the crust, a fork works well to press it into the pan. You don’t need a heavy presser. Just gentle pressure is enough. If you have a food processor, you can use it to mix the crust, but it’s not necessary. A bowl and your hands work fine.
I also recommend parchment paper. Line your pan with it, leaving an overhang on the sides. This makes removing the bars so much easier. You can lift them out and cut them cleanly. Without parchment, you might end up with jagged edges and stuck bits.
Preparation Method
Step 1: Prepare the Pan
Preheat your oven to 350°F (175°C). Line a 9×13 inch baking pan with parchment paper. Leave an overhang on the long sides. This is crucial for removing the bars later. Spray the parchment with non-stick spray just to be safe.
Step 2: Make the Crust
In a medium bowl, mix the flour, brown sugar, baking soda, salt, ginger, and cinnamon. Use a fork to combine them. Add the softened butter and molasses. Stir until the mixture looks like wet sand. It should hold together when you squeeze it in your hand.
Press the mixture into the bottom of the prepared pan. Use your fingers or the back of a spoon to create an even layer. You want it flat and smooth. Bake this for 10 minutes. This pre-bakes the crust and helps it set. It prevents the crust from getting soggy later.
Step 3: Make the Filling
While the crust bakes, beat the cream cheese and sugar in a large bowl. Use an electric mixer on medium speed. Beat for 2-3 minutes until smooth and creamy. Scrape down the sides of the bowl with a rubber spatula. Make sure there are no lumps.
Add the eggs one at a time. Mix on low speed just until combined. Do not overmix. Overmixing adds air, which can cause cracks. Add the vanilla, ginger, cinnamon, nutmeg, and cloves. Mix gently until everything is incorporated. The batter should be thick and smooth.
Step 4: Assemble and Bake
Remove the crust from the oven. Pour the cheesecake filling over the hot crust. Spread it out evenly. Use a knife to swirl the topping if you want a marbled effect, but it’s not necessary. The heat from the crust will help the cheesecake set from the bottom up.
Bake at 350°F (175°C) for 30-35 minutes. The edges should be set, but the center should still jiggle slightly. It will look like a firm jelly. If the center is liquid, bake for 5 more minutes. Do not overbake, or it will become dry.
Step 5: Cool and Serve
Let the bars cool in the pan for 30 minutes. Then, lift them out using the parchment paper. Let them cool completely on a wire rack. This step is important. The cheesecake needs to set completely before you cut it. If you cut it warm, it will fall apart.
Once cool, slice into squares. Store them in the fridge. They taste even better the next day.
Cooking Tips & Techniques
Avoiding Cracks
Cracks in cheesecake are usually caused by overmixing or overheating. When you add the eggs, mix on low speed. Stop as soon as they are incorporated. Also, don’t open the oven door while the bars are baking. The temperature drop can cause the surface to crack.
Room Temperature Ingredients
I cannot stress this enough. Your cream cheese and eggs must be room temperature. Cold ingredients create lumps. If you forget to take them out, soak the cream cheese block in warm water for 10 minutes. For eggs, run them under warm water for a minute. This saves you from having to beat out lumps later.
The Jiggle Test
Knowing when to take the bars out is an art. The center should have a slight jiggle, like Jell-O. It should not look liquid. It will continue to cook from the residual heat after you take it out of the oven. If it looks set when you pull it out, it will be overdone.
Multitasking
You can make the filling while the crust bakes. Just keep the cream cheese in the bowl. This saves time. When the crust is done, you can just pour the filling in. It’s a nice efficiency hack for busy holiday seasons.
Variations & Adaptations
Dietary Adjustments
You can make this recipe gluten-free by swapping the all-purpose flour for a 1:1 gluten-free flour blend. Make sure the blend contains xanthan gum. For a dairy-free version, use vegan cream cheese and dairy-free butter. The texture might be slightly different, but the flavor will still be great.
Flavor Variations
Add a layer of white chocolate chips on top of the cheesecake before baking. It melts into little pockets of sweetness. You can also add a drizzle of caramel sauce after baking. This pairs well with the molasses. For a spicier kick, add a pinch of cayenne pepper to the filling. It adds a warm heat that is subtle but noticeable.
Seasonal Twists
In the spring, you can add orange zest to the filling. It brightens up the heavy spices. In the summer, top with fresh berries. The tartness of the berries cuts through the richness. I love adding a few crushed peppermint candies on top during Christmas. It looks festive and tastes amazing.
Allergen Substitutions
If you are allergic to eggs, you can use flax eggs. Mix 1 tablespoon of ground flaxseed with 3 tablespoons of water per egg. Let it sit for 5 minutes until it becomes gelatinous. This works well in baked goods like these bars. Just note that the texture might be slightly denser.
Serving & Storage Suggestions
How to Serve
Serve these bars chilled. They are best served with a cup of hot coffee or tea. The warmth of the drink complements the cold dessert. You can also serve them with a dollop of whipped cream. The contrast in textures is delightful. For a party, arrange them on a platter with fresh mint leaves. It looks professional and inviting.
Storage Instructions
Store the bars in an airtight container in the refrigerator. They will keep for up to 5 days. You can also freeze them. Wrap individual bars in plastic wrap and then place them in a freezer bag. They will last for 3 months. Thaw them in the fridge overnight before serving.
Reheating Tips
You don’t need to reheat these bars. They taste best cold or at room temperature. If you prefer them warm, microwave a single bar for 10-15 seconds. Just be careful not to melt the cream cheese too much. It should remain creamy, not soupy.
Flavor Development
The flavors in these bars develop over time. The molasses and ginger meld together in the fridge. By the second day, the taste is deeper and more complex. This is why they are great for make-ahead desserts. You can prepare them a day or two before your event.
Nutritional Information & Benefits
Estimated Nutrition
Each bar contains approximately 350 calories. This includes the crust and the cheesecake filling. The fat content is moderate due to the cream cheese and butter. The sugar content is higher, so enjoy in moderation. The ginger and cinnamon offer some anti-inflammatory benefits. They can help soothe digestion.
Dietary Considerations
This recipe is not gluten-free or dairy-free by default. If you have dietary restrictions, use the substitutions mentioned earlier. It is also not low-carb. The molasses and sugar add significant carbs. However, the protein from the cream cheese helps balance the blood sugar spike slightly.
Personal Wellness Perspective
I believe in enjoying desserts without guilt. These bars are a treat, but they are also made with real ingredients. There are no artificial flavors or preservatives. The spices add flavor without extra calories. It’s a balanced approach to holiday baking. You can enjoy a slice and feel good about it.
Conclusion
These cozy gingerbread cheesecake bars with molasses crust are a holiday staple for a reason. They are easy to make, delicious to eat, and perfect for sharing. I hope you try this recipe and make it your own. Feel free to add your own twists, like extra spices or different toppings. The beauty of baking is in the customization.
Thank you for reading my blog. I love hearing from you. Please leave a comment below and let me know how your bars turned out. Did you add any special ingredients? Did your family love them? Share your stories with me. I read every comment.
If you make this recipe, tag me on social media. I love seeing your creations. Happy baking, and enjoy every bite. These bars are worth the effort. They bring warmth and joy to any table.
FAQs
Can I use light cream cheese?
It is not recommended. Light cream cheese has more water and less fat. This can make the filling runny and less creamy. Use full-fat cream cheese for the best texture.
Why did my crust crumble?
This usually happens if the molasses ratio is too low or the butter is too cold. Make sure you use enough molasses to bind the crust. Also, ensure the butter is softened but not melted.
Can I freeze these bars?
Yes, you can freeze them. Wrap them tightly in plastic wrap and foil. They will last for up to 3 months. Thaw them in the fridge before serving.
Can I use pumpkin pie spice instead of ginger and cinnamon?
You can, but the flavor will be different. Pumpkin pie spice has cloves and nutmeg already. You might need to adjust the amounts. I recommend sticking to the specific spices for the best flavor balance.
How do I know when the bars are done?
The edges should be set, and the center should jiggle slightly. It should look like firm Jell-O. If it is liquid, bake for 5 more minutes. Remember, it will continue to cook after you take it out of the oven.
Pin This Recipe!
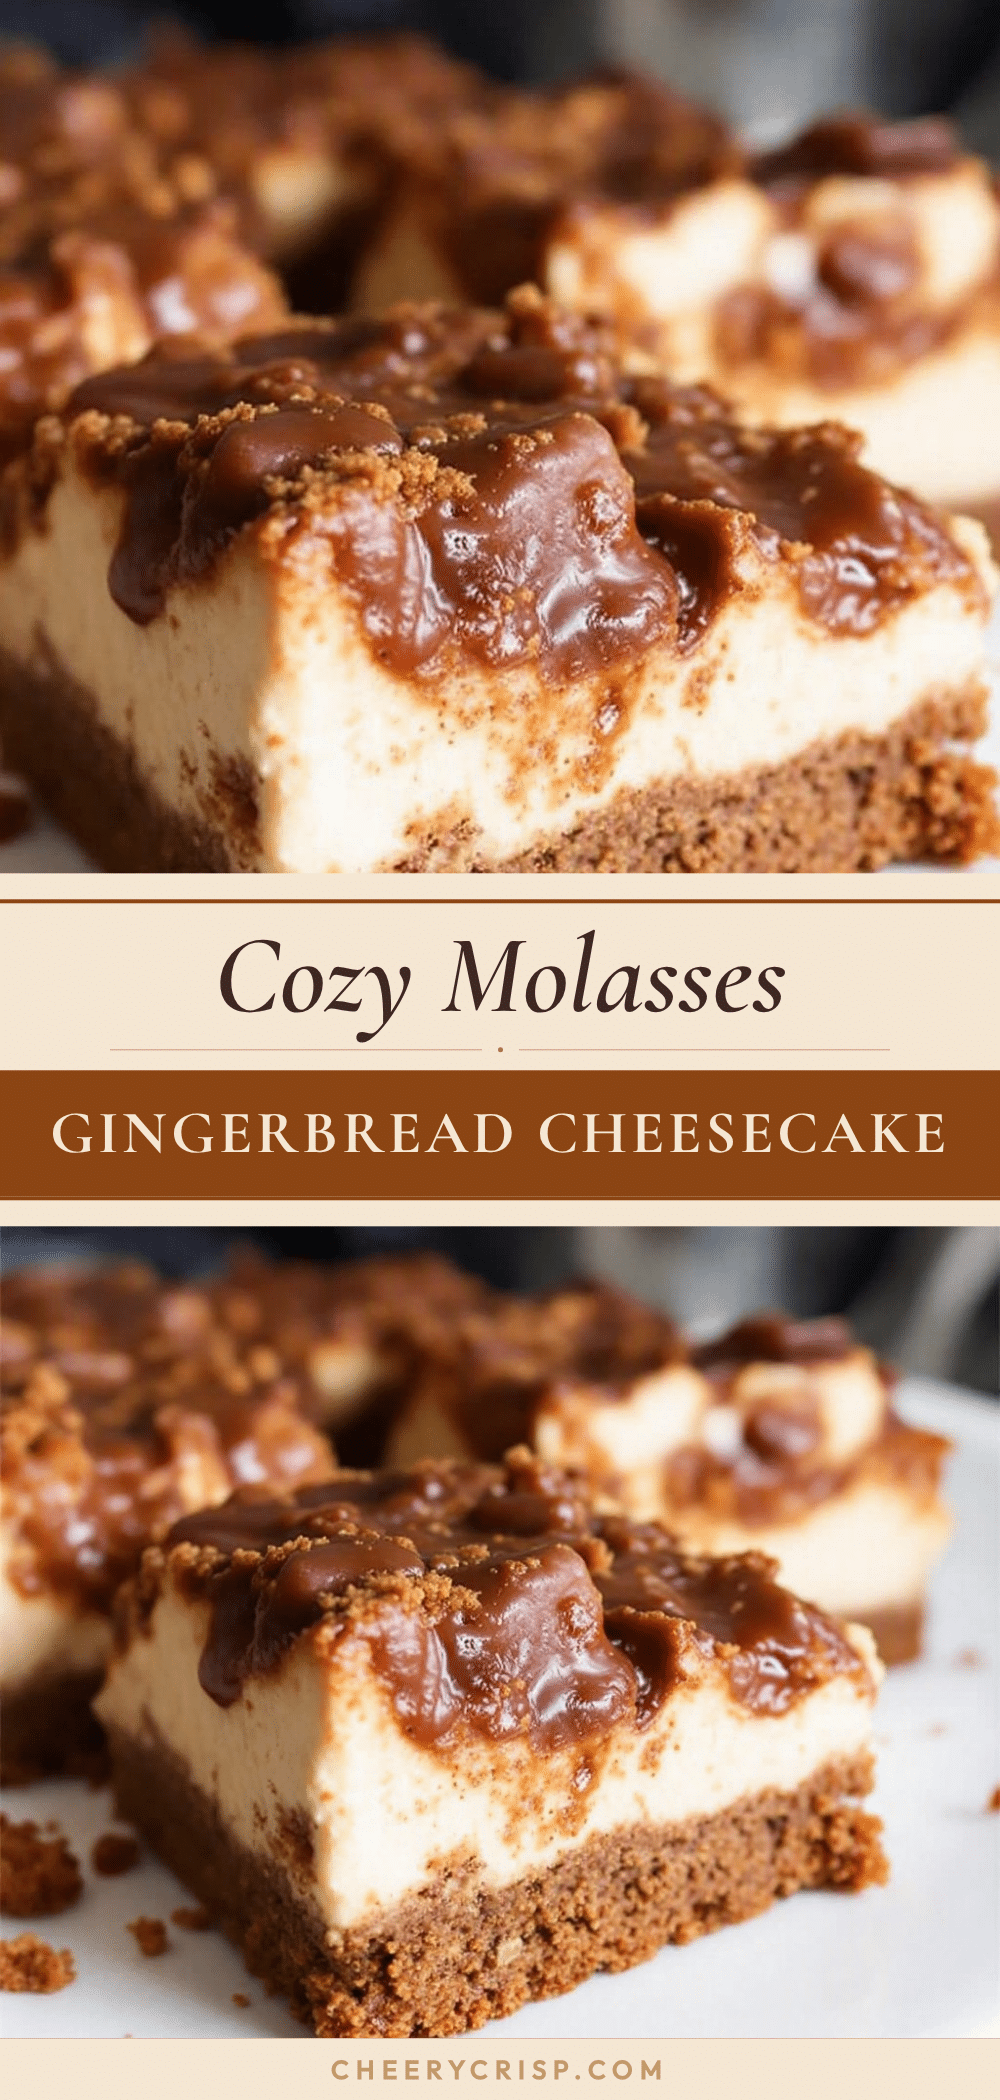
Cozy Gingerbread Cheesecake Bars: Best Easy Holiday Dessert
Chewy, tangy, and warm gingerbread cheesecake bars with a rich molasses crust. This easy holiday dessert combines the comfort of gingerbread with the creaminess of cheesecake for a perfect crowd-pleasing treat.
- Prep Time: 30 minutes
- Cook Time: 45 minutes
- Total Time: 75 minutes
- Yield: 12 servings 1x
- Category: Dessert
- Cuisine: American
Ingredients
- 1 ½ cups All-purpose flour
- ½ cup Unsalted butter, softened
- ½ cup Brown sugar, packed
- ¼ cup Molasses
- 1 tsp Ground ginger
- ½ tsp Ground cinnamon
- ½ tsp Baking soda
- ¼ tsp Salt
- 16 oz Cream cheese, room temperature
- ½ cup Granulated sugar
- 2 Large eggs, room temperature
- 1 tsp Vanilla extract
- 1 tsp Ground ginger
- 1 tsp Ground cinnamon
- ½ tsp Ground nutmeg
- ¼ tsp Cloves
Instructions
- Preheat oven to 350°F (175°C). Line a 9×13 inch baking pan with parchment paper, leaving an overhang on the long sides, and spray with non-stick spray.
- In a medium bowl, mix flour, brown sugar, baking soda, salt, ginger, and cinnamon. Add softened butter and molasses, stirring until the mixture resembles wet sand and holds together when squeezed.
- Press the crust mixture evenly into the bottom of the prepared pan. Bake for 10 minutes to pre-bake the crust, then remove from oven.
- While the crust bakes, beat cream cheese and granulated sugar in a large bowl with an electric mixer on medium speed for 2-3 minutes until smooth. Scrape down the sides.
- Add eggs one at a time, mixing on low speed just until combined. Do not overmix. Add vanilla, ginger, cinnamon, nutmeg, and cloves, mixing gently until incorporated.
- Pour the cheesecake filling over the hot pre-baked crust and spread evenly.
- Bake at 350°F (175°C) for 30-35 minutes. The edges should be set, but the center should jiggle slightly like firm Jell-O.
- Let the bars cool in the pan for 30 minutes. Lift them out using the parchment paper and cool completely on a wire rack.
- Once cool, slice into squares. Store in the refrigerator.
Notes
Ensure cream cheese and eggs are at room temperature to prevent lumps. Do not overmix the batter to avoid cracks. The bars taste better the next day as flavors meld. Can be frozen for up to 3 months.
Nutrition
- Serving Size: 1 bar
- Calories: 350
- Sugar: 32
- Sodium: 250
- Fat: 18
- Saturated Fat: 10
- Carbohydrates: 45
- Fiber: 1
- Protein: 6
Keywords: gingerbread cheesecake, holiday dessert, molasses crust, easy baking, Christmas treats, cream cheese bars, gingerbread bars



