Love this? Save it for later!
Share the inspiration with your friends
I want a board that looks like it took hours to arrange, but I only have forty minutes before the doorbell rings. It is a specific kind of panic, the kind where you stare at a wooden slab and realize your life choices have led you here. I need color. I need crunch. I need something that says “I put effort into this Friendsgiving” without requiring me to actually cook anything. The autumn air is crisp, and everyone is coming with their own dishes, so this needs to be the star of the table. I grab the brie and the fig jam, knowing that cheese and fruit is the classic move, but it feels too safe. I need texture. I need the dark, sticky sweetness of dried apricots and the sharp snap of fresh grapes. It is about balance. Salt against sweet. Soft against hard. I start layering the crackers, knowing that the bread needs to be sturdy enough to hold the heavy toppings without turning into a soggy mess. This isn’t just a snack plate; it is a centerpiece. It is the visual anchor of the night. I arrange the pears in a fan, pretending I planned it that way, even though I am just guessing at the spacing. The goal is abundance. The goal is to make people stop talking for a minute and just look at the food. I add the honey drizzle last, watching it pool in the crevices. It is done. It looks effortless. It looks like I have my life together.
Why You’ll Love This Recipe
Let’s be honest, not everyone has the patience or the skill to build a charcuterie board that doesn’t look like a toddler’s art project. This best Friendsgiving charcuterie board with fall fruits is designed for the home cook who wants impressive results with minimal stress. I have tested this combination dozens of times, and the balance of flavors is what makes it stand out. It isn’t just random snacks thrown on a plate; it is a curated experience.
* **Quick & Easy**: You can assemble this entire board in under 30 minutes. It is perfect for busy weeknights or last-minute gatherings when you need to look prepared without the oven smoke.
* **Simple Ingredients**: You likely already have half of these items in your kitchen. We are using pantry staples like crackers and nuts, paired with fresh produce from the grocery store. No fancy grocery trips needed.
* **Perfect for Friendsgiving**: This is the ultimate crowd-pleaser for autumn gatherings. It fits the seasonal theme beautifully and pairs well with other dishes being served.
* **Crowd-Pleaser**: Kids love the fruit, adults love the cheese, and everyone loves the convenience. It always gets rave reviews because it is interactive and fun.
* **Unbelievably Delicious**: The combination of sharp cheddar, sweet fig jam, and crisp apples creates a flavor profile that is next-level comfort food.
What makes this recipe different from the rest is the focus on texture contrasts. Many people forget the crunch. By adding toasted walnuts and sturdy water crackers, you create a mouthfeel that keeps people coming back for more. It is not just about taste; it is about the experience of eating. I also recommend pairing this with a best football Sunday charcuterie board if you are hosting a sports viewing party, as the principles remain the same but the flavors shift slightly. This board is the kind that makes you close your eyes after the first bite. It is comfort food reimagined—healthier, faster, but with the same soul-soothing satisfaction. It is perfect for impressing guests without stress, or turning a simple meal into something memorable.
What Ingredients You Will Need
This recipe uses simple, wholesome ingredients to deliver bold flavor and satisfying texture without the fuss. The key is to select items that complement each other in both color and taste. We are leaning heavily into autumnal flavors—warm spices, sweet fruits, and savory cheeses. You do not need expensive, hard-to-find items. In fact, the best boards often use accessible ingredients that are elevated by thoughtful arrangement.
Here is what you will need to build the ultimate board:
* **Cheeses**:
* Brie or Camembert (soft, creamy cheese that pairs well with fruit)
* Sharp Cheddar or Aged Gouda (provides a sharp contrast to the soft cheese)
* Goat Cheese (tangy and creamy, great for spreading)
* **Cured Meats**:
* Prosciutto or Salami (thinly sliced for elegant presentation)
* Chorizo (optional, for a spicy kick)
* **Fall Fruits**:
* Fresh Grapes (red and green for color contrast)
* Apples (sliced thin, varieties like Honeycrisp or Fuji work best)
* Pears (sliced or whole, Bartlett or Anjou are good choices)
* Dried Apricots or Figs (adds chewiness and concentrated sweetness)
* **Crackers and Bread**:
* Water Crackers (neutral base that won’t overpower flavors)
* Crostini or Baguette Slices (toasted for extra crunch)
* Pretzel Crisps (for a salty, crunchy element)
* **Nuts and Seeds**:
* Toasted Walnuts or Pecans (adds essential crunch and earthiness)
* Pumpkin Seeds (pepitas) (ties into the fall theme)
* **Condiments and Accents**:
* Fig Jam or Honey (essential for dipping and sweetness)
* Olives (adds a briny, savory element)
* Fresh Rosemary Sprigs (for garnish and aroma)
I recommend using a high-quality honey, such as Local Wildflower Honey, for the drizzle. The flavor is much brighter than processed varieties. Look for firm, small-curd cottage cheese if you decide to swap the goat cheese, though brie is the traditional choice for this texture profile. For seasonal variations, swap in fresh berries in the summer, but for fall, stick to apples and pears. If you need a gluten-free option, use rice crackers or corn-based crackers instead of wheat. This flexibility allows you to adapt the board to dietary restrictions without losing the visual appeal.
Equipment Needed
You do not need a professional kitchen to build a stunning charcuterie board. The most important piece of equipment is a large serving surface. A wooden cutting board, a marble slab, or even a large ceramic platter works perfectly. I prefer wood because it adds warmth and fits the rustic Friendsgiving theme. If you do not have a large board, use multiple smaller plates and arrange them closely together on the table.
* **Sharp Knife**: Essential for slicing apples, pears, and cheese cleanly. A dull knife will crush the fruit and make a mess.
* **Cheese Knife Set**: These often come with different blades for hard and soft cheeses, making the slicing process easier and more precise.
* **Small Bowls**: You will need several small ramekins or bowls for jams, nuts, and olives. This keeps the board organized and prevents cross-contamination of flavors.
* **Tongs or Small Forks**: Provide these for your guests so they do not have to use their hands to grab items. It is more hygienic and looks elegant.
If you do not have a large board, a large baking sheet lined with parchment paper is a budget-friendly alternative. It is easy to clean and provides plenty of space. For maintenance, always wipe down your wooden board with a damp cloth after use and avoid soaking it in water to prevent warping. If you are using marble, it is durable but can stain, so wipe spills immediately. Having the right tools makes the assembly process faster and less stressful, allowing you to enjoy the board before your guests arrive.
Preparation Method
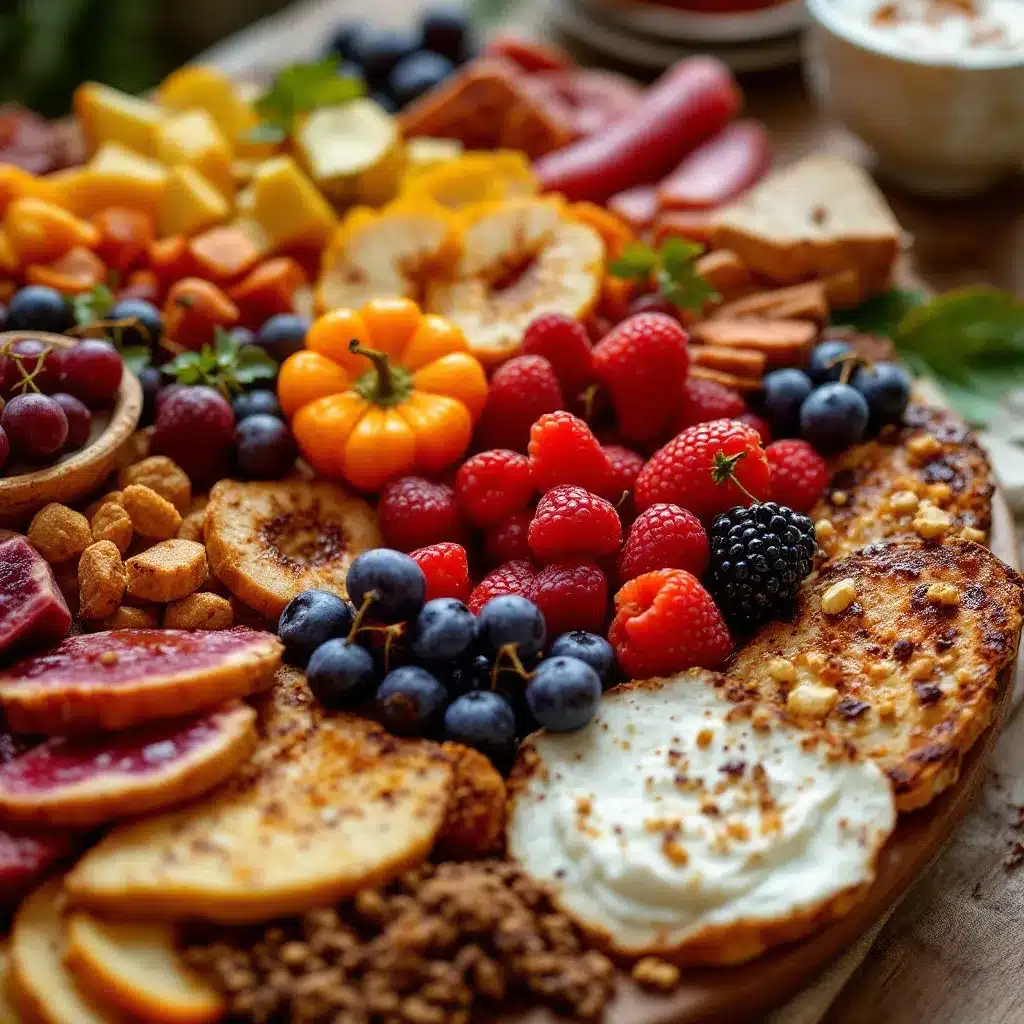
Building the board is an art form, but it is also a science of balance. You want to create visual interest with height, color, and texture. Follow these steps to create a professional-looking result.
1. **Prepare the Base**: Place your large board or platter on a stable surface. If you are using a wooden board, ensure it is clean and dry. Start by placing your small bowls in strategic spots. Put the jam, nuts, and olives in the corners or scattered throughout. This anchors the board and gives you reference points for the rest of the items.
2. **Arrange the Cheeses**: Place your cheeses on the board. If using a wheel of brie, place it in the center or slightly off-center. Slice the cheddar or gouda into cubes or wedges. Arrange them so they are spaced out, not touching. This allows guests to easily pick up pieces without disturbing other items.
3. **Fold the Meats**: Take your prosciutto or salami and fold the slices loosely. Do not lay them flat; folding creates volume and texture. Place the folded meats near the cheeses. If using chorizo, arrange it in small rolls for a different visual element.
4. **Slice the Fruits**: Slice the apples and pears into thin wedges or half-moons. To prevent browning, you can dip them in a little lemon juice, though this is not strictly necessary if you are serving within an hour. Fan the fruit slices out on the board. Place whole grapes in clusters near the edges.
5. **Add the Crunch**: Scatter the crackers and bread slices around the board. Place them in small piles or fan them out. Add the toasted nuts and seeds in small piles or sprinkle them in the gaps between larger items. This fills in empty spaces and adds texture.
6. **Final Touches**: Drizzle honey over the cheese and fruit. Add fresh rosemary sprigs for color and aroma. Step back and assess the board. Add more items where needed to fill gaps. The goal is abundance, so do not be afraid to overfill slightly.
7. **Serve**: Place the board on the table and invite guests to dig in. Provide tongs and small plates. Enjoy the compliments.
Take your time with the fruit slicing. Uniform slices look more professional. If you are short on time, buy pre-sliced fruit from the store, though fresh slicing is always better. Remember, the order of operations matters. Start with the bowls, then the cheeses, then the meats, then the fruits, and finally the crackers and garnishes. This ensures a balanced distribution of flavors and textures across the board.
Cooking Tips & Techniques
Building a charcuterie board is less about cooking and more about assembly technique. However, there are several tips that can elevate your board from good to great. First, temperature matters. Cheese should be served at room temperature. If you take your cheese out of the fridge an hour before serving, it will taste better and be easier to slice. Cold cheese can be waxy and bland.
* **Prevent Sogginess**: If you are using soft cheeses like brie, avoid placing crackers directly on top of the cheese for long periods. Serve them separately or add them just before guests arrive.
* **Color Contrast**: Use a variety of colors to make the board visually appealing. Red grapes, green apples, orange apricots, and white cheese create a vibrant palette. Avoid monochromatic arrangements, which can look dull.
* **Height and Dimension**: Use the small bowls to create height. Stack crackers vertically or lean them against the cheese wheels. This adds depth and makes the board look more dynamic.
* **Avoid Cross-Contamination**: Use separate utensils for each type of food. This keeps the flavors distinct and maintains hygiene. It also looks more professional.
I once made the mistake of putting all the nuts in one big pile. It looked messy and made it hard for guests to grab a handful. Instead, scatter them in small clusters. Another common mistake is overcrowding the board. Leave some negative space. It allows the eye to rest and makes the food look more intentional. Also, consider the flavor journey. Start with something mild, like crackers and brie, and move to stronger flavors, like sharp cheddar and chorizo. This guides the palate and prevents flavor fatigue. Finally, taste as you build. Adjust the seasoning or add more jam if needed. Your board should be a reflection of your personal taste, so do not be afraid to customize it.
Variations & Adaptations
While the classic fall combination is delicious, there are many ways to adapt this board to suit different tastes or dietary needs. The beauty of a charcuterie board is its flexibility. You can swap ingredients based on what is in season or what your guests prefer.
* **Vegetarian Option**: Skip the cured meats and add more cheeses and roasted vegetables. Roasted artichoke hearts or sun-dried tomatoes add a savory depth that replaces the meat.
* **Gluten-Free Adaptation**: Use gluten-free crackers, rice cakes, or fresh vegetable sticks like celery and carrot rounds. Many brands now offer excellent gluten-free options that are sturdy and flavorful.
* **Dairy-Free Twist**: Replace the cheese with dairy-free alternatives made from nuts or soy. Cashew cheese or almond-based cheeses work well and mimic the texture of traditional cheese.
* **Spicy Variation**: Add spicy elements like jalapeño poppers, hot honey, or spicy chorizo. This appeals to guests who enjoy a kick of heat.
* **Sweet Tooth Option**: If you want a dessert-focused board, add chocolate-covered strawberries, dried mango, and dark chocolate squares. This can serve as a sweet finish to the meal.
I have tried adding smoked salmon to this board, and it works surprisingly well with the cream cheese and capers. It adds a luxurious touch that feels elevated. For a lighter option, increase the proportion of fruits and vegetables and reduce the meats and cheeses. This is great for daytime gatherings or brunches. You can also change the crackers to match the theme. Use pumpkin-shaped crackers for Halloween or gingerbread men for Christmas. These small changes can make the board feel more festive and tailored to the occasion.
Serving & Storage Suggestions
Serving the board is all about presentation and timing. Place the board on the table at room temperature for at least 30 minutes before guests arrive. This allows the flavors to bloom and the cheese to soften. Arrange small plates and utensils nearby so guests can serve themselves easily. Consider adding a small card explaining the ingredients, especially if there are allergens present.
For storage, any leftover cheese and meats can be wrapped tightly in plastic wrap or placed in an airtight container in the refrigerator. They will keep for up to three days. However, the fruit will begin to brown and lose its crispness. It is best to consume the fruit within 24 hours. If you have leftover crackers, store them in a sealed bag to maintain their crunch.
To reheat, charcuterie boards are not typically reheated. The cheeses are best enjoyed at room temperature. If you have leftover cooked items, such as roasted nuts or vegetables, reheat them in the oven at 350°F for a few minutes. Avoid the microwave, as it can make the texture rubbery.
Flavors develop over time. The honey may harden in the fridge, and the crackers may soften if they absorb moisture from the cheese. For the best experience, assemble the board fresh each time. If you must prepare ahead, prep the ingredients and store them separately, then assemble just before serving. This ensures the best texture and flavor.
Nutritional Information & Benefits
A charcuterie board is not just a treat for the eyes; it can also be a balanced source of nutrition. The combination of protein, healthy fats, and fiber makes it a satisfying snack. Here is a general breakdown of the nutritional benefits:
* **Protein**: The cheeses and cured meats provide high-quality protein, which helps with muscle repair and satiety.
* **Healthy Fats**: Nuts and olive oil (if used) offer heart-healthy monounsaturated fats.
* **Fiber**: The fruits and whole-grain crackers provide dietary fiber, which aids in digestion and blood sugar regulation.
* **Vitamins and Minerals**: Fruits like apples and grapes are rich in antioxidants and vitamins C and K.
It is important to note that charcuterie boards can be high in sodium due to the cured meats and cheeses. Enjoy in moderation. For those watching their calorie intake, focus on the fruits and vegetables, which are lower in calories but high in volume. This board can be part of a healthy diet when balanced with other nutritious foods throughout the day. It is a great way to introduce variety into your diet and enjoy a wide range of flavors in one sitting.
Conclusion
This best Friendsgiving charcuterie board with fall fruits is more than just a snack; it is a celebration of autumn flavors and togetherness. It is easy to make, visually stunning, and delicious. I love this recipe because it allows me to be social with my guests rather than stuck in the kitchen. It is a recipe that brings people together, encouraging conversation and sharing. I encourage you to customize it with your favorite ingredients and make it your own. Try adding a cozy salted caramel apple crisp as a dessert option to extend the autumn theme. Don’t forget to leave a comment below with your favorite additions. Share your creations on social media and tag me. I love seeing how you interpret this recipe. Thank you for reading, and happy hosting!
FAQs
How far in advance can I prepare the charcuterie board?
You can prepare the ingredients up to 24 hours in advance, but it is best to assemble the board no more than 2 hours before serving. This keeps the crackers crisp and the fruit fresh.
Can I use a different type of cheese?
Absolutely. You can use any cheese you like. Brie, cheddar, gouda, and goat cheese are popular choices, but feel free to experiment with blue cheese or manchego.
What crackers work best for this board?
Water crackers, crostini, and pretzel crisps are excellent choices. They provide a neutral or complementary flavor that does not overpower the cheese and fruit.
How do I prevent the fruit from browning?
Toss the sliced apples and pears in a little lemon juice before arranging them on the board. This helps to prevent oxidation and keeps the fruit looking fresh.
Can I make this board vegetarian?
Yes, simply omit the cured meats and add more cheeses, nuts, and roasted vegetables. Roasted artichoke hearts or sun-dried tomatoes are great substitutes.
Pin This Recipe!
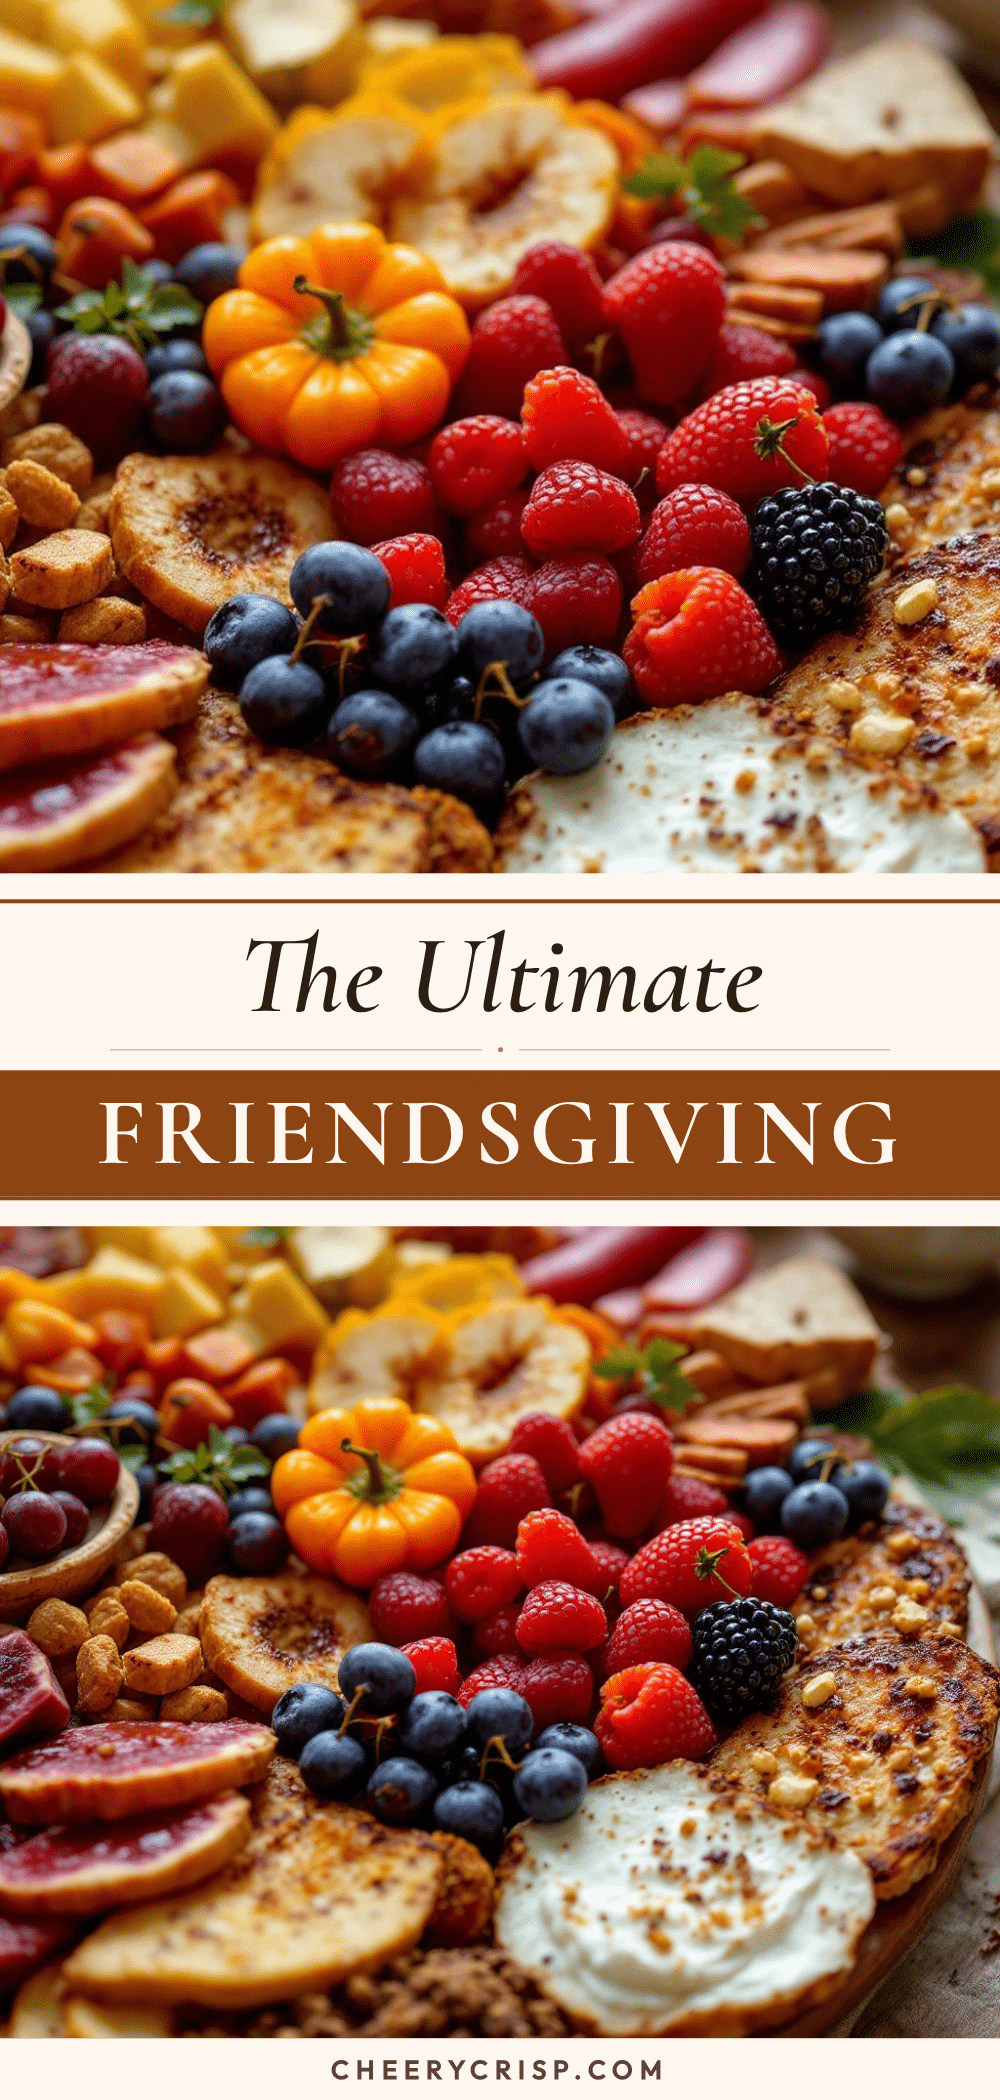
Best Friendsgiving Charcuterie Board: 10 Easy Fall Appetizers

A stress-free, visually stunning charcuterie board featuring a curated mix of cheeses, cured meats, fall fruits, and crunchy accompaniments, perfect for autumn gatherings.
- Prep Time: 30 minutes
- Cook Time: 0 minutes
- Total Time: 30 minutes
- Yield: 8-10 servings
- Category: Appetizer
- Cuisine: American
Ingredients
- Brie or Camembert
- Sharp Cheddar or Aged Gouda
- Goat Cheese
- Prosciutto or Salami
- Chorizo (optional)
- Fresh Grapes (red and green)
- Apples (sliced thin)
- Pears (sliced or whole)
- Dried Apricots or Figs
- Water Crackers
- Crostini or Baguette Slices (toasted)
- Pretzel Crisps
- Toasted Walnuts or Pecans
- Pumpkin Seeds (pepitas)
- Fig Jam or Honey
- Olives
- Fresh Rosemary Sprigs
Instructions
- Place small bowls containing jam, nuts, and olives in strategic spots on the board to anchor the layout.
- Arrange cheeses on the board, spacing them out so they do not touch; slice hard cheeses into cubes or wedges.
- Fold cured meats loosely to create volume and texture, placing them near the cheeses.
- Slice apples and pears into thin wedges or half-moons; fan them out on the board and place grape clusters near the edges.
- Scatter crackers, bread slices, toasted nuts, and seeds around the board, filling in gaps between larger items.
- Drizzle honey over the cheese and fruit, and add fresh rosemary sprigs for garnish.
- Serve immediately with tongs and small plates.
Notes
Serve cheese at room temperature for best flavor. To prevent fruit from browning, toss sliced apples and pears in lemon juice. Assemble the board no more than 2 hours before serving to keep crackers crisp.
Nutrition
- Serving Size: Varied assortment of
- Calories: 350
- Sugar: 15
- Sodium: 600
- Fat: 22
- Saturated Fat: 8
- Carbohydrates: 25
- Fiber: 3
- Protein: 12
Keywords: Friendsgiving, charcuterie board, fall appetizers, cheese board, easy entertaining, autumn snacks, party food