Love this? Save it for later!
Share the inspiration with your friends
The candy bowl was empty. Not just low—completely empty, like a sad plastic pumpkin that had given up on life. It was 6 PM on October 30th, and I had promised my niece I’d bring something “spooky and amazing” to her school Halloween party the next morning. The grocery store was a nightmare (pun intended), and I was staring at a box of black gel food coloring I’d bought for a project I never finished. Plus a stick of butter. And some chocolate chips. That’s when this Spooky Black Cat Halloween Cookie Cake idea just sort of… pounced.
I wasn’t planning on baking a cake that looked like a cat. Honestly, I was planning on buying those pre-made sugar cookies with the orange icing. But the store was a zoo, and my kitchen had other plans. There’s something about a deadline—and a very excited eight-year-old—that makes you get creative. I grabbed my go-to small batch chocolate chip cookies recipe as a base, scaled it up, and started shaping it into something that looked less like dessert and more like a familiar feline friend.
The first attempt was… lumpy. Let’s just say my cat looked more like a potato with ears. But the second one? That was the one. The kids at the party went absolutely silent for a second, then erupted. And honestly? That moment, watching a bunch of little goblins grin at a chocolate cookie shaped like a black cat, is why this recipe stuck. It’s not just a dessert—it’s a little piece of Halloween magic you can actually eat.
Why You’ll Love This Recipe
I’ve tested this Spooky Black Cat Halloween Cookie Cake about six times now. I burned the ears off the first one. The second one spread into a puddle. But by the third attempt, I had it dialed in—and I’m telling you, this is the version that works every single time. Here’s why it belongs in your Halloween lineup:
- Quick & Easy : From mixing to decorating, you’re looking at about 45 minutes. No complicated layers, no fussy frosting. Just one giant, adorable cookie cake.
- Simple Ingredients : You probably have everything already—butter, sugar, flour, cocoa powder, and chocolate chips. No weird extracts or hard-to-find candy parts.
- Perfect for Halloween Parties : This thing is a showstopper. It’s great for classroom treats, spooky movie nights, or just surprising your kids on October 31st.
- Crowd-Pleaser : Adults love it because it’s basically a giant chocolate chip cookie. Kids love it because it’s a cat. Everyone wins.
- Unbelievably Delicious : The edges are slightly crisp, the center is soft and chewy, and the chocolate chips melt into little pockets of gooey goodness. It’s comfort food with a costume on.
What makes this different from every other Halloween cookie out there? It’s the texture. I use a slightly higher ratio of brown sugar to white sugar, which gives it that soft, almost fudgy center that holds its shape even after you cut into it. Plus, the black cocoa powder (not just regular cocoa) gives it that deep, dark color without tasting artificial. It’s not just another version—it’s the best version.
This recipe is the kind that makes you close your eyes after the first bite. It’s Halloween fun without the Halloween stress. Perfect for impressing the PTA without spending all night in the kitchen.
What Ingredients You Will Need
This recipe uses simple, pantry-friendly ingredients to create a rich, chocolatey cookie cake that’s soft in the middle and slightly crisp around the edges. The magic is in the combination of black cocoa powder and mini chocolate chips—trust me on this one.
- Unsalted butter, softened (1 cup / 2 sticks) – I use Land O’Lakes for consistent results. Softened means leave it out for about 30 minutes, not melted.
- Light brown sugar, packed (1 cup / 200g) – This gives the cookie its chewy texture and deep flavor. Dark brown sugar works too, but the color will be slightly different.
- Granulated sugar (1/2 cup / 100g) – Adds a bit of crispness to the edges.
- Large eggs (2, room temperature) – Cold eggs can seize the butter. Just set them in warm water for 5 minutes if you forgot.
- Vanilla extract (2 teaspoons) – Pure vanilla, not imitation. It makes a difference.
- All-purpose flour (2 1/2 cups / 315g) – Spoon and level it. Scooping directly from the bag packs in too much flour and makes the cookie dry.
- Black cocoa powder (1/2 cup / 50g) – This is the secret ingredient. It’s darker than regular cocoa and has a subtle Oreo-like flavor. You can find it at specialty baking stores or online. If you can’t find it, use dark cocoa powder plus a drop of black gel food coloring.
- Baking soda (1 teaspoon) – For lift.
- Salt (1/2 teaspoon) – Balances the sweetness.
- Mini chocolate chips (1 1/2 cups / 260g) – Mini chips distribute better than regular ones. I like Ghirardelli’s mini semi-sweet chips.
- Black gel food coloring (optional, 1/2 teaspoon) – Only if your cocoa powder isn’t dark enough. Americolor brand is my go-to.
For the face decoration, you’ll need a few extras: candy eyes (the kind with the flat backs), a pink or red M&M for the nose, and some black licorice strings or black frosting for the whiskers. I’ve also used easy mummy wrapped sausage for a savory Halloween option, but for this, stick with the candy—it’s more fun.
Equipment Needed
You don’t need a fancy bakery setup for this. Here’s what you’ll actually use:
- Large mixing bowl – I use a glass one so I can see if the butter and sugar are properly creamed.
- Electric hand mixer or stand mixer – You can do this by hand, but your arm will get tired. I’ve done both, and the mixer is worth it.
- Baking sheet – A rimmed half-sheet pan works best. Line it with parchment paper—don’t skip this step.
- Parchment paper – For easy removal and cleanup.
- Offset spatula – For smoothing the dough into a cat shape. A regular spatula works too, but the offset one gives you cleaner lines.
- Cooling rack – Lets air circulate so the cookie doesn’t get soggy on the bottom.
- Small knife or toothpick – For shaping the ears and tail before baking.
No offset spatula? No problem. Use the back of a spoon. No cooling rack? Just carefully slide the parchment onto a flat surface. Baking doesn’t have to be complicated—it just has to work.
Preparation Method
- Preheat your oven to 350°F (175°C). Line a large baking sheet with parchment paper. Don’t use wax paper—it’ll melt.
- Cream the butter and sugars. In your large bowl, beat the softened butter, brown sugar, and granulated sugar together until light and fluffy. This takes about 3 minutes with a hand mixer. You’re looking for a pale, airy texture. Scrape down the sides once.
- Add the eggs and vanilla. Beat in the eggs one at a time, making sure the first is fully incorporated before adding the second. Then mix in the vanilla extract. The mixture should look smooth and glossy.
- Combine the dry ingredients. In a separate bowl, whisk together the flour, black cocoa powder, baking soda, and salt. If you’re using black gel food coloring, add it to the wet ingredients now—not the dry.
- Mix the dry into the wet. Add the flour mixture to the butter mixture in three additions, mixing on low speed after each. Stop when you can’t see any more white streaks. Overmixing will make the cookie tough.
- Fold in the chocolate chips. Use a spatula to gently fold in the mini chocolate chips. Make sure they’re evenly distributed—nobody wants a chip-free bite.
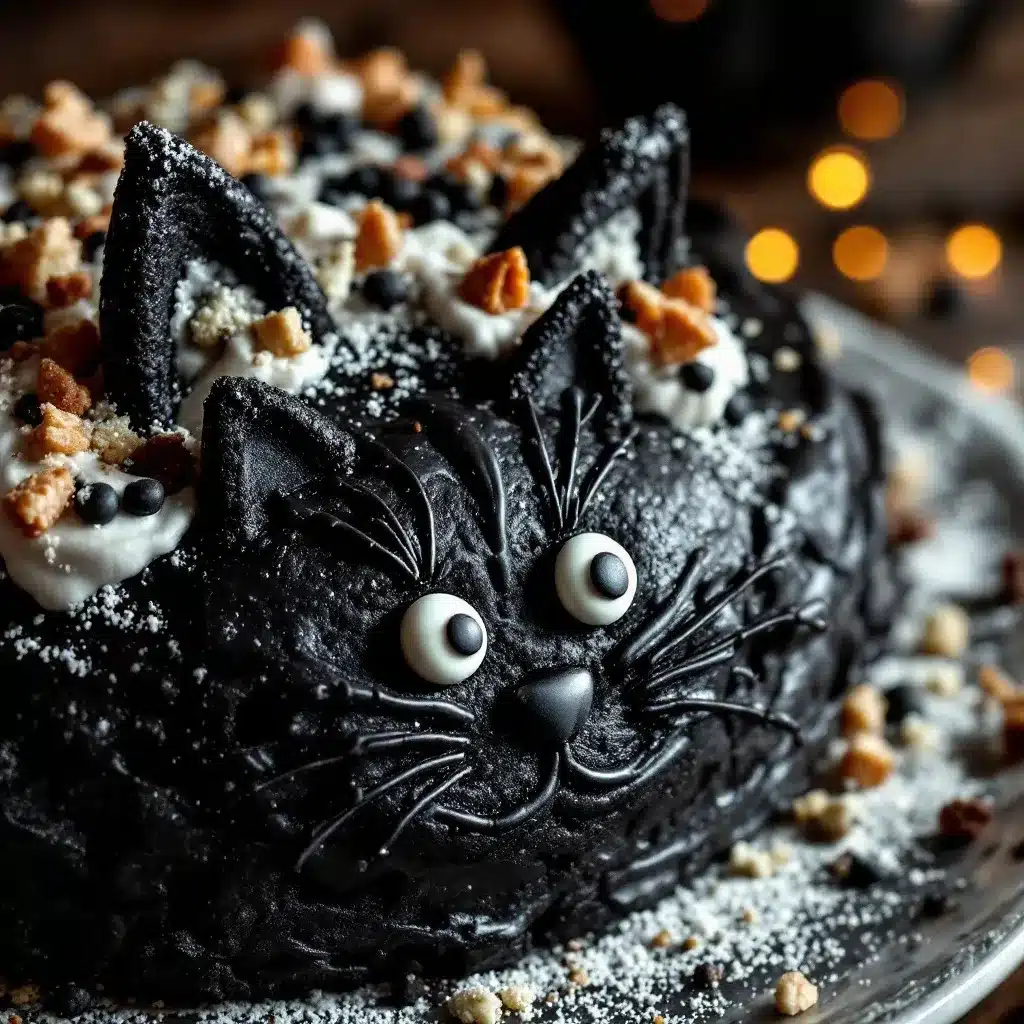
- Shape the cat. Transfer the dough onto the prepared baking sheet. Using your hands (lightly floured if sticky) or an offset spatula, shape it into a rough cat silhouette. Think of a rounded body, a smaller round head, two pointy ears on top, and a curved tail on one side. Keep it about 1/2-inch thick—any thicker and the center won’t bake through.
- Chill the shaped dough. Pop the baking sheet into the fridge for 15 minutes. This is crucial—it prevents the cookie from spreading into a blob. I learned this the hard way. Trust me.
- Bake for 18-22 minutes. The edges should look set and slightly cracked, but the center will still look a little soft. That’s okay—it continues to bake as it cools. Rotate the pan halfway through for even baking.
- Cool completely on the pan. Let the cookie cake sit on the baking sheet for 10 minutes, then transfer it (still on the parchment) to a cooling rack. Wait until it’s completely cool before decorating. Warm cookie + candy eyes = melted mess.
- Decorate the face. Press the candy eyes gently into the cookie. Add the pink M&M for the nose. Use black frosting or licorice strings for the whiskers. If you want to get fancy, pipe a little mouth below the nose.
Cooking Tips & Techniques
I’ve made this Spooky Black Cat Halloween Cookie Cake about a dozen times now, and I’ve collected a few battle scars—and tips—along the way.
Don’t skip the chill. I know it’s tempting to just bake it right away. But the 15-minute chill in the fridge is what keeps your cat looking like a cat instead of a puddle. The butter needs to firm up so the cookie holds its shape.
Black cocoa powder is your friend. Regular cocoa powder will give you a brown cat, not a black one. Black cocoa powder is darker, less acidic, and has that mild Oreo taste. If you can’t find it, use dark cocoa powder and add a tiny drop of black gel food coloring to the wet ingredients. But go easy—too much food coloring tastes bitter.
Watch the edges. The ears and tail are thin, so they’ll bake faster than the body. If they start looking too dark at the 15-minute mark, cover them loosely with small pieces of foil. This is called “tenting,” and it saves your cat’s ears every time.
Let it cool fully. I once decorated a warm cookie cake. The candy eyes slid right off and landed on the counter like tiny, disappointed marbles. Patience is not my strong suit, but it’s necessary here.
Use a template if you’re nervous. Draw a cat shape on a piece of paper, cut it out, and place it on the dough. Use a knife to trace around it. That’s what I did for my first few attempts, and it helps a lot.
Variations & Adaptations
One of the best things about this recipe is how flexible it is. Here are a few ways I’ve tweaked it depending on the occasion or who’s eating it:
- Gluten-Free Version : Swap the all-purpose flour with a 1:1 gluten-free baking flour (I like Bob’s Red Mill). Add an extra tablespoon of milk to the dough—gluten-free flours tend to be drier.
- Vegan Adaptation : Use vegan butter (like Miyoko’s), flax eggs (1 tablespoon ground flax + 3 tablespoons water per egg), and dairy-free chocolate chips. The texture is slightly less chewy, but it’s still delicious.
- White Chocolate Pumpkin Cat : For a fall twist, swap the black cocoa powder for regular cocoa and the chocolate chips for white chocolate chips. Shape it the same way, but use orange frosting for the face details. It’s a cute variation for a moist chocolate chip pumpkin bread kind of vibe.
- Peanut Butter Cat : Reduce the butter to 1/2 cup and add 1/2 cup creamy peanut butter. The peanut butter adds a rich, savory note that pairs beautifully with the chocolate. My kids go crazy for this version.
- Spider Cat : Instead of a tail, shape eight little legs around the body. Add eight candy eyes (yes, eight) and call it a spidery cat hybrid. It’s weird but wonderful—and perfect for a Halloween party.
I’ve also tried making this as individual cookie cats (like cat-shaped cookies on a stick), but honestly? The giant cake version is way more impressive and less fiddly.
Serving & Storage Suggestions
This cookie cake is best served at room temperature, cut into wedges like a pizza. The edges are slightly crisp, the center is soft, and the chocolate chips are perfectly melty. If you want to get fancy, serve it with a scoop of vanilla ice cream or a drizzle of warm chocolate sauce.
How to store it: Place the cookie cake in an airtight container at room temperature. It’ll stay fresh for up to 3 days. Don’t refrigerate it—the fridge dries out baked goods and makes them hard.
Can you freeze it? Yes! Wrap the undecorated cookie cake tightly in plastic wrap, then in foil. Freeze for up to 3 months. When you’re ready to serve, thaw it at room temperature (still wrapped) for about 2 hours, then decorate. The candy eyes don’t freeze well—add those after thawing.
Reheating tip: If you want that just-baked warmth, pop a slice in the microwave for 10-15 seconds. Or warm it in a 300°F oven for 5 minutes. The edges will crisp up again, and the center will get all gooey.
One thing I’ve noticed: the flavors actually get better on day two. The cocoa powder settles into the dough, and the chocolate chips meld with the cookie. It’s still amazing on day one, but day two is where the magic happens.
Nutritional Information & Benefits
Let’s be real—this is a treat, not a health food. But here’s what you’re working with (per serving, based on 12 servings):
- Calories: ~380
- Fat: 18g
- Carbohydrates: 52g
- Protein: 5g
- Fiber: 3g
- Sugar: 34g
That said, black cocoa powder is rich in antioxidants (more than regular cocoa, actually), and dark chocolate has some heart-healthy benefits. Plus, there’s a little protein from the eggs and a tiny bit of fiber from the flour. It’s not a superfood, but it’s not the worst thing you could eat either.
If you’re watching your sugar intake, you can reduce the granulated sugar by 1/4 cup. The cookie won’t be as sweet, but it’ll still taste great. For a lower-fat option, swap half the butter with unsweetened applesauce—though the texture will be more cake-like than cookie-like.
Potential allergens: dairy (butter, chocolate chips), eggs, gluten (flour), and soy (in some chocolate chips). Check your labels if you’re cooking for someone with allergies.
Conclusion
This Spooky Black Cat Halloween Cookie Cake is the kind of recipe that makes you look like a baking hero with minimal effort. It’s fun, it’s festive, and honestly? It tastes amazing. The deep chocolate flavor, the soft-and-chewy texture, and the adorable cat face make it a winner for kids and adults alike.
I love that this recipe doesn’t take itself too seriously. It’s a cookie shaped like a cat. It’s supposed to be fun. So don’t stress about making the ears perfectly pointy or the whiskers exactly symmetrical. Imperfect cats are charming cats. And honestly, the slightly wonky ones are the ones people remember.
If you make this, I’d love to hear about it. Leave a comment below and tell me how your cat turned out—or better yet, tag me in your photos. Did you add a witch hat? Make it a pumpkin cat? Go wild. That’s what Halloween is all about.
Now go preheat that oven. Your spooky cat is waiting.
Frequently Asked Questions
Can I use regular cocoa powder instead of black cocoa powder?
You can, but your cat will be more of a dark brown than a true black. If you want that deep, spooky color, add a drop of black gel food coloring to the wet ingredients. Regular cocoa also has a more acidic taste, so the cookie might be slightly tangier.
Why did my cookie cake spread into a blob?
This usually happens for one of two reasons: you skipped the chill step, or your butter was too soft. Make sure you chill the shaped dough for at least 15 minutes. If your kitchen is warm, chill it for 20. Also, don’t use melted butter—softened is the way to go.
Can I make this ahead of time?
Yes! You can bake the cookie cake up to 2 days in advance. Store it in an airtight container at room temperature. Decorate it the day you plan to serve it—the candy eyes stay fresher that way. You can also freeze the undecorated cookie for up to 3 months.
How do I get clean slices without the cookie crumbling?
Use a sharp chef’s knife and cut in one smooth motion—don’t saw back and forth. Wipe the knife clean between cuts. For the cleanest slices, refrigerate the cookie cake for about 20 minutes before cutting. It firms up the chocolate chips and makes the edges less crumbly.
Can I make this into individual cookies instead of one big cake?
Absolutely. Shape the dough into 12-14 smaller cat shapes (or just round cookies) and bake for 10-12 minutes. Keep an eye on them—smaller cookies bake faster. Decorate each one with its own little face. They’re perfect for party favors or lunchbox surprises.
Pin This Recipe!
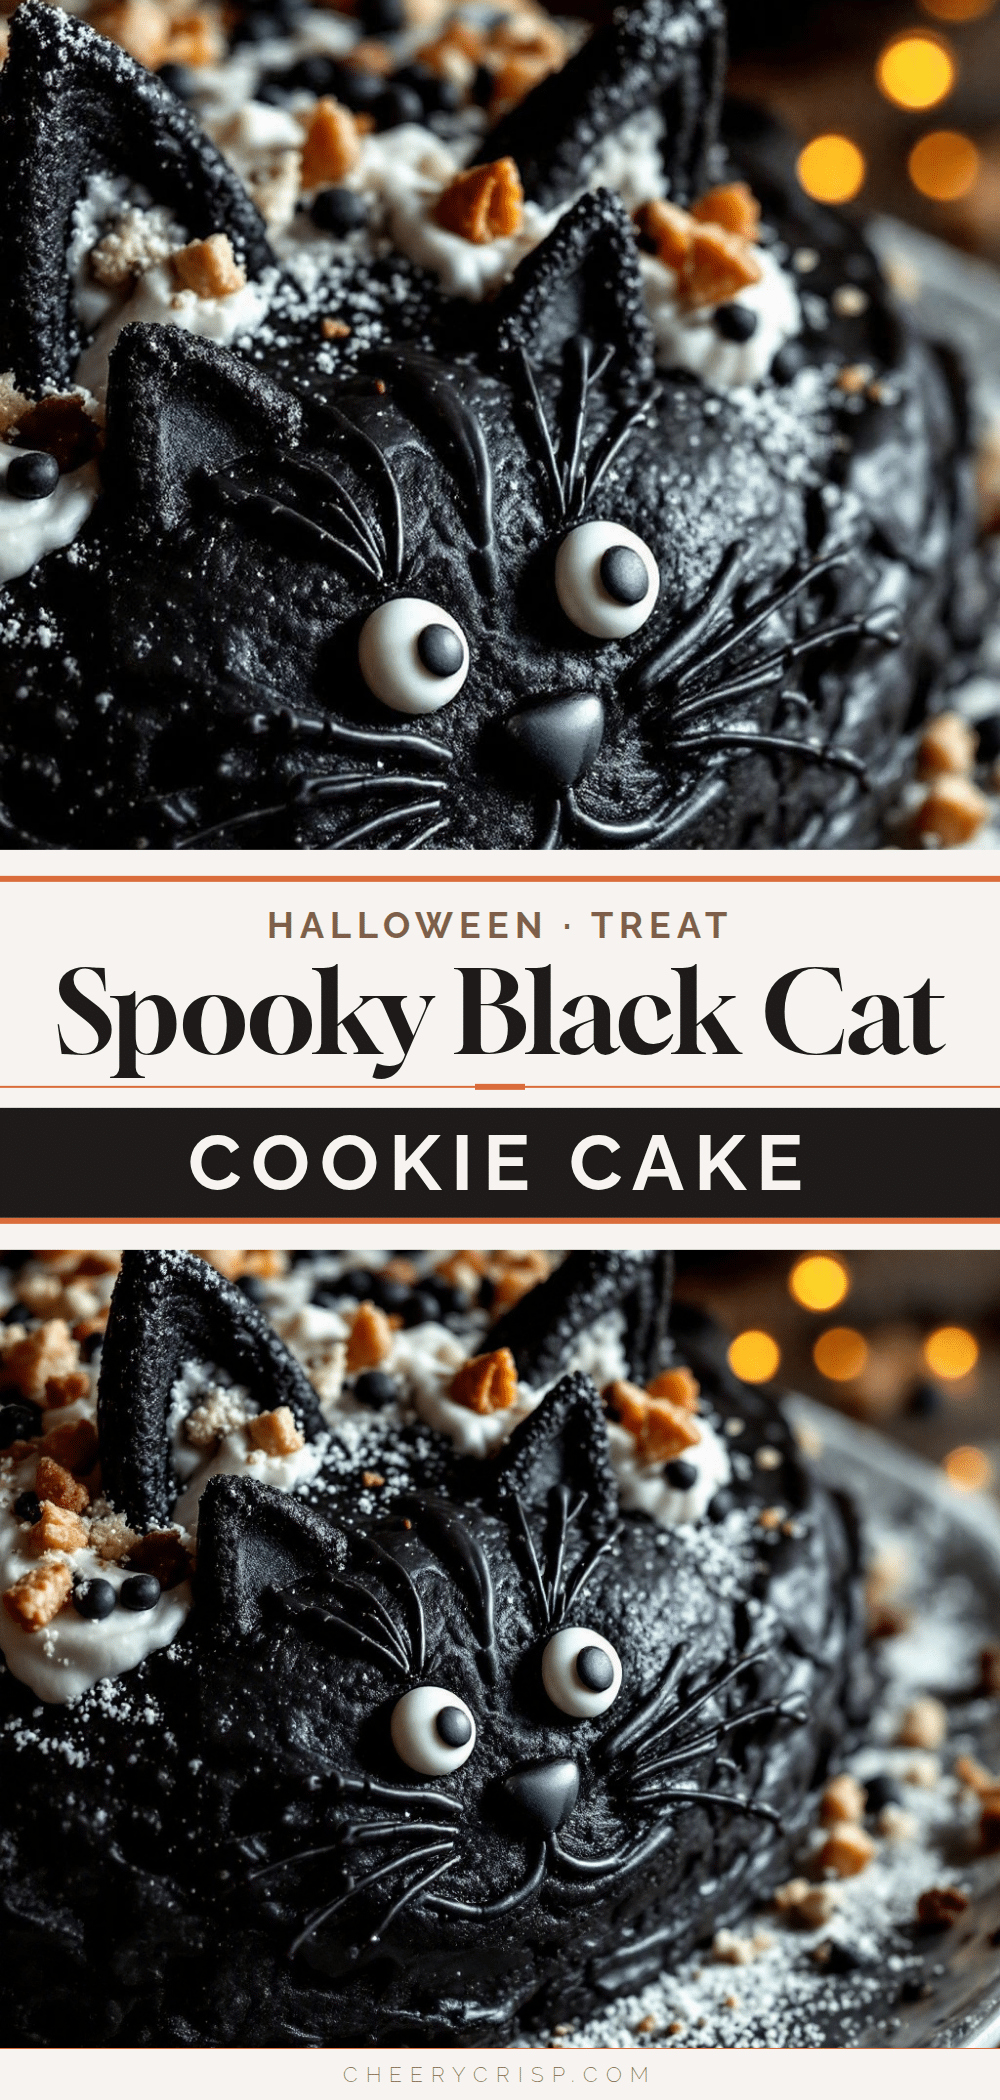
Spooky Black Cat Halloween Cookie Cake

A giant chocolate chip cookie shaped like a black cat, perfect for Halloween parties. This easy recipe uses black cocoa powder for a deep, dark color and a soft, chewy texture that’s sure to impress kids and adults alike.
- Prep Time: 15 minutes
- Cook Time: 20 minutes
- Total Time: 45 minutes
- Yield: 12 servings 1x
- Category: Dessert
- Cuisine: American
Ingredients
- 1 cup (2 sticks) unsalted butter, softened
- 1 cup (200g) light brown sugar, packed
- 1/2 cup (100g) granulated sugar
- 2 large eggs, room temperature
- 2 teaspoons vanilla extract
- 2 1/2 cups (315g) all-purpose flour
- 1/2 cup (50g) black cocoa powder
- 1 teaspoon baking soda
- 1/2 teaspoon salt
- 1 1/2 cups (260g) mini chocolate chips
- 1/2 teaspoon black gel food coloring (optional)
- Candy eyes (flat back)
- 1 pink or red M&M (for nose)
- Black licorice strings or black frosting (for whiskers)
Instructions
- Preheat your oven to 350°F (175°C). Line a large baking sheet with parchment paper.
- In a large bowl, cream the softened butter, brown sugar, and granulated sugar together until light and fluffy, about 3 minutes with a hand mixer. Scrape down the sides once.
- Beat in the eggs one at a time, ensuring the first is fully incorporated before adding the second. Mix in the vanilla extract until smooth and glossy.
- In a separate bowl, whisk together the flour, black cocoa powder, baking soda, and salt. If using black gel food coloring, add it to the wet ingredients now.
- Add the flour mixture to the butter mixture in three additions, mixing on low speed after each. Stop when no white streaks remain. Do not overmix.
- Gently fold in the mini chocolate chips with a spatula until evenly distributed.
- Transfer the dough onto the prepared baking sheet. Using lightly floured hands or an offset spatula, shape it into a rough cat silhouette: a rounded body, a smaller round head, two pointy ears on top, and a curved tail on one side. Keep it about 1/2-inch thick.
- Chill the shaped dough in the fridge for 15 minutes. This prevents spreading.
- Bake for 18-22 minutes, rotating the pan halfway through. The edges should look set and slightly cracked, but the center will still look soft. It continues to bake as it cools.
- Let the cookie cake cool on the baking sheet for 10 minutes, then transfer it (still on the parchment) to a cooling rack. Cool completely before decorating.
- Decorate the face: Press candy eyes gently into the cookie. Add the pink M&M for the nose. Use black frosting or licorice strings for whiskers. Optionally, pipe a small mouth below the nose.
Notes
Don’t skip the chill step—it prevents the cookie from spreading. Black cocoa powder gives the best dark color; if unavailable, use dark cocoa powder plus a drop of black gel food coloring. Tent the ears and tail with foil if they brown too quickly. Cool completely before decorating to prevent candy from sliding off.
Nutrition
- Serving Size: 1 slice (1/12 of cak
- Calories: 380
- Sugar: 34
- Sodium: 220
- Fat: 18
- Saturated Fat: 10
- Carbohydrates: 52
- Fiber: 3
- Protein: 5
Keywords: Halloween cookie cake, black cat cookie, chocolate chip cookie cake, spooky dessert, Halloween baking, easy Halloween recipe



