Love this? Save it for later!
Share the inspiration with your friends
The fourth empty lunchbox in a row came home with a sticky note from my six-year-old. “Mom, can you make the bars again? The ones that don’t fall apart.” That note sat on my counter for two days, staring at me every time I walked past. I’d been buying those store-bought granola bars for months, you know, the ones that claim to be healthy but taste like cardboard wrapped in promises. My kids ate them, sure, but they never asked for them. Not once.
So I went back to my kitchen, determined to figure out a no-bake granola bar that actually held together, tasted like a treat, and didn’t require a trip to some specialty grocery store. Honestly, I failed the first three times. The first batch crumbled into a sad pile of oats and honey. The second was so sticky it could’ve doubled as glue. The third? My youngest took one bite, looked at me with those honest little eyes, and said, “It’s okay, Mom.” That’s code for “please don’t make these again.”
But the fourth batch? That was the one. The texture was just right—chewy but not sticky, firm but not hard. My kids polished off the entire pan in two days. Then they asked me to make more. Then their friends started asking for the recipe. I knew I had something worth sharing when my neighbor texted me at 9 PM asking if I had any left. These healthy no-bake granola bars kids love became our go-to snack, and honestly, they might just become yours too.
Why You’ll Love This Recipe
Let me tell you why these granola bars have earned a permanent spot in my weekly meal prep rotation. I’ve tested this recipe more times than I care to admit, and I can confidently say it delivers every single time.
- Ready in 15 Minutes — No oven required. No baking sheets to scrub. Just mix, press, and chill. Perfect for those afternoons when you realize you have nothing for tomorrow’s lunchboxes.
- Simple Pantry Ingredients — You probably have everything you need right now. Oats, peanut butter, honey, and a few mix-ins. No weird health food store finds or expensive superfood powders.
- Kid-Approved Texture — These bars are chewy without being sticky, firm without being hard. My kids actually fight over the corner pieces because they’re slightly firmer. Who knew?
- Naturally Sweetened — Just a touch of honey or maple syrup gives these bars the perfect sweetness. No refined sugar needed, and honestly, no one misses it.
- Endlessly Customizable — Swap the mix-ins based on what you have or what your kids are into. Chocolate chips, dried fruit, seeds, coconut—they all work beautifully.
What makes these different from every other no-bake granola bar recipe out there? It’s the ratio. I spent weeks tweaking the wet-to-dry ingredient balance until I found the sweet spot where the bars hold together without being overly sticky or dry. The secret is letting the mixture sit for five minutes before pressing it into the pan. That small step gives the oats time to absorb the liquid, creating a texture that’s perfectly chewy and stable.
These aren’t just healthy—they’re the kind of snack that makes you feel good about what you’re feeding your family. And when your kid asks for them instead of a packaged treat, you know you’ve won.
What Ingredients You Will Need
This recipe uses simple, wholesome ingredients that work together to create bars that are both delicious and nutritious. Here’s everything you’ll need:
For the Base
- 2 cups old-fashioned rolled oats — Not quick oats! Old-fashioned oats give the bars the right texture and structure. Quick oats turn into mush and don’t hold up as well.
- 1 cup creamy peanut butter — Natural peanut butter works great, but make sure it’s well-stirred. I prefer using a brand like Justin’s or Kirkland for consistent results. If you use the kind with oil on top, stir it really well before measuring.
- 1/2 cup honey or maple syrup — Honey gives a slightly different flavor than maple syrup. Both work, but honey creates a slightly firmer bar. Use pure maple syrup for a vegan option.
- 1 teaspoon vanilla extract — Pure vanilla extract adds warmth and depth. The imitation stuff works in a pinch, but pure is better.
- 1/4 teaspoon salt — Just a pinch to balance the sweetness and bring out the flavors. If your peanut butter is already salted, you can skip this.
For the Mix-Ins
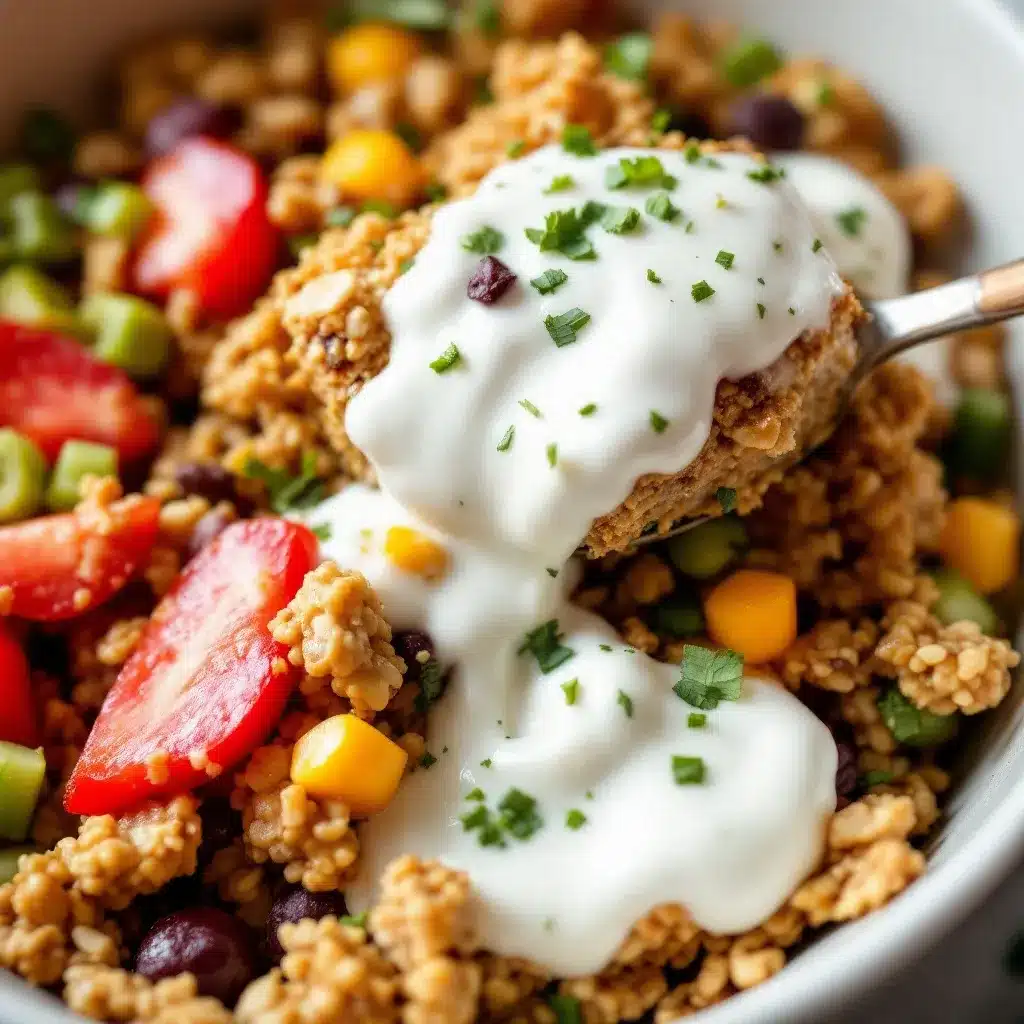
- 1/2 cup mini chocolate chips — Mini chips distribute more evenly than regular-sized ones. I like Enjoy Life brand for dairy-free options or Lily’s for lower sugar.
- 1/4 cup chopped almonds or peanuts — Adds crunch and healthy fats. Chop them small so they don’t create weak spots in the bars. You can also use sunflower seeds for a nut-free version.
- 1/4 cup dried cranberries or raisins — Adds natural sweetness and chewy texture. Chop larger dried fruits like apricots into small pieces.
Optional Add-Ins
- 2 tablespoons flax seeds or chia seeds — For extra fiber and omega-3s. Completely optional but a nice boost.
- 1/4 cup unsweetened shredded coconut — Adds texture and a subtle tropical flavor. Toast it lightly first for even more flavor.
- 1 tablespoon coconut oil — Helps the bars hold together better if you’re using a runnier nut butter. Melt it with the peanut butter mixture.
Equipment Needed
You don’t need fancy equipment for these bars, which is part of why I love this recipe so much. Here’s what you’ll need:
- 8×8-inch baking pan — This is the perfect size for thick bars. A 9×9 works too, but your bars will be slightly thinner. Line it with parchment paper for easy removal.
- Parchment paper — Absolute lifesaver. Leave enough overhang on two sides so you can lift the whole block out cleanly. Trust me on this one.
- Medium saucepan — For melting the peanut butter and honey together. A heavy-bottomed pan works best to prevent scorching.
- Large mixing bowl — For combining the dry ingredients. Any bowl you have will work.
- Spatula or wooden spoon — For mixing everything together. A silicone spatula is my favorite because it scrapes the sides clean.
- Measuring cups and spoons — Accurate measurements matter here. The right ratio is what makes these bars hold together.
- Sharp knife — For cutting clean bars. A chef’s knife works better than a butter knife. Run it under hot water between cuts for cleaner edges.
I’ve made these bars with just a bowl and a microwave when I was traveling, and they still turned out great. The microwave method works fine—just heat the peanut butter and honey in 30-second bursts, stirring between each.
Preparation Method
Let me walk you through exactly how to make these healthy no-bake granola bars kids love. The process is straightforward, but a few small details make all the difference.
- Prepare your pan. Line an 8×8-inch baking pan with parchment paper, leaving about 2 inches of overhang on two opposite sides. This creates handles that let you lift the entire block out later. Lightly spray the parchment with cooking spray if you want extra insurance against sticking.
- Combine the dry ingredients. In a large mixing bowl, combine 2 cups of old-fashioned rolled oats, 1/2 cup mini chocolate chips, 1/4 cup chopped almonds, and 1/4 cup dried cranberries. Stir everything together with a spatula so the mix-ins are evenly distributed. Set this bowl aside.
- Melt the wet ingredients. In a medium saucepan over low heat, combine 1 cup creamy peanut butter, 1/2 cup honey, 1 teaspoon vanilla extract, and 1/4 teaspoon salt. Stir constantly as the mixture warms up. You’re not trying to boil it—just heat it until everything comes together into a smooth, glossy sauce. This takes about 2-3 minutes. The mixture should be warm but not hot to the touch. If it gets too hot, it can make the bars crumbly later.
- Let the mixture rest. Here’s the trick that changed everything for me. Pour the warm peanut butter mixture over the dry ingredients and stir until everything is well coated. Then let the mixture sit in the bowl for 5 minutes. I know it’s tempting to skip this step, but don’t. During this rest time, the oats absorb some of the liquid, which helps the bars hold together much better. The mixture will look wet at first, but after 5 minutes, it will thicken noticeably.
- Press into the pan. Transfer the mixture to your prepared pan. Here’s where you need to be firm—literally. Use the back of a spatula or a flat-bottomed measuring cup to press the mixture down as firmly as you can. Press into the corners first, then work your way across. The more pressure you apply, the better your bars will hold together. I press until the surface is completely flat and even. This step is non-negotiable for bars that don’t crumble.
- Chill until firm. Place the pan in the refrigerator for at least 1 hour. Two hours is better. The bars need time to set completely. If you’re in a hurry, you can pop them in the freezer for 30 minutes, but watch them closely—they can get too hard if left too long.
- Cut and serve. Once the mixture is completely firm, lift the entire block out using the parchment paper handles. Place it on a cutting board. Use a sharp knife to cut into 12 even bars. For the cleanest cuts, run your knife under hot water and wipe it dry between each cut. Store the bars in an airtight container in the refrigerator.
A quick note about texture: if your mixture seems too dry when you’re pressing it into the pan, you can add a teaspoon of warm water or melted coconut oil. If it seems too wet, add a tablespoon more oats. The perfect mixture should feel like damp sand that holds together when squeezed.
Cooking Tips & Techniques
After making these bars dozens of times, I’ve learned a few things the hard way. Here are my best tips for perfect results every time:
Don’t overheat the peanut butter mixture. I once got distracted and let the mixture simmer for too long. The bars turned out dry and crumbly because the honey started to caramelize. Keep the heat low and stir constantly. You just want everything warm enough to combine smoothly.
Press firmly and evenly. This is the most common mistake I see. If you don’t press the mixture down firmly enough, the bars will fall apart when you cut them. I use a flat-bottomed measuring cup and really lean into it. My kids actually love helping with this part—they press down with all their weight, and honestly, they do a great job.
Use room temperature peanut butter. Cold peanut butter is harder to mix and can create lumps. If your peanut butter has been in the fridge, let it sit out for 15-20 minutes before starting. Or just microwave it for 10 seconds to soften it up.
Chill completely before cutting. I know it’s hard to wait, but cutting too early is a recipe for disaster. The bars need that full hour in the fridge to set up properly. If you cut them too soon, you’ll end up with a sticky mess. I learned this the hard way when I tried to rush the process before a playdate.
Store properly for best texture. These bars are best kept in the refrigerator. At room temperature, they soften and can become sticky. In the fridge, they stay perfectly chewy for up to two weeks. If you want them softer, let them sit at room temperature for 5 minutes before eating.
Double the batch. Honestly, these bars disappear fast in my house. I almost always double the recipe and press it into a 9×13 pan. The extra batch goes straight into the freezer for busy mornings. Trust me, future you will thank present you.
Variations & Adaptations
One of the best things about this recipe is how flexible it is. Here are some of my favorite variations:
Nut-Free Version — Swap the peanut butter for sunflower seed butter or WowButter. Use sunflower seeds instead of almonds. Make sure your oats are certified gluten-free if needed, and check that your chocolate chips are nut-free too. This version works perfectly for school lunchboxes with nut-free policies.
Vegan Option — Replace the honey with pure maple syrup or brown rice syrup. Use dairy-free chocolate chips. The bars will be slightly softer with maple syrup, so you might want to add an extra tablespoon of oats to compensate.
Low-Sugar Version — Reduce the honey to 1/3 cup and add 2 tablespoons of unsweetened applesauce. Use sugar-free chocolate chips or skip them entirely and add extra dried fruit. The bars won’t be as sweet, but they’re still delicious.
Protein-Packed Bars — Add 2 tablespoons of your favorite protein powder to the dry ingredients. Vanilla or chocolate both work well. You might need to add an extra tablespoon of honey to balance the dryness of the protein powder. I’ve used collagen powder too, and it blends in seamlessly.
Tropical Twist — Swap the dried cranberries for dried mango or pineapple, and add 1/4 cup toasted coconut flakes. Use macadamia nuts instead of almonds. These taste like a vacation in bar form.
Fall Spice Version — Add 1 teaspoon of cinnamon and 1/4 teaspoon of nutmeg to the dry ingredients. Use dried apples instead of cranberries, and add 2 tablespoons of pumpkin seeds. Perfect for autumn lunchboxes.
My personal favorite variation is the chocolate peanut butter version. I add an extra 2 tablespoons of cocoa powder to the dry ingredients and use peanut butter chips instead of chocolate chips. It feels like a dessert, but it’s still packed with wholesome ingredients.
Serving & Storage Suggestions
These bars are incredibly versatile when it comes to serving. Here’s how I handle them:
Serving Temperature — I prefer these bars straight from the fridge for a firm, chewy texture. If you like them softer, let them sit at room temperature for 5-10 minutes before eating. My kids actually love them frozen straight from the freezer on hot summer days.
Presentation Ideas — For lunchboxes, I wrap individual bars in parchment paper and tie them with kitchen twine. It looks cute and keeps them fresh. For snacks, I arrange them on a plate with fresh fruit and yogurt for dipping. For parties, I cut them into smaller bite-sized squares and arrange them on a platter.
What to Serve With Them — These bars pair beautifully with a glass of cold milk or a warm cup of tea. For a more substantial snack, serve them alongside some creamy peanut butter banana overnight oats for a complete breakfast. They also go great with a creamy 5-minute peanut butter protein smoothie bowl for a post-workout refuel.
Storage Instructions — Store the bars in an airtight container in the refrigerator for up to 2 weeks. Layer them between sheets of parchment paper to prevent sticking. If you’re stacking them, make sure they’re completely firm before layering.
Freezer Instructions — These bars freeze beautifully. Wrap each bar individually in plastic wrap, then place them in a freezer-safe bag or container. They’ll keep for up to 3 months. To thaw, just let them sit at room temperature for 10-15 minutes, or pop one directly into a lunchbox—it’ll be thawed by lunchtime.
Flavor Development — Here’s something interesting: these bars actually taste better the day after you make them. The flavors meld together overnight, and the texture becomes more uniform. So if you can, make them a day ahead. Your patience will be rewarded.
For busy mornings, I like to prep a batch of these alongside some easy no-bake protein balls for a complete grab-and-go breakfast solution. Both recipes use similar ingredients, so it’s efficient too.
Nutritional Information & Benefits
Let me break down what’s in each bar and why these ingredients are good for you. Keep in mind these values are estimates and will vary based on your specific ingredients and mix-ins.
| Nutrient | Per Bar (1/12 of recipe) |
|---|---|
| Calories | 245 |
| Total Fat | 13g |
| Saturated Fat | 3g |
| Carbohydrates | 28g |
| Fiber | 4g |
| Sugar | 14g |
| Protein | 8g |
| Sodium | 95mg |
Health Benefits — These bars pack a surprising nutritional punch. The oats provide soluble fiber that helps keep blood sugar stable and supports heart health. Peanut butter adds protein and healthy monounsaturated fats that keep kids full and focused through the school day. The nuts and seeds contribute vitamin E, magnesium, and zinc—all important for growing bodies.
Dietary Considerations — This recipe is naturally dairy-free if you use dairy-free chocolate chips. It can be made gluten-free by using certified gluten-free oats. For a nut-free version, simply swap the peanut butter for sunflower seed butter. The recipe is vegetarian as written and vegan with the maple syrup substitution.
Potential Allergens — This recipe contains peanuts (from peanut butter), tree nuts (from almonds), and may contain dairy (from chocolate chips). Always check your ingredient labels, especially if you’re serving these to children with allergies.
I personally love that these bars give my kids sustained energy without the sugar crash that comes from store-bought snacks. They’re substantial enough for an after-school snack but not so heavy that they spoil dinner.
Conclusion
These healthy no-bake granola bars kids love have genuinely changed our snack game in this house. No more store-bought bars with ingredients I can’t pronounce. No more crumbly homemade disasters that fall apart in lunchboxes. Just simple, wholesome bars that my kids actually ask for—and that I feel good about giving them.
The beauty of this recipe is how forgiving it is. You can swap ingredients based on what you have, adjust the sweetness to your taste, and customize the mix-ins to match your family’s preferences. It’s the kind of recipe that becomes a staple, the one you make on autopilot because you’ve memorized it and know it works.
I’d love to hear how these turn out for you. Did your kids love them? Did you try a fun variation? Drop a comment below and let me know. And if you’re looking for more easy, kid-friendly snacks, you might also enjoy my small batch chocolate chip cookies for two or these healthy baked pumpkin protein oatmeal cups for another grab-and-go option.
Happy snacking, friends. Your lunchboxes are about to get a whole lot better.
Frequently Asked Questions
Can I use quick oats instead of old-fashioned oats?
I wouldn’t recommend it. Quick oats are more finely processed and absorb liquid differently. They tend to make the bars mushy and less structured. Stick with old-fashioned rolled oats for the best texture. If you only have quick oats on hand, you can use them, but expect a softer, less chewy bar.
Why did my granola bars fall apart?
This usually happens for one of three reasons: you didn’t press the mixture firmly enough into the pan, you cut them before they were fully chilled, or your wet-to-dry ratio was off. Make sure you’re pressing down with serious force, chilling for at least an hour, and measuring your ingredients accurately. If your mixture seemed dry when pressing, add a teaspoon of honey or melted coconut oil next time.
Can I make these without peanut butter?
Absolutely! Sunflower seed butter, almond butter, cashew butter, or WowButter all work beautifully. Just keep in mind that different nut and seed butters have different consistencies. Sunflower seed butter is usually runnier, so you might need to add an extra tablespoon of oats. Almond butter is often thicker, so you might need a tiny splash of warm water to help everything come together.
How long do these bars stay fresh?
Stored in an airtight container in the refrigerator, these bars stay fresh for up to 2 weeks. In the freezer, they’ll keep for up to 3 months. I don’t recommend storing them at room temperature for more than a day or two, as they can become sticky and soft. For lunchboxes, I pack them straight from the fridge—they’ll be perfectly thawed by lunchtime.
Can I reduce the sugar in this recipe?
Yes, you can cut the honey down to 1/3 cup without major issues. The bars will be less sweet and slightly more crumbly. For a lower-sugar option, try adding 2 tablespoons of unsweetened applesauce along with the reduced honey—the applesauce adds moisture and natural sweetness without extra sugar. You can also use sugar-free chocolate chips or skip them entirely.
Pin This Recipe!
Healthy No-Bake Granola Bars Kids Love (Easy 15-Min Recipe)
These healthy no-bake granola bars are chewy, kid-approved, and ready in just 15 minutes. Made with simple pantry ingredients like oats, peanut butter, and honey, they hold together perfectly and are endlessly customizable.
- Prep Time: 15 minutes
- Cook Time: 0 minutes
- Total Time: 1 hour 15 minutes (includes chilling)
- Yield: 12 bars 1x
- Category: Snack
- Cuisine: American
Ingredients
- 2 cups old-fashioned rolled oats
- 1 cup creamy peanut butter
- 1/2 cup honey or maple syrup
- 1 teaspoon vanilla extract
- 1/4 teaspoon salt
- 1/2 cup mini chocolate chips
- 1/4 cup chopped almonds or peanuts
- 1/4 cup dried cranberries or raisins
- 2 tablespoons flax seeds or chia seeds (optional)
- 1/4 cup unsweetened shredded coconut (optional)
- 1 tablespoon coconut oil (optional)
Instructions
- Line an 8×8-inch baking pan with parchment paper, leaving about 2 inches of overhang on two opposite sides. Lightly spray with cooking spray if desired.
- In a large mixing bowl, combine 2 cups old-fashioned rolled oats, 1/2 cup mini chocolate chips, 1/4 cup chopped almonds, and 1/4 cup dried cranberries. Stir to distribute evenly.
- In a medium saucepan over low heat, combine 1 cup creamy peanut butter, 1/2 cup honey, 1 teaspoon vanilla extract, and 1/4 teaspoon salt. Stir constantly until smooth and glossy, about 2-3 minutes. Do not boil.
- Pour the warm peanut butter mixture over the dry ingredients and stir until well coated. Let the mixture rest for 5 minutes to allow oats to absorb liquid.
- Transfer the mixture to the prepared pan. Press down firmly and evenly using the back of a spatula or a flat-bottomed measuring cup, especially into the corners.
- Refrigerate for at least 1 hour (2 hours is better) until firm. For faster setting, freeze for 30 minutes.
- Lift the block out using the parchment handles. Place on a cutting board and cut into 12 even bars using a sharp knife. Run the knife under hot water and wipe dry between cuts for cleaner edges.
- Store in an airtight container in the refrigerator for up to 2 weeks, or freeze for up to 3 months.
Notes
Let the mixture rest for 5 minutes before pressing to allow oats to absorb liquid. Press firmly into the pan for bars that hold together. Chill completely before cutting. For best texture, store in the refrigerator. Bars taste even better the next day.
Nutrition
- Serving Size: 1 bar
- Calories: 245
- Sugar: 14
- Sodium: 95
- Fat: 13
- Saturated Fat: 3
- Carbohydrates: 28
- Fiber: 4
- Protein: 8
Keywords: no-bake granola bars, healthy granola bars, kid-friendly snacks, easy granola bars, homemade granola bars, peanut butter granola bars



