Love this? Save it for later!
Share the inspiration with your friends
Second-time-in-a-Thursday and I was still staring at the air fryer basket like it owed me money. The smell of melting mozzarella was drifting through the house, which is usually the good part, but this time? It smelled like regret. I had just pulled out another batch of chicken that was supposed to be crispy but ended up feeling more like “steamed in a plastic box with breadcrumbs.” You know that feeling. You’re hungry, you’re tired, and you just want dinner that doesn’t taste like cardboard. Honestly, I almost gave up on the air fryer version entirely. I considered just ordering pizza or eating cereal for the third night in a row.
But then I remembered the first time I made this. That was two weeks ago. I had watched a tutorial that promised “restaurant-quality crunch” without the oil bath. I followed it to the letter. And it failed. Miserably. The breading slid right off. The chicken was dry. It was a mess. So, I tried again last week. I adjusted the flour mix. I changed the oil spray technique. I even preheated the basket this time. Better? Maybe. But still not *that* crispy. Not the kind of crispy that shatters when you bite into it.
That brings me to tonight. The third attempt. I stopped trying to follow the rules and started listening to the food. I realized I was treating the chicken like a delicate soufflé when it needed to be treated like a brick. I stopped flipping it too early. I stopped crowding the basket. And I stopped being afraid of a little extra panko. When that basket opened tonight, the scent hit me first. Garlic. Herbs. Toasted bread. And the sound? A little *crunch* as I lifted the tongs. I took a bite. And for the first time, I didn’t think about the previous two failures. I just thought about how good this was.
It’s not magic. It’s just patience. And a little bit of stubbornness. I made this because I was tired of compromising on texture. I wanted the comfort of classic chicken parmesan without the guilt of frying a pan full of oil. And honestly? I think I finally cracked it. It’s not perfect, but it’s close enough that I’m willing to make it again. And again. And again. Until it’s just right.
Why You’ll Love This Crispy Air Fryer Chicken Parmesan Recipe
Look, I get it. Chicken Parmesan is a classic for a reason. It’s warm, it’s cheesy, and it feels like a hug on a plate. But let’s face it: traditional versions are a pain. You have to dredge, you have to fry in hot oil that splatters everywhere, and then you have to deal with the cleanup. It’s a lot of work for a Tuesday night. This air fryer version changes the game. It’s not just a shortcut; it’s a better way to cook the dish. The hot air circulation creates a crunch that’s surprisingly close to deep-fried, but without the mess or the heavy grease. You get that satisfying snap when you bite into the coating, followed by the tender, juicy chicken inside. It’s the best of both worlds.
Here’s why this recipe is worth your time:
* **Quick & Easy**: You can have this on the table in under 30 minutes. Seriously. From prep to plate, it’s faster than waiting for a delivery driver. Perfect for busy weeknights when you’re starving and don’t have the energy to cook for an hour.
* **Simple Ingredients**: You likely have everything in your kitchen right now. Breadcrumbs, parmesan, Italian seasoning, chicken breasts, marinara, and mozzarella. No fancy grocery trips needed. No obscure spices you’ll use once and forget.
* **Perfect for Date Night**: This feels fancy enough to serve to guests, but it’s easy enough to make when you’re cooking for one. It’s great for impressing someone without the stress of a complicated meal.
* **Crowd-Pleaser**: Kids love the cheese pull. Adults love the crunch. It’s the kind of dish that clears the plate. I’ve made this for family dinners, and even the picky eaters go back for seconds.
* **Unbelievably Delicious**: The texture and flavor combo is next-level comfort food. The breading stays crispy even after being topped with sauce and cheese. That’s the holy grail of chicken parmesan.
What makes this different from other air fryer recipes? It’s the double-coating technique. Most recipes just dip the chicken in flour, then egg, then breadcrumbs. I add a second layer of breadcrumbs mixed with extra parmesan. This creates a thicker, more durable crust that doesn’t fall off in the air fryer. It’s a small tweak, but it makes a huge difference. It’s my best version, and once you try it, you’ll know why.
What Ingredients You Will Need
This recipe relies on simple, high-quality ingredients to deliver bold flavor and satisfying texture without the fuss. The key is in the breading mix. You don’t need anything fancy, but you do need the right ratios. Using fresh parmesan instead of the pre-grated stuff in the green can makes a huge difference in flavor and how well the breading sticks. Also, don’t skimp on the olive oil spray. It’s what helps the breadcrumbs turn golden brown instead of staying pale and dusty.
Here’s what you’ll need to gather:
* **Chicken Breasts**: Boneless, skinless. About 1.5 to 2 pounds. I recommend pounding them to an even thickness so they cook uniformly. If you buy large breasts, split them in half.
* **All-Purpose Flour**: About ½ cup. This helps the egg wash adhere to the chicken. If you need a gluten-free option, you can swap this for a 1:1 gluten-free flour blend, though the texture might be slightly different.
* **Large Eggs**: 2 large eggs, beaten. Room temperature eggs work best for even coating.
* **Milk**: 2 tablespoons of milk added to the eggs. This makes the coating slightly lighter and helps prevent it from getting too heavy.
* **Panko Breadcrumbs**: 1 cup. Panko is crucial. Regular breadcrumbs are too dense and won’t get crispy. Panko has jagged edges that create air pockets for crunch.
* **Parmesan Cheese**: ½ cup, freshly grated. Freshly grated parmesan melts better and tastes sharper than the pre-shredded kind, which has anti-caking agents.
* **Italian Seasoning**: 1 tablespoon. A mix of dried oregano, basil, and thyme. This gives the classic Italian flavor profile.
* **Garlic Powder**: 1 teaspoon. Adds depth without adding moisture.
* **Salt and Black Pepper**: To taste. Don’t forget to season the breading mix itself, not just the chicken.
* **Marinara Sauce**: 1 to 1.5 cups. Use your favorite jarred sauce or homemade. If you like it spicy, add some red pepper flakes.
* **Mozzarella Cheese**: 1 cup, shredded. Low-moisture mozzarella is best. Fresh mozzarella can make the dish too watery.
* **Fresh Basil**: For garnish. Adds a pop of color and freshness at the end.
* **Olive Oil Spray**: Essential for achieving that golden-brown crust.
I personally prefer using a brand like Kirkland Signature for the panko because the flakes are consistent and large. For the marinara, I like a simple tomato basil sauce without too many added sugars. If you’re watching sodium, look for a low-sodium version of the sauce. The cheese is where I don’t compromise. Freshly grated parmesan from a block tastes infinitely better. It’s worth the extra minute of grating.
Equipment Needed
You don’t need a lot of fancy gadgets for this recipe. The air fryer is the star of the show, but there are a few other tools that make the process smoother.
* **Air Fryer**: Obviously. Any size will work, but a basket-style air fryer is easier to manage for individual pieces. If you have a smaller model, you might need to cook in batches.
* **Meat Mallet or Rolling Pin**: To pound the chicken breasts to an even thickness. This ensures they cook evenly. If you don’t have a mallet, a heavy skillet works too.
* **Three Shallow Bowls**: For the dredging station. One for flour, one for egg wash, one for breadcrumbs.
* **Wire Rack (Optional)**: If your air fryer basket doesn’t have holes, a small wire rack can help air circulate underneath the chicken. But it’s not strictly necessary.
* **Tongs**: For flipping the chicken. Tongs are better than a fork because you won’t pierce the chicken and lose juices.
* **Kitchen Shears**: For snipping fresh basil at the end.
I’ve tried using parchment paper liners in the air fryer, and while they make cleanup easier, they can block airflow and prevent the bottom of the chicken from getting crispy. I recommend skipping them unless you’re worried about sticking. If you do use them, make sure to spray them with oil too. Also, keep your air fryer basket clean. Old grease buildup can smoke and affect the taste of your food. A quick wipe down before each use is a good habit.
Preparation Method
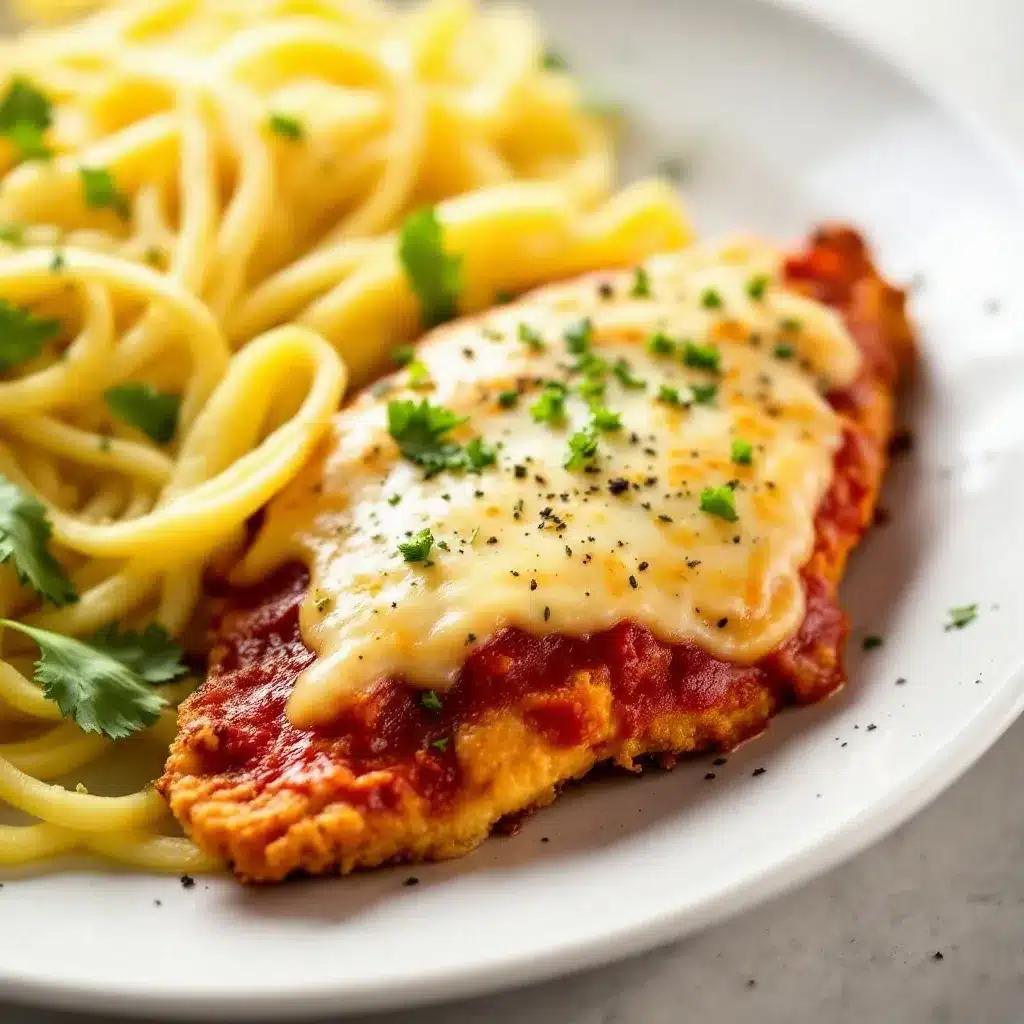
Let’s get into the nitty-gritty. This part is straightforward, but precision matters. Follow these steps closely for the best results.
1. **Prep the Chicken**: Start by placing the chicken breasts between two sheets of plastic wrap or parchment paper. Use a meat mallet to pound them to an even ½-inch thickness. This is important. If some parts are thick and others are thin, the thin parts will dry out before the thick parts are cooked. Season both sides generously with salt and pepper.
2. **Set Up the Dredging Station**: Get three shallow bowls. In the first, add the all-purpose flour. In the second, whisk the eggs with milk, a pinch of salt, and pepper. In the third, combine the panko breadcrumbs, grated parmesan, Italian seasoning, and garlic powder. Mix the dry ingredients well.
3. **Dredge the Chicken**: Take a piece of chicken and dredge it in the flour, shaking off any excess. Dip it into the egg wash, letting the excess drip off. Then press it firmly into the breadcrumb mixture. Make sure it’s fully coated. Press down gently to help the crumbs stick. Repeat with the remaining chicken.
4. **Preheat the Air Fryer**: Preheat your air fryer to 400°F (200°C) for about 3-5 minutes. This step is crucial for getting that initial crunch.
5. **Coat and Cook**: Lightly spray the air fryer basket with olive oil. Place the breaded chicken pieces in the basket, making sure they don’t touch. If you need to cook in batches, do so. Spray the tops of the chicken generously with olive oil. This helps them brown.
6. **Air Fry**: Cook for 10-12 minutes. Flip the chicken halfway through the cooking time. Spray the other side with oil after flipping. The chicken is done when the internal temperature reaches 165°F (74°C) and the coating is golden brown.
7. **Add Sauce and Cheese**: Once the chicken is cooked, remove the basket. Spoon a generous amount of marinara sauce over each piece. Top with shredded mozzarella cheese.
8. **Melt the Cheese**: Return the basket to the air fryer and cook for another 2-3 minutes, or until the cheese is melted and bubbly. Watch it closely so the cheese doesn’t burn.
9. **Garnish and Serve**: Remove from the air fryer. Garnish with fresh basil leaves. Serve immediately while hot and crispy.
Cooking Tips & Techniques
I’ve made my fair share of mistakes in the air fryer, so you don’t have to. Here are some tips to ensure your chicken parmesan turns out perfectly.
* **Don’t Skip the Pounding**: I know it’s an extra step, but pounding the chicken is non-negotiable. Uneven chicken leads to uneven cooking. Some parts will be rubbery, others dry. Take the time to get it even.
* **Press the Breadcrumbs**: When you coat the chicken, press the breadcrumbs into the meat. Don’t just roll it around. You want a tight bond so the coating doesn’t fall off in the air fryer.
* **Oil is Your Friend**: The air fryer uses hot air, not oil, to cook. But a little oil on the surface helps the breadcrumbs brown and crisp up. Don’t skimp on the spray. Use a light, even coat.
* **Don’t Overcrowd**: Air needs to circulate. If you pack the basket too tight, the chicken will steam instead of fry. Leave space between the pieces. If you have a small air fryer, cook in batches. It’s better to wait 5 minutes than to have soggy chicken.
* **Check the Temperature**: Use a meat thermometer. Chicken breasts can dry out quickly if overcooked. Pull them at 165°F (74°C). They’ll continue to cook slightly after you remove them.
* **Fresh Cheese Melts Better**: Pre-shredded cheese contains cellulose to prevent clumping. This can make the cheese grainy or slow to melt. Grate your own mozzarella and parmesan for the best texture and flavor.
* **Let It Rest**: After cooking, let the chicken rest for a minute or two before serving. This allows the juices to redistribute and the cheese to set slightly. It makes slicing easier and prevents a mess.
Variations & Adaptations
This recipe is versatile. You can tweak it to suit your dietary needs or taste preferences. Here are a few ideas:
* **Gluten-Free Option**: Swap the all-purpose flour and panko breadcrumbs for gluten-free alternatives. There are gluten-free panko blends available that work well. Just make sure to check the Italian seasoning label to ensure it’s gluten-free.
* **Spicy Kick**: Add red pepper flakes to the breadcrumb mixture. Or, use a spicy marinara sauce. If you like heat, sprinkle some cayenne pepper on the chicken before breading.
* **Turkey Version**: Substitute chicken breasts with turkey cutlets. Turkey is leaner, so it cooks faster. Be careful not to overcook it. Reduce the cooking time by 2-3 minutes.
* **Veggie Twist**: Use thick slices of eggplant or zucchini instead of chicken. You’ll need to salt the vegetables first to draw out moisture, then pat them dry before breading. Cook them for a shorter time, as they cook faster than chicken.
* **Herb Swap**: If you don’t have Italian seasoning, use a mix of dried oregano, basil, and thyme. Or try adding dried rosemary for a different flavor profile.
* **Cheese Variations**: Swap mozzarella for provolone or fontina. Both melt beautifully and add a different flavor. You can also add a layer of ricotta cheese for extra creaminess.
I’ve tried using almond flour for the coating, and it works, but it browns faster. Keep an eye on it so it doesn’t burn. I also like adding a little parmesan to the egg wash for extra savory flavor. It’s a small tweak, but it adds depth.
Serving & Storage Suggestions
Chicken parmesan is best served hot and fresh. Pair it with a simple side dish to balance the meal.
* **Serving Suggestions**: Serve with spaghetti, zucchini noodles, or a side salad. A light arugula salad with lemon vinaigrette cuts through the richness of the cheese. Garlic bread is a classic choice, but a simple green salad is lighter and refreshing.
* **Storage**: Store leftovers in an airtight container in the refrigerator for up to 3 days. The chicken will stay moist, but the breading may soften over time.
* **Reheating**: To reheat, use the air fryer. Place the chicken in the basket and cook at 350°F (175°C) for 3-5 minutes. This restores the crispiness better than a microwave. If you use a microwave, the breading will get soggy.
* **Freezing**: You can freeze the breaded chicken before cooking. Place them on a baking sheet and freeze until solid, then transfer to a freezer bag. Cook from frozen, adding a few minutes to the cooking time. Do not freeze the cooked chicken with sauce and cheese, as the texture will suffer.
* **Flavor Development**: The flavors meld nicely overnight. If you’re meal prepping, this recipe holds up well in the fridge. Just reheat properly to maintain texture.
Nutritional Information & Benefits
This recipe offers a lighter take on a classic comfort food. Here’s a rough estimate of the nutritional value per serving (based on 4 servings):
* **Calories**: Approximately 400-450 calories per piece.
* **Protein**: High protein content from the chicken and cheese, around 35g per serving. Great for muscle repair and satiety.
* **Carbohydrates**: Moderate carbs from the breadcrumbs and sauce, around 20g per serving.
* **Fat**: Lower fat than deep-fried versions, with around 15g per serving. Most of the fat comes from the cheese and olive oil spray.
* **Dietary Notes**: This recipe is not gluten-free or dairy-free by default. For gluten-free, use GF breadcrumbs. For dairy-free, use vegan cheese and omit the parmesan.
* **Health Benefits**: Chicken is a lean source of protein. Tomatoes in the sauce provide lycopene, an antioxidant. Fresh basil adds vitamins A and K.
I try to balance comfort food with nutritious ingredients. Using lean chicken breasts and controlling the oil amount helps keep this dish healthier. It’s still a treat, but not an unhealthy one.
Conclusion
This Crispy Air Fryer Chicken Parmesan is my go-to recipe for a reason. It’s easy, delicious, and satisfies that craving for comfort food without the hassle. I hope you try it and enjoy it as much as I do. Feel free to customize it with your favorite herbs or cheeses. Make it your own.
If you make this recipe, I’d love to hear how it turns out. Leave a comment below and let me know your thoughts. Did you add extra spice? Did you use zucchini instead? I read every comment and love hearing your adaptations. Share this recipe with friends who need a quick dinner idea. And don’t forget to save this post for later.
Thanks for reading. Happy cooking!
FAQs
Can I use chicken thighs instead of breasts?
Yes, you can use boneless, skinless chicken thighs. They are juicier and more forgiving if slightly overcooked. Adjust the cooking time to about 8-10 minutes, as thighs are often thinner.
Why is my chicken breading falling off?
This usually happens if the chicken isn’t pounded evenly or if the breadcrumbs aren’t pressed firmly into the meat. Make sure to dredge in flour first, then egg, then breadcrumbs, pressing down to adhere. Also, ensure the air fryer basket isn’t overcrowded.
Can I cook this in the oven?
Yes, preheat your oven to 400°F (200°C). Place the breaded chicken on a wire rack set over a baking sheet. Spray with oil and bake for 20-25 minutes, flipping halfway. Add sauce and cheese for the last 5 minutes to melt.
How do I keep the breading crispy?
The key is the panko breadcrumbs and the olive oil spray. Make sure to spray both sides of the chicken. Also, don’t cover the chicken with sauce until it’s fully cooked. Adding sauce too early can make the breading soggy.
Can I make this ahead of time?
You can bread the chicken and store it in the fridge for up to 24 hours before cooking. Keep it covered. Cook just before serving for the best texture. Do not add sauce and cheese until you are ready to eat.
Pin This Recipe!
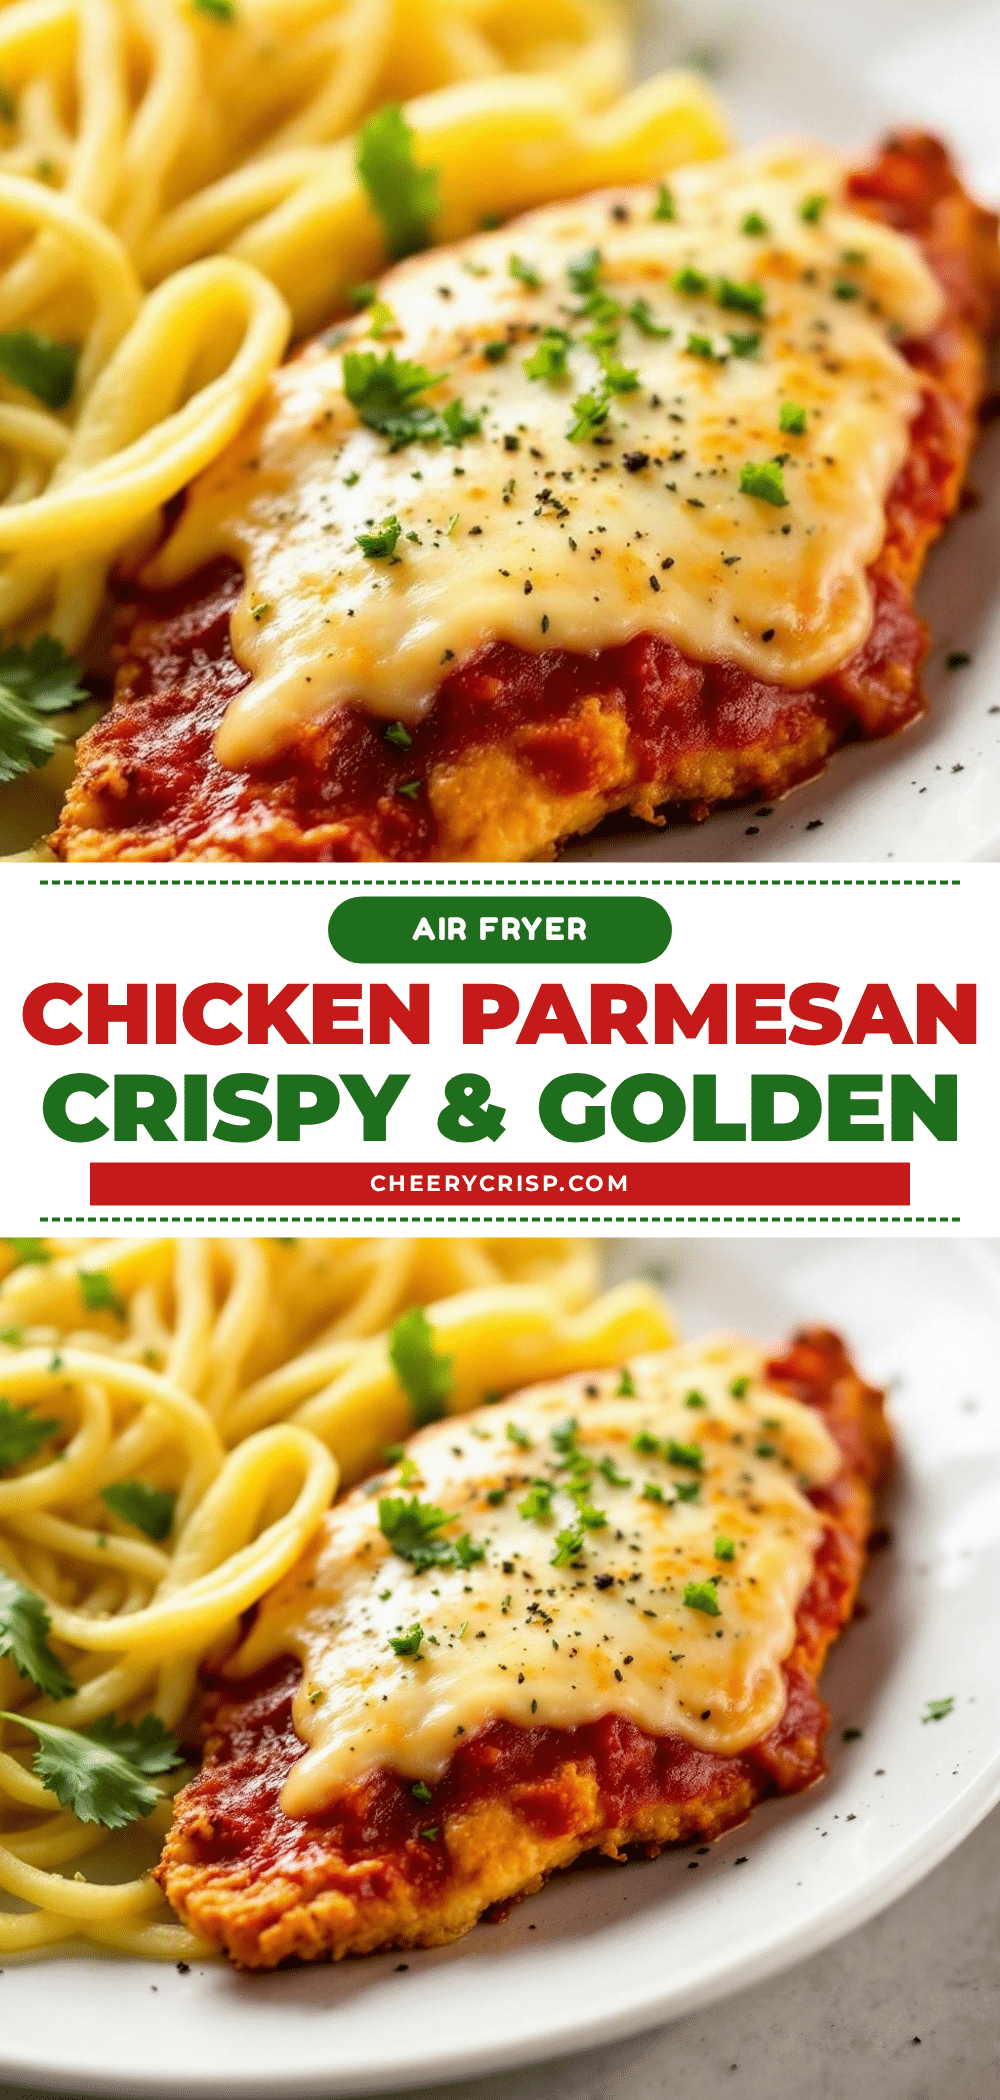
Crispy Air Fryer Chicken Parmesan: Easy 30-Minute Dinner

A healthier, crispy version of classic chicken parmesan made in an air fryer. This recipe uses a double-coating technique with panko and parmesan to achieve a restaurant-quality crunch without deep frying, ready in under 30 minutes.
- Prep Time: 15 minutes
- Cook Time: 15 minutes
- Total Time: 30 minutes
- Yield: 4 servings 1x
- Category: Main Course
- Cuisine: Italian
Ingredients
- 1.5 to 2 lbs boneless, skinless chicken breasts
- 1/2 cup all-purpose flour
- 2 large eggs, beaten
- 2 tablespoons milk
- 1 cup panko breadcrumbs
- 1/2 cup freshly grated parmesan cheese
- 1 tablespoon Italian seasoning
- 1 teaspoon garlic powder
- Salt and black pepper to taste
- 1 to 1.5 cups marinara sauce
- 1 cup shredded low-moisture mozzarella cheese
- Fresh basil for garnish
- Olive oil spray
Instructions
- Place chicken breasts between plastic wrap or parchment paper and pound to an even 1/2-inch thickness. Season both sides with salt and pepper.
- Set up three shallow bowls: one with flour, one with whisked eggs and milk, and one with panko, parmesan, Italian seasoning, garlic powder, salt, and pepper.
- Dredge each chicken piece in flour, dip in egg wash, then press firmly into the breadcrumb mixture to ensure a tight coating.
- Preheat air fryer to 400°F (200°C) for 3-5 minutes.
- Lightly spray the air fryer basket with olive oil. Place chicken pieces in the basket without overcrowding. Spray tops generously with olive oil.
- Air fry for 10-12 minutes, flipping halfway through and spraying the other side with oil. Cook until internal temperature reaches 165°F (74°C).
- Remove chicken from air fryer. Spoon marinara sauce over each piece and top with shredded mozzarella.
- Return to air fryer for 2-3 minutes until cheese is melted and bubbly.
- Garnish with fresh basil and serve immediately.
Notes
Do not skip pounding the chicken to ensure even cooking. Press breadcrumbs firmly to prevent them from falling off. Use fresh grated parmesan and low-moisture mozzarella for best texture. Do not overcrowd the air fryer basket; cook in batches if necessary. Let chicken rest for a minute before serving.
Nutrition
- Serving Size: 1 piece of chicken w
- Calories: 425
- Sugar: 4
- Sodium: 600
- Fat: 15
- Saturated Fat: 6
- Carbohydrates: 20
- Fiber: 1
- Protein: 35
Keywords: air fryer chicken parmesan, crispy chicken, healthy dinner, quick meals, air fryer recipes, chicken breast recipes, comfort food



