Love this? Save it for later!
Share the inspiration with your friends
It is just past seven on a Tuesday in November, and the only thing I want is crispy honey garlic chicken thighs. The rain is drumming a steady, hypnotic rhythm against the windowpane, blurring the streetlights into soft, orange smears. Inside, the kitchen is quiet, save for the hiss of oil heating in the skillet. There is a specific kind of peace that comes with this hour, when the day’s noise has faded but the night has not yet fully settled in.
I remember the first time I made this dish properly. It was three winters ago, during a particularly bleak stretch where the gray skies seemed to press down on the roof. I was tired, my shoulders tight from sitting at a desk all day, and I didn’t have the energy for anything complex. I needed something warm, something sweet, and something that tasted like comfort without requiring hours of standing over a stove.
The smell of garlic hitting hot oil changed the atmosphere instantly. It wasn’t just dinner; it was an anchor. The sweet tang of the honey mingling with the savory crunch of the skin created a scent that filled every corner of the house. My partner walked in, shook off the wet umbrella, and let out a sigh that I knew meant relief. We ate in silence, watching the rain streak the glass, feeling the warmth spread through our chests.
This recipe belongs to those quiet, rainy evenings. It is not for festive holidays or loud dinner parties. It is for the solitary cook who needs a moment of clarity, or for a couple seeking a low-key night in. The skin gets impossibly crisp, shattering slightly when you cut into it, while the meat underneath stays juicy and tender. The sauce clings to every piece, sticky and glossy, demanding that you dip your fork in for one more bite.
I have made this dozens of times since that night. Sometimes the rain is harder, sometimes the wind howls. But the ritual remains the same. I season the thighs, I sear them until they are golden brown, and I whisk the sauce. It is simple, yes, but it is the simplicity that matters. It reminds me that good food doesn’t need to be complicated to be meaningful.
Honestly, there is something deeply satisfying about controlling the heat in your own kitchen while the world outside is wet and cold. You know how it is. You just want to come home to something that feels like a hug. This dish provides that. It is reliable, forgiving, and incredibly flavorful. I keep coming back to it because it works, every single time. It is the kind of meal that stays with you, not just in your stomach, but in your memory.
Why You’ll Love This Recipe
You might wonder why this version stands out among the thousands of chicken recipes online. Let’s be real, most honey garlic chicken recipes are either too sweet or the sauce turns into a gloopy mess. I have tested this method through trial and error, and it delivers a balance that is actually achievable on a weeknight. The key is getting the skin crispy before adding the liquid, which prevents sogginess and creates a texture contrast that is genuinely addictive.
Here is what makes this recipe a standout in your weekly rotation:
- Quick & Easy: The entire process takes about 30 minutes from start to finish. It is perfect for busy weeknights when you are hungry but don’t want to order takeout.
- Simple Ingredients: You likely already have everything in your pantry. No fancy grocery trips needed. Just chicken, honey, garlic, soy sauce, and a few basic spices.
- Perfect for Cozy Dinners: This dish pairs beautifully with roasted vegetables or mashed potatoes, making it ideal for those chilly nights when you want a hearty meal.
- Crowd-Pleaser: Kids and adults alike love the sweet and savory combination. It is a foolproof way to get everyone to eat their dinner without complaint.
- Unbelievably Delicious: The texture is next-level. The skin crisps up like a chip, while the meat remains succulent. The sauce has the perfect consistency to coat every bite.
What makes this recipe different is the technique of searing the chicken skin-side down first. Many recipes toss everything in a pan at once, which steams the chicken instead of frying it. By taking the time to get that golden crust, you create a structural integrity that holds up to the sauce. It is a small step that makes a huge difference in the final result.
Connect emotionally with why this works. This recipe isn’t just good—it is the kind that makes you close your eyes after the first bite. It hits that sweet spot between comfort food and something slightly more elevated. It’s comfort food reimagined—faster, but with the same soul-soothing satisfaction. It is perfect for impressing guests without stress, or turning a simple meal into something memorable.
What Ingredients You Will Need
This recipe uses simple, wholesome ingredients to deliver bold flavor and satisfying texture without the fuss. The beauty of this dish lies in its accessibility. You do not need specialty stores or hard-to-find items. The magic happens in how these basic components interact under heat.
Here is what you will need to gather before you start cooking:
- Chicken Thighs (bone-in, skin-on): This is non-negotiable for the best results. Boneless thighs work, but they cook too fast and lack the rich flavor. Look for fresh, organic thighs if possible for better texture.
- Neutral Oil: Avocado oil or vegetable oil works best due to their high smoke points. Olive oil can burn at the high heat needed for crisping the skin.
- Garlic (fresh): Use about 4-5 cloves. Pre-minced jarred garlic lacks the bright, sharp flavor needed here. Fresh garlic provides the aromatic base that defines the dish.
- Honey: Use raw honey for a deeper flavor profile. It provides the necessary sweetness to balance the salty soy sauce. Avoid corn syrup-based sweeteners.
- Soy Sauce: Regular soy sauce is fine, but a low-sodium version allows you to control the saltiness. I recommend Kikkoman for consistency.
- Apple Cider Vinegar: A splash of this adds acidity to cut through the richness of the honey and chicken fat. It brightens the entire sauce.
- Chicken Broth: Use low-sodium broth to deglaze the pan and create the sauce volume. Water can work in a pinch, but broth adds depth.
- Garlic Powder: This adds an extra layer of garlic flavor that survives the cooking process better than fresh cloves alone.
- Red Pepper Flakes: Optional, but recommended. A pinch adds a subtle heat that complements the sweetness beautifully.
- Green Onions: For garnish. They add a fresh, crunchy contrast to the soft, saucy chicken.
- Sesame Seeds: Toasted sesame seeds add a nutty aroma and visual appeal. They are a classic pairing with Asian-inspired dishes.
I have found that using bone-in thighs is crucial for this specific recipe. The bone helps conduct heat evenly, ensuring the meat near the bone is cooked through without drying out the outer layers. If you must use boneless, reduce the cooking time significantly. For the honey, I prefer wildflower honey as it has a floral note that pairs well with the garlic. If you are making this for someone with a soy allergy, you can substitute tamari or coconut aminos.
Equipment Needed
You do not need a fully equipped professional kitchen to make this dish. A few reliable tools will get the job done efficiently.
- Large Skillet or Cast Iron Pan: A 12-inch skillet is ideal. Cast iron is preferred because it retains heat well, which helps in crisping the chicken skin evenly. If you do not have one, a heavy-bottomed stainless steel pan works too.
- Tongs:
- Whisk: A small whisk is necessary for emulsifying the sauce ingredients together quickly before adding them to the pan.
- Cutting Board: A dedicated board for raw chicken is essential for food safety. Make sure it is large enough to handle multiple thighs.
- Meat Thermometer: This is the best tool for ensuring your chicken is cooked safely. It takes the guesswork out of doneness.
I once tried making this in a non-stick pan, and while it worked, the skin did not get as crispy as I liked. The surface texture of cast iron or stainless steel provides better searing. If you are using a non-stick pan, be very careful not to overheat it, as it can degrade the coating. Clean your skillet immediately after cooking to prevent the honey sauce from hardening and sticking. Budget-friendly options include a standard aluminum skillet, but ensure it is heavy enough to prevent hot spots.
Preparation Method
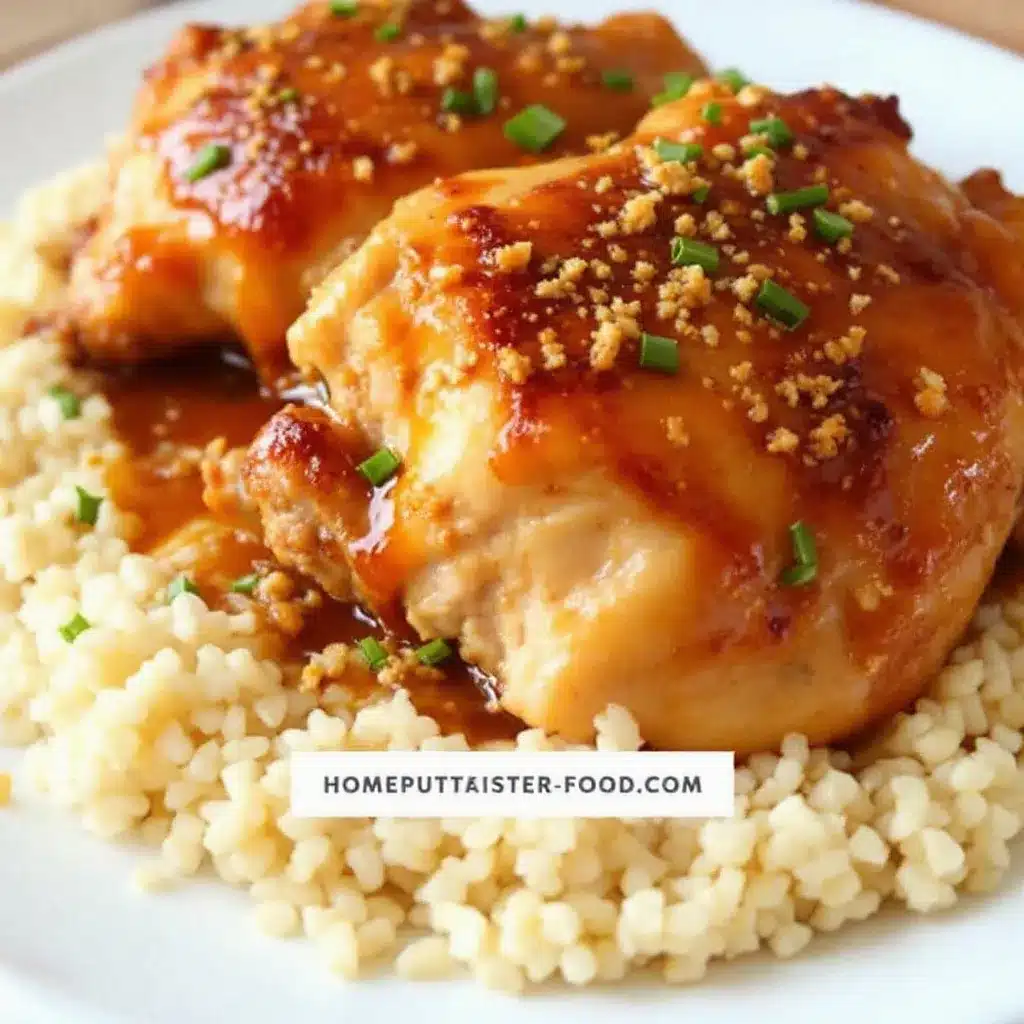
Getting the chicken crispy requires patience and attention to heat. Follow these steps carefully for the best results.
- Prepare the Chicken: Pat the chicken thighs completely dry with paper towels. This is the most important step. Moisture is the enemy of crispiness. Season both sides generously with salt, pepper, and garlic powder. Let them sit at room temperature for 15 minutes while you prep the sauce.
- Make the Sauce: In a small bowl, whisk together the honey, soy sauce, apple cider vinegar, and a splash of chicken broth. Set this aside. Having the sauce ready before you start cooking prevents burning the garlic later.
- Heat the Pan: Place your large skillet over medium-high heat. Add the neutral oil and let it heat until it shimmers but does not smoke. This should take about 2-3 minutes.
- Sear the Chicken: Place the chicken thighs in the pan, skin-side down. Do not overcrowd the pan; cook in batches if necessary. Press them down gently with a spatula to ensure even contact with the pan. Cook for 6-8 minutes without moving them. You want a deep golden-brown crust.
- Flip and Cook: Once the skin is crispy, flip the thighs over. Cook the other side for 5-7 minutes. The internal temperature should reach 165°F (74°C). If using a thermometer, insert it into the thickest part without touching the bone.
- Remove the Chicken: Transfer the cooked chicken to a plate. Leave the rendered fat and any browned bits in the pan. These bits are flavor gold.
- Make the Glaze: Reduce the heat to medium-low. Add the minced fresh garlic to the pan and sauté for 30 seconds until fragrant. Be careful not to burn it. Pour in the sauce mixture and let it simmer for 2-3 minutes. It will bubble and thicken slightly.
- Combine: Return the chicken thighs to the pan, skin-side up. Spoon the sauce over the chicken. Let it cook for another 1-2 minutes to let the flavors meld and the sauce coat the chicken evenly.
- Rest and Serve: Remove from heat. Let the chicken rest for 5 minutes before serving. This allows the juices to redistribute. Garnish with sliced green onions and sesame seeds.
Troubleshooting tip: If the sauce breaks or looks oily, add a teaspoon of cold water and whisk vigorously. This will help emulsify it back together. If the chicken is not cooked through after the skin is crispy, cover the pan with a lid for the last few minutes to steam the interior gently.
Cooking Tips & Techniques
Professional chefs emphasize the importance of dry surfaces for searing. I learned this the hard way when I rushed the drying step and ended up with steamed chicken. Always, always pat your meat dry. It seems like a minor detail, but it changes everything.
Another common mistake is adding the garlic too early. Fresh garlic burns quickly and turns bitter. By adding it after removing the chicken and reducing the heat, you preserve its sweet, aromatic quality. If you prefer a stronger garlic flavor, you can add half the garlic at the beginning with the chicken and the rest at the end.
Timing is everything. Do not walk away from the pan while the chicken is searing. The difference between golden brown and burnt is often less than a minute. Keep a close eye on the edges of the skin. If it starts to darken too fast, lower the heat slightly.
Multitasking strategy: While the chicken rests, you can quickly steam some broccoli or prepare a simple salad. This makes the entire meal come together faster. Consistency comes with practice. Once you get the hang of the searing time, you will be able to make this recipe almost by muscle memory.
Variations & Adaptations
This recipe is surprisingly adaptable to different dietary needs and flavor preferences.
- Spicy Version: Add a tablespoon of sriracha or chili crisp to the sauce mixture for a kick of heat. This pairs well with the sweetness of the honey.
- Gluten-Free: Simply swap regular soy sauce for tamari or coconut aminos. The flavor profile remains nearly identical.
- Low-Carb: Use erythritol or monk fruit sweetener instead of honey. You will need to adjust the quantity as these sweeteners are much sweeter than sugar.
- Vegetarian Swap: Replace chicken thighs with firm tofu or seitan. Press the tofu well and follow the same searing and saucing steps.
- Herb Infused: Add a sprig of fresh thyme or rosemary to the pan while the chicken rests. This adds a woody, earthy note that complements the garlic.
I once tried making this with drumsticks instead of thighs, and it worked well, though the cooking time was slightly longer. For a lighter version, you can bake the chicken in the oven at 400°F (200°C) for 35 minutes, then toss in the sauce on the stovetop. It is not as crispy, but it is easier to manage in large batches.
Serving & Storage Suggestions
Serve this dish immediately while the skin is still crisp. It pairs wonderfully with steamed jasmine rice, which soaks up the extra sauce beautifully. Roasted Brussels sprouts or garlic green beans are excellent side dishes that complement the savory notes. For a beverage, a crisp lager or a dry white wine like Sauvignon Blanc cuts through the richness perfectly.
To store leftovers, let the chicken cool completely before placing it in an airtight container. It will keep in the refrigerator for up to 3 days. The flavors actually deepen after a day, making it great for lunch the next day.
To reheat, avoid the microwave if you want to preserve the texture. Reheat in a skillet over medium heat with a splash of water to steam the meat slightly. This restores the moisture without making the skin soggy. You can also freeze the cooked chicken for up to 2 months. Thaw in the refrigerator overnight and reheat gently.
Nutritional Information & Benefits
Chicken thighs are a nutrient-dense protein source, rich in B vitamins and minerals like zinc and iron. They are also higher in healthy fats than breast meat, which helps keep you feeling full longer. The honey provides quick energy and contains antioxidants, though it should be consumed in moderation due to its sugar content.
This recipe is naturally gluten-free if you use tamari. It is also dairy-free, making it suitable for those with lactose intolerance. The garlic offers anti-inflammatory properties, adding a health benefit to the delicious flavor. Portion control is key, as the sauce adds calories, but the high protein content makes it a satisfying meal that supports muscle repair and overall wellness.
Conclusion
This crispy honey garlic chicken thighs recipe is worth trying because it balances ease with exceptional flavor. It is a dish that respects your time while delivering a restaurant-quality result. I encourage you to customize it based on your spice tolerance or dietary needs. I love this recipe because it brings a sense of calm to chaotic evenings. It is reliable, comforting, and always a hit.
Please try this recipe and let me know how it turns out for you. Share your variations or tips in the comments below. If you enjoy this, consider checking out my crispy baked chicken wings for another game-day favorite. You might also appreciate the easy one-pot cheeseburger potato soup for a heartier option. Enjoy the process of cooking, and remember that good food starts with good ingredients.
FAQs
Can I use boneless chicken thighs?
Yes, but reduce the cooking time by about 2-3 minutes per side. They cook faster and can dry out if overcooked.
Why is my chicken skin not crispy?
Likely because the skin was not dry enough before searing, or the pan was not hot enough. Ensure you pat the skin thoroughly and wait for the oil to shimmer.
Can I make the sauce ahead of time?
Yes, you can whisk the sauce ingredients together and store them in the fridge for up to 2 days. Bring it to room temperature before adding to the pan.
What can I serve with this dish?
Steamed rice, roasted vegetables, or a simple green salad work best. The sauce pairs well with starchy sides that can soak it up.
How do I prevent the garlic from burning?
Add the garlic after removing the chicken from the pan and lowering the heat. Sauté it briefly until fragrant, then add the sauce immediately.
Pin This Recipe!

Crispy Honey Garlic Chicken Thighs: Best Easy Dinner

A comforting and easy weeknight dinner featuring bone-in, skin-on chicken thighs seared until golden and crisp, then coated in a sticky, sweet, and savory honey garlic sauce.
- Prep Time: 15 minutes
- Cook Time: 20 minutes
- Total Time: 35 minutes
- Yield: 4 servings 1x
- Category: Main Course
- Cuisine: Asian-Inspired
Ingredients
- 4–6 bone-in, skin-on chicken thighs
- 2 tablespoons neutral oil (avocado or vegetable)
- 4–5 cloves fresh garlic, minced
- 1/4 cup honey (raw or wildflower preferred)
- 3 tablespoons soy sauce (or tamari for gluten-free)
- 1 tablespoon apple cider vinegar
- 1/4 cup chicken broth (low-sodium)
- 1 teaspoon garlic powder
- Salt and black pepper to taste
- 1/2 teaspoon red pepper flakes (optional)
- 2 green onions, sliced (for garnish)
- 1 tablespoon toasted sesame seeds (for garnish)
Instructions
- Pat the chicken thighs completely dry with paper towels and season both sides generously with salt, pepper, and garlic powder. Let them sit at room temperature for 15 minutes.
- In a small bowl, whisk together the honey, soy sauce, apple cider vinegar, and chicken broth. Set aside.
- Place a large skillet or cast iron pan over medium-high heat. Add the neutral oil and heat until it shimmers but does not smoke (about 2-3 minutes).
- Place the chicken thighs in the pan, skin-side down. Do not overcrowd the pan; cook in batches if necessary. Press gently to ensure even contact. Cook for 6-8 minutes without moving until the skin is deep golden brown and crispy.
- Flip the thighs over and cook the other side for 5-7 minutes, or until the internal temperature reaches 165°F (74°C).
- Transfer the cooked chicken to a plate, leaving the rendered fat and browned bits in the pan.
- Reduce heat to medium-low. Add the minced fresh garlic to the pan and sauté for 30 seconds until fragrant.
- Pour in the sauce mixture and let it simmer for 2-3 minutes until it bubbles and thickens slightly.
- Return the chicken thighs to the pan, skin-side up. Spoon the sauce over the chicken and cook for another 1-2 minutes to coat evenly.
- Remove from heat and let the chicken rest for 5 minutes. Garnish with sliced green onions and sesame seeds before serving.
Notes
Ensure chicken skin is completely dry before searing to achieve maximum crispiness. Do not add fresh garlic too early as it burns quickly; add it after removing the chicken and lowering the heat. If the sauce breaks, whisk in a teaspoon of cold water to emulsify. For a spicy version, add sriracha or chili crisp to the sauce.
Nutrition
- Serving Size: 1-2 chicken thighs p
- Calories: 450
- Sugar: 20
- Sodium: 680
- Fat: 28
- Saturated Fat: 7
- Carbohydrates: 22
- Protein: 32
Keywords: honey garlic chicken, crispy chicken thighs, easy dinner, weeknight meals, comfort food, gluten-free options, one-pan meal



