Love this? Save it for later!
Share the inspiration with your friends
It’s 7:45 AM on a Tuesday, and the house is still holding its breath before the chaos begins. I’m standing at the counter, coffee mug in hand, staring at the lunchbox on the table. My son needs a snack that won’t turn to mush by second period, and honestly, I don’t have the energy to bake something that requires an oven and thirty minutes of waiting. That’s when I reach for the container of peanut butter and the bag of chocolate chips. These easy no-bake chocolate peanut butter lunchbox bars are my secret weapon for those mornings when I need a win, fast. They don’t look like much, but they taste like a quiet victory. You know how it is when you’re rushing around, trying to be the perfect parent and chef all at once? This recipe is the opposite of stressful. It’s just simple, solid ingredients coming together in a bowl. I’ve made these so many times that my hands move on autopilot now. There’s a specific comfort in knowing that no matter how crazy the day gets, I can throw something together that my family will actually eat. It’s not about fancy plating or perfect cuts. It’s about feeding people with love, even if that love comes in a square of chilled, dense goodness. The kitchen is quiet for just a moment longer, and I smile because I know the hard part is already done.
Why You’ll Love This Recipe
Let’s be real for a second. Not every dessert needs to be a five-hour project. Sometimes you just want something that works. These bars are the ultimate test of efficiency without sacrificing flavor. I’ve spent years in kitchens, testing recipes that fail and ones that shine. This one is a shining star because it respects your time. Here is why this recipe has earned a permanent spot in my rotation:
- Quick & Easy: You’re looking at about 15 minutes of active prep time. That’s it. The rest is just chilling. It’s perfect for busy weeknights or when you need a last-minute treat for a school event.
- Simple Ingredients: You likely have everything you need right now. Peanut butter, chocolate, oats, and maybe some honey or syrup. No fancy grocery trips needed. It’s pantry-friendly cooking at its best.
- Perfect for Lunchboxes: Unlike cookies that crumble or brownies that get warm and messy, these bars hold their shape. They are sturdy, dense, and won’t make a mess in a lunch bag. They are also great for lunchbox ideas that need a sweet finish.
- Crowd-Pleaser: Kids love them because they taste like candy. Adults love them because they aren’t overly sweet. It’s a balance that works for everyone at the table.
- Unbelievably Delicious: The texture is chewy and rich. The peanut butter adds a salty depth that cuts through the sweetness of the chocolate. It’s next-level comfort food that doesn’t require heat.
What makes this different from other no-bake bars? It’s the ratio. I’ve tried recipes that are too crumbly or too hard as a rock. This version uses the right amount of binding agent to keep it soft but firm. It’s the kind of bar that makes you close your eyes after the first bite. It’s not just a snack; it’s a moment of pause. And if you are looking for other easy lunchbox ideas that are just as reliable, this fits right in.
What Ingredients You Will Need
This recipe relies on wholesome, simple ingredients to deliver bold flavor and satisfying texture without the fuss. You don’t need specialty stores or hard-to-find items. The magic here is in the quality of the basics. I like to keep these staples on hand because they are versatile. Here is what you need to make these bars, grouped by how you’ll use them.
- For the Base:
- 2 cups old-fashioned rolled oats (gluten-free if needed, but make sure they are certified GF)
- 1 cup creamy peanut butter (I recommend Jif or Skippy for consistency, but natural peanut butter works if you warm it up first)
- 1/2 cup unsalted butter, softened (adds richness and helps bind the mix)
- 1 cup granulated sugar (white sugar keeps the texture light; brown sugar makes it chewier)
- 1/2 cup honey or light corn syrup (this is the sticky binder that holds everything together)
- 1 teaspoon vanilla extract (don’t skip this; it adds depth)
- A pinch of salt (balances the sweetness perfectly)
- For the Chocolate Topping:
- 1 cup semi-sweet chocolate chips (Ghirardelli or Nestle Toll House are my go-tos)
- 1 tablespoon coconut oil or vegetable shortening (helps the chocolate stay smooth and shiny)
- Optional Add-ins:
- 1/2 cup mini chocolate chips (for extra chocolatey bites)
- 1/4 cup crushed peanuts (for a nice crunch on top)
If you are watching your sugar intake, you can swap the granulated sugar for a sugar-free alternative, but the texture might be slightly different. For a dairy-free version, use vegan butter and dairy-free chocolate chips. It’s surprisingly good. Also, if you don’t have honey, corn syrup or maple syrup works fine, though maple will change the flavor profile slightly. The key is to use ingredients that are at room temperature so they mix smoothly.
Equipment Needed
You don’t need much for this recipe, which is half the battle. The main tool you need is an 8×8 inch baking pan. Line it with parchment paper, leaving an overhang on the sides. This is crucial for lifting the bars out later. Without the parchment, you’ll be digging for the last piece, and that’s no fun. You’ll also need a large mixing bowl. A glass or metal bowl works best because it’s easy to clean. A wooden spoon or a sturdy spatula is all you need for stirring. If you are using natural peanut butter, you might want a microwave-safe bowl to warm it up slightly so it mixes easier. For the topping, you can use a small saucepan or a microwave-safe bowl. A small offset spatula helps spread the chocolate evenly, but a butter knife works in a pinch. Keep it simple. You don’t need fancy gadgets for this.
Preparation Method
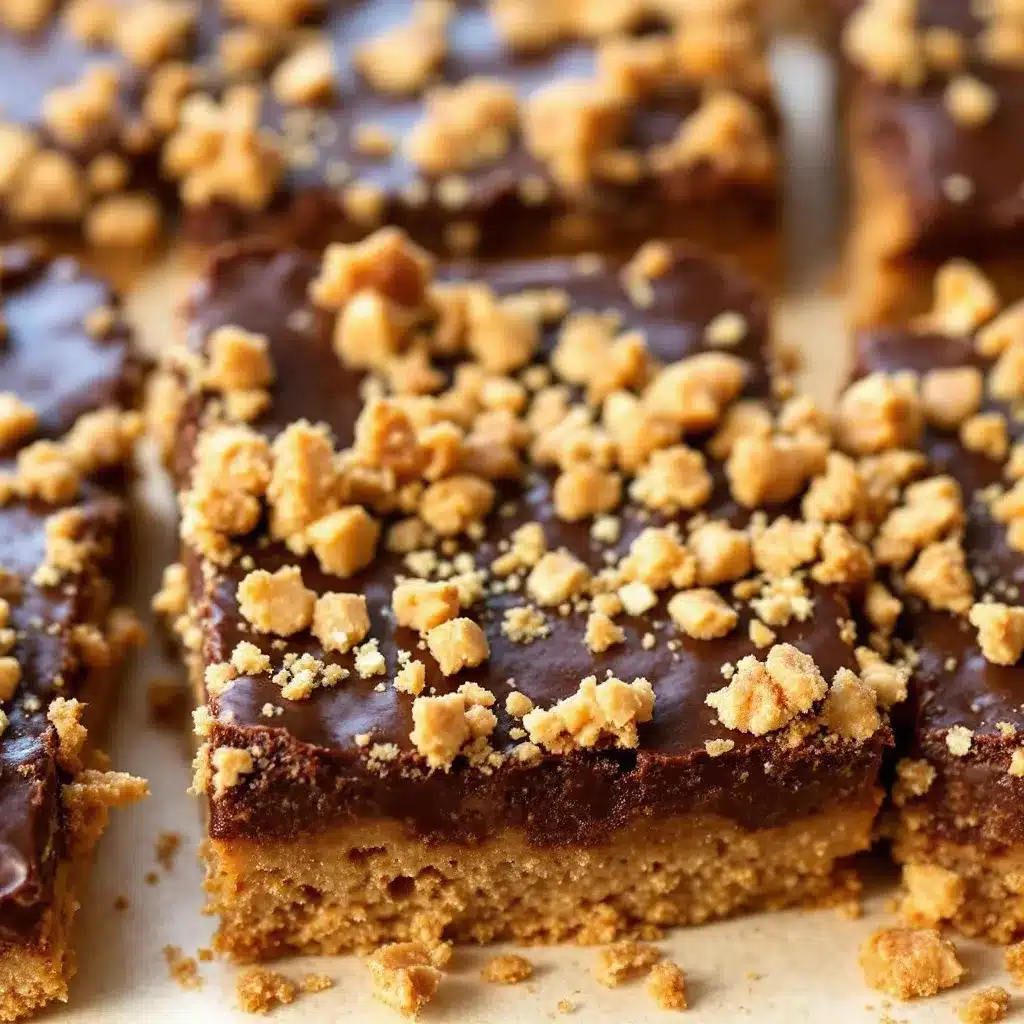
Let’s get into the nitty-gritty. This process is straightforward, but there are a few tricks to make sure your bars turn out perfect every time. Follow these steps closely, and you won’t go wrong.
- Prepare the Pan (2 minutes): Start by lining your 8×8 inch baking pan with parchment paper. Grease the parchment lightly with butter or cooking spray. This ensures nothing sticks. Set it aside.
- Mix the Dry Ingredients (1 minute): In your large mixing bowl, add the rolled oats. If you are adding extra mini chocolate chips or crushed peanuts now, add them here too. Toss them with the oats so they are distributed evenly.
- Combine Wet Ingredients (3 minutes): In a separate medium bowl, mix the softened butter, sugar, honey, vanilla extract, and salt. Whisk this together until it is smooth and well-combined. If your peanut butter is cold or stiff, you can microwave it for 10-15 seconds to soften it. Add the peanut butter to the wet mixture and stir until it is creamy and uniform.
- Combine Everything (2 minutes): Pour the wet mixture over the dry oats. Use your spatula to fold everything together. You want every oat to be coated. This takes a little muscle, so don’t be shy with the stirring. If you see dry patches, keep mixing. The mixture should look like a sticky, cohesive mass.
- Press into Pan (3 minutes): Transfer the mixture into your prepared pan. Use the back of a spoon or a flat-bottomed glass to press it down firmly. This is the most important step for texture. If it’s too loose, the bars will fall apart. Press it down until it is even and compact. You want it tight.
- Chill the Base (20 minutes): Place the pan in the refrigerator. Let the base set for at least 20 minutes. This makes it easier to spread the chocolate on top without digging into the bars.
- Melt the Chocolate (2 minutes): While the base chills, melt the chocolate chips and coconut oil. You can do this in the microwave in 30-second intervals, stirring in between, or in a small saucepan over low heat. Stir until smooth and glossy. Do not overheat the chocolate, or it can seize up.
- Add Topping (1 minute): Remove the pan from the fridge. Pour the melted chocolate over the chilled base. Use an offset spatula or a butter knife to spread it evenly to the edges. If you want a little crunch, sprinkle crushed peanuts or a few extra chocolate chips on top now.
- Final Set (30 minutes): Put the pan back in the fridge for at least 30 minutes, or until the chocolate is completely firm. This step takes patience, but it’s worth it.
- Cut and Serve: Lift the bars out of the pan using the parchment overhang. Place them on a cutting board. Use a sharp knife to cut them into squares. Wipe the knife between cuts for clean edges. Enjoy!
Cooking Tips & Techniques
I’ve made these bars so many times that I’ve learned a few things the hard way. Here is how to avoid common mistakes. First, don’t skip the chilling step for the base. If you put warm chocolate on a warm base, it will melt into the oats and you’ll have a chocolate oat mess. Cold base, cold chocolate application. Second, when pressing the mixture into the pan, be firm. I used to be too gentle, and my bars were crumbly. Now I press down hard. It creates that dense, chewy texture people love. Also, if your peanut butter is natural and separates, make sure to stir the jar well before measuring. Oil separation can make the mixture greasy. And for the chocolate, if it looks too thick to spread, add another half-teaspoon of coconut oil. It’s better to have it slightly runny than too thick. Multitasking is key here. While the base chills, melt the chocolate. It saves time. And always use a sharp knife for cutting. A dull knife will squish the bars. Clean the blade with a paper towel between every few cuts for the cleanest look.
Variations & Adaptations
One thing I love about this recipe is how flexible it is. You can tweak it to fit your dietary needs or taste preferences. Here are a few variations I’ve tried:
- Gluten-Free: Simply use certified gluten-free rolled oats. The rest of the ingredients are naturally gluten-free, so this is an easy swap.
- Dairy-Free: Swap the butter for vegan butter or coconut oil. Use dairy-free chocolate chips and ensure your peanut butter is dairy-free (most are). These bars become completely plant-based.
- Lower Sugar: Reduce the sugar by half and rely more on the honey for sweetness. Or use a sugar-free chocolate chip alternative. The texture might be slightly less chewy, but it’s still tasty.
- Protein Boost: Add a scoop of vanilla protein powder to the dry ingredients. You might need to add a tablespoon of milk or water if the mixture gets too dry. This is great for a post-workout snack.
- Flavor Twist: Add a tablespoon of espresso powder to the chocolate topping. It enhances the chocolate flavor without making it taste like coffee. Or stir in some crushed pretzels into the base for a sweet-and-salty kick.
Personally, I love adding a layer of caramel before the chocolate. Just spread a thin layer of store-bought caramel sauce over the chilled base. It takes it to the next level. But honestly, the classic version is hard to beat.
Serving & Storage Suggestions
These bars are best served cold. They are firm, clean to eat, and refreshing. They are perfect for lunchboxes because they don’t melt easily in warm bags. Pair them with a piece of fruit or a yogurt cup for a balanced snack. For storage, keep them in an airtight container in the refrigerator. They will stay fresh for up to two weeks. You can also freeze them for up to three months. Just thaw them in the fridge overnight before eating. The flavors actually develop over time, so they taste even better on day two. When you reheat them, the chocolate might soften, so eat them at room temperature for the best texture. They are also great for potlucks because they are easy to grab and eat without utensils.
Nutritional Information & Benefits
While these are definitely a treat, they do have some nutritional benefits. Peanut butter provides healthy fats and protein, which help keep you full. Oats are a good source of fiber, which supports digestion. The chocolate offers antioxidants, especially if you use semi-sweet or dark chocolate. However, these bars are calorie-dense due to the sugar and fats. A typical square contains around 150-180 calories. They are not low-carb or keto-friendly unless you make significant substitutions. For most people, they are a perfect occasional indulgence. They satisfy a sweet tooth without leaving you feeling sluggish like a candy bar might. I like to think of them as a balanced treat—sweet, but with some substance behind it.
Conclusion
These easy no-bake chocolate peanut butter lunchbox bars are more than just a recipe. They are a solution for busy days, a comfort for tired evenings, and a favorite for kids of all ages. I hope you try them and find them as useful in your kitchen as I do. Feel free to tweak the ingredients to suit your taste. Maybe you add more peanuts, or less sugar. Make it yours. And if you do try them, I’d love to hear how they turned out. Leave a comment below with your favorite variation. Share your photos on social media and tag me. Let’s keep the conversation going. Thanks for reading, and happy cooking!
FAQs
Can I use crunchy peanut butter instead of creamy?
Yes, you can. It will add a nice texture to the bars, but the mixture might be slightly harder to press down evenly. Just make sure to press it firmly into the pan.
Why are my bars crumbly?
This usually happens if the mixture wasn’t pressed down firmly enough or if there wasn’t enough binding agent. Make sure to use the correct amount of honey and butter, and press the mixture down tightly.
Can I freeze these bars?
Absolutely. They freeze very well. Store them in a single layer in an airtight container or freeze them individually wrapped. They last up to three months.
What can I use instead of honey?
You can use light corn syrup, maple syrup, or agave nectar. The texture might vary slightly, but the flavor will still be good.
Do I have to chill the bars?
Yes, chilling is essential. It allows the fats to solidify and the bars to set. If you cut them warm, they will fall apart. Chill the base before adding chocolate, and the whole bar after.
Pin This Recipe!
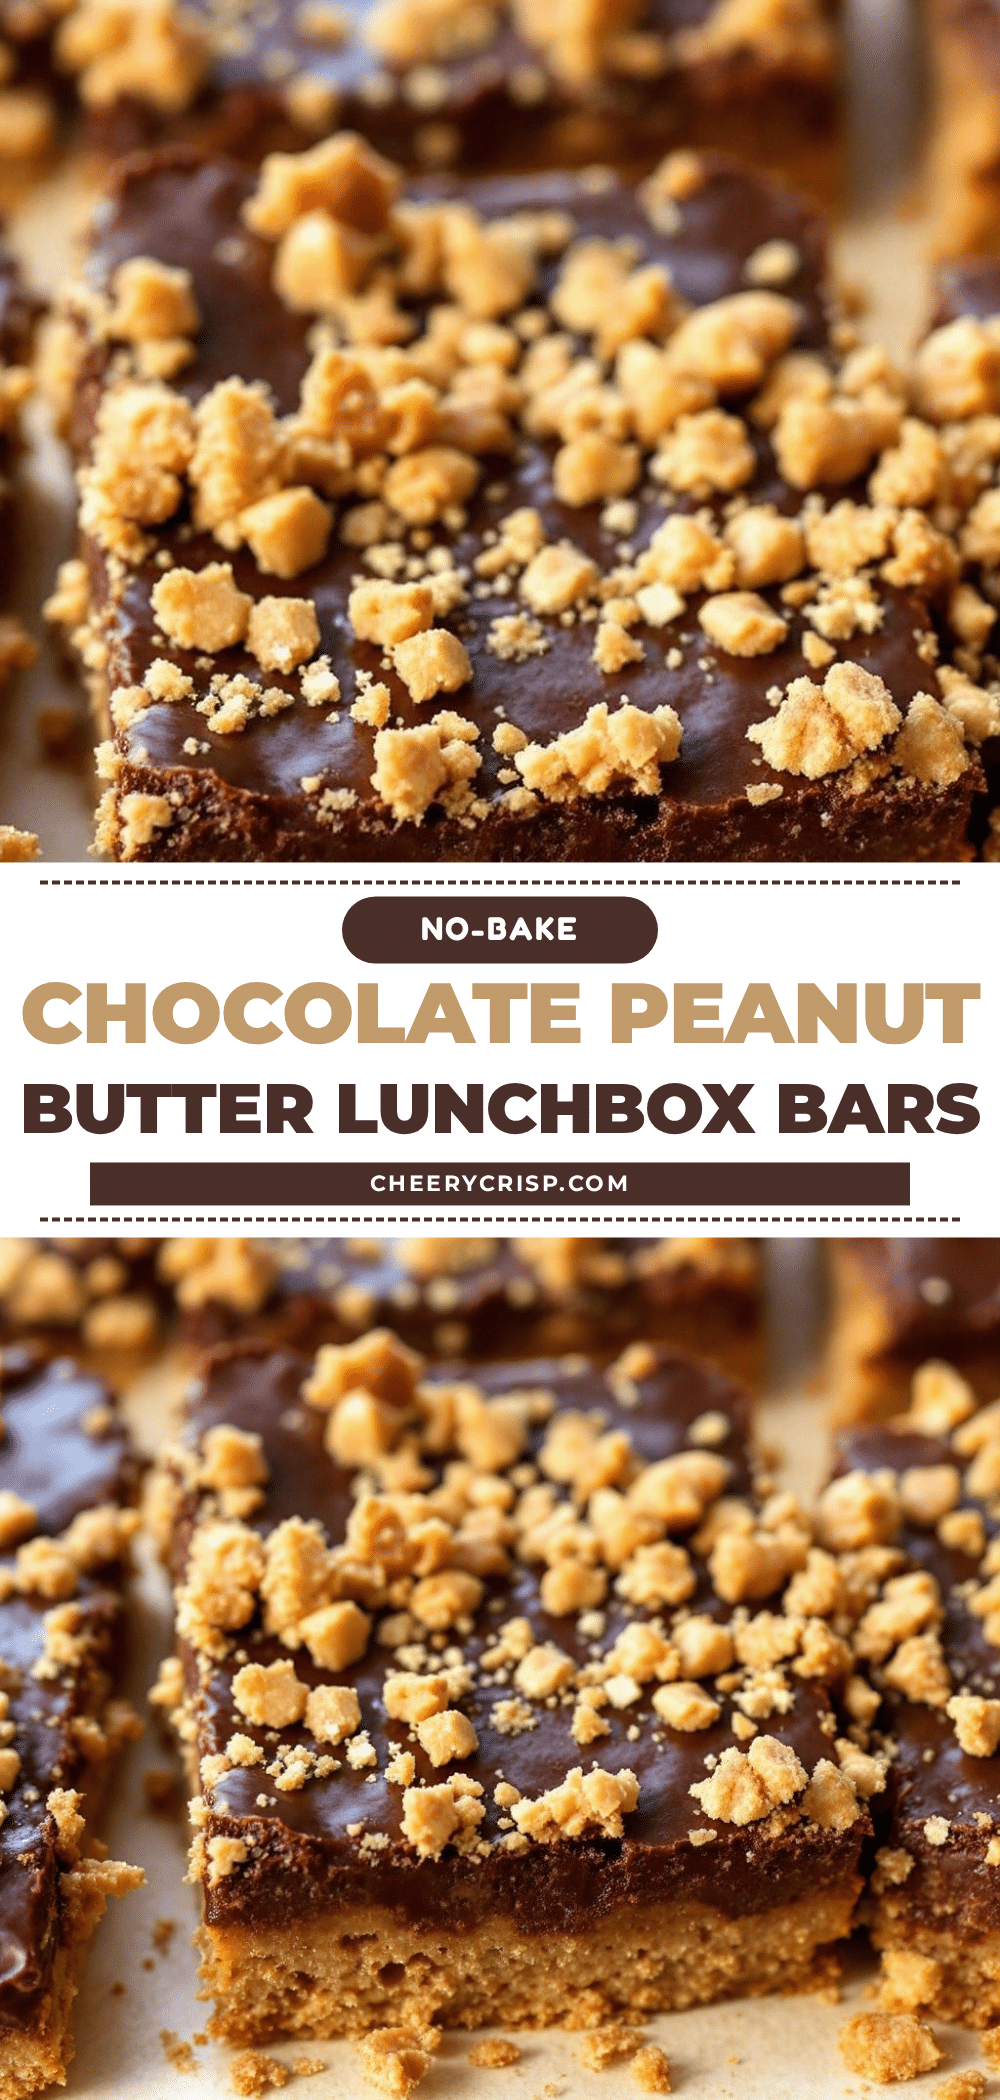
Easy No-Bake Chocolate Peanut Butter Lunchbox Bars
These easy no-bake chocolate peanut butter lunchbox bars are a quick, sturdy, and delicious treat perfect for busy mornings and school lunches. They require no oven, use simple pantry ingredients, and hold their shape well without crumbling.
- Prep Time: 15 minutes
- Cook Time: 0 minutes
- Total Time: 45 minutes
- Yield: 16 servings 1x
- Category: Dessert
- Cuisine: American
Ingredients
- 2 cups old-fashioned rolled oats
- 1 cup creamy peanut butter
- 1/2 cup unsalted butter, softened
- 1 cup granulated sugar
- 1/2 cup honey or light corn syrup
- 1 teaspoon vanilla extract
- A pinch of salt
- 1 cup semi-sweet chocolate chips
- 1 tablespoon coconut oil or vegetable shortening
- Optional: 1/2 cup mini chocolate chips
- Optional: 1/4 cup crushed peanuts
Instructions
- Line an 8×8 inch baking pan with parchment paper, leaving an overhang on the sides, and grease lightly with butter or cooking spray.
- In a large mixing bowl, add the rolled oats. If using optional add-ins like mini chocolate chips or crushed peanuts, toss them with the oats now.
- In a separate medium bowl, whisk together the softened butter, sugar, honey, vanilla extract, and salt until smooth. If using cold peanut butter, microwave it briefly to soften, then add it to the wet mixture and stir until creamy and uniform.
- Pour the wet mixture over the dry oats. Use a spatula to fold everything together until every oat is coated and the mixture forms a sticky, cohesive mass.
- Transfer the mixture to the prepared pan. Use the back of a spoon or a flat-bottomed glass to press it down firmly and evenly to ensure the bars hold together.
- Place the pan in the refrigerator and chill the base for at least 20 minutes to set.
- While the base chills, melt the chocolate chips and coconut oil in the microwave in 30-second intervals or in a small saucepan over low heat, stirring until smooth and glossy.
- Remove the pan from the fridge. Pour the melted chocolate over the chilled base and spread it evenly to the edges using an offset spatula or butter knife. Sprinkle with crushed peanuts if desired.
- Return the pan to the refrigerator and chill for at least 30 minutes, or until the chocolate is completely firm.
- Lift the bars out of the pan using the parchment overhang. Place on a cutting board and cut into squares using a sharp knife, wiping the blade between cuts for clean edges.
Notes
For best results, press the oat mixture firmly into the pan to prevent crumbling. Ensure the base is fully chilled before adding the chocolate topping to prevent melting. Natural peanut butter works but should be warmed slightly to mix smoothly. Bars can be stored in the refrigerator for up to two weeks or frozen for up to three months.
Nutrition
- Serving Size: 1 square bar
- Calories: 165
- Sugar: 14
- Sodium: 85
- Fat: 9
- Saturated Fat: 5
- Carbohydrates: 20
- Fiber: 2
- Protein: 4
Keywords: no-bake bars, peanut butter bars, chocolate peanut butter, lunchbox snacks, easy dessert, kid-friendly snacks, gluten-free option, dairy-free option



