Love this? Save it for later!
Share the inspiration with your friends
Threw open the fridge door at 5:15 PM staring blankly at a pack of chicken thighs and a half-empty block of Parmesan. My kids were already circling like hungry sharks, and I needed dinner on the table in under thirty minutes. No elaborate marinades. No complicated steps. Just real food that would actually get eaten without complaints.
That night, I grabbed my air fryer (honestly, my most-used kitchen gadget) and decided to wing it. I coated those thighs in a simple garlic-Parmesan mixture, popped them in the basket, and prayed for the best. What came out was nothing short of miraculous—crispy, golden, juicy chicken that had everyone asking for seconds before I even sat down.
These crispy garlic Parmesan chicken thighs have become our go-to weeknight lifesaver. They’re the kind of recipe that makes you look like a hero with almost zero effort. And let’s face it, we all need more of those nights.
Why You’ll Love This Recipe
I’ve tested this recipe at least a dozen times to get it just right. Trust me when I say these air fryer chicken thighs deliver on every single promise.
- Quick & Easy : Comes together in under 25 minutes, perfect for those chaotic weeknights when you’re racing against the clock.
- Simple Ingredients : No fancy grocery trips needed. You probably have garlic powder, Parmesan, and chicken thighs in your kitchen right now.
- Perfect for Busy Families : Great for dinner, meal prep, or even game day snacking alongside some football shaped buffalo chicken dip bites.
- Crowd-Pleaser : Even picky eaters devour these. The crispy exterior and juicy interior win everyone over.
- Unbelievably Delicious : The garlic-Parmesan crust gets impossibly crunchy in the air fryer, while the meat stays tender and moist.
What makes this recipe different? It’s not just another breaded chicken recipe. The secret lies in how the Parmesan crisps up against the chicken skin, creating a texture you can’t get from baking or frying alone. Plus, there’s zero oil splatter or messy cleanup.
This is comfort food reimagined—healthier, faster, but with the same soul-soothing satisfaction. Perfect for impressing guests without stress, or turning a simple Tuesday dinner into something memorable.
What Ingredients You Will Need
This recipe uses simple, wholesome ingredients to deliver bold flavor and satisfying texture without the fuss. Most of these are pantry staples you probably already have on hand.
- Chicken Thighs (bone-in, skin-on, about 2 lbs or 900g) — The skin gets incredibly crispy in the air fryer. I prefer bone-in for maximum juiciness, but boneless works too (just reduce cooking time).
- Grated Parmesan Cheese (1 cup, 100g) — Use the real stuff from a block, not the green can. Freshly grated melts and crisps better. I recommend BelGioioso or Sartori brands for best texture.
- Garlic Powder (2 teaspoons) — Not garlic salt! We’re controlling the salt separately. Garlic powder distributes evenly and won’t burn like fresh garlic.
- Paprika (1 teaspoon) — Adds color and a subtle smoky sweetness. Smoked paprika works beautifully here too.
- Dried Italian Seasoning (1 teaspoon) — A blend of oregano, basil, and thyme complements the Parmesan perfectly.
- Salt (1 teaspoon) — Adjust based on your Parmesan’s saltiness. Some cheeses are saltier than others.
- Black Pepper (½ teaspoon, freshly ground) — Freshly ground makes a difference here.
- Olive Oil Spray — Helps the coating stick and promotes even browning. Avocado oil spray also works great (adds richness).
- Fresh Parsley (optional, for garnish) — Adds a pop of color and freshness. Use dairy-free milk if needed.
Ingredient Selection Tips: Look for chicken thighs with the skin still attached and intact. The skin acts as a natural barrier, keeping the meat moist while getting beautifully crispy. If your Parmesan tastes flat, your final dish will too—always taste your cheese before grating.
Substitution Guidance: Use almond flour mixed with nutritional yeast for a gluten-free, low-carb option. Swap the Italian seasoning with herbes de Provence for a different flavor profile. For a dairy-free version, use dairy-free Parmesan alternatives (just know the crispiness may vary).
Equipment Needed
You don’t need much for this recipe, which is part of its beauty.
- Air Fryer (6-quart or larger recommended) — Any brand works. I use a Cosori 5.8-quart and love how evenly it cooks. If yours is smaller, cook in batches.
- Mixing Bowls (2 medium bowls) — One for the coating mixture, one for holding the chicken.
- Tongs — For flipping the chicken without burning your fingers.
- Meat Thermometer — Not optional! Chicken needs to reach 165°F (74°C) internally. I’ve learned this the hard way.
- Paper Towels — For patting the chicken dry. This step is crucial for crispy skin.
- Spray Bottle for Oil — A simple misting bottle works better than aerosol sprays, which can damage air fryer baskets over time.
Budget-Friendly Tip: Don’t have an air fryer? You can bake these at 400°F (200°C) on a wire rack set over a baking sheet for about 30-35 minutes. The texture won’t be quite as crispy, but it’s still delicious.
Preparation Method
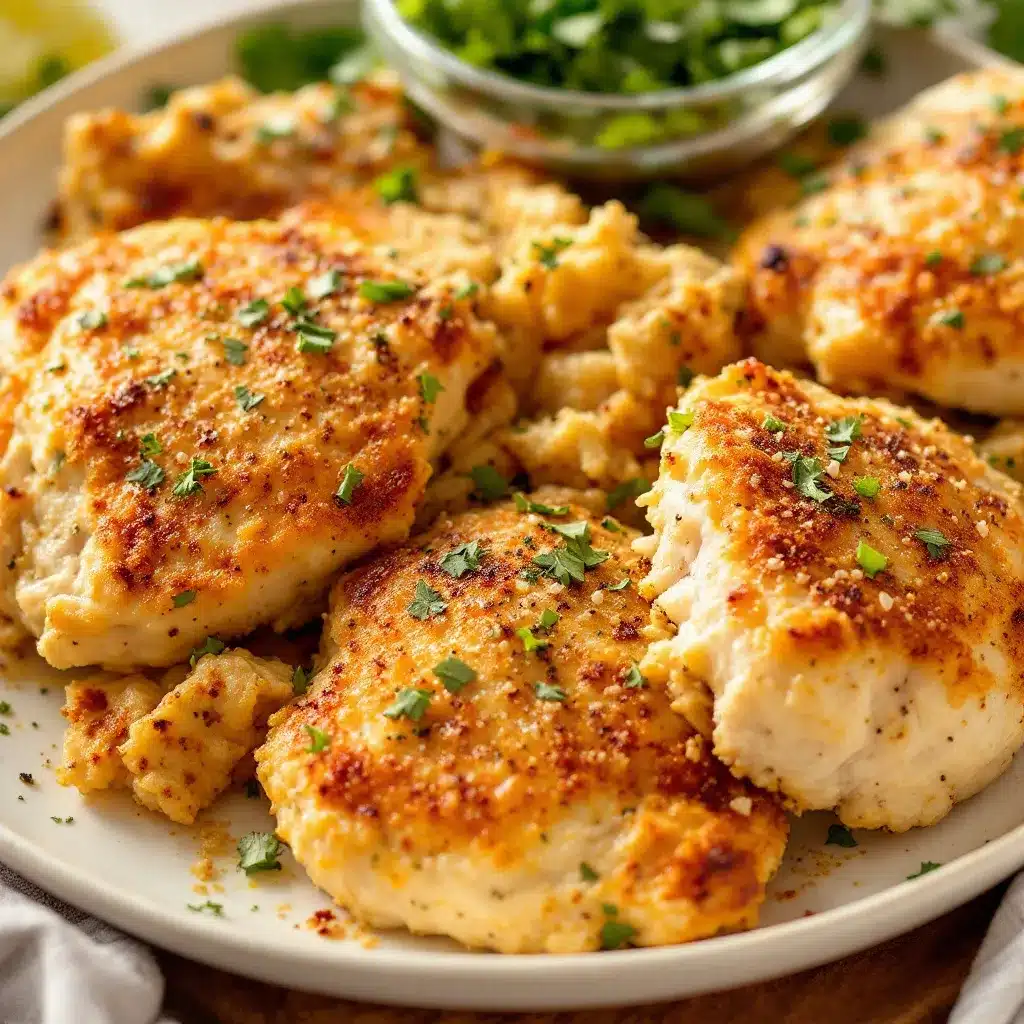
Let’s get cooking! Here’s how to make the crispiest garlic Parmesan chicken thighs of your life.
- Prep the chicken: Pat the chicken thighs completely dry with paper towels. This is non-negotiable—moisture is the enemy of crispy skin. Leave them on a plate while you prepare the coating. (About 5 minutes)
- Make the coating: In a medium bowl, combine the grated Parmesan, garlic powder, paprika, Italian seasoning, salt, and pepper. Mix well with a fork, breaking up any clumps of cheese. The mixture should look like coarse sand. (About 2 minutes)
- Coat the chicken: Working one thigh at a time, press the chicken into the Parmesan mixture, coating all sides evenly. Don’t be shy—really pack it on. Place the coated thighs on a clean plate. (About 5 minutes)
- Preheat the air fryer: Set your air fryer to 380°F (193°C) and let it preheat for 3 minutes. Preheating ensures the coating starts crisping immediately.
- Arrange in the basket: Lightly spray the air fryer basket with olive oil. Place the chicken thighs skin-side down in a single layer. Don’t overcrowd—leave space between each piece for air circulation. If needed, cook in batches. (About 2 minutes)
- First cook: Air fry at 380°F (193°C) for 12 minutes. The chicken will look pale but starting to brown. The kitchen will smell incredible at this point.
- Flip and spray: Using tongs, carefully flip each thigh. Spray the tops lightly with olive oil. This second spray is what creates that ultra-crispy, golden crust. (About 1 minute)
- Second cook: Air fry for another 10-12 minutes at 380°F (193°C). The chicken should be deep golden brown and the coating should feel firm to the touch. Internal temperature should read 165°F (74°C) when inserted into the thickest part of the meat. (About 12 minutes)
- Rest: Let the chicken rest in the air fryer (turned off) for 2-3 minutes. This allows the juices to redistribute. Then transfer to a serving plate. (About 3 minutes)
- Garnish and serve: Sprinkle with fresh parsley if desired. Serve immediately while the skin is at its crispiest. (About 1 minute)
Sensory Cue: The chicken should look deeply golden with visible crispy edges. When you tap the skin, it should sound crunchy. The meat should feel firm but give slightly when pressed. If the coating looks pale or soft, give it another 2-3 minutes.
Pro Tip: For extra crispy results, let the coated chicken rest in the fridge for 15 minutes before air frying. This helps the coating adhere better and creates an even crunchier crust.
Cooking Tips & Techniques
After making these chicken thighs more times than I can count, I’ve picked up a few tricks worth sharing.
Don’t skip the drying step. I once rushed through this and ended up with soggy, sad chicken. The moisture steams the coating instead of crisping it. Pat those thighs until they’re practically desert-dry.
Watch your Parmesan. Freshly grated Parmesan behaves differently than pre-shredded. Pre-shredded contains anti-caking agents that prevent proper melting and crisping. Spend the extra two minutes grating your own—it makes a real difference.
Temperature matters. 380°F is the sweet spot. Too high and the Parmesan burns before the chicken cooks through. Too low and you get greasy, soft skin. I learned this after one particularly sad batch that tasted like burnt garlic regret.
Batch cooking strategy. If you’re cooking for a crowd, keep the first batch warm in a 200°F (93°C) oven while the second batch cooks. The oven won’t dry them out, and you’ll serve everything hot at once. Pair them with sheet pan sweet potato and chicken sausage for a complete meal.
Multitasking tip: While the chicken cooks, prep a simple side salad or steam some vegetables. The air fryer does all the heavy lifting, leaving you free to handle the rest of dinner.
Consistency secret: If your chicken thighs vary in size, check the smaller ones first. Remove them when done and let the larger ones cook a few minutes longer. This ensures everything comes out perfectly cooked.
Variations & Adaptations
This recipe is wonderfully flexible. Here are some variations I’ve tried and loved.
- Spicy Buffalo Version: Add 1 teaspoon cayenne pepper and ½ teaspoon red pepper flakes to the coating. After cooking, toss the hot chicken in buffalo sauce. Serve with ranch or blue cheese dressing. Perfect for game day alongside crispy baked chicken wings.
- Lemon Herb Twist: Add 2 teaspoons lemon zest and 1 tablespoon fresh rosemary (finely chopped) to the Parmesan mixture. The brightness cuts through the richness beautifully.
- Keto-Friendly Option: This recipe is naturally low-carb. Swap the Parmesan for a mix of almond flour and nutritional yeast for an even lower-carb version. The texture stays remarkably similar.
- Cajun Style: Replace the Italian seasoning with 1 tablespoon Cajun seasoning. Add ½ teaspoon smoked paprika for extra depth. The spicy, smoky flavors pair perfectly with the crispy skin.
- Air Fryer vs. Oven: For oven baking, place the coated thighs on a wire rack over a baking sheet. Bake at 400°F (200°C) for 30-35 minutes, flipping halfway. The texture won’t be quite as crispy, but it’s still delicious.
Personal Favorite Variation: I once added a tablespoon of nutritional yeast to the coating on a whim, and it added this incredible umami depth. Now I do it every time. Don’t knock it till you try it!
Serving & Storage Suggestions
These chicken thighs shine in so many settings. Here’s how to make the most of them.
Serving Temperature: Serve immediately while the skin is at its crispiest. The texture deteriorates as they cool, so eat them hot. If you’re serving a crowd, keep them warm in a low oven (200°F / 93°C) for up to 30 minutes.
Presentation: Arrange the thighs on a large platter, sprinkle with fresh parsley, and serve with lemon wedges on the side. The bright yellow against the golden chicken looks gorgeous. For a casual dinner, serve directly from the air fryer basket—no shame in that game.
Complementary Sides: These pair beautifully with roasted vegetables, a crisp green salad, or mashed potatoes. For a complete meal, try them alongside loaded baked potato salad for a comfort food feast. They also work great over rice or quinoa with a drizzle of pan juices.
Storage: Store leftovers in an airtight container in the refrigerator for up to 4 days. The skin will soften, but the flavor stays great. To reheat, pop them back in the air fryer at 350°F (175°C) for 3-4 minutes. The microwave will make them soggy—avoid it if you can.
Freezer Instructions: Cooked chicken thighs freeze beautifully for up to 3 months. Wrap each thigh individually in plastic wrap, then place in a freezer bag. Thaw overnight in the fridge and reheat in the air fryer. The texture won’t be quite as perfect as fresh, but it’s still darn good.
Flavor Development: Interestingly, the garlic flavor deepens overnight. Leftovers actually taste more garlicky and complex the next day. Cold, sliced over a salad? Absolutely delicious.
Nutritional Information & Benefits
Here’s a rough estimate per serving (2 thighs, based on 4 servings total):
- Calories: 485
- Protein: 38g
- Fat: 32g
- Carbohydrates: 4g
- Fiber: 0.5g
- Sugar: 0.5g
- Sodium: 780mg
Health Benefits: Chicken thighs are rich in selenium, which supports thyroid function and immune health. They also provide B vitamins for energy metabolism. The Parmesan adds calcium and protein, while garlic offers antimicrobial properties. This recipe is naturally gluten-free and low-carb, making it suitable for various dietary needs.
Dietary Considerations: This recipe contains dairy (Parmesan). For a dairy-free version, use nutritional yeast or a dairy-free Parmesan alternative. It’s naturally low-carb and keto-friendly as written. If you’re watching sodium, reduce the added salt and use low-sodium Parmesan.
Personal Perspective: I love that this recipe feels indulgent but isn’t deep-fried. The air fryer gives you that satisfying crunch without the heavy oil. It’s the kind of meal that makes you feel like you’re eating something decadent while actually being pretty sensible.
Conclusion
These crispy garlic Parmesan chicken thighs have saved dinner at my house more times than I can count. They’re quick, they’re foolproof, and they deliver that satisfying crunch we all crave without the mess of deep frying.
What I love most about this recipe is how adaptable it is. Change up the seasonings, swap the cheese, adjust the spice level—it always works. It’s become my secret weapon for busy nights when I need something that feels special but takes almost no effort.
I’d love to hear how these turn out for you! Did you try a variation? Add your own twist? Drop a comment below and let me know. And if you loved them, share this recipe with a friend who needs a weeknight dinner win. Happy cooking, friends!
Frequently Asked Questions
Can I use boneless skinless chicken thighs for this recipe?
Yes, but reduce the cooking time to about 15-18 minutes total. The skin is what gets super crispy, so the texture won’t be quite the same. You can add a light coating of mayonnaise or oil to help the Parmesan mixture stick better to skinless thighs.
Why is my coating falling off the chicken?
This usually happens if the chicken isn’t dry enough. Pat those thighs thoroughly with paper towels before coating. Also, letting the coated chicken rest for 10-15 minutes in the fridge helps the coating adhere better during cooking.
Can I make these ahead of time for a party?
Absolutely! Cook them completely, let them cool, and store in the fridge. Reheat in the air fryer at 350°F (175°C) for 3-4 minutes just before serving. They won’t be quite as crispy as fresh, but they’ll still be delicious.
What if I don’t have an air fryer?
No problem! Bake them on a wire rack over a baking sheet at 400°F (200°C) for 30-35 minutes, flipping halfway. The texture will be slightly different—less crispy, more baked—but still incredibly tasty.
How do I know when the chicken is fully cooked?
Use a meat thermometer! Insert it into the thickest part of the thigh (avoiding the bone). It should read 165°F (74°C). The juices should run clear when you pierce the meat, and the coating should be deep golden brown and firm to the touch.
Pin This Recipe!

Crispy Air Fryer Garlic Parmesan Chicken Thighs

Quick and easy air fryer chicken thighs with a crispy garlic-Parmesan crust, perfect for busy weeknights. Ready in under 25 minutes with simple ingredients.
- Prep Time: 15 minutes
- Cook Time: 22-24 minutes
- Total Time: 37-39 minutes
- Yield: 4 servings 1x
- Category: Main Course
- Cuisine: American
Ingredients
- 2 lbs (900g) bone-in, skin-on chicken thighs
- 1 cup (100g) grated Parmesan cheese
- 2 teaspoons garlic powder
- 1 teaspoon paprika
- 1 teaspoon dried Italian seasoning
- 1 teaspoon salt
- ½ teaspoon black pepper, freshly ground
- Olive oil spray
- Fresh parsley (optional, for garnish)
Instructions
- Pat the chicken thighs completely dry with paper towels.
- In a medium bowl, combine grated Parmesan, garlic powder, paprika, Italian seasoning, salt, and pepper. Mix well.
- Working one thigh at a time, press the chicken into the Parmesan mixture, coating all sides evenly. Place coated thighs on a clean plate.
- Preheat air fryer to 380°F (193°C) for 3 minutes.
- Lightly spray the air fryer basket with olive oil. Place chicken thighs skin-side down in a single layer, leaving space between each piece.
- Air fry at 380°F (193°C) for 12 minutes.
- Using tongs, carefully flip each thigh. Spray the tops lightly with olive oil.
- Air fry for another 10-12 minutes at 380°F (193°C) until deep golden brown and internal temperature reaches 165°F (74°C).
- Let the chicken rest in the air fryer (turned off) for 2-3 minutes.
- Sprinkle with fresh parsley if desired. Serve immediately.
Notes
For extra crispy results, let the coated chicken rest in the fridge for 15 minutes before air frying. If chicken thighs vary in size, check smaller ones first and remove when done. To keep warm for a crowd, place in a 200°F (93°C) oven for up to 30 minutes.
Nutrition
- Serving Size: 2 thighs
- Calories: 485
- Sugar: 0.5
- Sodium: 780
- Fat: 32
- Carbohydrates: 4
- Fiber: 0.5
- Protein: 38
Keywords: air fryer chicken thighs, garlic parmesan chicken, crispy chicken thighs, easy chicken recipe, weeknight dinner, low-carb chicken, keto chicken



