Love this? Save it for later!
Share the inspiration with your friends
Introduction
“I never saw myself as a bread baker,” I confessed to my friend during a late-night phone call. It was a chilly Thursday evening, and the kitchen was a mess—flour dusted every surface, and I had just pulled out a loaf of bread that looked nothing like the fluffy sandwich bread I’d imagined. Honestly, I was about to give up. You see, I’d been trying to make soft gluten-free sandwich bread for weeks, and every attempt felt like a crumbly heartbreak.
What makes this story a little unusual is that the inspiration came from my local bookstore, of all places. I was browsing the cooking section when a small, handwritten note fell out of a cookbook—something about a “life-changing gluten-free bread recipe.” Skeptical but curious, I decided to give it one more shot. That night, armed with borrowed tips and a stubborn spirit, I whipped up a batch that not only rose beautifully but tasted soft, tender, and downright delicious.
Maybe you’ve been there—frustrated by dry, crumbly gluten-free bread that just doesn’t hold together or taste good. That’s exactly why this soft gluten-free sandwich bread recipe stayed with me. It’s the kind of bread that makes you forget it’s gluten-free, perfect for sandwiches, toast, or just a comforting slice with butter. Let me tell you, this recipe changed my kitchen game, and I’m betting it’ll do the same for you.
Why You’ll Love This Recipe
This soft gluten-free sandwich bread recipe is the real deal, tested and perfected through many trials (and a few messy failures). Whether you’re new to gluten-free baking or a seasoned pro, here’s why this bread deserves a spot on your counter:
- Quick & Easy: Ready in under 2 hours from start to finish, it fits perfectly into busy weeknights or spontaneous sandwich cravings.
- Simple Ingredients: No need to hunt for specialty flours—most items are pantry staples or easy to find at any grocery store.
- Perfect for Everyday Use: This bread shines in any situation, from school lunches to cozy weekend brunches.
- Crowd-Pleaser: Even friends who aren’t gluten-free keep asking for seconds—it’s that good.
- Unbelievably Soft Texture: Thanks to a secret combo of xanthan gum and a bit of apple cider vinegar, this loaf stays tender and moist for days.
What sets this recipe apart? It’s not just about swapping out flour. The precise balance of ingredients and a little patience in the rising process give you a loaf that’s bouncy, not crumbly, with a crust that’s soft but sturdy.
Honestly, this bread isn’t just food; it’s comfort wrapped in a slice. I find myself closing my eyes after the first bite, savoring the texture and warmth. If you’ve struggled with gluten-free breads before, this might just be your new favorite. Plus, it’s beginner-friendly—if I can get it right on a chaotic Thursday night, so can you!
What Ingredients You Will Need
This recipe uses simple, wholesome ingredients to deliver bold flavor and a satisfying soft texture without any fuss. Most are pantry staples, and substitutions are easy if you need them.
- For the Bread:
- 1 ¾ cups (210g) gluten-free all-purpose flour blend (I recommend Bob’s Red Mill 1-to-1 baking flour for best texture)
- ½ cup (50g) brown rice flour (adds a subtle nuttiness)
- 2 tsp xanthan gum (helps with elasticity and rise)
- 1 tbsp sugar (feeds the yeast for a gentle rise)
- 1 ½ tsp instant yeast
- 1 tsp salt
- 1 cup (240ml) warm water (around 110°F/43°C)
- 2 large eggs, room temperature (adds richness and structure)
- 3 tbsp olive oil or melted butter (for moisture and softness)
- 1 tsp apple cider vinegar (helps tenderize the crumb)
Feel free to swap the olive oil with dairy-free butter for a vegan-friendly option. If you prefer a slightly sweeter bread, a tablespoon of honey works well instead of sugar. For those avoiding eggs, a flax egg (1 tbsp ground flaxseed + 3 tbsp water, mixed and rested) can be a decent replacement, though texture may vary.
When selecting your gluten-free flour blend, look for one that includes a mix of rice, tapioca, and potato starches for the best balance. Using just one type often leads to dense bread. This combination, along with the xanthan gum, mimics the gluten network surprisingly well.
Equipment Needed
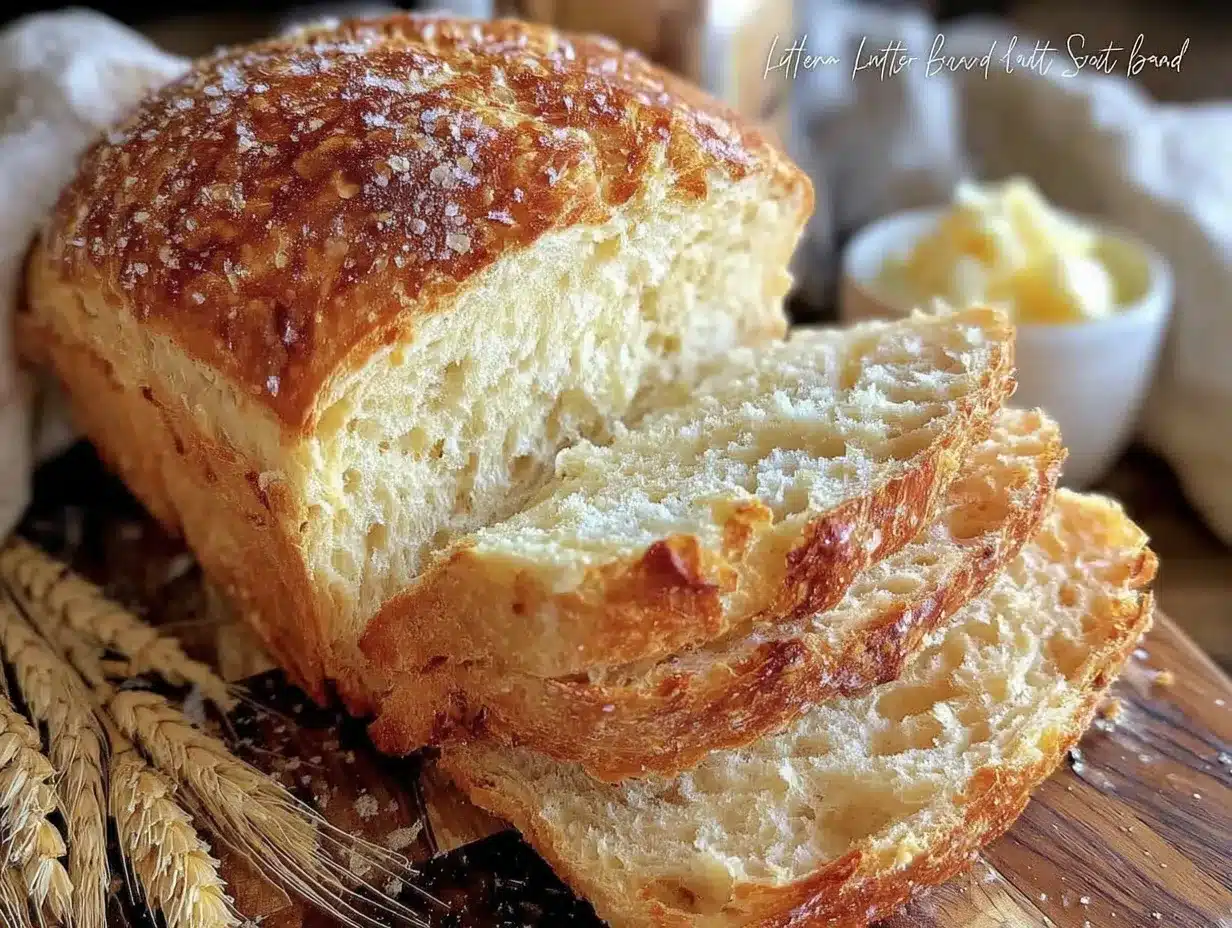
- 9×5-inch (23×13 cm) loaf pan — a non-stick one works best for easy removal
- Large mixing bowl
- Whisk or electric mixer with a dough hook (optional but helpful)
- Measuring cups and spoons for accuracy
- Kitchen thermometer (to check water temperature, optional but recommended)
- Clean kitchen towel or plastic wrap for covering dough during rising
If you don’t have a loaf pan, a small baking dish or even a cast-iron skillet can work, but keep in mind the shape of your bread will change. I once used a Pyrex dish when I misplaced my loaf pan, and it turned out just fine—just a bit shorter and rounder.
For those on a budget, silicone loaf pans are a great alternative and easy to clean. Avoid metal pans without non-stick coating unless you grease them well.
Preparation Method
- Activate the yeast: In your large mixing bowl, combine the warm water (110°F/43°C) with the sugar and yeast. Stir gently and let it sit for 5-7 minutes until foamy. If it doesn’t foam, your yeast might be dead—start over with fresh yeast.
- Mix dry ingredients: While the yeast activates, whisk together the gluten-free all-purpose flour, brown rice flour, xanthan gum, and salt in a separate bowl. This ensures even distribution.
- Combine wet ingredients: To the yeast mixture, add the eggs, olive oil (or melted butter), and apple cider vinegar. Whisk until smooth.
- Form the dough: Slowly add the dry ingredients into the wet mixture, stirring continuously. The dough will be sticky and wetter than traditional bread dough—don’t panic! That’s how gluten-free dough usually behaves.
- Knead gently: Using a spatula or your hands, fold the dough in the bowl a few times to ensure everything is combined. No heavy kneading needed here.
- First rise: Cover the bowl with a clean towel or plastic wrap and place it in a warm spot (ideally around 75-80°F/24-27°C). Let it rise for about 45-60 minutes, or until the dough has nearly doubled in size and looks puffy.
- Prepare loaf pan: Grease your loaf pan lightly with butter or oil.
- Transfer dough: Scrape the dough into the loaf pan, smoothing the top gently with a wet spatula or your fingers. The dough should fill the pan about halfway.
- Second rise: Cover the pan loosely and let it rise again for 30-40 minutes until it has puffed up to the top edges of the pan.
- Bake: Preheat your oven to 375°F (190°C). Bake the bread for 30-35 minutes until the crust is golden brown and a toothpick inserted in the center comes out clean. If the top browns too quickly, tent with foil halfway through baking.
- Cool: Allow the bread to cool in the pan for 10 minutes, then transfer to a wire rack to cool completely before slicing. This helps the crumb set and prevents squishing.
Pro tip: If your bread feels too dense after baking, try letting it rise a bit longer next time. Temperature and humidity can affect gluten-free dough quite a bit.
Cooking Tips & Techniques
Gluten-free bread baking is a bit of an art, but these tips will make the process smoother and your loaf softer:
- Don’t skip the xanthan gum: It’s the glue that holds the bread together, giving it the chew and elasticity gluten normally provides.
- Mind your water temperature: Too hot kills yeast; too cold slows the rise. Aim for warm, like a cozy bath.
- Sticky dough is normal: Gluten-free dough won’t behave like regular dough. Use wet hands or a spatula to handle it.
- Let it rise twice: Patience pays off. Rises might take longer than wheat bread, but they’re crucial for that soft texture.
- Don’t rush cooling: Cutting too soon can cause crumbling. Wait until fully cool to slice cleanly.
- Experiment with flour blends: Some brands absorb more liquid than others—adjust water slightly if your dough feels dry or overly wet.
I once baked a loaf right before a power outage and had to finish it in a cold kitchen. The rise was slower, but the bread still turned out soft and lovely, proving that even imperfect conditions can work!
Variations & Adaptations
Want to switch things up? Here are some ways to customize this soft gluten-free sandwich bread:
- Herb & Garlic: Add 1 tsp dried rosemary and 1 tsp garlic powder to the dry ingredients for a savory twist perfect for sandwiches or toast.
- Seeded Crunch: Mix 2 tbsp chia seeds, flaxseeds, or sunflower seeds into the dough or sprinkle on top before baking for texture and nutrition.
- Whole Grain Boost: Substitute half the brown rice flour with sorghum flour to add a hearty flavor and extra fiber.
- Dairy-Free Option: Use coconut oil instead of butter and almond milk for a vegan-friendly loaf (replace eggs with flax eggs).
- Sweet Version: Increase sugar to 3 tbsp and add 1 tsp cinnamon for a slightly sweet bread that pairs beautifully with jam or nut butter.
I tried the seeded version last fall, adding pumpkin seeds on top, and it quickly became a lunchtime favorite. The extra crunch makes sandwiches way more interesting!
Serving & Storage Suggestions
This bread is best enjoyed fresh but holds up well over several days if stored properly. Here’s how to get the most out of your loaf:
- Serving: Slice and toast lightly for a crisp outside and soft inside. It’s wonderful with simple butter, avocado, or your favorite sandwich fillings.
- Complementary dishes: Pair with hearty soups or stews, or make classic sandwiches like turkey and cranberry or grilled cheese for an easy meal.
- Storage: Keep leftover bread in an airtight container or zip-top bag at room temperature for up to 3 days.
- Freezing: Slice and freeze in a resealable bag for up to 3 months. Toast slices straight from the freezer for best results.
- Reheating: A quick toast or warming in the oven (350°F/175°C for 5-7 minutes) refreshes the loaf beautifully.
Flavors tend to mellow and blend after a day, so if you’re prepping ahead, try slicing the bread and freezing it right away to keep that fresh-baked taste.
Nutritional Information & Benefits
Here’s an approximate snapshot per slice (based on 12 slices per loaf):
| Nutrient | Amount |
|---|---|
| Calories | 120 kcal |
| Carbohydrates | 22g |
| Protein | 3g |
| Fat | 3.5g |
| Fiber | 1.5g |
This bread is naturally gluten-free, making it safe for those with celiac disease or gluten sensitivity. The combination of brown rice and gluten-free flour blends provides a decent fiber boost compared to many store-bought gluten-free breads. Using olive oil adds heart-healthy fats, while eggs contribute protein and structure.
Keep in mind this recipe contains eggs and may contain traces of nuts depending on your flour blend. For allergen concerns, adapting with flax eggs and dairy alternatives can help.
From a wellness standpoint, I appreciate that this bread allows people with dietary restrictions to enjoy the simple joy of homemade sandwich bread without compromises.
Conclusion
Making soft gluten-free sandwich bread at home might seem daunting, but this recipe breaks it down into achievable steps with ingredients you can trust. It’s a loaf that holds together, tastes great, and brings a little comfort back to gluten-free baking. I love how it fits into busy days and special meals alike, and I hope you’ll find the same joy in it.
Feel free to tweak the flavors or try some of the variations to make it your own. And when you do, I’d love to hear how it turned out—drop a comment or share your twist!
Here’s to soft, homemade bread that feels like a hug in every slice.
FAQs
Can I use a different gluten-free flour blend?
Yes! Just make sure your blend contains a mix of starches and flours (like rice, tapioca, and potato starch) and includes xanthan gum or add it separately. Different blends may require slight adjustments in liquid.
How do I make this bread dairy-free?
Swap the butter for coconut oil or olive oil and use a flax egg in place of the eggs. The texture might be a bit different but still delicious.
Why is my gluten-free bread crumbly?
Often, this happens when there’s not enough xanthan gum or the dough didn’t rise long enough. Make sure your yeast is active and give the dough time to puff up before baking.
Can I freeze this bread?
Absolutely! Slice first, freeze in an airtight bag, and toast slices directly from the freezer for best freshness.
What’s the best way to store leftover bread?
Keep it in an airtight container at room temperature for up to 3 days or freeze for longer storage. Avoid refrigerating, as it can dry out the bread.
For more gluten-free baking inspiration, you might enjoy my gluten-free cinnamon rolls or the vegan gluten-free pancakes that are perfect weekend treats.
Pin This Recipe!

Soft Gluten-Free Sandwich Bread Recipe Easy Homemade Perfect for Beginners
A soft, tender, and delicious gluten-free sandwich bread recipe that’s beginner-friendly and perfect for everyday use. This bread is quick to make, uses simple pantry ingredients, and yields a loaf with a soft crust and moist crumb.
- Prep Time: 15 minutes
- Cook Time: 35 minutes
- Total Time: 1 hour 40 minutes
- Yield: 12 slices 1x
- Category: Bread
- Cuisine: Gluten-Free
Ingredients
- 1 ¾ cups (210g) gluten-free all-purpose flour blend (e.g., Bob’s Red Mill 1-to-1 baking flour)
- ½ cup (50g) brown rice flour
- 2 tsp xanthan gum
- 1 tbsp sugar
- 1 ½ tsp instant yeast
- 1 tsp salt
- 1 cup (240ml) warm water (around 110°F/43°C)
- 2 large eggs, room temperature
- 3 tbsp olive oil or melted butter
- 1 tsp apple cider vinegar
Instructions
- Activate the yeast: In a large mixing bowl, combine the warm water (110°F/43°C) with the sugar and yeast. Stir gently and let it sit for 5-7 minutes until foamy.
- Mix dry ingredients: Whisk together the gluten-free all-purpose flour, brown rice flour, xanthan gum, and salt in a separate bowl.
- Combine wet ingredients: Add the eggs, olive oil (or melted butter), and apple cider vinegar to the yeast mixture. Whisk until smooth.
- Form the dough: Slowly add the dry ingredients into the wet mixture, stirring continuously. The dough will be sticky and wetter than traditional bread dough.
- Knead gently: Fold the dough in the bowl a few times using a spatula or your hands to combine everything.
- First rise: Cover the bowl with a clean towel or plastic wrap and place in a warm spot (75-80°F/24-27°C). Let rise for 45-60 minutes until nearly doubled and puffy.
- Prepare loaf pan: Lightly grease a 9×5-inch loaf pan with butter or oil.
- Transfer dough: Scrape the dough into the loaf pan, smoothing the top gently with a wet spatula or fingers. Fill the pan about halfway.
- Second rise: Cover the pan loosely and let rise for 30-40 minutes until the dough has puffed up to the top edges of the pan.
- Bake: Preheat oven to 375°F (190°C). Bake for 30-35 minutes until crust is golden brown and a toothpick inserted in the center comes out clean. Tent with foil if browning too quickly.
- Cool: Let bread cool in the pan for 10 minutes, then transfer to a wire rack to cool completely before slicing.
Notes
Use a gluten-free flour blend with rice, tapioca, and potato starch for best texture. Xanthan gum is essential for elasticity. Water temperature should be warm (110°F) to activate yeast properly. Dough will be sticky—handle with wet hands or spatula. Let bread cool completely before slicing to avoid crumbling. Variations include adding herbs, seeds, or using dairy-free and vegan substitutions.
Nutrition
- Serving Size: 1 slice
- Calories: 120
- Sugar: 1
- Sodium: 200
- Fat: 3.5
- Saturated Fat: 0.5
- Carbohydrates: 22
- Fiber: 1.5
- Protein: 3
Keywords: gluten-free bread, sandwich bread, soft bread, homemade bread, gluten-free baking, easy bread recipe, beginner bread recipe



