Love this? Save it for later!
Share the inspiration with your friends
Introduction
“The summer I turned thirty, I found myself rummaging through a dusty box of old recipes my college roommate had left behind. There, scribbled on a crumpled index card, was a recipe for these strawberry oat bars. I wasn’t expecting much, honestly. But after tweaking it to fit my vegan and gluten-free lifestyle, they turned into my go-to snack for everything from mid-morning cravings to lazy afternoon pick-me-ups. You know that feeling when a simple bite of something sweet and wholesome instantly brightens your day? That’s exactly what these bars do for me.
One chaotic Tuesday, I forgot to pack my usual lunch and had just these bars in my bag. They kept me fueled through a marathon of meetings and a surprise visit from my neighbor (who’s notoriously hard to impress). She actually asked for the recipe! Maybe you’ve been there—needing a snack that’s quick, nourishing, and genuinely tasty without the fuss. These strawberry oat bars hit all those marks. Plus, the subtle caramel-like flavor from coconut sugar adds a unique twist that makes them feel special, even if they’re made from just simple pantry staples.
Let me tell you, this recipe has stuck with me because it’s honest food — nothing complicated, just wholesome ingredients coming together to make something satisfying. So if you’re after an easy vegan gluten-free strawberry oat bars recipe that doesn’t skimp on flavor or texture, you’re in the right place.
Why You’ll Love This Recipe
Having tested these bars countless times—sometimes under pressure when I needed to bring something to a potluck or pack a quick snack—I can confidently say this recipe ticks all the boxes. Here’s why it’s become a staple for me and many others:
- Quick & Easy: Comes together in under 30 minutes, perfect for busy mornings or last-minute snack cravings.
- Simple Ingredients: No fancy grocery runs needed; most ingredients are pantry basics or easy to find at any grocery store.
- Perfect for Any Occasion: Great for school lunches, hiking trips, or an afternoon treat with tea.
- Crowd-Pleaser: Loved by kids and adults alike, even those skeptical about vegan or gluten-free treats.
- Unbelievably Delicious: The chewy oats combined with the tangy-sweet strawberry filling and the caramel notes from coconut sugar make for a comforting but fresh flavor combo.
What makes this recipe stand out? The use of coconut sugar instead of refined sugar lends a deeper, more nuanced sweetness that balances the tartness of strawberries perfectly. Plus, I blend rolled oats and gluten-free flour in just the right ratio to get a bar that’s tender but holds together well—no crumbly mess here! Honestly, it’s the kind of snack where you close your eyes after the first bite and feel a little happy sigh escape. If you want a simple healthy snack that feels like a treat, this one’s for you.
What Ingredients You Will Need
This recipe uses simple, wholesome ingredients to deliver bold flavor and satisfying texture without the fuss. Most of these are pantry staples, while fresh or frozen strawberries add a seasonal pop. Here’s what you’ll need:
- For the oat crust and topping:
- 1 ½ cups rolled oats (gluten-free certified if needed) – I like Bob’s Red Mill for consistent texture
- 1 cup gluten-free all-purpose flour (make sure it contains xanthan gum or add ½ tsp separately)
- ⅓ cup coconut sugar (adds a rich caramel flavor, but brown sugar works in a pinch)
- ½ tsp baking powder
- Pinch of salt
- ⅓ cup coconut oil, melted (or use vegan butter alternative)
- 2-3 tbsp plant-based milk (almond, oat, or soy, depending on preference)
- For the strawberry filling:
- 2 cups fresh or frozen strawberries, chopped (if frozen, thaw and drain excess liquid)
- 3 tbsp coconut sugar (adjust to taste depending on strawberry sweetness)
- 1 tbsp lemon juice (brightens the flavor)
- 1 tbsp cornstarch or arrowroot powder (to thicken the filling)
If you want to make it nut-free, just double-check your gluten-free flour and oats for cross-contamination. I’ve also swapped in mashed ripe bananas instead of coconut oil for a different moisture profile—works nicely if you want a fruitier bar. In summer, fresh berries shine here, but in winter, frozen strawberries give you that same vibrant taste without the hassle.
Equipment Needed

- 8×8 inch (20×20 cm) baking pan – glass or metal works fine; I prefer glass for even heat distribution.
- Mixing bowls – medium and large sizes for separate dough and filling.
- Measuring cups and spoons – accurate measurements keep these bars consistent.
- Spatula or wooden spoon – for mixing.
- Food processor or blender (optional) – if you want to pulse oats for a finer texture in the crust.
- Parchment paper – makes cleanup easier and helps bars lift out without crumbling.
If you don’t have a food processor, no worries! I usually just mix by hand and it turns out great. Also, a silicone spatula is my personal favorite because it scrapes every bit of dough from the bowl, minimizing waste. For budget-conscious cooks, a simple metal pan and wooden spoon do the job perfectly well.
Preparation Method
- Preheat your oven to 350°F (175°C) and line your 8×8 inch baking pan with parchment paper, leaving some overhang on the sides for easy removal later. This takes about 5 minutes.
- Prepare the oat crust: In a large bowl, combine 1 ½ cups rolled oats, 1 cup gluten-free flour, ⅓ cup coconut sugar, ½ tsp baking powder, and a pinch of salt. Stir well to distribute everything evenly.
- Add the melted coconut oil and plant-based milk to the dry ingredients. Mix with a spatula or your hands until the dough comes together but remains slightly crumbly. It should hold when pressed but isn’t too wet. This step takes around 3-5 minutes. If it feels too dry, add a little more milk, 1 teaspoon at a time.
- Set aside about 1 cup of this oat mixture for the topping. Press the remaining dough evenly into the bottom of your prepared pan, forming the base layer. Use your fingers or the flat bottom of a glass to press firmly and get an even surface.
- Make the strawberry filling: In a medium bowl, toss the chopped strawberries with 3 tbsp coconut sugar, 1 tbsp lemon juice, and 1 tbsp cornstarch. Stir gently but thoroughly to coat all the fruit. The cornstarch helps thicken the filling while baking.
- Spread the strawberry filling evenly over the pressed oat crust. Try not to disturb the crust layer beneath.
- Sprinkle the reserved oat topping evenly over the strawberry filling. It’s okay if it looks a bit crumbly; it will bake into a nice crunchy topping.
- Bake for 35-40 minutes, until the topping is golden brown and the filling is bubbling slightly at the edges. If you notice the top browning too fast, tent it loosely with foil.
- Remove from the oven and let the bars cool completely in the pan, about 1-2 hours. This cooling step is key to firm up the filling and make slicing easier.
- Use the parchment overhang to lift the bars out of the pan. Cut into 12 squares or bars with a sharp knife. Store leftovers in an airtight container in the fridge.
Little tip: I sometimes get distracted and forget to set the timer. Don’t do that! Check at 35 minutes and use the bubbling filling as your visual cue. If it’s still too runny, give it another 5 minutes. Also, if your strawberries are on the juicier side, the cornstarch is your best friend here.
Cooking Tips & Techniques
Making these strawberry oat bars perfectly can feel a bit like a balancing act between chewy and crumbly. Here are some pro tips I’ve picked up:
- Press the crust firmly: This prevents the bottom from falling apart when you slice the bars. I like to use the bottom of a flat glass for even pressure.
- Don’t skip the cooling time: I’ve tried slicing immediately after baking—huge mess! Cooling lets the filling set and the bars hold together.
- Adjust sweetness based on your berries: Strawberries vary in sweetness, so taste them first and tweak coconut sugar accordingly.
- Use room temperature ingredients: Coconut oil melts better and mixes evenly if it’s not cold straight from the fridge.
- Multitasking hack: While the bars bake, clean up your bowls and prep your next snack or meal. Saves time and sanity!
One time I was rushing and skipped the parchment paper—let’s just say scraping the bars off the pan took a solid 20 minutes and a lot of patience. So trust me, parchment is a game changer here.
Variations & Adaptations
These strawberry oat bars are a fantastic base for creativity. Here are a few ways I’ve changed things up or recommend trying:
- Berry Mix-Up: Swap strawberries for mixed berries like blueberries, raspberries, or blackberries. Frozen works perfectly too.
- Nutty Boost: Add ½ cup chopped nuts (walnuts, pecans, or almonds) to the oat crust for extra crunch and protein.
- Chocolate Drizzle: After baking and cooling, drizzle melted vegan dark chocolate over the bars for a decadent touch.
- Lower Sugar Option: Reduce coconut sugar by half and add a splash of vanilla extract to enhance natural sweetness.
- Allergen-Friendly: Use oat flour instead of gluten-free all-purpose flour for a nut-free and simpler ingredient list.
I once made a batch with mashed ripe banana replacing some coconut oil, which gave the bars a softer texture and subtle banana flavor that my kids adored—definitely a winner for picky eaters!
Serving & Storage Suggestions
These bars are best served at room temperature or slightly chilled. Honestly, they’re just as good cold straight from the fridge after a hot day. For a fresh twist, try pairing with a dollop of coconut yogurt or a splash of almond milk.
They make a perfect grab-and-go snack for road trips, school lunches, or post-workout refueling. If you’re serving at a gathering, arrange them on a pretty platter with some fresh strawberries for a pop of color.
Store leftover bars in an airtight container in the refrigerator for up to 5 days. For longer storage, wrap individual bars tightly and freeze for up to 3 months. When reheating, a quick 20-second zap in the microwave brings back that chewy warmth, but let them cool slightly before eating.
Flavors actually deepen after a day or two in the fridge, so if you can wait, the bars taste even better the next day.
Nutritional Information & Benefits
Each bar provides a good source of whole-grain fiber from oats, which supports digestion and keeps you feeling full longer. The strawberries add vitamin C and antioxidants, while coconut sugar offers a lower glycemic index alternative to refined sugar—meaning less of a sugar crash (though moderation is key).
This recipe is naturally vegan and gluten-free, making it suitable for many dietary needs. Just be sure to use certified gluten-free oats if you have celiac or severe gluten intolerance.
These bars are a healthier snack option that satisfies sweet cravings without artificial ingredients or preservatives, aligning well with balanced eating habits.
Conclusion
If you’re looking for a snack that’s easy, nourishing, and downright tasty, these easy vegan gluten-free strawberry oat bars with coconut sugar will quickly become a favorite. They’re reliable, adaptable, and have that comforting homemade feel without complicated steps.
Feel free to tweak the sweetness, fruit, or add-ins to match your preferences. I love this recipe because it feels like a little homemade hug in bar form—simple but special. I really hope you give it a try and make it your own.
Don’t forget to leave a comment sharing your favorite variations or how these bars fit into your snack rotation. Sharing your experience helps others find their new favorite treat too!
Happy baking and snacking!
Frequently Asked Questions (FAQs)
Are these strawberry oat bars truly gluten-free?
Yes, as long as you use certified gluten-free oats and gluten-free all-purpose flour, the bars are safe for gluten-sensitive individuals.
Can I use other fruits instead of strawberries?
Absolutely! Blueberries, raspberries, or a berry mix all work well. Just adjust the sugar depending on the fruit’s natural sweetness.
Is coconut sugar necessary? Can I substitute it?
Coconut sugar adds a unique caramel-like flavor, but you can substitute with brown sugar or maple syrup. Keep in mind liquid sweeteners may affect texture.
How do I store these bars to keep them fresh?
Store in an airtight container in the fridge for up to 5 days or freeze for longer storage. Warm gently before serving if you prefer a softer texture.
Can I make these bars nut-free and soy-free?
Yes, this recipe is naturally soy-free. To keep it nut-free, avoid adding nuts and ensure your gluten-free flour blend is nut-free as well.
Pin This Recipe!
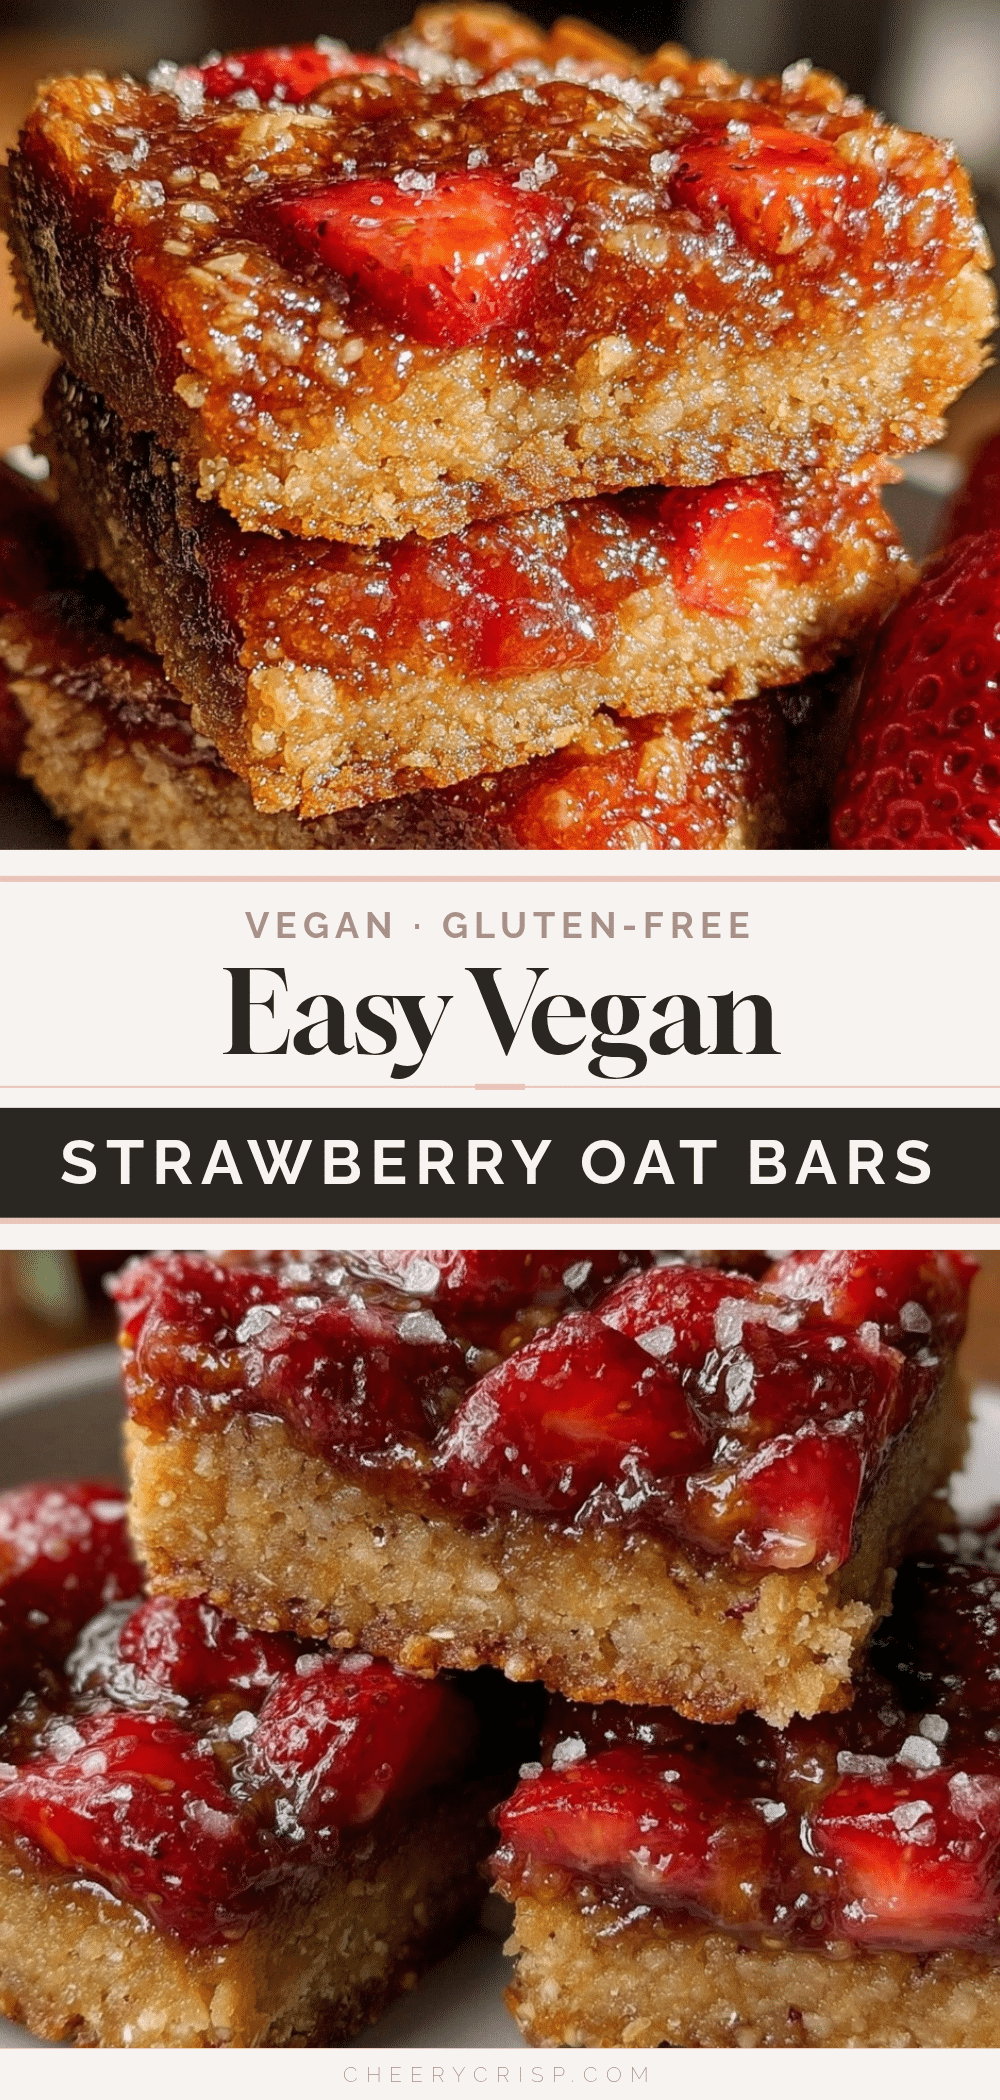
Easy Vegan Gluten-Free Strawberry Oat Bars

These easy vegan gluten-free strawberry oat bars are a wholesome, chewy snack with a tangy-sweet strawberry filling and a subtle caramel flavor from coconut sugar. Perfect for quick, nourishing snacks or lunchbox treats.
- Prep Time: 10 minutes
- Cook Time: 40 minutes
- Total Time: 50 minutes
- Yield: 12 bars 1x
- Category: Snack
- Cuisine: American
Ingredients
- 1 ½ cups rolled oats (gluten-free certified if needed)
- 1 cup gluten-free all-purpose flour (with xanthan gum or add ½ tsp separately)
- ⅓ cup coconut sugar (or brown sugar as substitute)
- ½ tsp baking powder
- Pinch of salt
- ⅓ cup coconut oil, melted (or vegan butter alternative)
- 2–3 tbsp plant-based milk (almond, oat, or soy)
- 2 cups fresh or frozen strawberries, chopped (if frozen, thaw and drain excess liquid)
- 3 tbsp coconut sugar (adjust to taste)
- 1 tbsp lemon juice
- 1 tbsp cornstarch or arrowroot powder
Instructions
- Preheat your oven to 350°F (175°C) and line an 8×8 inch baking pan with parchment paper, leaving some overhang for easy removal.
- In a large bowl, combine rolled oats, gluten-free flour, coconut sugar, baking powder, and salt. Stir well.
- Add melted coconut oil and plant-based milk to the dry ingredients. Mix until dough comes together but remains slightly crumbly. Add more milk if too dry.
- Set aside about 1 cup of the oat mixture for the topping. Press the remaining dough evenly into the bottom of the prepared pan.
- In a medium bowl, toss chopped strawberries with coconut sugar, lemon juice, and cornstarch. Stir to coat all fruit.
- Spread the strawberry filling evenly over the pressed oat crust.
- Sprinkle the reserved oat topping evenly over the strawberry filling.
- Bake for 35-40 minutes until the topping is golden brown and filling bubbles slightly. Tent with foil if top browns too fast.
- Remove from oven and let bars cool completely in the pan for 1-2 hours to firm up.
- Use parchment overhang to lift bars out of pan. Cut into 12 squares and store leftovers in an airtight container in the fridge.
Notes
Press the crust firmly to prevent crumbling. Cool bars completely before slicing to allow filling to set. Adjust coconut sugar based on strawberry sweetness. Use room temperature coconut oil for better mixing. Parchment paper is essential for easy removal.
Nutrition
- Serving Size: 1 bar (1 of 12)
- Calories: 160
- Sugar: 10
- Sodium: 80
- Fat: 7
- Saturated Fat: 5
- Carbohydrates: 23
- Fiber: 3
- Protein: 2
Keywords: vegan, gluten-free, strawberry oat bars, healthy snack, coconut sugar, dairy-free, plant-based, easy recipe