Love this? Save it for later!
Share the inspiration with your friends
Introduction
“You won’t believe these are zucchini,” my friend Mark said, eyeing the golden sticks on my kitchen counter. Honestly, I wasn’t sure either the first time I made this recipe. It was a late Thursday evening, and I was rummaging through my fridge trying to avoid the usual potato fries that tend to weigh me down. I grabbed a couple of zucchinis, thinking I’d give them a shot. The oven was already preheating, and I accidentally knocked over a jar of garlic aioli sauce—messy, yes, but serendipitous because that combo turned into something magical.
Maybe you’ve been there—searching for a snack that’s both satisfying and a little healthier without skimping on the crunch factor. These crispy baked zucchini fries hit that sweet spot. The texture is just right: crispy on the outside, tender on the inside, and paired with that garlicky aioli, it’s game-changing. I still remember the exact moment I bit into the first one and thought, “Why did I wait this long to make these?”
This recipe has stuck around because it’s simple, a little unexpected, and honestly, it’s become my go-to when I want that comfort food vibe without the grease. Plus, it’s a great way to sneak more veggies into your diet without anyone batting an eye. So let me tell you how I make these crispy baked zucchini fries with garlic aioli sauce—you’re going to want to keep this one in your recipe box.
Why You’ll Love This Recipe
Having whipped up countless versions of zucchini fries (and yes, some flops), I can confidently say this recipe nails the balance between crispy, flavorful, and healthy. Tested in my kitchen and approved by friends who usually claim to “not like zucchini,” it’s a winner for sure.
- Quick & Easy: Ready in under 30 minutes, perfect for those busy weeknights or snack attacks.
- Simple Ingredients: You likely have everything on hand—no special grocery runs necessary.
- Perfect for Entertaining: Great for casual get-togethers, game nights, or even a cozy night in.
- Crowd-Pleaser: Kids and adults alike rave about the crunch and the garlicky dip.
- Unbelievably Delicious: The crispy coating combined with tender zucchini and rich aioli is comfort food without the guilt.
What sets this recipe apart? It’s all about the baking technique combined with the garlic aioli that I make from scratch (because store-bought just doesn’t cut it here). The fries come out perfectly crisp—not soggy, not greasy, just right. Plus, the seasoning is spot on, with a little paprika and parmesan adding that extra umph.
This isn’t your average side dish. It’s the kind of recipe that makes you close your eyes after the first bite and say, “Yup, this is the snack I’ve been waiting for.” Whether you’re aiming to impress guests without fuss or just want a tasty way to up your veggie game, these crispy baked zucchini fries with garlic aioli sauce have got you covered.
What Ingredients You Will Need
This recipe uses simple, wholesome ingredients to deliver that bold flavor and satisfying crunch without any fuss. Most are pantry staples, and substitutions are easy if you need to adapt.
- For the Zucchini Fries:
- 2 medium zucchinis (about 14 oz / 400 g), sliced into fries
- 1 cup panko breadcrumbs (use gluten-free panko for GF option) – I like Kikkoman brand for best crunch
- ⅓ cup grated Parmesan cheese (adds richness and sharpness)
- 1 teaspoon smoked paprika (adds subtle smoky flavor)
- ½ teaspoon garlic powder
- Salt and freshly ground black pepper, to taste
- 2 large eggs, beaten (for coating)
- Cooking spray or olive oil for brushing
- For the Garlic Aioli Sauce:
- ½ cup mayonnaise (look for full-fat for creaminess)
- 2 garlic cloves, minced (fresh is best here)
- 1 tablespoon fresh lemon juice
- ½ teaspoon Dijon mustard
- Salt and pepper, to taste
- Optional: a pinch of cayenne for a little kick
- Baking sheet (preferably rimmed to catch drips)
- Parchment paper or silicone baking mat (prevents sticking and helps with cleanup)
- Mixing bowls (one for eggs, one for dry coating)
- Tongs or fork (for dipping fries without mess)
- Whisk or fork (to beat eggs for coating)
- Small bowl for mixing garlic aioli
- Measuring cups and spoons
- Preheat your oven to 425°F (220°C). Line a baking sheet with parchment paper or a silicone mat for easy cleanup. This high heat helps get that crispiness without frying.
- Prepare the zucchini: Wash and dry the zucchinis thoroughly. Slice them into evenly sized fries about 3 inches long and ½ inch thick. Uniform size means even cooking.
- Set up your coating station: In one bowl, beat the 2 eggs with a pinch of salt. In another bowl, combine panko breadcrumbs, grated Parmesan, smoked paprika, garlic powder, salt, and pepper. Mix well to distribute spices.
- Coat the zucchini fries: Dip each zucchini piece into the egg mixture, letting excess drip off, then roll it in the breadcrumb mixture. Press lightly so the coating sticks well. Place coated fries on the baking sheet in a single layer, leaving space between each one (crowding leads to soggy fries).
- Lightly spray or brush the coated fries with olive oil or cooking spray. This helps them brown nicely. I often forget this step and end up with less crisp fries—trust me, don’t skip it!
- Bake for 20-25 minutes, flipping halfway through (around 12 minutes). You want them golden with a crunchy exterior and tender inside. Watch closely the last 5 minutes to avoid burning.
- While the fries bake, prepare the garlic aioli: In a small bowl, combine mayonnaise, minced garlic, lemon juice, Dijon mustard, salt, pepper, and cayenne if using. Stir until smooth. Taste and adjust seasoning as needed.
- Remove fries from oven and let cool for 2 minutes before serving. This brief rest lets the coating firm up.
- Serve immediately with the garlic aioli on the side for dipping. Honestly, it’s a combo that keeps people reaching for more.
- Spicy Zucchini Fries: Add ½ teaspoon cayenne pepper or chili powder to the breadcrumb mix for some heat.
- Gluten-Free Option: Use gluten-free panko breadcrumbs or crushed gluten-free cornflakes.
- Vegan Version: Swap eggs with a flax egg (1 tablespoon ground flaxseed + 3 tablespoons water, mixed and rested) and use vegan mayo for the aioli.
- Different Dipping Sauces: Try a tangy yogurt dill dip or a smoky chipotle mayo instead of garlic aioli.
- Herb-Infused: Mix in finely chopped fresh herbs like parsley or basil into the breadcrumb mixture for a fresh twist.
If you want to keep the aioli lighter, swap mayo with Greek yogurt, but honestly, the mayo gives that silky mouthfeel that’s hard to beat. And if you’re out of smoked paprika, regular paprika works fine but the flavor will be a bit less complex. In summer, feel free to swap zucchini with yellow squash for a colorful twist.
Equipment Needed

If you don’t have parchment paper, lightly grease the baking sheet with olive oil to avoid sticking. I’ve tried a few baking sheets over the years, and a heavy-duty non-stick one makes this so much easier, but budget-friendly options work fine if you spray well. Also, a silicone baking mat is a great investment if you bake fries often. For the aioli, a small whisk works better than a fork for blending smoothly.
Preparation Method
Pro tip: If you want extra crunch, pop the fries under the broiler for 1-2 minutes at the end, but watch them like a hawk—they burn fast!
Cooking Tips & Techniques
One thing I’ve learned is that drying the zucchini before coating is key. If the slices are wet, the breading won’t stick properly, and you’ll get soggy fries. After slicing, pat them down with a clean kitchen towel or paper towel to remove moisture.
Using panko breadcrumbs instead of regular ones makes a huge difference—the larger flakes create that signature crispy texture. Also, mixing in Parmesan adds not just flavor but a lovely golden color when baked.
Don’t overcrowd the baking sheet! You want air to circulate around each fry so they crisp up instead of steaming. If you don’t have a big baking sheet, bake in batches.
Another tip: flipping the fries halfway through baking helps get even coloring. I sometimes use tongs to gently turn each fry, which avoids breaking the coating.
As for the garlic aioli, fresh garlic is a must. Avoid garlic powder here—it just doesn’t have the same punch. If you have time, let the aioli chill in the fridge for 15-20 minutes before serving; the flavors marry beautifully.
Variations & Adaptations
Once, I tried coating the fries with crushed nuts for a different crunch, which was surprisingly good. Just remember to watch the bake time as nuts can brown faster.
Serving & Storage Suggestions
Serve these crispy baked zucchini fries hot or warm with plenty of garlic aioli on the side. They’re fantastic as an appetizer, snack, or side dish alongside something like crispy garlic chicken or a fresh salad.
If you have leftovers (which is rare in my house), store them in an airtight container in the fridge for up to 2 days. To keep them crispy when reheating, pop them in the oven at 375°F (190°C) for 8-10 minutes rather than microwaving, which softens the coating.
Flavors actually deepen a bit after resting, especially the aioli, so you might find the next day’s snack even better—if it lasts that long!
Nutritional Information & Benefits
Each serving provides a light, veggie-forward snack packed with fiber, vitamins A and C from zucchini, and a protein boost from Parmesan and eggs. Baking instead of frying keeps the fat content lower, making it a guilt-free comfort food.
This recipe can easily fit into gluten-free, low-carb (with substitutions), and vegetarian diets. The garlic in the aioli is great for digestion and adds antioxidants, making it a flavorful way to sneak in health benefits.
In my experience, this snack keeps me satisfied longer than typical fried options, probably because of the balanced protein and fiber combo.
Conclusion
Honestly, these crispy baked zucchini fries with garlic aioli sauce are a recipe you’ll come back to again and again. They check all the boxes: easy, delicious, and just a little bit special. Whether you’re looking for a healthier snack or something to impress friends at your next casual gathering, these fries deliver.
Feel free to tweak the seasonings and dipping sauces to match your taste buds—cooking is all about making it your own. I love how this recipe turns humble zucchini into a crave-worthy treat, and I hope it becomes a favorite in your kitchen too.
Give it a try, let me know how your batch turns out, and don’t forget to share your own twists in the comments. Here’s to more crispy, garlicky goodness in your life!
FAQs
Can I freeze these zucchini fries for later?
Freezing is possible but not ideal as the coating might lose crispiness. If you do freeze, freeze them on a baking sheet first, then transfer to a container. Reheat in the oven to bring back crunch.
What’s the best zucchini variety for this recipe?
Regular green zucchinis work best due to their firm texture. Smaller, younger zucchinis tend to have less water and hold up better when baked.
Can I make the garlic aioli ahead of time?
Yes! The aioli can be made up to 2 days in advance and kept refrigerated. Flavors deepen nicely when chilled.
How do I get the fries extra crispy without frying?
Using panko breadcrumbs, baking at a high temp (425°F/220°C), and using a light oil spray helps. Flipping halfway and broiling briefly at the end also boosts crispiness.
Are these zucchini fries kid-friendly?
Absolutely! Most kids love the crispy texture and garlicky dip. You can adjust the seasoning to be milder if preferred.
Pin This Recipe!
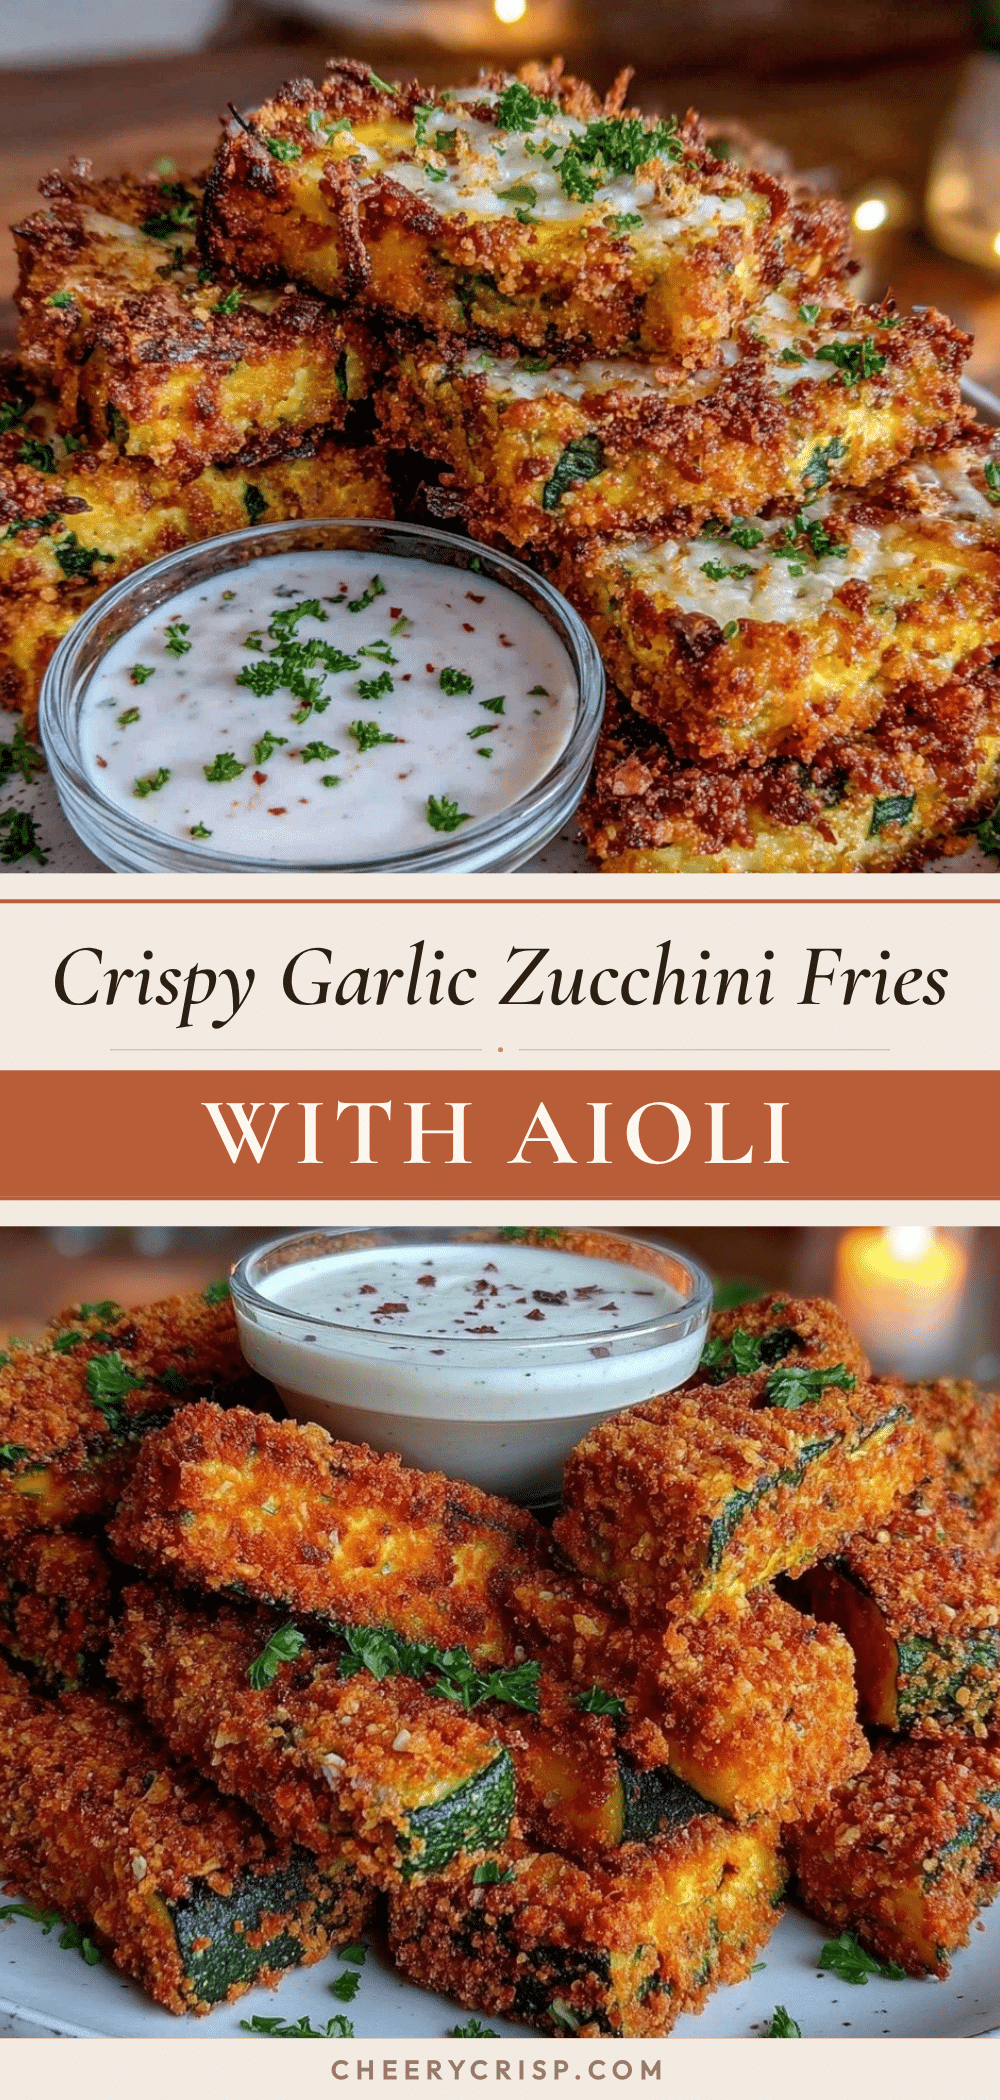
Crispy Baked Zucchini Fries with Garlic Aioli

These crispy baked zucchini fries are a healthy, crunchy snack paired perfectly with a homemade garlic aioli sauce. They are easy to make, flavorful, and a great way to enjoy a guilt-free comfort food.
- Prep Time: 10 minutes
- Cook Time: 25 minutes
- Total Time: 35 minutes
- Yield: 4 servings 1x
- Category: Snack
- Cuisine: American
Ingredients
- 2 medium zucchinis (about 14 oz / 400 g), sliced into fries
- 1 cup panko breadcrumbs (use gluten-free panko for GF option)
- ⅓ cup grated Parmesan cheese
- 1 teaspoon smoked paprika
- ½ teaspoon garlic powder
- Salt and freshly ground black pepper, to taste
- 2 large eggs, beaten
- Cooking spray or olive oil for brushing
- ½ cup mayonnaise
- 2 garlic cloves, minced
- 1 tablespoon fresh lemon juice
- ½ teaspoon Dijon mustard
- Salt and pepper, to taste
- Optional: a pinch of cayenne pepper
Instructions
- Preheat your oven to 425°F (220°C). Line a baking sheet with parchment paper or a silicone mat.
- Wash and dry the zucchinis thoroughly. Slice them into evenly sized fries about 3 inches long and ½ inch thick.
- In one bowl, beat the 2 eggs with a pinch of salt. In another bowl, combine panko breadcrumbs, grated Parmesan, smoked paprika, garlic powder, salt, and pepper. Mix well.
- Dip each zucchini piece into the egg mixture, letting excess drip off, then roll it in the breadcrumb mixture. Press lightly so the coating sticks well. Place coated fries on the baking sheet in a single layer, leaving space between each one.
- Lightly spray or brush the coated fries with olive oil or cooking spray.
- Bake for 20-25 minutes, flipping halfway through (around 12 minutes), until golden and crispy.
- While the fries bake, prepare the garlic aioli: In a small bowl, combine mayonnaise, minced garlic, lemon juice, Dijon mustard, salt, pepper, and cayenne if using. Stir until smooth and adjust seasoning to taste.
- Remove fries from oven and let cool for 2 minutes before serving.
- Serve immediately with the garlic aioli on the side for dipping.
Notes
Dry zucchini slices thoroughly before coating to ensure the breading sticks and fries stay crispy. Do not overcrowd the baking sheet to avoid soggy fries. Flip fries halfway through baking for even crispiness. For extra crunch, broil for 1-2 minutes at the end but watch carefully to prevent burning. Garlic aioli can be made up to 2 days ahead and refrigerated to deepen flavors.
Nutrition
- Serving Size: About 1/4 of the rec
- Calories: 180
- Sugar: 2
- Sodium: 320
- Fat: 12
- Saturated Fat: 3
- Carbohydrates: 12
- Fiber: 2
- Protein: 6
Keywords: zucchini fries, baked zucchini, healthy snack, garlic aioli, crispy fries, gluten-free option, vegetarian snack