Love this? Save it for later!
Share the inspiration with your friends
There used to be a tiny sandwich shop tucked behind a laundromat on Elm Street that made the best turkey and cheese sandwich I have ever eaten. When they closed—just a taped-up sign on the door one Tuesday morning—I honestly felt a little lost. That sandwich was my Tuesday ritual, the thing that got me through the midweek slump. After about twelve tries—some embarrassingly soggy, others just sad—I finally cracked the code. The secret, as it turns out, has nothing to do with fancy bread or expensive cheese. It is all about building a barrier against moisture, and let me tell you, it works like a charm. Maybe you have been there, chasing a flavor memory from a place that no longer exists. This no-soggy-bread turkey and cheese lunchbox sandwich is my tribute to that little shop, and it is the lunch I actually look forward to packing every single day.
The first time I tried to recreate it, I used regular mayonnaise and slapped everything together the night before. By lunchtime, the bread was a disaster—soggy, limp, and totally unappetizing. I almost gave up, but that first bite memory kept nagging at me. So I started playing around with different techniques. I tried toasting the bread (too crunchy for my taste), using lettuce as a barrier (it worked, but the texture was off), and even spreading butter on both slices (messy, but getting closer). The winning combination came to me on a random Wednesday when I was out of mayo and used cream cheese instead. It was a total accident, and honestly, it changed everything. That creamy layer acted like a seal, keeping the bread perfectly intact even after hours in a lunchbox. That is the version I am sharing with you today, and it is the reason I keep making this sandwich week after week. It is simple, it is reliable, and it tastes like victory.
Why You’ll Love This Recipe
Let me be straight with you—this is not just another sandwich recipe. This is the lunchbox hero you have been looking for. After countless trials in my own kitchen, I can tell you with confidence that this no-soggy-bread turkey and cheese lunchbox sandwich solves the single biggest problem parents and meal-preppers face: the dreaded soggy bread. I have tested this method with at least eight different types of bread, three kinds of cheese, and more spreads than I care to admit. The result is a sandwich that stays fresh, flavorful, and structurally sound from morning to lunchtime.
- Quick & Easy: Comes together in under 10 minutes, making it perfect for busy mornings when you are packing lunches for the whole family.
- Simple Ingredients: No fancy grocery trips needed. You likely already have everything in your kitchen—bread, turkey, cheese, and a spread of your choice.
- Perfect for Lunchboxes: Great for school, work, picnics, or road trips. It holds up beautifully in any lunch bag or container.
- Crowd-Pleaser: Always gets rave reviews from kids and adults alike. My niece actually asked for seconds, which never happens.
- Unbelievably Delicious: The texture and flavor combo is next-level comfort food. The bread stays soft, the fillings stay fresh, and every bite is pure satisfaction.
What makes this recipe different from the rest is the barrier technique. Instead of relying on toasting or dry ingredients, you create a moisture-proof layer between the bread and the wet fillings. It is a simple trick that professional sandwich shops use, and it makes all the difference. This is not just another version of a turkey and cheese sandwich—it is the best version. The kind that makes you close your eyes after the first bite, even if you are eating it at your desk or on a park bench. It is comfort food reimagined—fresher, smarter, but with the same soul-soothing satisfaction. Perfect for impressing your kids without stress, or turning a simple lunch into something you actually look forward to.
What Ingredients You Will Need
This recipe uses simple, wholesome ingredients to deliver bold flavor and satisfying texture without the fuss. Most of these are pantry staples, and I have included substitution notes so you can customize it to your liking.
- Bread: 2 slices of your choice (I prefer a sturdy sourdough or whole wheat; avoid super soft breads that tear easily)
- Spread: 2 tablespoons cream cheese, softened (this is the secret weapon—it creates a moisture barrier that mayo alone cannot match; I recommend Philadelphia brand for best texture)
- Deli Turkey: 4-6 slices, depending on thickness (look for oven-roasted or smoked turkey for the best flavor; avoid pre-packaged turkey that is overly wet or watery)
- Cheese: 2 slices of your choice (Swiss, cheddar, provolone, or pepper jack all work beautifully; I prefer Swiss for its mild nuttiness)
- Lettuce: 1-2 large leaves, washed and thoroughly dried (romaine or iceberg work best; the key is drying them completely—any excess water will ruin the barrier)
- Tomato: 3-4 thin slices (optional, but adds a nice freshness; pat them dry with a paper towel before adding to the sandwich)
- Salt and Pepper: To taste (a light sprinkle on the tomato or turkey enhances the flavors)
For the spread, I have tested cream cheese against butter, mayo, and hummus. Cream cheese wins every time because it is thick enough to form a complete seal without making the bread greasy. If you are dairy-free, use a vegan cream cheese or a thick layer of avocado (mashed, not sliced) as your barrier. For a lower-fat option, Greek yogurt works in a pinch, but it is thinner, so you will need to use a generous layer and let it sit for a minute before adding the other ingredients. I also recommend using a high-quality deli turkey from the counter rather than the pre-packaged kind. It has less water content, which means less moisture seeping into your bread. If you can only find pre-packaged, pat the slices dry with a paper towel before assembling. Trust me on this one—it makes a difference.
Equipment Needed
You do not need much for this recipe, which is part of its beauty. Here is what I use:
- Butter knife for spreading the cream cheese evenly across the bread
- Cutting board for assembling the sandwich
- Sharp knife for slicing the sandwich cleanly (a serrated bread knife works best for crusty loaves)
- Paper towels for drying the lettuce and tomato slices thoroughly
- Lunchbox or container that fits the sandwich snugly to prevent shifting
- Parchment paper or reusable wrap for wrapping the sandwich if not using a container
If you do not have a serrated knife, a regular chef’s knife works fine—just use a gentle sawing motion to avoid squishing the sandwich. I have made this sandwich with nothing but a butter knife and my hands, and it turned out great. The most important piece of equipment is actually the paper towels for drying your veggies. I cannot stress this enough. A wet lettuce leaf will undo all your hard work. I learned this the hard way after my third soggy sandwich. Now I pat everything dry like it is my job. For the container, I prefer a snug-fit bento box or a sandwich keeper that holds the sandwich in place. If it slides around too much, the fillings can shift and create gaps in your barrier. A simple piece of parchment paper folded around the sandwich also works wonders—it keeps everything tight and prevents moisture from escaping onto the bread.
Preparation Method
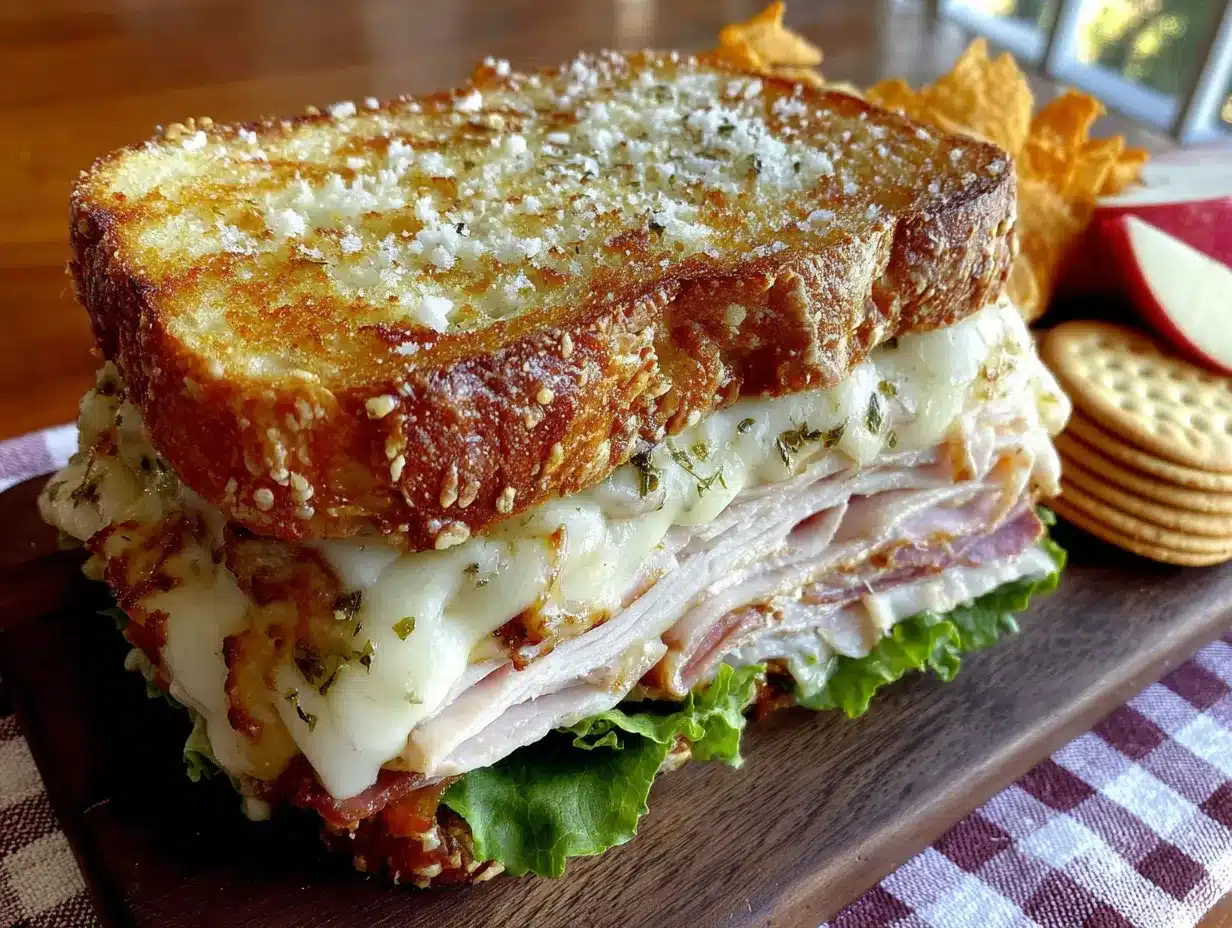
Follow these steps carefully, and you will have a no-soggy-bread turkey and cheese lunchbox sandwich that stays perfect for hours.
- Prepare your ingredients (2 minutes): Take the cream cheese out of the fridge to soften slightly—about 5 minutes at room temperature works perfectly. Wash and thoroughly dry your lettuce leaves using paper towels. Pat them dry until no water droplets remain. Slice your tomato thinly and pat each slice dry as well. If your deli turkey looks wet, pat it dry too. This step is non-negotiable.
- Spread the barrier (1 minute): Lay your two slices of bread on a clean cutting board. Using a butter knife, spread a generous, even layer of cream cheese on one side of each slice. Go all the way to the edges—this creates a complete seal. The layer should be about 1/8 inch thick. If you use too little, moisture can sneak through. Too much, and it overpowers the other flavors. You want a smooth, even coating that covers the entire surface.
- Layer the dry ingredients (2 minutes): On one slice of bread (the bottom slice), place your lettuce leaves. Make sure they cover the bread completely, overlapping slightly if needed. This adds another layer of protection. Next, add your cheese slices. Then layer the turkey slices evenly on top of the cheese. If you are using tomato, place the slices on top of the turkey. Sprinkle a tiny pinch of salt and pepper on the tomato if desired.
- Close and press (30 seconds): Take the second slice of bread (the top slice) and place it cream cheese-side down on top of the fillings. Gently press down on the sandwich with the palm of your hand to help everything stick together. Do not squish it flat—just a gentle, even pressure to compact the layers slightly.
- Wrap or containerize (1 minute): Wrap the sandwich tightly in parchment paper or place it in a snug-fitting container. If using parchment, fold the paper over the sandwich and tuck the ends underneath to create a neat package. This keeps everything in place and prevents the sandwich from drying out. For best results, let the sandwich rest for 5 minutes before packing—this allows the cream cheese to set slightly and bond with the bread.
- Pack and go (30 seconds): Place the wrapped sandwich in your lunchbox with an ice pack if you are using perishable ingredients like turkey and cheese. The sandwich will stay fresh and non-soggy for up to 6 hours at room temperature, or up to 24 hours in the refrigerator.
One thing I always do is make the sandwich the night before and store it in the fridge. The cream cheese barrier actually gets better overnight—it firms up slightly and creates an even stronger seal. Just add the tomato in the morning if you are worried about it making the sandwich wet. I have tested this method with lettuce, tomato, and even pickles, and the bread stays perfectly dry every single time. The key is patience and attention to detail in the prep work. Rush through the drying step, and you will regret it. Take your time, and you will be rewarded with the best lunchbox sandwich of your life.
Cooking Tips & Techniques
After making this no-soggy-bread turkey and cheese lunchbox sandwich more times than I can count, I have picked up a few tricks that make a real difference. First, always let your cream cheese come to room temperature before spreading. Cold cream cheese tears the bread and leaves gaps in your barrier. I learned this the hard way when I tried to rush through a morning packing session and ended up with shredded bread and a soggy mess. Let it sit on the counter for 5-10 minutes, and you will get a smooth, even spread every time.
Another mistake I used to make was using too many wet ingredients. Pickles, sliced cucumbers, and even certain types of roasted peppers can release water over time. If you love those additions, pat them dry thoroughly and place them in the middle of the sandwich, away from the bread. The cream cheese barrier is strong, but it is not invincible. I once added a layer of sliced pickles directly on the bread, and by lunchtime, the barrier had failed. Now I put pickles between the turkey slices, where their moisture is absorbed by the meat rather than the bread.
Timing is also important. If you are packing the sandwich for a school lunch that will be eaten in 3-4 hours, you can assemble it in the morning without any issues. For longer storage, like an overnight camping trip or a full workday, make the sandwich the night before and refrigerate it. The cream cheese barrier sets up beautifully in the fridge, and the flavors actually meld together better. Just avoid adding tomato until the morning, as it tends to release water over time. I also recommend using a sturdy bread like sourdough or a hearty whole wheat for best results. Soft white bread can tear under the pressure of spreading, and it does not hold up as well against moisture. Think of your bread as the foundation of a house—you want it strong and stable.
Variations & Adaptations
One of the best things about this no-soggy-bread turkey and cheese lunchbox sandwich is how easy it is to customize. Here are some of my favorite variations:
- Mediterranean Twist: Swap the cream cheese for hummus, use feta cheese instead of Swiss, and add roasted red peppers and cucumber slices (dried thoroughly). The hummus acts as a fantastic moisture barrier and adds a whole new flavor profile.
- Spicy Southwestern: Use pepper jack cheese, add sliced jalapeños (pickled or fresh, patted dry), and spread a thin layer of refried beans under the cream cheese. The beans add extra protein and help seal the bread even more.
- Apple and Turkey Combo: Add thin slices of Granny Smith apple (patted dry) between the turkey and cheese. The tartness of the apple cuts through the richness of the cheese and adds a wonderful crunch. This is my personal favorite for fall lunches.
- Gluten-Free Option: Use your favorite gluten-free bread. I have tested this with several brands, and the cream cheese barrier works just as well. Just be gentle when spreading, as gluten-free bread can be more delicate.
- Low-Carb Version: Replace the bread with large lettuce leaves or collard greens. Use the cream cheese as a spread on the greens, and wrap everything up like a tortilla. It is not a sandwich in the traditional sense, but it hits the same spot without the carbs.
I have also tried this with different spreads. Avocado works surprisingly well as a barrier, though it is not as firm as cream cheese. Pesto adds incredible flavor but can be oily, so use a thin layer and let it sit for a minute before adding other ingredients. Nut butters like almond or peanut butter are also excellent barriers, especially if you are making a turkey and cheese sandwich with a sweet twist—add a drizzle of honey for a savory-sweet combination that is absolutely addictive.
Serving & Storage Suggestions
This no-soggy-bread turkey and cheese lunchbox sandwich is best served cold or at room temperature. I actually prefer it after it has sat in the fridge for an hour or two—the flavors meld together, and the cream cheese barrier firms up to the perfect consistency. If you are packing it for a school lunch, include an ice pack to keep the turkey and cheese safe. The sandwich will stay fresh for up to 24 hours in the refrigerator, though I recommend eating it within 12 hours for the best texture.
For serving, I like to cut the sandwich diagonally—it just feels more satisfying that way, and it makes the sandwich easier to handle for little hands. Pair it with a side of baby carrots, apple slices, or a small handful of pretzels for a complete lunch. If you are packing it for an adult lunch, add a small container of soup or a side salad for a heartier meal. The sandwich also pairs beautifully with a thermos of hot tomato soup or a cold glass of lemonade.
When it comes to storage, avoid using plastic wrap directly on the sandwich if you are storing it for more than a few hours. Plastic wrap can trap moisture and make the bread sweat, which defeats the purpose of the barrier. Instead, use parchment paper or a breathable sandwich wrap. If you are using a container, choose one that fits the sandwich snugly—too much air space can dry out the bread. I have also frozen these sandwiches successfully. Assemble them without the lettuce and tomato, wrap tightly in parchment and then foil, and freeze for up to a month. Thaw in the refrigerator overnight, and add fresh lettuce and tomato in the morning. The cream cheese barrier holds up beautifully through the freezing and thawing process.
Nutritional Information & Benefits
Here is the approximate nutritional breakdown for one no-soggy-bread turkey and cheese lunchbox sandwich made with sourdough bread, cream cheese, oven-roasted turkey, Swiss cheese, lettuce, and tomato:
| Nutrient | Amount |
|---|---|
| Calories | 380-420 |
| Protein | 28-32g |
| Carbohydrates | 30-35g |
| Fat | 16-20g |
| Fiber | 3-4g |
| Sodium | 800-1000mg |
This sandwich is a great source of lean protein from the turkey, which helps keep you full and satisfied throughout the day. The cream cheese adds a small amount of calcium and healthy fats, while the lettuce and tomato provide a boost of vitamins A and C. If you use whole wheat bread, you will also get additional fiber and B vitamins. For a lower-sodium option, look for low-sodium deli turkey and reduced-fat cheese. The cream cheese barrier also allows you to use less spread than you would with mayonnaise, cutting down on calories and fat without sacrificing flavor. I love that this sandwich feels indulgent but is actually quite balanced—it is the kind of lunch that fuels your afternoon without weighing you down.
Conclusion
This no-soggy-bread turkey and cheese lunchbox sandwich is proof that the best solutions are often the simplest. A little cream cheese, a few careful steps, and you have a lunch that stays fresh, delicious, and structurally sound from the first bite to the last. Whether you are packing for a picky eater, a busy workday, or a weekend picnic, this recipe delivers every single time. I love how versatile it is—you can switch up the cheese, the spread, or the add-ins and get a completely different sandwich every time. It has become my go-to lunch staple, and I honestly look forward to eating it as much as I enjoy making it. Give it a try, and let me know how it turns out. Did you use a different spread? Add a secret ingredient? I would love to hear about your version in the comments below. Happy lunching!
Frequently Asked Questions
Can I make this sandwich the night before?
Yes, absolutely. In fact, the cream cheese barrier sets up even better overnight. Just add the tomato in the morning to prevent excess moisture.
What is the best bread to use for this sandwich?
Sturdy breads like sourdough, whole wheat, or rye work best. Avoid very soft breads that tear easily when spreading the cream cheese.
Can I use mayonnaise instead of cream cheese?
You can, but it is not as effective. Mayonnaise is thinner and can soak into the bread over time. For best results, stick with cream cheese or a thick spread like hummus.
How do I keep the sandwich from getting soggy if I add pickles?
Pat the pickle slices dry with a paper towel and place them in the middle of the sandwich, between the turkey slices, rather than directly on the bread.
Is this sandwich safe to pack for school lunches without an ice pack?
If you are using perishable ingredients like turkey and cheese, it is best to include an ice pack. The sandwich will stay safe for about 2 hours at room temperature without one.
Pin This Recipe!

Best No-Soggy-Bread Turkey and Cheese Lunchbox Sandwich

A foolproof turkey and cheese sandwich that stays perfectly fresh and non-soggy for hours, thanks to a cream cheese moisture barrier. Perfect for lunchboxes, picnics, or meal prep.
- Prep Time: 10 minutes
- Cook Time: 0 minutes
- Total Time: 10 minutes
- Yield: 1 serving 1x
- Category: Lunch
- Cuisine: American
Ingredients
- 2 slices sturdy bread (sourdough or whole wheat recommended)
- 2 tablespoons cream cheese, softened
- 4–6 slices deli turkey (oven-roasted or smoked)
- 2 slices cheese (Swiss, cheddar, provolone, or pepper jack)
- 1–2 large lettuce leaves (romaine or iceberg), washed and thoroughly dried
- 3–4 thin slices tomato (optional), patted dry
- Salt and pepper to taste
Instructions
- Prepare your ingredients: Let cream cheese soften at room temperature for 5 minutes. Wash and thoroughly dry lettuce leaves with paper towels. Slice tomato thinly and pat each slice dry. If deli turkey looks wet, pat it dry too.
- Spread the barrier: Lay bread slices on a cutting board. Spread a generous, even layer of cream cheese (about 1/8 inch thick) on one side of each slice, going all the way to the edges.
- Layer the dry ingredients: On one slice of bread (bottom), place lettuce leaves covering the bread completely. Add cheese slices, then layer turkey evenly on top. If using tomato, place slices on turkey and sprinkle with salt and pepper if desired.
- Close and press: Place the second slice of bread cream cheese-side down on top of the fillings. Gently press down with the palm of your hand to compact layers slightly.
- Wrap or containerize: Wrap sandwich tightly in parchment paper or place in a snug-fitting container. Let rest for 5 minutes before packing to allow cream cheese to set.
- Pack and go: Place wrapped sandwich in lunchbox with an ice pack if using perishable ingredients. Sandwich stays fresh for up to 6 hours at room temperature or up to 24 hours in the refrigerator.
Notes
For best results, let cream cheese come to room temperature before spreading. Pat all wet ingredients (lettuce, tomato, turkey) completely dry. For overnight storage, add tomato in the morning. Sturdy bread like sourdough or whole wheat works best. The cream cheese barrier gets even better overnight in the fridge.
Nutrition
- Serving Size: 1 sandwich
- Calories: 380420
- Sugar: 46
- Sodium: 8001000
- Fat: 1620
- Saturated Fat: 810
- Carbohydrates: 3035
- Fiber: 34
- Protein: 2832
Keywords: turkey and cheese sandwich, no soggy bread, lunchbox sandwich, meal prep sandwich, cream cheese sandwich, easy lunch, kid-friendly lunch



