Love this? Save it for later!
Share the inspiration with your friends
Halloween treat bags can be a bit of a letdown, honestly. You spend all that time picking out the perfect costume, carving the pumpkin just right, and then the payoff is a handful of wrapped candies that are gone in thirty seconds. I wanted something that felt a little more special. Something that said, “Hey, I actually thought about this.” But I also needed it to be easy. The kind of thing you could make on a Tuesday night after work without losing your mind. That’s where these Easy Mini Pumpkin Pie Cookies for Halloween Treat Bags came in. They are the perfect little handheld bite of fall, and they solve the “treat bag problem” beautifully.
I had been looking for a Halloween treat that actually tasted like the season. Not just sugar and food coloring, but something with a little warmth. A little spice. Something that would make you close your eyes for a second after you bit into it. These mini cookies are exactly that. They pack all the cozy flavor of a classic pumpkin pie into a buttery, sturdy little cookie that won’t fall apart in a goodie bag. They are the answer to a craving I didn’t even know I had until I took the first batch out of the oven. And the best part? They are genuinely simple to put together, which is the kind of magic you need when you’re already juggling Halloween chaos.
Why You’ll Love This Recipe
These aren’t just another cookie. They are a complete experience in one perfect, two-bite package. I’ve tested this recipe more times than I can count to make sure it delivers every single time. Here is why they are going to become your new go-to for Halloween and beyond.
- Perfect for Treat Bags: These cookies are small, sturdy, and don’t get soggy. They hold their shape beautifully, making them the ideal pre-portioned treat to bag up for parties, classmates, or neighbors.
- Real Pumpkin Flavor: We are using actual pumpkin purée and a warm blend of spices. This isn’t a “pumpkin spice” cookie that tastes like a candle. It tastes like the real deal.
- No Chilling Required: The dough comes together fast and goes straight into the oven. No waiting, no fussing. You can have a batch ready in under 30 minutes.
- Simple Ingredients: You probably have most of these in your pantry right now. No weird extracts or hard-to-find specialty items.
- Kid-Friendly to Make: This is a great recipe to get little hands involved. Rolling the dough into balls is a job even the smallest helper can handle.
- Always a Crowd-Pleaser: I have brought these to three different Halloween gatherings and they were the first thing to disappear every single time. Kids love them, but adults are the ones who sneak a second (and third) one.
What makes these different from every other pumpkin cookie recipe out there? It’s the texture. We use a bit of cornstarch in the dough to give them a soft, almost melt-in-your-mouth crumb. They are not cakey and they are not crunchy. They are just right. Plus, the cinnamon-sugar coating on the outside gives them that little extra sparkle and crunch that makes them feel like a real bakery treat.
What Ingredients You Will Need
This recipe uses simple, wholesome ingredients to deliver that big pumpkin pie flavor without any fuss. Everything comes together with items you likely already have in your kitchen. Let me walk you through each one.
- Unsalted Butter: 1/2 cup (1 stick), softened to room temperature. Using unsalted butter lets you control the salt level in the cookie. I always use a good quality butter like Kerrygold for the best flavor, but any brand works fine.
- Granulated Sugar: 1/2 cup. This provides the sweetness and helps create that soft, tender crumb. We will also use a little extra for rolling the cookies.
- Pumpkin Purée: 1/4 cup. Make sure you are using 100% pumpkin purée, not pumpkin pie filling. The pie filling has added sugar and spices that will throw off the recipe. I usually grab a small 15-ounce can and use the leftover for a batch of moist chocolate chip pumpkin bread.
- Large Egg Yolk: 1. Using just the yolk adds richness and tenderness without making the dough too wet. Save the egg white for your breakfast scramble tomorrow!
- Vanilla Extract: 1 teaspoon. Pure vanilla extract makes a difference here. It rounds out the pumpkin and spice flavors beautifully.
- All-Purpose Flour: 1 cup, spooned and leveled. How you measure your flour matters. Spoon it into your measuring cup and level it off with a knife. Scooping directly from the bag can pack in too much flour and make your cookies dry.
- Cornstarch: 2 tablespoons. This is my secret ingredient. It gives the cookies that soft, tender, almost shortbread-like texture that sets them apart.
- Pumpkin Pie Spice: 1 teaspoon. You can use store-bought or make your own. I like to make a big batch of my own blend with cinnamon, nutmeg, ginger, and cloves.
- Ground Cinnamon: 1/2 teaspoon. For an extra layer of warm spice in the dough.
- Baking Powder: 1/2 teaspoon. This gives the cookies just a little lift so they are not too dense.
- Salt: 1/4 teaspoon. Don’t skip this. Salt balances the sweetness and makes all the flavors pop.
- For the Coating: 1/4 cup granulated sugar mixed with 1 teaspoon ground cinnamon. This is what gives the cookies that signature crackled top and sweet, spicy crunch.
Ingredient Swaps: If you are out of pumpkin pie spice, you can use 1/2 teaspoon cinnamon, 1/4 teaspoon nutmeg, 1/4 teaspoon ginger, and a pinch of cloves. For a dairy-free option, you can use a high-quality vegan butter stick, but the texture may be slightly different.
Equipment Needed
You don’t need any fancy equipment for these cookies. Here is what you will need:
- Mixing Bowls: One medium bowl for the dry ingredients and one large bowl for the wet ingredients.
- Electric Hand Mixer or Stand Mixer: A hand mixer works perfectly. You can also cream the butter and sugar by hand with a wooden spoon, but it will take a little more elbow grease.
- Measuring Cups and Spoons: For accurate measuring. This is important for baking.
- Baking Sheets: One or two standard baking sheets. I recommend lining them with parchment paper for easy cleanup and even baking.
- Parchment Paper or Silicone Baking Mat: This prevents sticking and helps the cookies bake evenly.
- Cooling Rack: For letting the cookies cool completely before you bag them up.
- Small Bowl: For the cinnamon-sugar coating.
If you don’t have a cooling rack, you can let the cookies cool on the baking sheet for a few minutes, then carefully transfer them to a plate. It is not ideal, but it works in a pinch.
Preparation Method
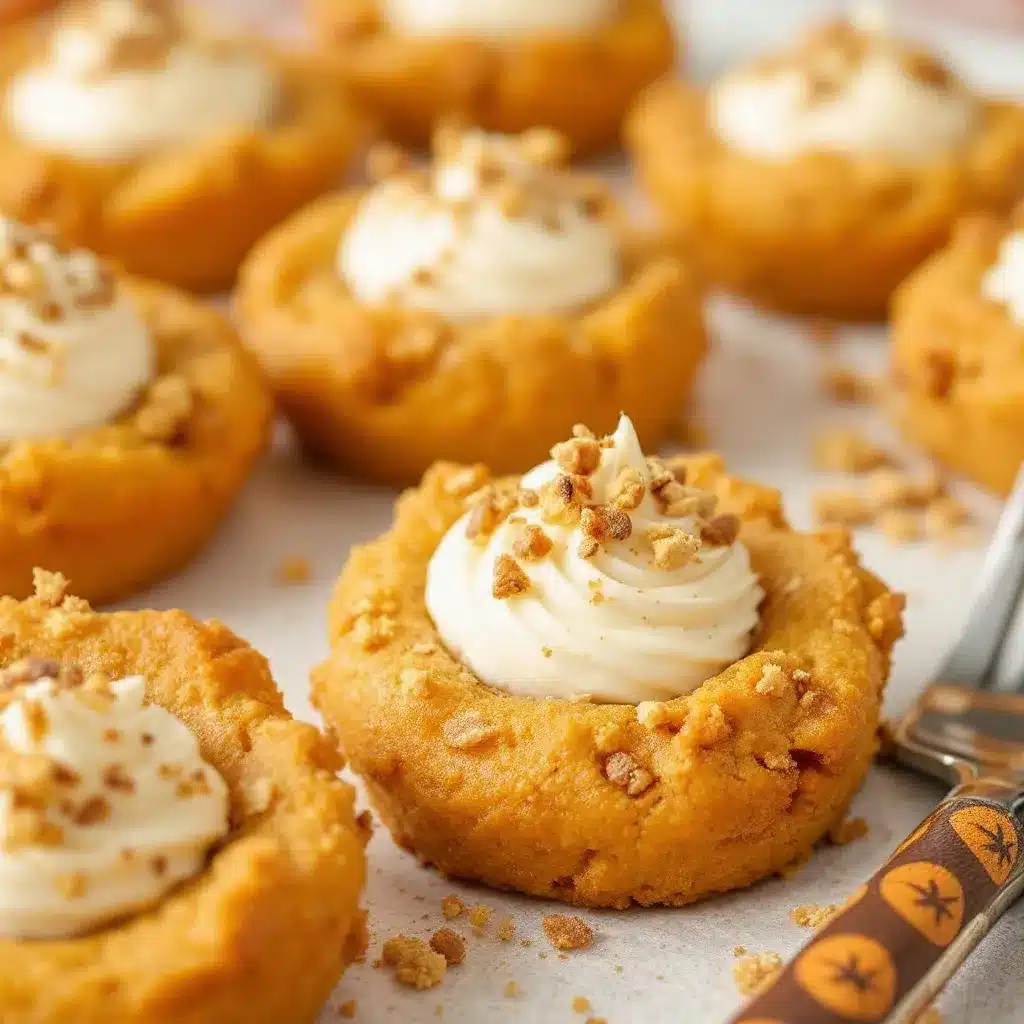
Let’s get to the fun part. This recipe comes together in about 20 minutes of active time. Follow these steps and you will have a tray of perfect mini pumpkin pie cookies.
- Preheat Your Oven: Set your oven to 350°F (175°C). Line your baking sheets with parchment paper or a silicone baking mat. This is non-negotiable for easy cleanup.
- Whisk the Dry Ingredients: In a medium bowl, whisk together the flour, cornstarch, pumpkin pie spice, cinnamon, baking powder, and salt. Set this aside. Whisking ensures everything is evenly distributed so you don’t get a pocket of baking powder in one cookie.
- Cream the Butter and Sugar: In a large bowl, beat the softened butter and 1/2 cup of granulated sugar together with your hand mixer on medium speed. You want this to be light and fluffy, about 2 to 3 minutes. It should look pale and a little bit like whipped cream. (Scrape down the sides of the bowl once during this process.)
- Add the Wet Ingredients: Beat in the pumpkin purée, egg yolk, and vanilla extract. Mix until everything is fully combined. The mixture might look a little curdled or separated at this point. Don’t panic. That is totally normal and will come together once you add the flour.
- Combine Wet and Dry: Add the dry ingredient mixture to the wet ingredients. Mix on low speed until just combined. You want to stop as soon as you don’t see any more streaks of flour. Over-mixing will make the cookies tough. The dough will be soft and a little sticky, which is exactly what you want.
- Prepare the Coating: In a small, shallow bowl, stir together the 1/4 cup of granulated sugar and 1 teaspoon of ground cinnamon.
- Scoop and Roll: Using a small cookie scoop (about 1 tablespoon in size) or a spoon, scoop out portions of dough. Roll each portion into a smooth ball between your palms. The dough is soft, so don’t be afraid to use a light touch. Roll each ball in the cinnamon-sugar mixture until it is fully coated.
- Place on Baking Sheet: Place the coated dough balls on your prepared baking sheets, spacing them about 2 inches apart. They will spread a little, but not a ton. You should be able to fit about 12 cookies per standard baking sheet.
- Bake: Bake for 10 to 12 minutes. The cookies are done when the bottoms are lightly golden and the tops look set and have a few cracks. They will be very soft when they come out of the oven. Do not over-bake them, or they will lose their tender texture. At the 10-minute mark, they should look puffed and the cracks should be visible.
- Cool: Let the cookies cool on the baking sheet for 5 minutes. This allows them to set up enough to be moved. Then, transfer them to a wire cooling rack to cool completely. If you try to move them too soon, they will fall apart. Be patient here.
And that is it. The whole process from start to finish takes less than 30 minutes. You will have about 20 to 24 mini cookies, depending on how big you scoop them.
Cooking Tips & Techniques
I have made these cookies about a dozen times now, and I have learned a few things the hard way so you don’t have to. Here are my best tips for perfect results every time.
Don’t Over-Bake. This is the single most important tip. Because these cookies are so small, they can go from perfect to dry in about 60 seconds. Pull them out when they look puffed and the edges are just barely starting to turn golden. They will continue to cook on the hot baking sheet as they cool. Trust the process. I have definitely left a batch in for “just one more minute” and ended up with cookies that were more like little hockey pucks. Learn from my mistake.
Use Room Temperature Ingredients. Your butter needs to be soft enough that you can easily press a finger into it, but not melted. Cold butter won’t cream properly with the sugar, and your cookies will be dense. If you forgot to take the butter out of the fridge, cut it into small cubes and microwave it in 5-second bursts until it is just soft. The egg yolk should also be at room temperature. Just let it sit on the counter for 15 minutes.
Measure Your Flour Correctly. I cannot stress this enough. The number one reason cookies turn out dry is too much flour. Spoon the flour into your measuring cup and level it off with the back of a knife. Do not scoop directly from the bag. If you want to be extra precise, use a kitchen scale. 1 cup of all-purpose flour should weigh about 120 grams.
Chill if the Dough Gets Too Sticky. On a warm day, the dough might get a little too soft to roll into balls. If that happens, just pop the bowl of dough in the fridge for 15 to 20 minutes. It will firm up and be much easier to handle. I live in a warm climate, so this happens to me more often than I’d like to admit.
Work in Batches. If you only have one baking sheet, let it cool completely between batches. Placing dough on a hot sheet will cause the butter to start melting before the cookies even hit the oven, which leads to flat, greasy cookies. Run the sheet under cold water, dry it off, and line it with fresh parchment.
Variations & Adaptations
One of the best things about this recipe is how easy it is to adapt. Here are a few of my favorite ways to change it up.
- Gluten-Free Version: Swap the all-purpose flour for a 1-to-1 gluten-free baking flour blend. I have tested this with the Bob’s Red Mill 1-to-1 Baking Flour and it works perfectly. The texture is a tiny bit more crumbly, but still delicious.
- Add Chocolate Chips: For a pumpkin chocolate chip cookie, fold in 1/3 cup of mini chocolate chips into the dough before rolling. The little pockets of melted chocolate are incredible with the warm pumpkin spice.
- Maple Glaze: For a more decadent treat, skip the cinnamon-sugar coating and drizzle the cooled cookies with a simple maple glaze. Just whisk together 1/2 cup of powdered sugar with 2 tablespoons of pure maple syrup and a splash of milk until smooth. Drizzle over the cookies and let it set.
- Spice It Up: Add a pinch of cayenne pepper or chipotle powder to the cinnamon-sugar coating for a spicy-sweet kick. It sounds weird, but it works. The heat plays really nicely with the sweet pumpkin flavor.
- Pumpkin Cream Cheese Filling: For a real showstopper, sandwich a dollop of cream cheese frosting between two cookies. Use a simple frosting made from 4 ounces of cream cheese, 2 tablespoons of butter, 1 cup of powdered sugar, and a splash of vanilla. It is over the top, but sometimes that is exactly what you need.
Serving & Storage Suggestions
These cookies are incredibly versatile when it comes to serving. They are fantastic on their own, but here are a few ways to make them even better.
Serving Temperature: These cookies are delicious at room temperature, but I actually prefer them just slightly warm. If you are serving them a few hours after baking, pop them in a 300°F oven for 3 to 4 minutes to warm them through. It makes the texture even more tender and the spices more fragrant.
For Halloween Treat Bags: This is where they really shine. Once the cookies are completely cool, place one or two in a small cellophane bag. Tie the bag with a piece of orange or black twine. You can even attach a little tag that says “Trick or Treat!” They make the perfect non-candy option for classroom parties or for neighbors with dietary restrictions. They also pair wonderfully with a batch of perfect black velvet cupcakes for a full Halloween dessert spread.
Storage: Store the cookies in an airtight container at room temperature for up to 5 days. Place a piece of bread in the container to help keep them soft. The bread will absorb any excess moisture and the cookies will stay tender. Change the bread out every day if you are storing them for more than a couple of days.
Freezing Instructions: These cookies freeze beautifully. You can freeze the baked cookies in a single layer in a freezer-safe bag or container for up to 3 months. Thaw them at room temperature for about 30 minutes before serving. You can also freeze the unbaked dough balls. Roll them in the cinnamon-sugar, place them on a baking sheet, and freeze them solid. Then, transfer the frozen dough balls to a freezer bag. You can bake them straight from frozen, just add 2 to 3 minutes to the baking time.
Flavor Development: Honestly, these cookies taste even better the next day. The spices have time to meld and mellow out. The texture also gets a little bit softer and more tender. So, feel free to make them a day ahead of your Halloween party. Your future self will thank you.
Nutritional Information & Benefits
While these are definitely a treat, they do have a few redeeming qualities. Here is the estimated nutritional breakdown for one cookie (based on a batch of 22 cookies).
| Nutrient | Amount per Cookie |
|---|---|
| Calories | 95 |
| Total Fat | 4.5g |
| Saturated Fat | 2.8g |
| Cholesterol | 20mg |
| Sodium | 45mg |
| Total Carbohydrates | 13g |
| Dietary Fiber | 0.5g |
| Sugars | 7g |
| Protein | 1g |
| Vitamin A | 15% DV |
The star ingredient here is pumpkin. It is packed with Vitamin A, which is great for eye health and your immune system. It also adds a good dose of fiber and antioxidants. The cinnamon is also a powerhouse of anti-inflammatory properties. So, while you are enjoying a delicious cookie, you are also getting a little nutritional boost. It is a win-win. Just remember, the key is moderation. These are a wonderful treat to enjoy as part of a balanced diet. If you are looking for a healthier breakfast option to balance things out, try these healthy baked pumpkin protein oatmeal cups.
Conclusion
These Easy Mini Pumpkin Pie Cookies for Halloween Treat Bags are the kind of recipe that makes you look like a rockstar with very little effort. They are cute, they are delicious, and they are genuinely fun to make. They solve the “what do I bring to the Halloween party?” dilemma in the best possible way. You get all the cozy, comforting flavors of fall in a perfectly portable, two-bite package.
I love this recipe because it feels like a little hug in cookie form. It is the treat I look forward to making every October. I hope you give them a try and make them your own. Maybe you will add a little extra cinnamon. Maybe you will sneak in some chocolate chips. That is the beauty of a simple, solid recipe. It is a starting point for your own kitchen creativity.
I would love to hear how they turn out for you. Did you make any changes? Did you bag them up for a party? Drop a comment below and let me know. And if you are looking for another fun Halloween treat to add to your menu, you have to check out these easy mummy wrapped sausages. They are the perfect savory counterpart to these sweet little cookies. Happy baking, and have a wonderful Halloween!
Frequently Asked Questions
Can I use a gluten-free flour blend in this recipe?
Yes, absolutely. A 1-to-1 gluten-free baking flour blend works perfectly. I have tested this with Bob’s Red Mill brand and the cookies came out tender and delicious. Just make sure the blend contains xanthan gum for structure.
My dough is too sticky to roll. What should I do?
This can happen if the weather is warm or if your pumpkin purée was a little watery. Just pop the bowl of dough into the refrigerator for 15 to 20 minutes. The chill will firm up the butter and make the dough much easier to handle.
Can I make these cookies ahead of time for a party?
Definitely. These cookies actually taste even better the next day. You can bake them up to two days in advance and store them in an airtight container at room temperature. You can also freeze the baked cookies for up to three months.
My cookies came out flat. What went wrong?
Flat cookies are usually caused by butter that was too soft or melted, or by not using enough flour. Make sure your butter is softened, not melted. Also, be sure to measure your flour correctly by spooning it into the cup and leveling it off.
Can I double this recipe?
Yes, this recipe doubles beautifully. Just make sure you are using a large enough bowl to hold all the ingredients. You may need to bake the cookies in a few extra batches to avoid overcrowding your baking sheets.
Pin This Recipe!
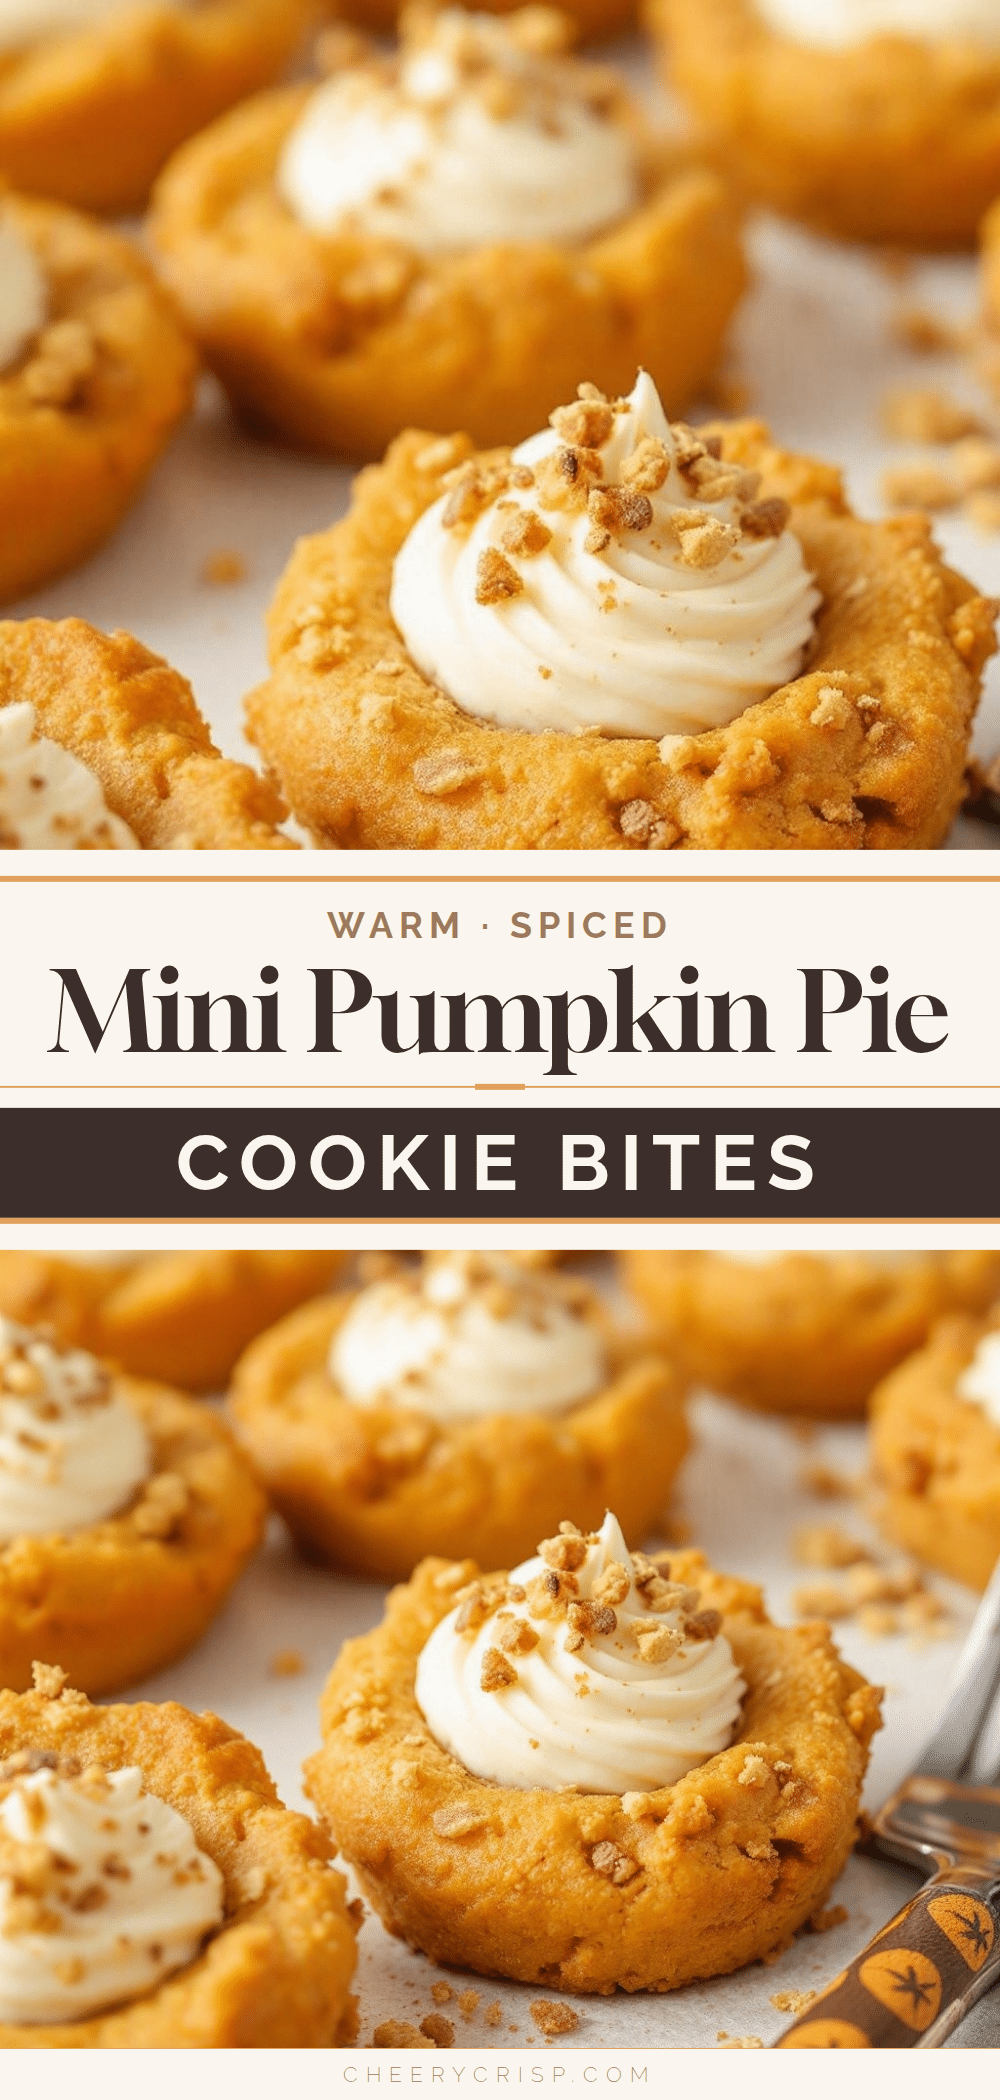
Easy Mini Pumpkin Pie Cookies: Perfect for Halloween Treat Bags
These easy mini pumpkin pie cookies are the perfect handheld bite of fall, packed with warm pumpkin spice flavor and a tender, melt-in-your-mouth texture. Ideal for Halloween treat bags, they are simple to make with no chilling required and are always a crowd-pleaser.
- Prep Time: 20 minutes
- Cook Time: 12 minutes
- Total Time: 32 minutes
- Yield: 22 cookies 1x
- Category: Dessert
- Cuisine: American
Ingredients
- 1/2 cup (1 stick) unsalted butter, softened to room temperature
- 1/2 cup granulated sugar
- 1/4 cup pumpkin purée (100% pumpkin, not pie filling)
- 1 large egg yolk
- 1 teaspoon vanilla extract
- 1 cup all-purpose flour, spooned and leveled
- 2 tablespoons cornstarch
- 1 teaspoon pumpkin pie spice
- 1/2 teaspoon ground cinnamon
- 1/2 teaspoon baking powder
- 1/4 teaspoon salt
- For the coating: 1/4 cup granulated sugar mixed with 1 teaspoon ground cinnamon
Instructions
- Preheat your oven to 350°F (175°C). Line baking sheets with parchment paper or a silicone baking mat.
- In a medium bowl, whisk together the flour, cornstarch, pumpkin pie spice, cinnamon, baking powder, and salt. Set aside.
- In a large bowl, beat the softened butter and 1/2 cup granulated sugar together with an electric hand mixer on medium speed until light and fluffy, about 2 to 3 minutes.
- Beat in the pumpkin purée, egg yolk, and vanilla extract until fully combined.
- Add the dry ingredient mixture to the wet ingredients. Mix on low speed until just combined. The dough will be soft and slightly sticky.
- In a small shallow bowl, stir together the 1/4 cup granulated sugar and 1 teaspoon ground cinnamon for the coating.
- Using a small cookie scoop (about 1 tablespoon), scoop portions of dough and roll into smooth balls. Roll each ball in the cinnamon-sugar mixture until fully coated.
- Place the coated dough balls on the prepared baking sheets, spacing them about 2 inches apart.
- Bake for 10 to 12 minutes, until the bottoms are lightly golden and the tops look set with a few cracks. Do not over-bake.
- Let the cookies cool on the baking sheet for 5 minutes, then transfer to a wire cooling rack to cool completely.
Notes
Don’t over-bake; cookies continue to cook on the hot sheet. Use room temperature ingredients for best results. Measure flour correctly by spooning and leveling. If dough gets too sticky, chill for 15-20 minutes. Cookies taste even better the next day.
Nutrition
- Serving Size: 1 cookie
- Calories: 95
- Sugar: 7
- Sodium: 45
- Fat: 4.5
- Saturated Fat: 2.8
- Carbohydrates: 13
- Fiber: 0.5
- Protein: 1
Keywords: mini pumpkin pie cookies, Halloween treat bags, pumpkin cookies, easy pumpkin cookies, fall cookies, no chill cookies



