Love this? Save it for later!
Share the inspiration with your friends
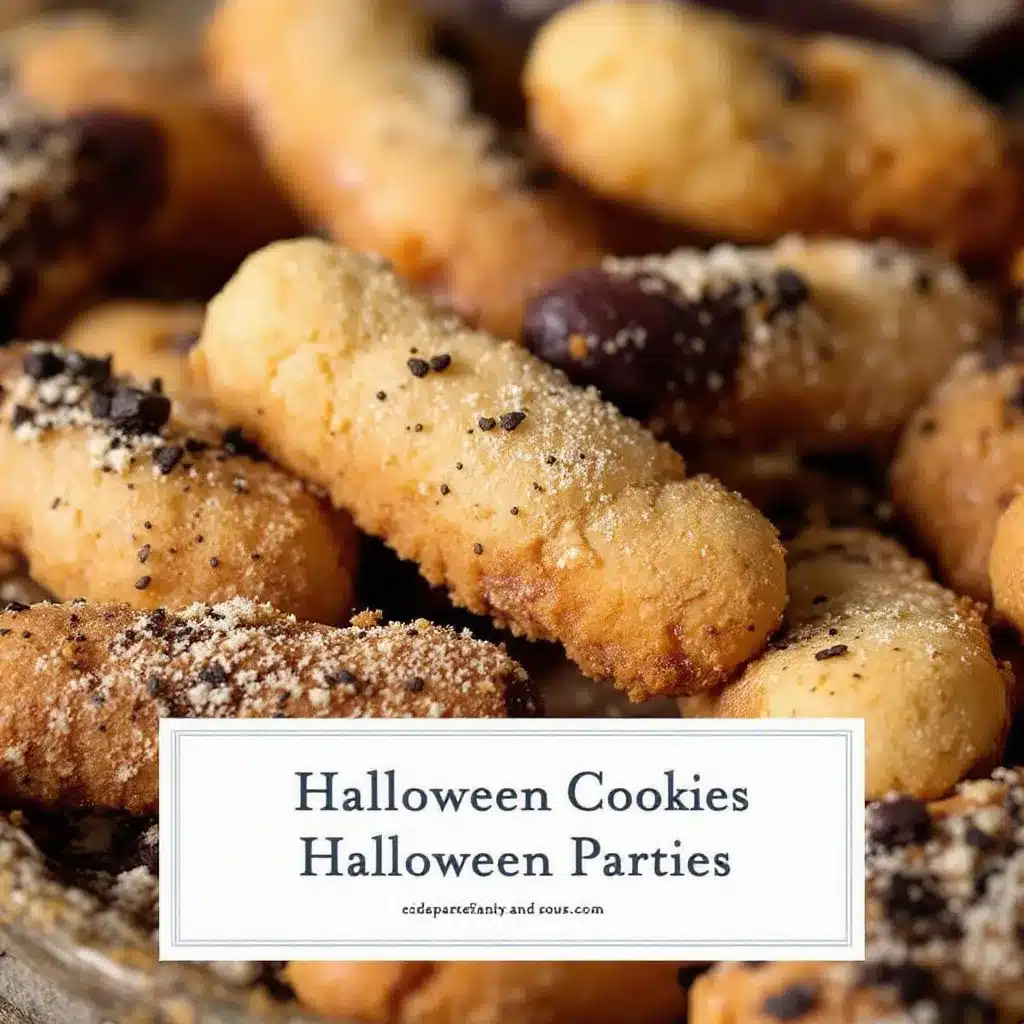
I need a cookie that looks genuinely gross but tastes absolutely nothing like it. That’s the whole thought. Not “oh, let’s make something cute for Halloween.” No. I want someone to pick one up, hesitate, maybe even say “ew,” and then take a bite and immediately reach for another. That’s the energy I’m chasing. Witch finger cookies. They have to look like actual fingers—knuckles, wrinkles, that slightly greenish tint around the nail—but inside, they’re just buttery, almond-scented shortbread with a single toasted almond slice standing in for the fingernail. I’ve got almond extract in the pantry, butter softening on the counter, and a bag of slivered almonds staring at me from the shelf. No grocery run needed. No special molds. Just my hands, some dough, and the willingness to shape thirty-something creepy little digits while my kids watch from the doorway, half horrified and half thrilled.
The trick is commitment. You can’t half-heartedly shape these. You have to press the knuckle indentations deep enough that they survive the oven. You have to smear that red jam or food coloring at the “cuticle” so it looks like the nail was just pressed on. And you absolutely have to position the almond fingernail at a slightly crooked angle—perfectly straight nails ruin the illusion. I learned that the hard way last year when my first batch looked more like elegant lady fingers at a tea party than something you’d find reaching out of a graveyard. This time, I’m going full grotesque. And honestly? It’s way more fun.
There’s something deeply satisfying about making food that tricks the eye before it rewards the mouth. It’s Halloween’s whole deal, right? The thrill of the fake-out. These cookies deliver that in spades. They’re the kind of thing that makes people laugh, then moan, then ask for the recipe before they’ve even swallowed. That’s the magic I’m after.
Why You’ll Love This Recipe
Let me tell you why these spooky witch finger cookies have become my non-negotiable Halloween bake. I’ve tested them four times across three different ovens, adjusted the flour ratio twice, and even tried them with salted butter versus unsalted—the results are consistent every single time. That’s the kind of reliability you want when you’re baking for a party or a classroom event.
- Quick & Easy: From start to finish, you’re looking at about 45 minutes. The dough comes together in one bowl, chills for 20 minutes, and bakes in 12. That’s it. No complicated techniques, no stand mixer required—a hand mixer or even a wooden spoon works fine.
- Simple Ingredients: Butter, sugar, flour, almond extract, salt, and eggs. Plus a handful of slivered almonds and a dab of red jam or gel food coloring. You probably have everything except maybe the almonds already.
- Perfect for Halloween Parties: These are the star of any spread. I brought them to a neighborhood potluck last year and they were gone before the punch bowl was empty. Kids love the gross factor, adults love the buttery shortbread flavor.
- Crowd-Pleaser: I’ve served these to picky eaters, almond-haters, and people who swore they didn’t like shortbread. Every single person changed their tune after one bite. The almond flavor is subtle—it’s more of a fragrant background note than an in-your-face nuttiness.
- Unbelievably Delicious: Here’s the thing—these look like something you’d find in a haunted house prop kit, but they taste like a high-end bakery cookie. The texture is crisp on the outside, tender on the inside, with that unmistakable melt-in-your-mouth quality that only real butter can deliver.
What makes these different from every other witch finger cookie recipe out there? Two things. First, I use a touch of cream cheese in the dough—just an ounce—which gives the cookies a slightly tangy richness and helps them hold their shape better during baking. Second, I brush the finished cookies with a light egg wash before baking, which gives them that slightly shiny, almost waxy “skin” look that makes the illusion complete. It’s a small detail, but it makes a huge difference in the final presentation.
These cookies aren’t just good for Halloween baking. They’re good for connecting with people. Every time I make them, someone tells me a story about baking with their grandma, or about the first time they saw a witch finger cookie at a bakery, or about their own failed attempt that turned into blobs instead of fingers. Food does that—it opens doors. And these creepy little cookies open a lot of doors, usually followed by laughter and requests for seconds.
What Ingredients You Will Need
This recipe uses simple, pantry-friendly ingredients that come together to create something genuinely impressive. There’s nothing fancy here, no obscure extracts or specialty flours—just honest baking staples that work together beautifully.
- Unsalted butter, softened (1 cup / 2 sticks / 226g) — Use good-quality butter here. I prefer Kerrygold or Plugrà for their higher fat content, which makes the cookies more tender. If you only have salted butter, reduce the added salt to ¼ teaspoon.
- Cream cheese, softened (1 ounce / 28g) — This is my secret ingredient. It adds a subtle tang and helps the cookies keep their shape. Full-fat block cream cheese works best—avoid the spreadable tub version.
- Granulated sugar (½ cup / 100g) — Regular white sugar. Nothing special, but don’t substitute with powdered sugar—the texture won’t be right.
- Large egg yolk (1) — Save the white for the egg wash. The yolk adds richness and helps bind the dough without making it too wet.
- Almond extract (1 teaspoon) — This is non-negotiable for the signature flavor. Pure almond extract is worth the extra cost—imitation versions have a chemical aftertaste that’s hard to mask.
- Vanilla extract (½ teaspoon) — Just a touch to round out the almond flavor. Pure vanilla extract, please.
- All-purpose flour (2 cups / 250g) — Spoon and level your flour. Scooping directly from the bag packs it down and gives you too much flour, which makes dry, crumbly cookies.
- Salt (¼ teaspoon) — Fine sea salt or table salt. Don’t skip it—salt balances the sweetness and enhances the almond flavor.
- Slivered almonds (about 30-35 pieces) — These become the fingernails. Look for whole slivered almonds, not sliced—sliced almonds are too thin and break easily. If you can only find whole almonds, slice them lengthwise into 3-4 thin pieces.
- Red jam or gel food coloring (for the “cuticle” area) — Strawberry jam works beautifully. Raspberry too. If you want a bloodier look, use red gel food coloring mixed with a drop of water. I’ve also used beet powder mixed with a tiny bit of water—it works but stains everything it touches.
- Egg wash (1 egg white + 1 tablespoon water, beaten) — This gives the cookies that slightly glossy, skin-like sheen. Don’t skip it—it’s what makes them look like actual fingers instead of pale dough blobs.
Ingredient substitutions I’ve tested: You can use vegan butter and a flax egg (1 tablespoon ground flaxseed + 3 tablespoons water) for a dairy-free, egg-free version. The texture will be slightly less tender, but the shape holds well. For a gluten-free option, swap the all-purpose flour with a 1:1 gluten-free baking blend that contains xanthan gum—I’ve had good results with Bob’s Red Mill. Avoid coconut flour or almond flour; they don’t provide enough structure for shaping.
Equipment Needed
You don’t need much for these cookies, which is part of their charm. Here’s what I use every single time:
- Mixing bowls — One large bowl for the dough, one small bowl for the egg wash. Nothing fancy.
- Hand mixer or stand mixer — A hand mixer works perfectly. If you’re mixing by hand, make sure your butter is very soft and be prepared to work the dough a bit more.
- Rubber spatula — For scraping down the bowl and folding in the flour.
- Baking sheets — Two standard half-sheet pans. Line them with parchment paper or silicone baking mats. I’ve tested both—parchment is easier for cleanup, silicone mats give slightly more even browning.
- Parchment paper or silicone baking mats — Non-negotiable. These cookies stick to unlined pans, especially around the almond fingernails.
- Cooling rack — Wire rack for cooling the cookies completely before handling.
- Small knife or bench scraper — For making the knuckle indentations. A butter knife works too, but a bench scraper gives cleaner lines.
- Pastry brush — For applying the egg wash. A silicone brush is easier to clean, but a natural bristle brush applies a thinner, more even layer.
Budget-friendly alternatives: No pastry brush? Use a clean finger to dab the egg wash on. No bench scraper? The back of a butter knife works fine. No hand mixer? Your wooden spoon will do the job—just cream the butter and sugar together for an extra minute to get enough air into the mixture.
Preparation Method
Let’s get into the actual process. I’ve broken this down step by step so you can follow along without any confusion.
Step 1: Cream the butter and cream cheese. In a large mixing bowl, beat the softened butter and cream cheese together on medium speed until smooth and well combined—about 2 minutes. You want a uniform, pale yellow mixture with no streaks of white cream cheese. Scrape down the sides of the bowl with your spatula halfway through.
Step 2: Add the sugar. Add the granulated sugar and beat on medium-high speed until light and fluffy—about 3 minutes. The mixture should look pale, almost white, and feel airy when you scrape it. This is where you’re building the structure for tender cookies, so don’t rush this step.
Step 3: Add the egg yolk and extracts. Add the egg yolk, almond extract, and vanilla extract. Beat on low speed until just combined—about 30 seconds. Scrape the bowl again. The mixture might look slightly curdled at this point, but that’s fine. It’ll come together when you add the flour.
Step 4: Add the dry ingredients. In a separate small bowl, whisk together the flour and salt. Add this to the butter mixture in two additions, mixing on low speed after each addition until just combined. Stop as soon as you don’t see any more white flour streaks. Overmixing at this stage develops gluten and makes tough cookies.
Step 5: Chill the dough. Scrape the dough onto a piece of plastic wrap, flatten it into a disc, and wrap it tightly. Refrigerate for at least 20 minutes—30 is better. Chilling firms up the butter and makes the dough much easier to shape. If you skip this step, the dough will be too sticky to work with, and your fingers will lose their shape in the oven.
Step 6: Preheat and prepare. While the dough chills, preheat your oven to 325°F (165°C). Line two baking sheets with parchment paper or silicone mats. Have your slivered almonds ready, along with a small bowl of red jam or gel food coloring and a tiny brush or toothpick for applying it.
Step 7: Shape the fingers. Remove the dough from the fridge. Pinch off a piece about the size of a walnut—roughly 1 tablespoon. Roll it between your palms into a log shape about 3 inches long and ¾ inch thick. Don’t make it perfectly uniform. Real fingers have thicker bases and slightly tapered tips. Place it on the prepared baking sheet. Repeat with the remaining dough, spacing the fingers about 2 inches apart—they spread very little, so you can fit 12-15 per sheet.
Step 8: Create the knuckles and details. Using the back of a small knife or a bench scraper, press gentle indentations across each finger at the knuckle points—two lines for the middle knuckle, one for the top knuckle near the “nail.” Press deeply enough that the indentations remain visible after baking. Then, using your fingertip, gently press a small divot at the tip of each finger where the nail will go. This creates a little bed for the almond slice.
Step 9: Add the fingernails. Take a slivered almond and press it gently into the divot at the tip of each finger. Position it at a slight angle—crooked nails look more realistic than perfectly straight ones. Press just firmly enough that it stays in place, but not so hard that it sinks into the dough completely.
Step 10: Apply the egg wash. In a small bowl, beat the reserved egg white with 1 tablespoon of water until frothy. Using your pastry brush, gently brush each finger with the egg wash. This gives them that slightly shiny, skin-like appearance. Don’t brush the almond nails—they’ll brown enough on their own.
Step 11: Add the “blood” or “cuticle” detail. Using a toothpick or a tiny brush, apply a small dab of red jam or gel food coloring at the base of each almond nail, where it meets the dough. This creates the illusion of a bloody cuticle or freshly pressed-on nail. A little goes a long way—you want it to look gruesome, not like a crime scene.
Step 12: Bake. Bake at 325°F (165°C) for 12-14 minutes, or until the cookies are just barely golden around the edges. The bottoms should be lightly browned but the tops should remain pale. Overbaking dries them out and makes the fingers look less realistic—pale fingers are creepy, brown fingers are just burnt cookies.
Step 13: Cool completely. Let the cookies cool on the baking sheets for 5 minutes, then transfer them to a wire rack to cool completely. Don’t try to move them while they’re hot—they’re fragile right out of the oven and the almond nails might fall off. Once fully cooled, they firm up nicely and the nails stay put.
Step 14: Final touches. Once cooled, you can add extra details if you want—a tiny smear of red jam on the “knuckles” for a bruised look, or a light dusting of powdered sugar for a “mummified” effect. I usually leave them as-is, because the simple version is already creepy enough.
Cooking Tips & Techniques
I’ve made these cookies more times than I care to count, and I’ve learned a few things the hard way. Here’s what I wish someone had told me before my first attempt.
Don’t overwork the dough. The first time I made these, I was so focused on getting the perfect finger shape that I kept re-rolling the dough scraps. By the third batch, the cookies were tough and dense. The trick is to handle the dough as little as possible. Shape each finger once, place it on the sheet, and move on. If the dough starts feeling warm and sticky, pop it back in the fridge for 10 minutes.
The almond nail placement matters more than you think. I learned this during my second test batch. I placed the almonds flat against the dough, and they looked like… almonds on cookies. Not fingernails. The key is to press the pointed end of the almond into the dough at a slight angle, so the rounded end sticks up just a tiny bit. It mimics the natural curve of a real fingernail. Also, make sure the almond is facing the right direction—the pointed tip should be pointing toward the fingertip, not the knuckle.
Temperature control is everything. If your kitchen is warm, the dough will get soft and greasy within minutes. Work in batches—keep half the dough in the fridge while you shape the other half. If you notice the dough starting to feel oily, stop what you’re doing and refrigerate everything for 15 minutes. Warm, greasy dough won’t hold its shape, and your fingers will spread into sad little blobs.
Use the right baking sheet. Dark, non-stick baking sheets absorb more heat and can over-brown the bottoms of your cookies before the tops are done. I use light-colored aluminum sheets. If you only have dark sheets, reduce the oven temperature by 25°F and check the cookies at the 10-minute mark.
Don’t skip the chilling step. I know it’s tempting to skip straight to shaping and baking, but the 20-minute chill is non-negotiable. The dough needs that time for the flour to fully hydrate and the butter to firm up. Without it, your fingers will lose their definition in the oven, and you’ll end up with creepy blobs instead of creepy fingers.
Variations & Adaptations
One of the best things about this recipe is how easily it adapts to different tastes, dietary needs, and creative visions. Here are some variations I’ve tried and loved.
Gluten-Free Version: Substitute the all-purpose flour with a 1:1 gluten-free baking blend that contains xanthan gum. I’ve tested this with Bob’s Red Mill 1:1 Baking Flour and Cup4Cup, and both worked well. The dough is slightly more fragile when shaping, so be gentle. Bake time remains the same—12-14 minutes at 325°F.
Vegan Version: Use vegan butter (I like Miyoko’s or Country Crock Plant Butter) and replace the egg yolk with 1 tablespoon of aquafaba (the liquid from a can of chickpeas) mixed with 1 teaspoon of cornstarch. The cream cheese can be replaced with vegan cream cheese—Tofutti or Kite Hill work well. The texture will be slightly less tender, but the shape holds beautifully.
Chocolate Witch Fingers: Add 2 tablespoons of unsweetened cocoa powder to the flour mixture and reduce the flour by 2 tablespoons to compensate. The chocolate version looks even more realistic—like dirt-caked fingers straight out of a grave. I made these for a Halloween party last year and they were the first thing to disappear.
Spiced Pumpkin Fingers: Replace the almond extract with 1 teaspoon of pumpkin pie spice and add 2 tablespoons of pumpkin puree. Reduce the flour by 1 tablespoon to account for the extra moisture. These have a warm, fall flavor that pairs beautifully with the buttery shortbread base. They look less realistic but taste amazing.
Matcha Green Witch Fingers: Add 1 tablespoon of matcha powder to the flour mixture. The green tint gives the cookies an undead, slightly moldy appearance that’s perfect for a zombie or swamp witch theme. The matcha flavor is subtle and earthy—it pairs surprisingly well with the almond extract.
Blood Drip Variation: After baking and cooling, drizzle the fingers with a simple glaze made from powdered sugar and strawberry puree (or red gel food coloring). Let it drip down the sides for a bloody effect. This is extra work, but the visual impact is worth it for a Halloween party centerpiece.
If you’re looking for other Halloween treats to round out your spread, these perfect black velvet cupcakes are a fantastic companion—they’re dark, dramatic, and pair beautifully with the creepy finger cookies. And for a savory option that still fits the theme, these easy mummy-wrapped sausages are always a hit with both kids and adults.
Serving & Storage Suggestions
These cookies are best served at room temperature, straight from the cooling rack. The texture is perfect—crisp on the outside, tender on the inside, with that buttery almond flavor that makes you reach for another before you’ve finished the first one.
Presentation ideas: Arrange the fingers on a platter as if they’re reaching up from the ground. I like to use a black or dark purple serving board and scatter a few fake spiderwebs around the edges. For an extra creepy touch, place a small bowl of red jam in the center for “dipping”—it looks like blood, and guests get a kick out of the visual gag. You can also stand a few fingers upright in a small glass or jar, like they’re reaching out of a grave.
What to serve with them: These cookies pair beautifully with a hot cup of coffee or spiced apple cider. For a Halloween party, serve them alongside a warm mug of homemade spiced pumpkin Halloween coffee syrup for a cozy, themed beverage. They also work well on a dessert table with other Halloween treats—the contrast between the creepy fingers and something sweet like pumpkin bread or caramel apples is delightful.
Storage: Store the cooled cookies in an airtight container at room temperature for up to 5 days. Layer them between sheets of parchment paper to prevent the almond nails from getting knocked off. Do not refrigerate—the refrigerator dries out shortbread and makes it crumbly. If you live in a humid climate, add a piece of bread to the container to absorb excess moisture and keep the cookies crisp.
Freezing: These cookies freeze beautifully. Place the cooled, unadorned cookies in a single layer on a baking sheet and freeze for 1 hour, then transfer them to a freezer-safe bag or container. They’ll keep for up to 3 months. When you’re ready to serve, thaw them at room temperature for 30 minutes, then add the red jam or food coloring details fresh. Do not freeze the cookies with the jam already applied—it will make the cookies soggy as it thaws.
Reheating: If you want to restore that just-baked crispness, place the cookies on a baking sheet in a 300°F (150°C) oven for 3-4 minutes. Let them cool completely before serving. Microwaving is not recommended—it makes the cookies soft and the almond nails can fall off.
Flavor development: Interestingly, these cookies taste even better the day after baking. The almond extract mellows out and the butter flavor becomes more pronounced. If you can resist eating them all on day one, you’re in for a treat on day two.
Nutritional Information & Benefits
Let’s be honest—these are cookies, not health food. But they’re made with real, recognizable ingredients, and that counts for something. Here’s the estimated nutritional breakdown per cookie (based on 30 cookies):
| Nutrient | Amount per Cookie |
|---|---|
| Calories | 115 |
| Total Fat | 7g |
| Saturated Fat | 4g |
| Cholesterol | 25mg |
| Sodium | 45mg |
| Total Carbohydrates | 12g |
| Dietary Fiber | 0.5g |
| Sugars | 5g |
| Protein | 2g |
Health benefits of key ingredients: Almonds are a good source of vitamin E, magnesium, and healthy monounsaturated fats. Butter provides vitamin A and butyrate, a fatty acid that supports gut health. And while we’re not pretending these are a health food, using real butter and real almonds means you’re getting nutrients you simply won’t find in packaged cookies with preservatives and artificial flavors.
Dietary considerations: This recipe contains dairy (butter, cream cheese), eggs, and tree nuts (almonds). It can be made gluten-free with a 1:1 gluten-free flour blend, and vegan with the substitutions listed in the variations section. It is not suitable for those with nut allergies unless you omit the almond extract and use a different “fingernail” (try a white chocolate chip or a slice of dried apple).
My personal take: I believe in balance. These cookies are a once-a-year treat for most people, and there’s nothing wrong with enjoying them fully. The fact that they’re made with simple, whole ingredients is a bonus, not a guilt-trip. Eat two, share the rest, and have a happy Halloween.
Conclusion
These spooky witch finger cookies are everything I want in a Halloween recipe—they’re fun to make, impressive to serve, and genuinely delicious to eat. They’re the kind of cookie that makes people stop, laugh, take a picture, and then ask for the recipe before they’ve even finished their first bite. That’s the magic of Halloween baking, right? The thrill of the unexpected, the joy of sharing something that surprises and delights.
I love these cookies because they remind me that cooking doesn’t always have to be serious. Sometimes it’s okay to play with your food, to make something that looks ridiculous and tastes amazing, to lean into the weird and wonderful side of the kitchen. These cookies are that permission slip, wrapped in butter and almond extract and a single slivered almond.
I’d love to hear how yours turn out. Did you try a variation? Did your kids help shape the fingers? Did anyone at your party scream (in a good way)? Drop a comment below and let me know—I read every single one, and your stories make my day. And if you’re looking for more Halloween inspiration, check out these perfect black velvet cupcakes or these easy mummy-wrapped sausages for a full spooky spread.
Happy Halloween, friends. May your cookies be creepy, your butter be cold, and your almond nails stay perfectly crooked.
Frequently Asked Questions
Can I make these cookies ahead of time?
Absolutely. You can prepare the dough up to 3 days in advance and keep it wrapped tightly in the refrigerator. You can also freeze the shaped, unbaked cookies on a baking sheet, then transfer them to a freezer bag. Bake directly from frozen—just add 2-3 minutes to the baking time.
My almond nails keep falling off after baking. What am I doing wrong?
This usually happens when the almond isn’t pressed firmly enough into the dough, or when the dough was too cold when you added the almond. Make sure you press the almond into the dough at a slight angle, and that the dough is at room temperature—too cold and the almond won’t adhere. Also, let the cookies cool completely on the baking sheet before moving them; the nails are fragile when warm.
Can I use a different nut for the fingernails?
Yes! Slivered pistachios work beautifully and give a slightly green tint that looks even more realistic. You can also use white chocolate chips, sliced dried apple, or even a small piece of toasted coconut for a different texture. Just make sure whatever you use is roughly the same size and shape as a fingernail.
Why did my cookies spread and lose their shape?
This is almost always a temperature issue. Either your oven wasn’t hot enough (invest in an oven thermometer—they’re cheap and worth their weight in gold), or your dough was too warm when it went into the oven. Make sure you chill the dough for the full 20 minutes, and if your kitchen is warm, work in batches and keep the unused dough in the fridge.
Can I make these cookies without almond extract?
You can, but they won’t taste the same. The almond extract is what gives these cookies their signature flavor. If you absolutely must skip it, use an additional ½ teaspoon of vanilla extract instead, or try ½ teaspoon of lemon zest for a different flavor profile. Just know that the result will be a plain shortbread cookie—still delicious, but missing that almond magic.
Pin This Recipe!
Bake These Spooky Witch Finger Cookies

These spooky witch finger cookies look genuinely gross but taste absolutely nothing like it. They’re buttery, almond-scented shortbread with a single toasted almond slice standing in for the fingernail, perfect for Halloween parties.
- Prep Time: 20 minutes
- Cook Time: 12 minutes
- Total Time: 45 minutes
- Yield: 30 cookies 1x
- Category: Dessert
- Cuisine: American
Ingredients
- 1 cup (2 sticks / 226g) unsalted butter, softened
- 1 ounce (28g) cream cheese, softened
- ½ cup (100g) granulated sugar
- 1 large egg yolk
- 1 teaspoon almond extract
- ½ teaspoon vanilla extract
- 2 cups (250g) all-purpose flour
- ¼ teaspoon fine sea salt
- 30–35 slivered almonds
- Red jam or gel food coloring (for cuticle detail)
- 1 egg white + 1 tablespoon water (for egg wash)
Instructions
- In a large mixing bowl, beat the softened butter and cream cheese together on medium speed until smooth and well combined, about 2 minutes.
- Add the granulated sugar and beat on medium-high speed until light and fluffy, about 3 minutes.
- Add the egg yolk, almond extract, and vanilla extract. Beat on low speed until just combined, about 30 seconds.
- In a separate small bowl, whisk together the flour and salt. Add to the butter mixture in two additions, mixing on low speed after each addition until just combined.
- Scrape the dough onto plastic wrap, flatten into a disc, and wrap tightly. Refrigerate for at least 20 minutes (30 is better).
- Preheat oven to 325°F (165°C). Line two baking sheets with parchment paper or silicone mats.
- Pinch off a piece of dough about the size of a walnut (roughly 1 tablespoon). Roll between your palms into a log shape about 3 inches long and ¾ inch thick, with a thicker base and slightly tapered tip. Place on prepared baking sheet. Repeat with remaining dough, spacing fingers about 2 inches apart.
- Using the back of a small knife or bench scraper, press gentle indentations across each finger at the knuckle points (two lines for the middle knuckle, one for the top knuckle). Press a small divot at the tip of each finger for the nail.
- Press a slivered almond gently into the divot at the tip of each finger at a slight angle (crooked nails look more realistic).
- In a small bowl, beat the reserved egg white with 1 tablespoon of water until frothy. Brush each finger with the egg wash, avoiding the almond nails.
- Using a toothpick or tiny brush, apply a small dab of red jam or gel food coloring at the base of each almond nail.
- Bake at 325°F (165°C) for 12-14 minutes, until just barely golden around the edges. The bottoms should be lightly browned but the tops should remain pale.
- Let cookies cool on the baking sheets for 5 minutes, then transfer to a wire rack to cool completely.
- Once cooled, add extra details if desired (e.g., a tiny smear of red jam on knuckles for a bruised look).
Notes
Don’t overwork the dough. The almond nail placement matters—press the pointed end into the dough at a slight angle. Temperature control is key; if dough gets warm, refrigerate. Use light-colored aluminum baking sheets to prevent over-browning. Don’t skip the chilling step. These cookies taste even better the day after baking.
Nutrition
- Serving Size: 1 cookie
- Calories: 115
- Sugar: 5
- Sodium: 45
- Fat: 7
- Saturated Fat: 4
- Carbohydrates: 12
- Fiber: 0.5
- Protein: 2
Keywords: witch finger cookies, Halloween cookies, shortbread cookies, spooky cookies, almond cookies, Halloween baking, creepy cookies



