Love this? Save it for later!
Share the inspiration with your friends
My husband took a bite of this pumpkin sourdough bread, stopped mid-chew, and just stared at the slice in his hand like he was trying to figure out if I’d bought it from a bakery. That moment—the quiet disbelief—is exactly when I knew this recipe was a keeper. I’d been tinkering with my sourdough starter for weeks, trying to get it to play nice with pumpkin puree without turning into a dense, gummy mess. And honestly? There were some real failures along the way. Loaves that barely rose. Bread that smelled amazing but tasted like wet cardboard. You know the drill.
But this one? This one worked. The crumb is tender with just the right chew, the pumpkin keeps it moist for days (if it lasts that long), and the fall spices hit every single note without overpowering the natural tang of the sourdough. It’s the kind of bread that makes toast feel like an event. Slather it with butter, drizzle a little honey, and you’ve got breakfast. Or serve it alongside a bowl of soup and pretend you’re at a cozy café. I’m not here to tell you this bread will change your life, but I will say this—it made my husband stop mid-chew. And that’s pretty high praise in this house.
Why You’ll Love This Recipe
This isn’t just another pumpkin bread recipe. This is pumpkin sourdough bread, which means you get the best of both worlds—the complex, slightly tangy flavor of fermented dough and the warm, cozy sweetness of fall spices. Here’s why this one stands out:
- Perfect Texture : The sourdough starter gives this bread a light, airy crumb with a crisp crust. No dense, brick-like loaves here.
- Real Pumpkin Flavor : We’re using actual pumpkin puree (not just pumpkin spice) which adds moisture and a subtle earthy sweetness.
- Balanced Spices : Cinnamon, nutmeg, ginger, and cloves are measured just right—they complement the sourdough tang without fighting it.
- No Commercial Yeast : This is a naturally leavened bread, which means it’s easier to digest and has that signature sourdough complexity.
- Make-Ahead Friendly : The dough does a slow cold ferment in the fridge, so you can prep it one day and bake it the next.
- Versatile : Great for sandwiches, toast, or just eating warm out of the oven with a pat of butter.
I’ve tested this recipe four times to get the hydration and fermentation timing just right. The first loaf was a pancake. The second was edible but dense. The third and fourth? Goldilocks territory. This is the version I keep making on repeat, and I think you’ll feel the same way.
What Ingredients You Will Need
This recipe uses simple, wholesome ingredients to create something that feels special without requiring a trip to a specialty store. Most of these are pantry staples, especially if you keep a sourdough starter at home.
- Active sourdough starter (100g) — This is your leavening agent. Make sure it’s bubbly and doubled in size before you start. A hungry, sluggish starter will give you a flat loaf.
- Pumpkin puree (200g, about ¾ cup) — Use canned or homemade. If using canned, I prefer Libby’s for consistent texture. Don’t use pumpkin pie filling—it has added sugar and spices that will throw off the balance.
- Bread flour (400g, about 3 cups) — Higher protein content gives better structure. All-purpose works in a pinch, but the crumb won’t be as chewy.
- Whole wheat flour (100g, about ¾ cup) — Adds depth of flavor and a little more nutrition. You can substitute with all-purpose if you prefer a lighter loaf.
- Water (100g, about ½ cup) — Room temperature. The pumpkin adds moisture, so we use less water than a standard sourdough recipe.
- Pumpkin spice blend (2 teaspoons) — I use a mix of cinnamon, nutmeg, ginger, and cloves. You can buy a pre-made blend or make your own.
- Salt (10g, about 1½ teaspoons) — Fine sea salt works best. Don’t skip this—it controls fermentation and enhances flavor.
- Brown sugar (50g, about ¼ cup) — Just a touch to complement the pumpkin and warm spices. Dark brown sugar adds more molasses flavor.
- Butter or olive oil (30g, about 2 tablespoons) — Softens the crumb and adds richness. I use unsalted butter, but olive oil works beautifully too.
If your kitchen runs cold, your starter may take longer to activate. I keep mine on the counter near the stove where it’s slightly warmer. And if you’ve got extra pumpkin puree left over, you can use it in my moist chocolate chip pumpkin bread with sea salt—it’s a completely different vibe but just as good.
Equipment Needed
You don’t need a professional bakery setup to make this bread. Here’s what I use and what you can substitute if needed.
- Digital kitchen scale — I know, I know, measuring cups are easier. But sourdough is finicky, and weight measurements give consistent results. A $15 scale from Amazon does the job.
- Dutch oven — This creates steam and gives you that beautiful, crackly crust. No Dutch oven? Use a heavy baking sheet with a metal bowl inverted over the loaf.
- Banneton or proofing basket — Helps the dough hold its shape during the final rise. A mixing bowl lined with a floured kitchen towel works just fine.
- Bench scraper — Makes handling sticky dough so much easier. A plastic dough scraper is cheap and worth every penny.
- Razor blade or lame — For scoring the dough before baking. A sharp knife will work, but a lame gives cleaner cuts.
- Parchment paper — Prevents sticking and makes transferring the dough into the Dutch oven a breeze.
- Cooling rack — Essential for letting the bread cool properly. Slicing it too early will give you a gummy interior.
I’ve baked this in a cast iron Dutch oven and also in a standard stainless steel pot with an oven-safe lid. Both worked. The key is trapping steam, so whatever you use, make sure the lid fits tightly.
Preparation Method
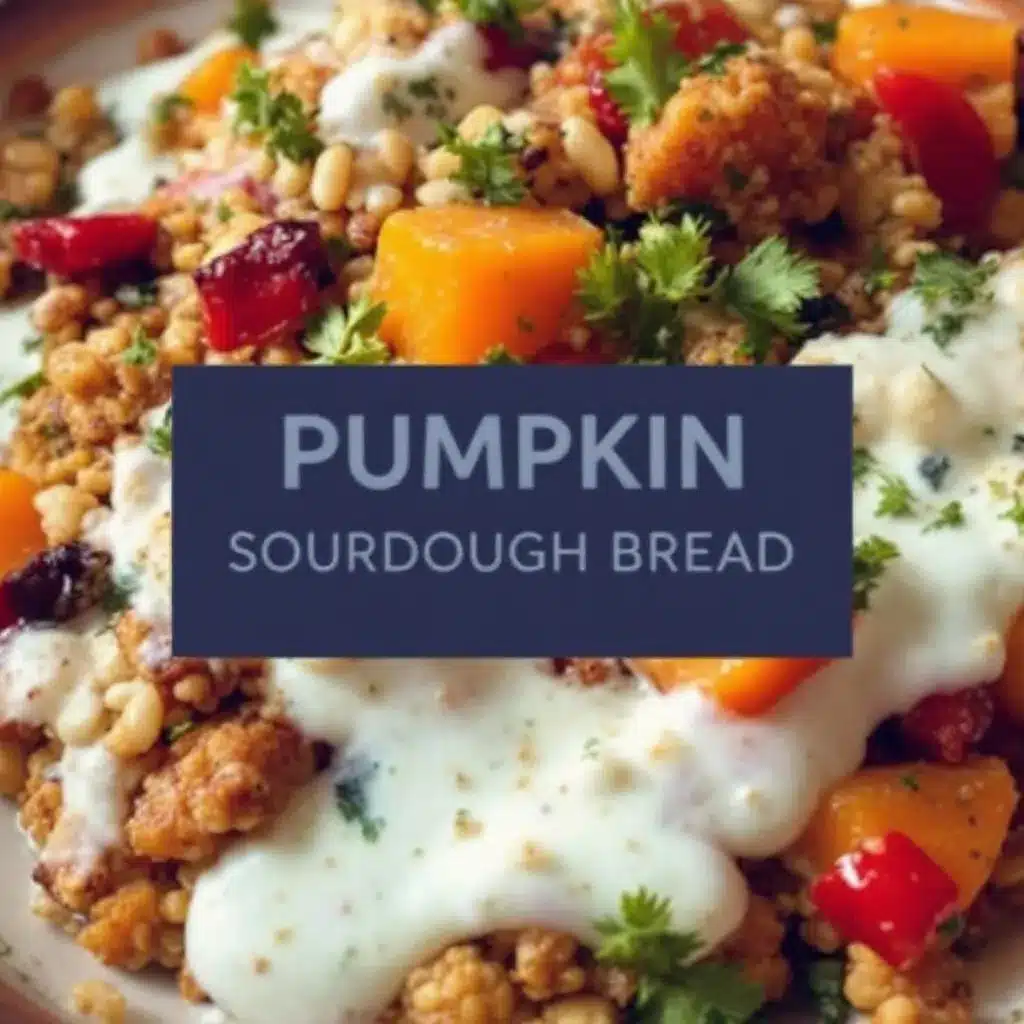
This recipe follows a two-day process. Day one is mixing, stretch and folds, and shaping. Day two is baking. It sounds like a lot, but the active work is only about 20 minutes spread across the day.
Day 1: Mixing and Bulk Fermentation
- Feed your starter (morning, 8-10 hours before mixing). I feed mine a 1:1:1 ratio (50g starter, 50g flour, 50g water) and let it sit at room temperature until it’s bubbly and doubled. A ripe starter should pass the float test—drop a small spoonful in water and see if it floats.
- Mix the dough (when starter is ready). In a large bowl, combine 400g bread flour, 100g whole wheat flour, 10g salt, 2 teaspoons pumpkin spice, and 50g brown sugar. Whisk to distribute. Add 200g pumpkin puree, 100g water, 100g active starter, and 30g softened butter. Mix with your hands or a dough whisk until no dry bits remain. The dough will be shaggy and sticky—that’s normal.
- Rest and stretch (30 minutes). Cover the bowl with a damp towel and let it rest for 30 minutes. This is called autolyse—it lets the flour absorb the liquid and starts developing gluten naturally.
- Stretch and folds (every 30 minutes, 4 rounds). Wet your hands slightly to prevent sticking. Grab one side of the dough, stretch it up, and fold it over the top. Rotate the bowl 90 degrees and repeat. Do 4 stretches total per round. After the fourth round, cover the bowl and let it rest. Repeat this process three more times at 30-minute intervals. After the last round, the dough should feel smoother and more elastic.
- Bulk fermentation (4-6 hours at room temperature). Cover the bowl and let the dough rise. It should increase in volume by about 40-50% and have bubbles visible on the surface. The timing depends on your kitchen temperature—warm kitchens ferment faster, cool kitchens take longer.
- Shape the dough. Lightly flour your work surface. Turn the dough out gently, trying not to deflate it too much. Fold the edges toward the center to create a round boule. Flip it over and use your bench scraper to pull the dough toward you, creating surface tension. Let it rest seam-side down for 15 minutes, then do a final shaping.
- Cold ferment (overnight, 12-18 hours). Place the shaped dough seam-side up in a floured banneton. Cover with a plastic bag or damp towel and refrigerate overnight. This slow ferment develops flavor and makes the dough easier to handle.
Day 2: Baking
- Preheat your oven and Dutch oven (30 minutes before baking). Place your Dutch oven inside the oven and preheat to 475°F (245°C). Let it heat for a full 30 minutes—this is crucial for that first burst of steam.
- Score the dough. Take the dough out of the fridge. Flip it onto a piece of parchment paper. Use your lame or razor blade to make a deep slash across the top, about ½ inch deep. Score confidently—a hesitant cut can cause the dough to tear.
- Bake covered (25 minutes). Carefully place the dough (on the parchment) into the hot Dutch oven. Put the lid on and bake for 25 minutes. The steam trapped inside helps the bread rise and creates a crispy crust.
- Bake uncovered (20-25 minutes). Remove the lid and continue baking until the crust is deep golden brown and the internal temperature reaches 200°F (93°C). If your oven runs hot, check at 18 minutes.
- Cool completely (at least 2 hours). Transfer the bread to a cooling rack. I know it’s tempting to slice into it right away, but cutting too early will give you a gummy, sticky crumb. Patience pays off here.
Cooking Tips & Techniques
I’ve made every mistake in the book with sourdough, so let me save you some trouble.
Watch your hydration. Pumpkin puree is mostly water, but it also contains fiber and starch that absorb liquid differently than flour. If your dough feels overly sticky after the first stretch and fold, resist the urge to add more flour. Give it time—the gluten will develop and the dough will firm up. If it’s still a sticky mess after the second stretch, add a tablespoon of flour at a time.
Temperature matters more than you think. Cold dough is harder to shape and takes longer to bake. If your kitchen is cold (below 68°F), your bulk fermentation might take 8 hours instead of 5. I’ve had loaves that took 10 hours to rise. Don’t rush it. The dough tells you when it’s ready, not the clock.
Don’t skip the scoring. I once forgot to score a loaf and it exploded out the side like a volcano. Scoring gives the dough a controlled place to expand. If your lame drags and catches, dip it in water before each cut.
Steam is your best friend. If you don’t have a Dutch oven, create steam by placing a baking sheet on the bottom rack and pouring a cup of hot water into it right after you put the bread in the oven. Close the door quickly to trap the steam.
I once baked a loaf without preheating the Dutch oven long enough, and the crust came out pale and soft. Now I set a timer for 30 minutes of preheating and don’t rush it. Little details make a big difference.
Variations & Adaptations
This recipe is forgiving enough to play around with. Here are a few ways I’ve tweaked it depending on my mood or what’s in the pantry.
- Add mix-ins : Fold in 100g of toasted pecans, walnuts, or pepitas during the last stretch and fold. The crunch is fantastic against the soft crumb.
- Make it dairy-free : Swap the butter for olive oil or coconut oil. I’ve used olive oil and the flavor is slightly fruity but still works beautifully with the pumpkin and spices.
- Spice it up : Add a pinch of cardamom or allspice for a more complex flavor profile. I did this once on a whim and it was incredible.
- Try whole wheat : Replace the bread flour with all whole wheat flour for a denser, nuttier loaf. You’ll need to add 25-50g more water since whole wheat absorbs more liquid.
- Sweet version : Increase the brown sugar to 75g and add 50g of dried cranberries or raisins. This makes a great breakfast toast with cream cheese.
If you’re feeling adventurous, try using the leftover pumpkin puree in my easy slow cooker pumpkin butter with cinnamon—it’s the perfect spread for this bread.
Serving & Storage Suggestions
This bread is at its best on day one, but it stays surprisingly good for several days if stored properly.
Serving : Slice and toast lightly before serving. The heat brings out the spices and crisps up the crust. Serve with salted butter, honey, or a smear of cream cheese. It’s also fantastic alongside a warm bowl of soup—try it with my creamy roasted tomato soup with fresh basil for the ultimate fall combo.
Storage : Wrap the cooled loaf tightly in beeswax wrap or a clean kitchen towel and keep it at room temperature for up to 3 days. Do not store it in plastic—the crust will turn soft and rubbery. For longer storage, slice the bread, wrap it in plastic wrap, then place the slices in a freezer bag. Freeze for up to 3 months.
Reheating : Toast frozen slices directly from the freezer. Or wrap the whole loaf in foil and warm it in a 350°F oven for 10-15 minutes. The crust will crisp back up beautifully.
One thing I love about this bread is how the flavors deepen on day two. The pumpkin and spices meld together, and the sourdough tang becomes more pronounced. If you can resist eating it all on day one, you’re in for a treat.
Nutritional Information & Benefits
This bread is made with simple, whole ingredients and offers a few nutritional perks worth noting. Per slice (assuming 12 slices per loaf):
- Calories : ~180
- Carbohydrates : 34g
- Protein : 5g
- Fat : 3g
- Fiber : 2g
- Sugar : 6g
Pumpkin is rich in vitamin A and antioxidants, which support eye health and immune function. The whole wheat flour adds fiber and B vitamins, while the sourdough fermentation breaks down phytic acid, making the minerals in the flour more bioavailable. Some people with mild gluten sensitivities find sourdough easier to digest because the fermentation process partially breaks down gluten proteins.
This bread is vegetarian and can be made dairy-free with a simple butter swap. It’s not low-carb, but it’s a more nourishing option than store-bought sandwich bread. If you’re watching your sugar intake, you can reduce the brown sugar to 25g without affecting the texture too much.
Conclusion
This homemade pumpkin sourdough bread with fall spices is the kind of recipe that makes you feel like a real baker—even if you’re just starting out. It’s forgiving enough for beginners but rewarding enough for experienced sourdough enthusiasts. The combination of tangy sourdough, sweet pumpkin, and warm spices is something you won’t find in any store-bought loaf.
I love making this bread on a cool Saturday afternoon, letting the house fill with the smell of cinnamon and nutmeg, and knowing that breakfast the next morning is already taken care of. It’s simple, it’s satisfying, and it’s genuinely delicious.
I’d love to hear how yours turns out. Did you add mix-ins? Try a different spice blend? Let me know in the comments below—and don’t forget to share a photo if you bake it. Happy baking!
Frequently Asked Questions
Can I use all-purpose flour instead of bread flour?
Yes, you can. The bread will be a little less chewy and may not rise as high, but it will still taste great. Just note that all-purpose flour has less protein, so the dough may feel slightly stickier.
Why is my dough so sticky?
Pumpkin puree adds a lot of moisture. If your dough feels overly sticky after the first stretch and fold, don’t panic. Give it time—the gluten will develop and the dough will become more manageable. If it’s still sticky after the second stretch, add a tablespoon of flour at a time until it feels right.
Can I skip the cold ferment?
Technically yes, but I don’t recommend it. The cold ferment develops flavor and makes the dough easier to handle. Without it, the bread will be less tangy and the crumb may be denser. If you’re short on time, you can bake it after a 4-hour room temperature rise, but the results won’t be the same.
How do I know when my starter is ready to use?
Your starter should be bubbly, doubled in size, and smell pleasantly sour—not like nail polish remover. Drop a small spoonful into a glass of water. If it floats, it’s ready. If it sinks, give it another hour or two.
Can I freeze this bread?
Absolutely. Slice the cooled loaf, wrap each slice in plastic wrap, and place them in a freezer bag. They’ll keep for up to 3 months. Toast straight from the freezer for a quick breakfast or snack.
Pin This Recipe!
Perfect Homemade Pumpkin Sourdough Bread with Fall Spices

This pumpkin sourdough bread combines the tangy complexity of naturally leavened dough with warm fall spices and real pumpkin puree for a tender, moist loaf with a crisp crust. It’s perfect for toast, sandwiches, or enjoying warm out of the oven.
- Prep Time: 30 minutes
- Cook Time: 45 minutes
- Total Time: 14 hours (includes overnight cold ferment)
- Yield: 12 servings 1x
- Category: Bread
- Cuisine: American
Ingredients
- 100g active sourdough starter (about ½ cup)
- 200g pumpkin puree (about ¾ cup)
- 400g bread flour (about 3 cups)
- 100g whole wheat flour (about ¾ cup)
- 100g water (about ½ cup), room temperature
- 2 teaspoons pumpkin spice blend (cinnamon, nutmeg, ginger, cloves)
- 10g fine sea salt (about 1½ teaspoons)
- 50g brown sugar (about ¼ cup)
- 30g unsalted butter or olive oil (about 2 tablespoons)
Instructions
- Feed your starter 8-10 hours before mixing until bubbly and doubled in size.
- In a large bowl, combine bread flour, whole wheat flour, salt, pumpkin spice, and brown sugar. Whisk to distribute.
- Add pumpkin puree, water, active starter, and softened butter. Mix until no dry bits remain. The dough will be shaggy and sticky.
- Cover and let rest for 30 minutes (autolyse).
- Perform 4 rounds of stretch and folds every 30 minutes: wet hands, stretch one side of dough up and fold over top, rotate bowl 90°, repeat for 4 stretches per round.
- Cover and let bulk ferment at room temperature for 4-6 hours until increased by 40-50% with visible bubbles.
- Lightly flour work surface, turn out dough, fold edges toward center to form a boule. Flip and use bench scraper to create surface tension. Rest 15 minutes, then final shape.
- Place shaped dough seam-side up in floured banneton, cover, and refrigerate for 12-18 hours (cold ferment).
- Preheat oven and Dutch oven to 475°F (245°C) for 30 minutes.
- Flip dough onto parchment paper, score with a deep slash (about ½ inch deep) using a lame or razor blade.
- Carefully place dough (on parchment) into hot Dutch oven, cover, and bake for 25 minutes.
- Remove lid and bake for 20-25 minutes more until deep golden brown and internal temperature reaches 200°F (93°C).
- Transfer to cooling rack and cool completely for at least 2 hours before slicing.
Notes
Pumpkin puree adds moisture, so use less water than standard sourdough. Cold ferment develops flavor and makes dough easier to handle. Do not skip scoring—it controls expansion. For best crust, preheat Dutch oven for full 30 minutes. Cool completely before slicing to avoid gummy texture. Store wrapped in beeswax wrap or towel at room temperature for up to 3 days; freeze sliced for up to 3 months.
Nutrition
- Serving Size: 1 slice
- Calories: 180
- Sugar: 6
- Sodium: 200
- Fat: 3
- Saturated Fat: 1
- Carbohydrates: 34
- Fiber: 2
- Protein: 5
Keywords: pumpkin sourdough bread, fall sourdough, pumpkin spice bread, homemade sourdough, sourdough bread recipe, pumpkin bread, fall baking, sourdough with pumpkin



