Love this? Save it for later!
Share the inspiration with your friends
By the fourth loaf in six days, I finally stopped overmixing. That was the thing, you see. I kept chasing this vision of a perfectly domed pumpkin bread with chocolate chips suspended like little dark jewels through every slice. But the first three loaves? Dense. Tunnels. Chocolate chips all sunk to the bottom like they gave up on life. And I was standing there, covered in flour for the third time that week, staring at another loaf that looked more like a pumpkin brick than bread.
It was the overmixing. Of course it was. I knew better, honestly, but something about pumpkin puree makes me want to keep stirring until it’s perfectly combined. (It’s not. Stop stirring.) The fourth time, I barely mixed it. Like, twenty folds with a spatula, maybe. I scraped the sides twice and called it done. And there it was — that perfect dome, those tender crumbs, the chocolate chips staying put like they actually wanted to be there. I ate a slice warm, standing over the counter, and let out this little involuntary noise my husband still makes fun of me for.
So here’s the thing about this one-bowl pumpkin chocolate chip bread. It’s not fancy. It doesn’t need a stand mixer or sifting or any of that nonsense. It’s the kind of recipe you make on a Wednesday afternoon because you bought an extra can of pumpkin and suddenly the whole house needs to smell like fall. And it works. Every time, as long as you stop stirring when you think you should keep going.
Why You’ll Love This Recipe
I’ve tested this recipe more times than I’m comfortable admitting out loud. Seven times, actually. And each version taught me something about what makes a truly great quick bread. Here’s what I know for sure:
- One bowl, no mixer. You don’t need a stand mixer, a hand mixer, or even a whisk if you’re feeling lazy. A spatula and a big bowl. That’s it. The cleanup is almost embarrassing.
- Super moist without being heavy. The pumpkin puree does double duty here — it adds flavor and keeps the bread incredibly tender. No dry crumb situation happening on my watch.
- The chocolate chips stay suspended. I figured out the trick. Toss them in a tablespoon of flour before folding them in. They stay put, every single time.
- It gets better the next day. This is the kind of bread that tastes even more flavorful on day two. The spices settle, the moisture distributes, and the chocolate gets all cozy with the pumpkin.
- Perfect for fall baking without the fuss. No creaming butter, no sifting dry ingredients, no complicated steps. Just dump, stir, bake, and try not to eat the whole loaf in one sitting.
This isn’t just another pumpkin bread recipe. It’s the one that makes you close your eyes after the first bite. The one you’ll text your friends about. The one that disappears from the kitchen counter before it’s even fully cooled. And it all comes together in one bowl with ingredients you probably already have.
What Ingredients You Will Need
This recipe uses simple, pantry-friendly ingredients to deliver that perfect pumpkin-chocolate combination. No weird stuff, no special trips to a specialty store. Here’s what you need:
For the Pumpkin Bread Batter
- All-purpose flour (1 ¾ cups / 220g) — regular all-purpose works perfectly. Spoon and level it into your measuring cup for the most accurate measurement.
- Granulated sugar (1 cup / 200g) — adds sweetness and helps with that tender crumb structure.
- Brown sugar (½ cup / 100g, packed) — I use light brown sugar here for moisture and that subtle molasses depth. Dark brown works too if that’s what you have.
- Pumpkin puree (1 cup / 245g) — make sure it’s 100% pumpkin puree, not pumpkin pie filling. I usually grab Libby’s, but any brand works.
- Vegetable oil (½ cup / 120ml) — keeps the bread incredibly moist. Canola or melted coconut oil also work well.
- Eggs (2 large, room temperature) — bring them to room temp by placing them in warm water for 5 minutes if you forgot to take them out earlier.
- Vanilla extract (2 teaspoons) — pure vanilla extract adds warmth and rounds out the pumpkin spice flavors.
- Pumpkin pie spice (2 teaspoons) — if you don’t have it, use 1 teaspoon cinnamon, ½ teaspoon ginger, ¼ teaspoon nutmeg, and ¼ teaspoon cloves.
- Cinnamon (1 teaspoon) — because you can never have too much cinnamon in pumpkin bread.
- Baking soda (1 teaspoon) — helps the bread rise and gives it that beautiful dome.
- Salt (½ teaspoon) — don’t skip it. Salt balances the sweetness and enhances all the flavors.
For the Chocolate Chip Addition
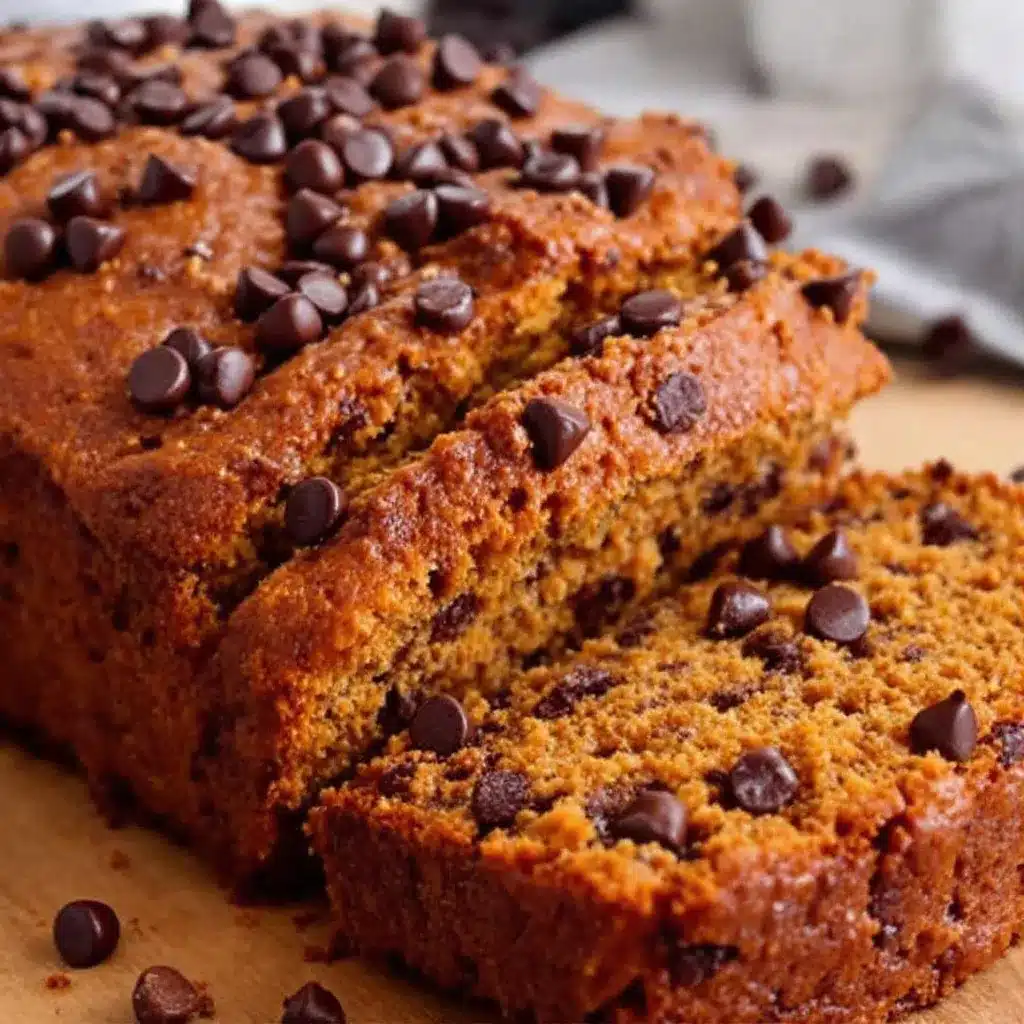
- Semi-sweet chocolate chips (1 cup / 175g) — I prefer Ghirardelli or Guittard for the best melt and flavor. Dark chocolate chips work beautifully too if you want less sweetness.
- Flour (1 tablespoon) — for tossing the chocolate chips. This little trick prevents them from sinking to the bottom.
Equipment Needed
You don’t need much for this recipe, which is honestly one of my favorite things about it. Here’s what you’ll need:
- One large mixing bowl — any big bowl works. I use a ceramic one I picked up at a home goods store for like eight dollars.
- A spatula or wooden spoon — for mixing. A rubber spatula is ideal for scraping down the sides.
- A 9×5-inch loaf pan — standard size. If you use an 8×4-inch pan, you’ll need to bake it a bit longer.
- Parchment paper — for lining the pan. Makes lifting the bread out so much easier.
- Cooling rack — lets air circulate around the bread so it cools evenly. If you don’t have one, you can use the stovetop grates (just clean them first).
- Measuring cups and spoons — for accurate measurements. I cannot stress this enough: spoon and level your flour.
That’s it. No stand mixer, no hand mixer, no sifter, no fuss. If you’ve got these basics, you’re ready to go.
Preparation Method
Let’s make some pumpkin chocolate chip bread. I’ll walk you through every step so you get that perfect loaf on your first try.
- Preheat your oven to 350°F (175°C). Position the rack in the center of the oven. While it’s heating up, line your 9×5-inch loaf pan with parchment paper, letting the edges hang over the sides. This creates little handles for lifting the bread out later. Lightly spray the parchment with nonstick spray if you want extra insurance.
- In your large mixing bowl, combine the sugars and wet ingredients. Add the granulated sugar, brown sugar, pumpkin puree, vegetable oil, eggs, and vanilla extract. Whisk or stir until everything is smooth and well combined. Don’t worry if it looks a bit separated at first — that’s normal. Keep stirring until it comes together into a silky, orange-hued mixture. (About 30 seconds of whisking should do it.)
- Add the dry ingredients right on top. Sprinkle the flour, pumpkin pie spice, cinnamon, baking soda, and salt over the wet mixture. Here’s the important part: stir gently, just until you can’t see any more streaks of flour. Maybe 15 to 20 strokes with your spatula. A few small lumps are perfectly fine — they’ll bake out. Overmixing at this stage develops gluten and makes your bread tough. Trust me on this one. I learned the hard way.
- Toss the chocolate chips with flour. In a small bowl, combine the chocolate chips with that 1 tablespoon of flour. Toss them around until each chip is lightly coated. This little step is the secret to keeping them suspended throughout the bread instead of sinking into a sad chocolate puddle at the bottom.
- Fold in the chocolate chips. Add the floured chocolate chips to the batter. Fold them in with your spatula — just 5 or 6 gentle folds. You want them evenly distributed without overworking the batter. Stop as soon as they’re incorporated.
- Pour the batter into your prepared pan. Use your spatula to scrape every last bit of batter into the pan. Spread it into an even layer. Give the pan a gentle tap on the counter to release any air bubbles.
- Bake for 55 to 65 minutes. Place the pan in the preheated oven and bake until a toothpick inserted into the center comes out clean or with just a few moist crumbs. Start checking at 55 minutes. If the top is browning too quickly but the center isn’t done yet, tent the pan loosely with aluminum foil for the last 10-15 minutes of baking.
- Cool in the pan for 15 minutes. Set the pan on a wire cooling rack. Let it sit for about 15 minutes — this gives the bread time to set up so it doesn’t fall apart when you remove it.
- Lift the bread out and cool completely. Use the parchment paper handles to lift the bread out of the pan. Place it directly on the cooling rack. Let it cool completely before slicing, if you can wait that long. (I usually can’t. Warm slices with a little butter are worth the slightly crumbly slices.)
Cooking Tips & Techniques
After making this recipe seven times in six days, I’ve collected a few tips that will save you from my mistakes. Here’s what I wish someone had told me:
Let your eggs come to room temperature. Cold eggs can make the batter seize up slightly, which affects the texture. If you forgot to take them out ahead of time, place them in a bowl of warm water for 5 minutes. Problem solved.
Don’t overmix the batter. I know I keep saying this, but it’s genuinely the most important tip. Mix until the flour disappears, then stop. A few lumps are totally fine. Overmixing develops gluten and gives you a tough, dense bread instead of that tender, cake-like crumb.
Check your baking soda’s freshness. Baking soda loses its potency over time. If yours has been sitting in the back of your cabinet for a year, it might not give you the rise you want. To test it: drop a teaspoon of baking soda into a small bowl of vinegar. If it fizzes vigorously, it’s still good. If not, buy a new box.
Use the toothpick test properly. Insert a toothpick into the very center of the bread. If it comes out clean or with just a few moist crumbs attached, it’s done. If there’s wet batter on it, give it another 5 minutes and check again.
Let it cool before slicing. I know the smell is intoxicating and you want to dig in immediately. But slicing into hot bread makes it crumble and fall apart. Give it at least 30 minutes on the cooling rack. The texture will be much better, I promise.
Variations & Adaptations
One of the best things about this pumpkin chocolate chip bread is how easy it is to adapt. Here are some of my favorite variations:
Gluten-free version: Swap the all-purpose flour for a good quality 1:1 gluten-free flour blend. I’ve had great results with Bob’s Red Mill and King Arthur brands. Everything else stays the same — no other adjustments needed.
Dairy-free option: This recipe is already dairy-free since it uses oil instead of butter. Just make sure your chocolate chips are dairy-free. Most semi-sweet chips are, but check the label to be safe. Enjoy Life makes great dairy-free chocolate chips.
Nutty pumpkin bread: Add ½ cup of chopped pecans or walnuts along with the chocolate chips. Toast them in a dry skillet for 3-4 minutes first for extra flavor. The crunch is absolutely lovely against the tender crumb.
Spice it up: If you love a strong spice flavor, add an extra teaspoon of pumpkin pie spice and a pinch of black pepper. The pepper doesn’t make it spicy — it just enhances the warmth of the other spices. It sounds weird but trust me, it works.
Make it into muffins: This batter makes about 12 standard muffins. Bake them at 350°F (175°C) for 18-22 minutes. Perfect for grab-and-go breakfasts or lunchbox treats. I love making a batch of these alongside my healthy baked pumpkin protein oatmeal cups for a full week of breakfasts.
Serving & Storage Suggestions
This bread is delicious in so many ways. Here’s how I like to serve and store it:
Serving suggestions: Serve slices warm or at room temperature. For an extra treat, spread a slice with salted butter, cream cheese, or a drizzle of honey. It’s also incredible toasted in a skillet with a little butter until the edges get crispy. I’ve been known to eat it for breakfast with a cup of coffee, as an afternoon snack, and sometimes for dessert with a scoop of vanilla ice cream. No judgment here.
Storage instructions: Store leftover bread in an airtight container at room temperature for up to 4 days. If your kitchen is warm or humid, pop it in the fridge — it’ll last up to a week there. The flavors actually deepen and get more delicious on the second day, so don’t worry if you can’t finish it all at once.
Freezing instructions: This bread freezes beautifully. Wrap the cooled loaf tightly in plastic wrap, then in aluminum foil, and freeze for up to 3 months. To thaw, leave it on the counter for a few hours or overnight in the fridge. You can also freeze individual slices for easy grab-and-go treats. Just pop a frozen slice in the toaster or microwave for a quick warm snack.
Reheating tips: For that just-baked experience, warm individual slices in the microwave for 15-20 seconds, or in a 300°F oven for about 5 minutes. Toasting brings out the chocolate and spice flavors beautifully.
Nutritional Information & Benefits
Here’s the approximate nutritional breakdown per slice (based on 10 slices):
- Calories: 320
- Fat: 14g
- Carbohydrates: 47g
- Fiber: 2g
- Sugar: 29g
- Protein: 5g
This bread isn’t health food, but it does have some redeeming qualities. Pumpkin is packed with vitamin A and fiber, and it adds moisture without needing tons of butter or oil. The chocolate chips provide a little antioxidant boost (that’s what I tell myself, anyway).
For a lighter option, you can reduce the sugar to 1 cup total (using only brown sugar) and swap half the oil for unsweetened applesauce. It won’t be quite as tender, but it’ll still be delicious. If you’re looking for a more protein-packed breakfast option, you might also enjoy my creamy 5 minute peanut butter protein smoothie bowl for a different kind of morning treat.
Conclusion
This one-bowl pumpkin chocolate chip bread is everything I want in a fall recipe. It’s simple enough for a Tuesday afternoon, impressive enough to bring to a gathering, and delicious enough that you’ll find yourself making it again and again. The tender crumb, the warm spices, the melty chocolate in every bite — it’s comfort food at its finest.
I love that this recipe doesn’t demand perfection. It forgives a heavy hand with the chocolate chips and doesn’t mind if you’re a little generous with the pumpkin spice. It’s the kind of recipe that makes you feel like a good baker, even on days when nothing else goes right.
So go ahead and make this bread. Make it for yourself, make it for your family, make it because the house needs to smell like fall. And when you do, come back and tell me how it turned out. Did you add nuts? Use dark chocolate chips? Eat half the loaf before it cooled completely? I want to hear all about it. Leave a comment below or tag me in your photos — nothing makes my day like seeing your beautiful loaves.
Happy baking, friends. And remember: stop stirring when you think you should keep going.
Frequently Asked Questions
Can I use fresh pumpkin instead of canned?
Absolutely! Just make sure to roast and puree your pumpkin until it’s smooth, then drain off any excess liquid. Fresh pumpkin puree tends to be more watery than canned, so you might need to reduce the oil by a tablespoon or two to compensate.
Why did my chocolate chips sink to the bottom?
This usually happens when the batter is too thin or the chips aren’t coated in flour. Tossing your chocolate chips in that tablespoon of flour before adding them to the batter is the best way to prevent sinking. Also, make sure your batter isn’t too runny — if it is, add an extra tablespoon of flour.
Can I make this recipe vegan?
You can try! Substitute the eggs with flax eggs (1 tablespoon ground flaxseed mixed with 3 tablespoons water per egg, let sit for 5 minutes) or unsweetened applesauce (¼ cup per egg). Use dairy-free chocolate chips. The texture will be slightly denser but still delicious.
How do I know when the bread is fully baked?
Insert a toothpick or wooden skewer into the center of the bread. If it comes out clean or with just a few moist crumbs attached, it’s done. If there’s wet batter on it, bake for another 5 minutes and test again. The top should also be golden brown and spring back when lightly touched.
Can I double this recipe?
Yes! This recipe doubles beautifully. Just use a larger bowl and bake in two separate loaf pans. You can also bake it in a 10-cup bundt pan — just increase the baking time to about 60-70 minutes and check for doneness with a toothpick.
Pin This Recipe!
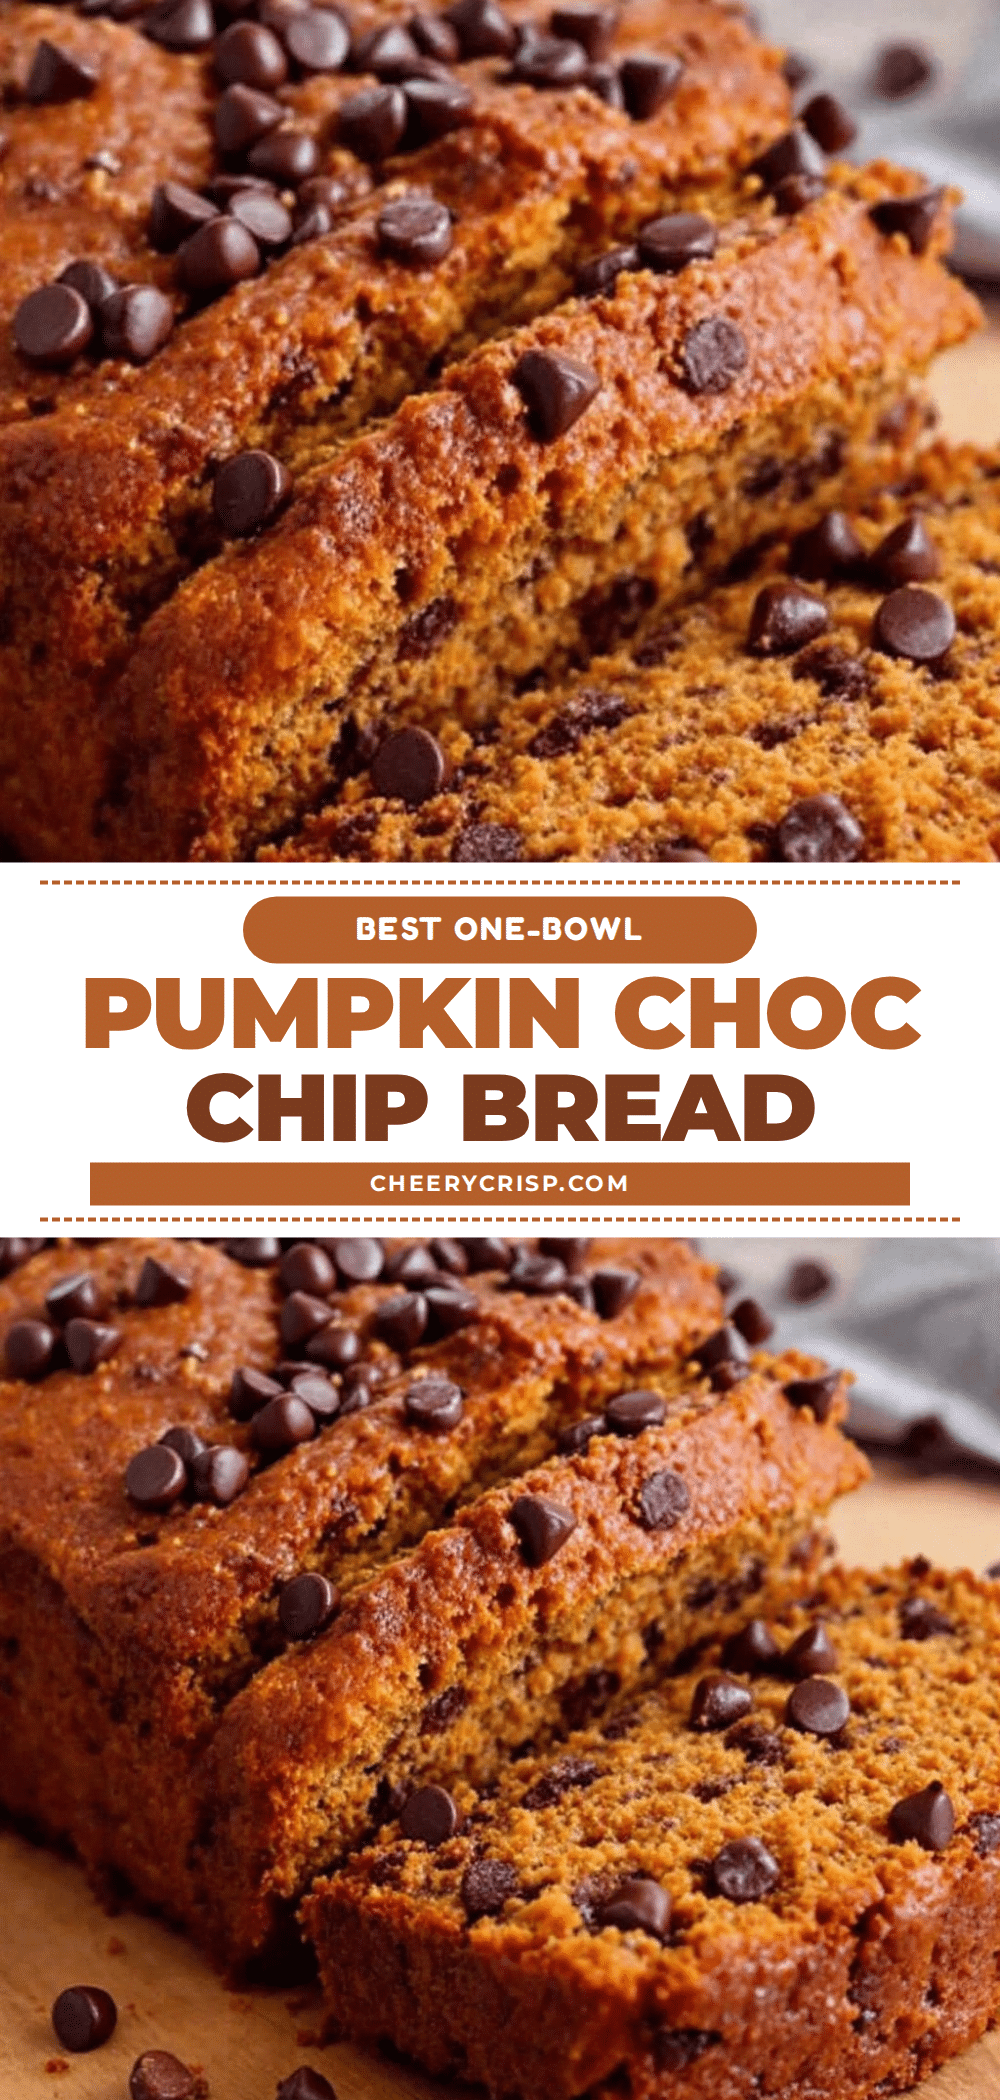
Best One-Bowl Pumpkin Chocolate Chip Bread – Easy Homemade Recipe
This one-bowl pumpkin chocolate chip bread is incredibly moist, tender, and packed with warm fall spices and melty chocolate chips. It’s an easy, no-mixer recipe that comes together in minutes and tastes even better the next day.
- Prep Time: 15 minutes
- Cook Time: 55 minutes
- Total Time: 1 hour 10 minutes
- Yield: 10 servings 1x
- Category: Dessert
- Cuisine: American
Ingredients
- 1 ¾ cups (220g) all-purpose flour
- 1 cup (200g) granulated sugar
- ½ cup (100g) packed light brown sugar
- 1 cup (245g) pumpkin puree (not pumpkin pie filling)
- ½ cup (120ml) vegetable oil (or canola or melted coconut oil)
- 2 large eggs, room temperature
- 2 teaspoons vanilla extract
- 2 teaspoons pumpkin pie spice
- 1 teaspoon cinnamon
- 1 teaspoon baking soda
- ½ teaspoon salt
- 1 cup (175g) semi-sweet chocolate chips
- 1 tablespoon all-purpose flour (for tossing chocolate chips)
Instructions
- Preheat your oven to 350°F (175°C). Position the rack in the center of the oven. Line a 9×5-inch loaf pan with parchment paper, letting the edges hang over the sides. Lightly spray the parchment with nonstick spray if desired.
- In a large mixing bowl, combine the granulated sugar, brown sugar, pumpkin puree, vegetable oil, eggs, and vanilla extract. Whisk or stir until smooth and well combined, about 30 seconds.
- Sprinkle the flour, pumpkin pie spice, cinnamon, baking soda, and salt over the wet mixture. Stir gently with a spatula just until no streaks of flour remain, about 15 to 20 strokes. A few small lumps are fine.
- In a small bowl, toss the chocolate chips with 1 tablespoon of flour until each chip is lightly coated.
- Fold the floured chocolate chips into the batter with 5 to 6 gentle folds, just until evenly distributed.
- Pour the batter into the prepared loaf pan and spread into an even layer. Gently tap the pan on the counter to release air bubbles.
- Bake for 55 to 65 minutes, until a toothpick inserted into the center comes out clean or with a few moist crumbs. If the top browns too quickly, tent loosely with aluminum foil for the last 10-15 minutes.
- Cool the bread in the pan on a wire rack for 15 minutes.
- Use the parchment paper handles to lift the bread out of the pan and transfer to the cooling rack. Cool completely before slicing.
Notes
Don’t overmix the batter—mix just until flour disappears. Tossing chocolate chips in flour prevents them from sinking. Let eggs come to room temperature for best texture. The bread tastes even better on day two. For muffins, bake at 350°F for 18-22 minutes.
Nutrition
- Serving Size: 1 slice
- Calories: 320
- Sugar: 29
- Sodium: 280
- Fat: 14
- Saturated Fat: 4
- Carbohydrates: 47
- Fiber: 2
- Protein: 5
Keywords: pumpkin chocolate chip bread, one bowl pumpkin bread, easy pumpkin bread, fall baking, quick bread, pumpkin recipe



