Love this? Save it for later!
Share the inspiration with your friends
“Mom, I don’t want an apple again.” Those exact words, mumbled around a mouthful of last week’s sandwich, hit me right in the lunch-packing guilt. I had been in a rut, you know? Same crackers, same fruit, same everything. My oldest, Leo, is a grazer. He doesn’t want a big meal at school, he wants little things he can pick at during recess. But I needed those little things to actually stick with him until the final bell. I needed something that wouldn’t get smashed, wouldn’t get soggy, and honestly? Something I could make on a Sunday afternoon without a lot of fuss.
So I stood there in my kitchen, staring at the bunch of bananas turning spotty on the counter and the half-empty jar of peanut butter. It was one of those moments where you just start mixing things together, hoping for the best. I grabbed some old-fashioned oats, a drizzle of honey, and a handful of chocolate chips (because, let’s be honest, a little chocolate makes everything better). I mashed, I stirred, I rolled. And when I handed one to Leo the next morning, he actually said, “These are good.” From a kid who considers a granola bar a betrayal of his taste buds, that was a win.
These Easy Peanut Butter Banana Energy Bites are my secret weapon now. No baking, no weird ingredients, just honest-to-goodness food that tastes like a treat. They are the kind of thing you feel good about packing because you know exactly what’s in them. And the best part? They take about fifteen minutes to throw together. Fifteen minutes for a week’s worth of happy lunchboxes. That’s a trade-off I’ll take every single time.
Why You’ll Love This Recipe
I have made a lot of recipes that sounded good on paper but flopped in real life. These energy bites are not one of them. They are the real deal, tested by my picky kids, my husband (who steals them from the fridge), and even a few of Leo’s friends at a playdate. They passed the test.
- Quick & Easy: There is no oven involved. No stovetop. Just a bowl, a spoon, and your hands. You can have a batch made in under 15 minutes, which is faster than a trip to the store.
- Simple Ingredients: You probably have everything you need in your pantry right now. Oats, peanut butter, a banana, honey. No fancy health food store runs required.
- Perfect for School Lunches: These are sturdy, they don’t leak, and they pack a punch of protein and fiber to keep little bellies full until dismissal. They are also nut-free friendly if you swap the peanut butter for sunflower seed butter.
- Crowd-Pleaser: I have yet to meet a kid who turns these down. They taste like a no-bake cookie, so they feel like a treat. But secretly, they are packed with good stuff.
- Unbelievably Delicious: The texture is soft and chewy, not dry or crumbly. The banana adds natural sweetness, so you don’t need a ton of added sugar. It is comfort food you can feel good about.
What makes these different from every other energy ball recipe out there? It’s the banana. Most recipes are dry and rely on sticky dates or loads of honey to hold them together. The banana adds moisture and a gentle, natural sweetness that pairs perfectly with the peanut butter. It is not just another version—it is the version that actually works. The one that makes you close your eyes after the first bite because it is just that good.
What Ingredients You Will Need
This recipe is built on simple, wholesome ingredients that come together to create something truly special. You don’t need a long list of specialty items, just a few pantry staples that do all the heavy lifting.
- 1 cup old-fashioned rolled oats: These give the bites their hearty texture. I prefer old-fashioned oats over quick oats because they hold their shape better and don’t get mushy. If you are gluten-sensitive, make sure to grab certified gluten-free oats.
- 1/2 cup creamy peanut butter: This is the glue that holds everything together. I use a natural peanut butter with no added sugar or weird oils for the best flavor. (I am partial to Justin’s or Smucker’s Natural.) If your peanut butter is too stiff, give it a good stir and microwave it for about 15 seconds to make it easier to mix.
- 1 medium ripe banana, mashed: The riper, the better. Those spotty bananas that nobody wants to eat? They are perfect here. They add moisture, sweetness, and a subtle banana flavor that makes these bites taste like a banana bread cookie.
- 1/4 cup honey or maple syrup: A little extra sweetness and stickiness. Honey is classic, but maple syrup works beautifully for a vegan option. Both add a lovely depth of flavor.
- 1/3 cup mini chocolate chips: Optional, but highly recommended. The mini chips distribute more evenly than regular-sized ones, giving you a little chocolate in every bite. I use semi-sweet or dark chocolate to balance the sweetness.
- 1/2 teaspoon vanilla extract: It rounds out the flavors and makes everything taste a little more bakery-fresh.
- 1/4 teaspoon salt: Just a pinch to enhance the sweetness and balance the peanut butter. If your peanut butter is salted, you can skip this or use a very small pinch.
- Optional add-ins: 2 tablespoons ground flaxseed or chia seeds for extra fiber and omega-3s. You can also toss in a handful of unsweetened shredded coconut or chopped nuts for texture.
For ingredient selection, I always recommend looking for a peanut butter that lists just peanuts and salt on the label. The natural stuff separates, so you will need to stir it well before measuring. And for the banana, the more brown spots, the better. That is where the sweetness lives.
Equipment Needed
You really don’t need much for this recipe, which is one of the reasons I love it so much.
- Large mixing bowl: Any bowl will do, but a wide one makes it easier to mix everything together without flinging oats across the counter.
- Fork or potato masher: For mashing that banana into a smooth paste. A fork works perfectly fine, but a potato masher is faster.
- Wooden spoon or sturdy spatula: For mixing everything together. The mixture gets thick, so you want something with a little muscle.
- Measuring cups and spoons: Precision matters, even in a forgiving recipe like this one.
- Baking sheet or large plate: To hold the rolled bites while you chill them. Line it with parchment paper or wax paper for easy cleanup.
- Cookie scoop or tablespoon: For portioning out uniform bites. A cookie scoop is my favorite tool here—it makes the process so much faster and gives you perfectly round balls every time. If you don’t have one, just use a heaping tablespoon.
- Parchment paper or wax paper: For lining the baking sheet and for storing the bites later.
- Airtight container: For storing the finished energy bites in the fridge or freezer.
I have made these with just a bowl and a spoon when I was at a friend’s house and needed a quick snack. It works. But the cookie scoop is a game-changer if you make these regularly. They are cheap and save so much time.
Preparation Method
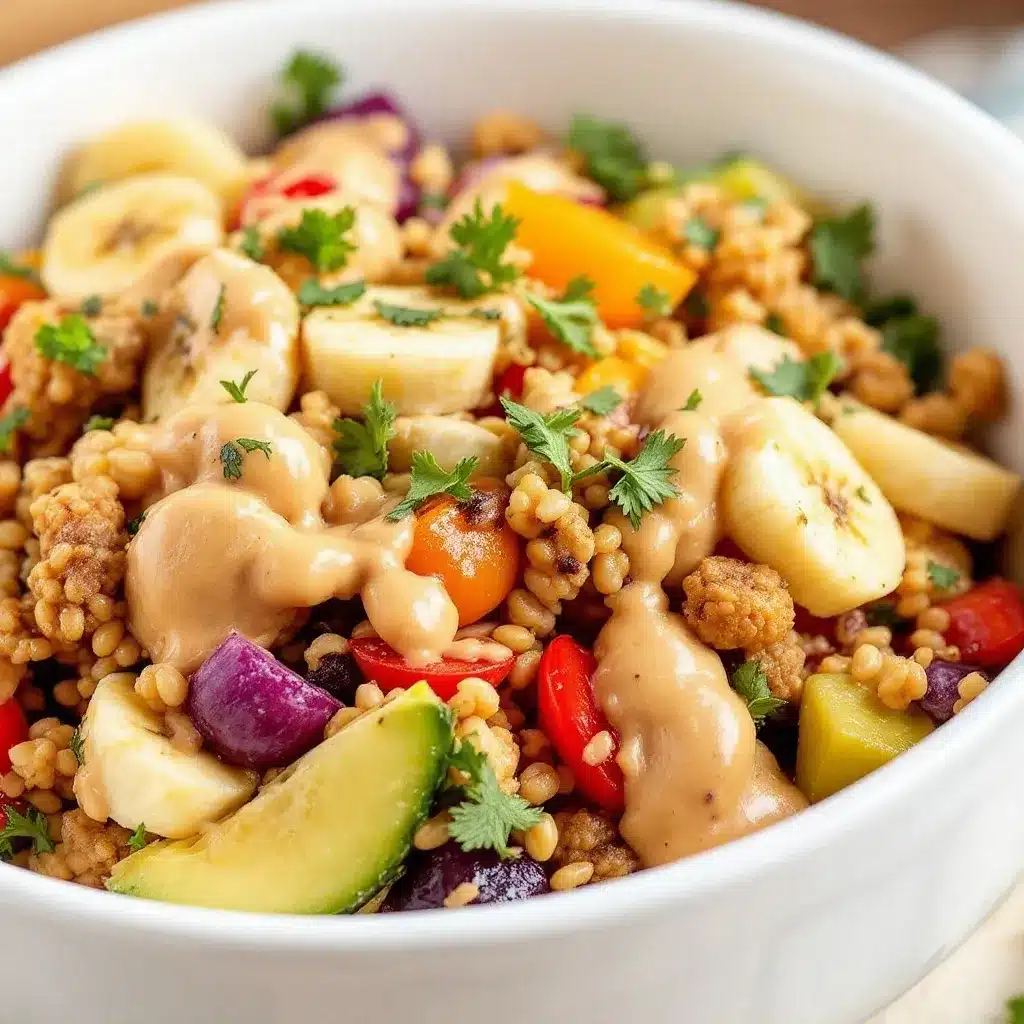
Making these energy bites is almost too easy. It is one of those recipes you will memorize after the first time.
- Mash the banana. In your large mixing bowl, add the ripe banana. Use a fork or potato masher to mash it until it is smooth and almost liquid. You want no big lumps. This takes about 30 seconds of focused mashing.
- Add the wet ingredients. To the mashed banana, add the creamy peanut butter, honey (or maple syrup), and vanilla extract. Stir everything together with your wooden spoon or spatula until it is fully combined. The mixture should look like a thick, glossy paste. If your peanut butter was cold, this might take a little more elbow grease. Be patient.
- Mix in the dry ingredients. Add the old-fashioned oats, salt, and any optional add-ins like flaxseed or chia seeds. Stir until the oats are evenly distributed and everything is coated in that peanut butter-banana mixture. The dough will look shaggy at first, then come together into a cohesive, slightly sticky mass.
- Fold in the chocolate chips. Gently fold the mini chocolate chips into the dough. Make sure they are evenly distributed so every bite gets a little chocolate love. If you add them too early, they might melt into the dough, so save them for last.
- Chill the dough. This is a crucial step. Cover the bowl with plastic wrap or a clean kitchen towel and pop it in the refrigerator for at least 30 minutes. Chilling the dough makes it much easier to roll into balls. If you try to roll them right away, the mixture will be too sticky and you will end up with a mess on your hands. I learned this the hard way.
- Roll into balls. Once the dough is chilled, line a baking sheet or large plate with parchment paper. Use your cookie scoop or a heaping tablespoon to portion out the dough. Roll each portion between your palms to form a smooth ball. If the dough starts to stick to your hands, dampen your hands slightly with water. This helps a ton.
- Chill again (optional but recommended). Place the rolled bites on the prepared baking sheet. Pop them back in the fridge for another 15-20 minutes to firm up. This helps them hold their shape better, especially if you are packing them for lunch the next day.
- Store or serve. Transfer the energy bites to an airtight container and store them in the refrigerator. They are ready to eat immediately, but they get even better after a few hours as the flavors meld together.
A little sensory cue for you: when the dough is ready, it should feel like a thick, slightly sticky cookie dough. It should hold together when you squeeze a handful. If it feels too dry and crumbly, add a teaspoon of honey or a splash of milk. If it feels too wet and sticky, add a tablespoon more oats. Trust your hands on this one.
Cooking Tips & Techniques
I have made these energy bites more times than I can count, and I have definitely made my share of mistakes. Here is what I have learned so you don’t have to.
Don’t skip the chilling step. I know, you want to eat them now. But if you try to roll the dough immediately, it will be a sticky, frustrating mess. Chilling for at least 30 minutes makes the dough firm enough to handle easily. It is the difference between a relaxing 10-minute rolling session and a sticky-fingered disaster.
Use a cookie scoop for even sizing. This is not just about aesthetics. Uniform balls mean they chill and freeze at the same rate. It also makes packing for lunches easier because every bite is roughly the same size. A #60 cookie scoop (about 1 tablespoon) is perfect for this recipe.
Wet your hands. If the dough is still a little sticky after chilling, just wet your palms with a little water before rolling. The moisture creates a barrier so the dough slides right off your hands without sticking. It is a simple trick that makes a huge difference.
Toast the oats for extra flavor. This is a pro tip I picked up from a friend. Spread the oats on a baking sheet and toast them in a 350°F oven for about 8-10 minutes, until they are fragrant and lightly golden. Let them cool completely before using. It adds a nutty, deep flavor that takes these bites to the next level.
One big mistake I made early on was using a banana that wasn’t ripe enough. A firm, yellow banana doesn’t mash well and doesn’t add enough sweetness. You need a banana that is spotted and soft. It makes a huge difference in both texture and flavor.
Variations & Adaptations
This recipe is incredibly forgiving, so feel free to play around with it. Here are some of my favorite variations.
- Nut-Free Version: Swap the peanut butter for sunflower seed butter (like SunButter). The flavor changes a bit, but it is still delicious. Just be aware that sunflower seed butter can react with baking soda (not an issue here) and can turn a little green when mixed with other ingredients. It is totally safe to eat, just a little funny looking.
- Vegan Version: Use maple syrup instead of honey. That is literally the only change. Everything else is already plant-based.
- Gluten-Free Version: Use certified gluten-free old-fashioned oats. Simple as that.
- Flavor Twist – Chocolate Peanut Butter: Use chocolate peanut butter (like the kind you find in the natural foods section) or add an extra tablespoon of cocoa powder to the dough. It turns these into a serious dessert-like treat.
- Flavor Twist – Tropical: Swap the chocolate chips for dried pineapple or mango pieces and add a handful of unsweetened shredded coconut. It is like a tropical vacation in a bite.
- Flavor Twist – Apple Cinnamon: Replace the banana with 1/2 cup of unsweetened applesauce and add 1 teaspoon of cinnamon. It creates a completely different flavor profile that tastes like apple pie.
- Add a Protein Boost: Mix in a scoop of your favorite vanilla or chocolate protein powder. You might need to add an extra tablespoon of honey or a splash of milk to balance the dryness. I have done this with a vanilla pea protein and it worked great.
My personal favorite variation is the apple cinnamon one. I made it on a whim one fall afternoon when I didn’t have a ripe banana, and it was a total happy accident. My kids loved them even more than the original.
Serving & Storage Suggestions
These energy bites are best served cold, straight from the fridge. The texture is firm and chewy, and the flavors are more pronounced. They are also perfectly fine at room temperature, which makes them ideal for lunchboxes. Just pop them in a container and they will be ready to eat by lunchtime.
Storage in the Refrigerator: Place the bites in an airtight container, layered between sheets of parchment paper if you are stacking them. They will stay fresh for up to one week. Honestly, they never last that long in my house, but they will hold up fine.
Storage in the Freezer: These freeze like a dream. Arrange the rolled bites on a baking sheet and freeze until solid (about 1-2 hours). Then transfer them to a freezer-safe bag or container. They will keep for up to 3 months. You can eat them straight from the freezer (they are like a frozen cookie) or let them thaw in the fridge overnight.
Packing for Lunch: I usually pack 2-3 bites in a small container or reusable snack bag. They don’t get smashed easily, which is a huge plus. I have even thrown them in a lunchbox with an ice pack and they stay perfectly chilled until lunchtime.
Reheating (if you want): You can microwave a bite for about 10-15 seconds if you want a softer, warmer texture. It makes the chocolate chips all melty and gooey. It is a nice treat on a cold day.
One thing I love about these is that the flavors actually develop over time. The first day, they are good. By the third day, they are amazing. The oats absorb the moisture from the banana and the flavors meld together into something truly special. So don’t be afraid to make them a few days ahead of time.
Nutritional Information & Benefits
These energy bites are a nutritional powerhouse disguised as a treat. Here is a rough estimate per bite (based on the recipe making about 20 bites):
| Nutrient | Amount per Bite |
|---|---|
| Calories | ~120 |
| Protein | 4g |
| Fat | 6g |
| Carbohydrates | 14g |
| Fiber | 2g |
| Sugar | 7g |
The peanut butter provides a solid dose of protein and healthy fats, which helps keep kids (and adults) full and focused. The oats offer complex carbohydrates for steady energy, and the banana adds potassium and natural sweetness. The chocolate chips? Well, they offer a little joy, which is its own kind of nutrition.
These bites are naturally dairy-free and can easily be made gluten-free, nut-free, or vegan. They are a great option for school bake sales, after-school snacks, or even a quick breakfast on the go. I love that I can feel good about giving these to my kids. They are not empty calories. They are fuel that tastes like a reward.
Conclusion
These Easy Peanut Butter Banana Energy Bites have become a staple in our house for a reason. They are simple, forgiving, and genuinely delicious. They solve the real problem of packing a lunch that your kid will actually eat, without requiring you to spend hours in the kitchen. That is a win in my book.
I hope you give them a try and make them your own. Add your favorite mix-ins, adjust the sweetness, or experiment with different nut butters. That is the beauty of a recipe like this. It is a starting point, not a rulebook.
When you make them, I would love to hear how they turned out. Did your kids love them? Did you try a fun variation? Drop a comment below and let me know. And if you are looking for another quick and easy lunch idea, you might want to check out these no-bake protein balls or this creamy peanut butter banana overnight oats. They are both perfect for busy mornings. Or, if you are in the mood for something savory, this crockpot ground turkey taco bowl is a weeknight lifesaver. Happy snacking!
Frequently Asked Questions
Can I use quick oats instead of old-fashioned oats?
Yes, you can. Quick oats will work, but the texture will be softer and less chewy. The bites might also be a little more crumbly. I prefer old-fashioned oats for their hearty texture, but quick oats are totally fine in a pinch.
My dough is too sticky to roll. What should I do?
If your dough is too sticky, it likely needs more chilling time. Pop it back in the fridge for another 15-20 minutes. If it is still sticky after that, add a tablespoon or two more oats and mix well. The banana’s moisture content can vary, so a little adjustment is normal.
Can I make these without peanut butter?
Absolutely. You can substitute any nut or seed butter you like. Almond butter, cashew butter, or sunflower seed butter all work great. Just keep in mind that different nut butters have different consistencies, so you might need to adjust the amount of oats or liquid slightly.
How long do these energy bites last?
They will stay fresh in an airtight container in the refrigerator for up to one week. In the freezer, they will keep for up to three months. They are perfect for meal prep.
Can I add protein powder to this recipe?
Yes, you can. Add one scoop of your favorite protein powder. You may need to add an extra tablespoon or two of honey or a splash of milk to balance the dryness. The texture will be a little different, but still delicious.
Pin This Recipe!
Easy Peanut Butter Banana Energy Bites (Kids Lunch Idea)
These no-bake energy bites are made with simple ingredients like oats, peanut butter, banana, and chocolate chips. They are perfect for school lunches, after-school snacks, or a quick breakfast on the go.
- Prep Time: 15 minutes
- Cook Time: 0 minutes
- Total Time: 45 minutes (includes chilling time)
- Yield: 20 bites 1x
- Category: Snack
- Cuisine: American
Ingredients
- 1 cup old-fashioned rolled oats
- 1/2 cup creamy peanut butter
- 1 medium ripe banana, mashed
- 1/4 cup honey or maple syrup
- 1/3 cup mini chocolate chips
- 1/2 teaspoon vanilla extract
- 1/4 teaspoon salt
- Optional: 2 tablespoons ground flaxseed or chia seeds, unsweetened shredded coconut, or chopped nuts
Instructions
- Mash the banana in a large mixing bowl until smooth.
- Add the peanut butter, honey (or maple syrup), and vanilla extract. Stir until fully combined into a thick, glossy paste.
- Mix in the oats, salt, and any optional add-ins (like flaxseed or chia seeds). Stir until the oats are evenly distributed and the dough comes together.
- Gently fold in the mini chocolate chips until evenly distributed.
- Cover the bowl and refrigerate the dough for at least 30 minutes to firm up.
- Line a baking sheet or large plate with parchment paper. Use a cookie scoop or tablespoon to portion out the dough, then roll each portion into a smooth ball.
- Place the rolled bites on the prepared baking sheet and refrigerate for another 15-20 minutes to firm up (optional but recommended).
- Transfer to an airtight container and store in the refrigerator. Serve cold or at room temperature.
Notes
Don’t skip the chilling step—it makes the dough easier to roll. If the dough is too sticky, add more oats; if too dry, add a teaspoon of honey or splash of milk. Wet your hands slightly to prevent sticking when rolling. For extra flavor, toast the oats in a 350°F oven for 8-10 minutes before using. The flavors develop over time, so these are even better after a day or two.
Nutrition
- Serving Size: 2-3 bites
- Calories: 120
- Sugar: 7
- Sodium: 85
- Fat: 6
- Saturated Fat: 1.5
- Carbohydrates: 14
- Fiber: 2
- Protein: 4
Keywords: energy bites, peanut butter banana, no-bake, kids lunch, healthy snack, gluten-free option, vegan option



