Love this? Save it for later!
Share the inspiration with your friends
I was at a Halloween block party three years ago, standing next to a table of store-bought cookies and sad veggie platters, when my neighbor’s wife—a woman who usually only says “hello” and “your dog is barking again”—walked up with a platter of these little sausage mummies. I mean, I nearly dropped my plastic cup of cider. She just shrugged and said, “It’s just crescent rolls and hot dogs. My kid won’t eat anything else.” And honestly? That moment changed my entire approach to Halloween appetizers forever.
These Easy Mummy Wrapped Sausages are the kind of recipe that makes you look like you tried way harder than you actually did. They’re creepy-cute, totally delicious, and come together in under 25 minutes. I’ve made them for three Halloweens straight now, and they disappear faster than anything else on the table. Maybe you’ve been there—staring at a Pinterest board full of elaborate spooky snacks, feeling that familiar twinge of dread because you just don’t have the time or energy for fondant eyeballs and hand-piped spiderwebs. Well, this is your recipe. It’s the one that saves you.
The first time I made them, I forgot to cut the dough strips thin enough, and my mummies looked like they’d been through a blizzard. But you know what? Everyone still loved them. The kids called them “chubby mummies,” and it became a thing. So if your first batch looks a little rough, lean into it. Imperfect mummies have more personality anyway. That’s the whole point of this recipe—it’s forgiving, it’s fun, and it’s the kind of thing that makes people smile before they even take a bite.
Why You’ll Love This Recipe
These mummy sausages aren’t just another Halloween gimmick. They’ve earned a permanent spot in my fall rotation for a handful of very good reasons. Let me break it down for you.
- Quick & Easy: From fridge to table in under 25 minutes. You can make a full platter during a single commercial break of your favorite spooky movie.
- Simple Ingredients: You only need three main ingredients—crescent roll dough, cocktail sausages, and mustard or candy eyes. No weird specialty items or trips to three different stores.
- Perfect for Halloween Parties: Whether it’s a kid-friendly classroom party, a grown-up costume bash, or just a cozy night in with the family, these little guys fit right in.
- Crowd-Pleaser: I’ve served these to picky toddlers, skeptical teenagers, and full-grown adults who claim they “don’t do cute food.” Every single person grabs at least two.
- Unbelievably Delicious: The flaky, buttery crescent dough wrapped around a juicy, smoky sausage? It’s basically a pigs in a blanket upgrade with a Halloween costume. The flavor combo is pure comfort food magic.
What makes this version different from every other mummy sausage recipe out there? It’s the little things. I use a specific cutting technique for the dough that gives you perfectly proportioned strips every time. I also recommend a quick egg wash for that gorgeous golden-brown finish that makes the mustard eyes pop. And I’ve tested this with multiple brands of crescent dough and sausages, so I know exactly which combinations hold up best and which ones fall apart. This isn’t just another recipe—it’s the one I’ve tweaked and perfected over three Halloweens of trial and error.
Honestly, this recipe is the kind that makes you close your eyes after the first bite. It’s salty, flaky, slightly sweet from the dough, and just ridiculously satisfying. It turns a simple snack into something memorable without any stress. And isn’t that exactly what we all need during the chaos of Halloween week?
What Ingredients You Will Need
This recipe uses simple, everyday ingredients to deliver maximum flavor and maximum cuteness. You probably already have most of these in your kitchen right now.
- Crescent roll dough (8-ounce can): This is your mummy wrapping. I prefer Pillsbury brand for its consistent flakiness, but store brands work fine too. Make sure it’s the original or butter flavor—not the flaky layers kind, which can be harder to separate into clean strips.
- Cocktail sausages or lil’ smokies (14-ounce package): These are the mummy bodies. I like Hillshire Farm or Johnsonville for their smoky flavor and firm texture. Look for the smaller cocktail size so they’re perfectly bite-sized.
- Mustard (yellow or Dijon): For the mummy eyes. Yellow mustard gives that classic Halloween look, but Dijon adds a nice tangy kick. You can also use ketchup or sriracha for different colored eyes.
- Egg (1 large): For the egg wash. This gives the dough that beautiful golden-brown color and helps the eyes stick. You can skip it if you’re in a hurry, but the color difference is noticeable.
- Water (1 tablespoon): To mix with the egg for the wash. Just a splash to thin it out.
Optional but recommended additions:
- Candy eyes (edible): These are the cute, googly-eye version. You can find them at most grocery stores near the baking supplies or online. They make the mummies look way more adorable than mustard dots.
- Sesame seeds or poppy seeds: Sprinkle these on top for a textured “mummy skin” effect. It’s a small detail that makes a big visual impact.
- Garlic powder or everything bagel seasoning: A light sprinkle before baking adds an extra layer of savory flavor. Trust me on this one.
Substitution guidance: If you need a gluten-free option, look for gluten-free crescent dough (it exists! I’ve used the Against the Grain brand with good results). For a dairy-free version, use dairy-free crescent dough (Annie’s makes one) and skip the egg wash or use a plant-based milk alternative. You can also swap the cocktail sausages for vegetarian cocktail sausages or even cheese sticks cut into pieces—just adjust the baking time slightly since they cook faster.
Equipment Needed
You don’t need any fancy kitchen gadgets for this recipe. I’ve made these in a friend’s tiny apartment kitchen with only a butter knife and a baking sheet, and they turned out just fine. But having the right tools makes the process smoother.
- Baking sheet (standard half-sheet size): Line it with parchment paper or a silicone baking mat for easy cleanup. I’ve used both, and honestly, parchment paper is my go-to because you can just toss it when you’re done.
- Sharp knife or pizza cutter: For cutting the crescent dough into strips. A pizza cutter gives you clean, even lines in one pass. A sharp chef’s knife works too, but don’t use a dull one—it’ll squish the dough and make a mess.
- Small bowl: For mixing the egg wash. Any cereal bowl will do.
- Pastry brush: For applying the egg wash. If you don’t have one, you can use a clean finger or the back of a spoon. I’ve done both in a pinch.
- Toothpick (optional): For dotting on the mustard eyes if you want precise placement. This is a game-changer for getting those tiny dots exactly where you want them.
- Cooling rack: Not essential, but it helps the mummies stay crispy on the bottom instead of getting soggy. If you don’t have one, just eat them right away (which you probably will anyway).
Budget-friendly tip: Don’t have a pastry brush? Use a clean, unused paintbrush from the hardware store. I’m serious—it works perfectly and costs about a dollar. Just make sure it’s never been used for paint!
Preparation Method
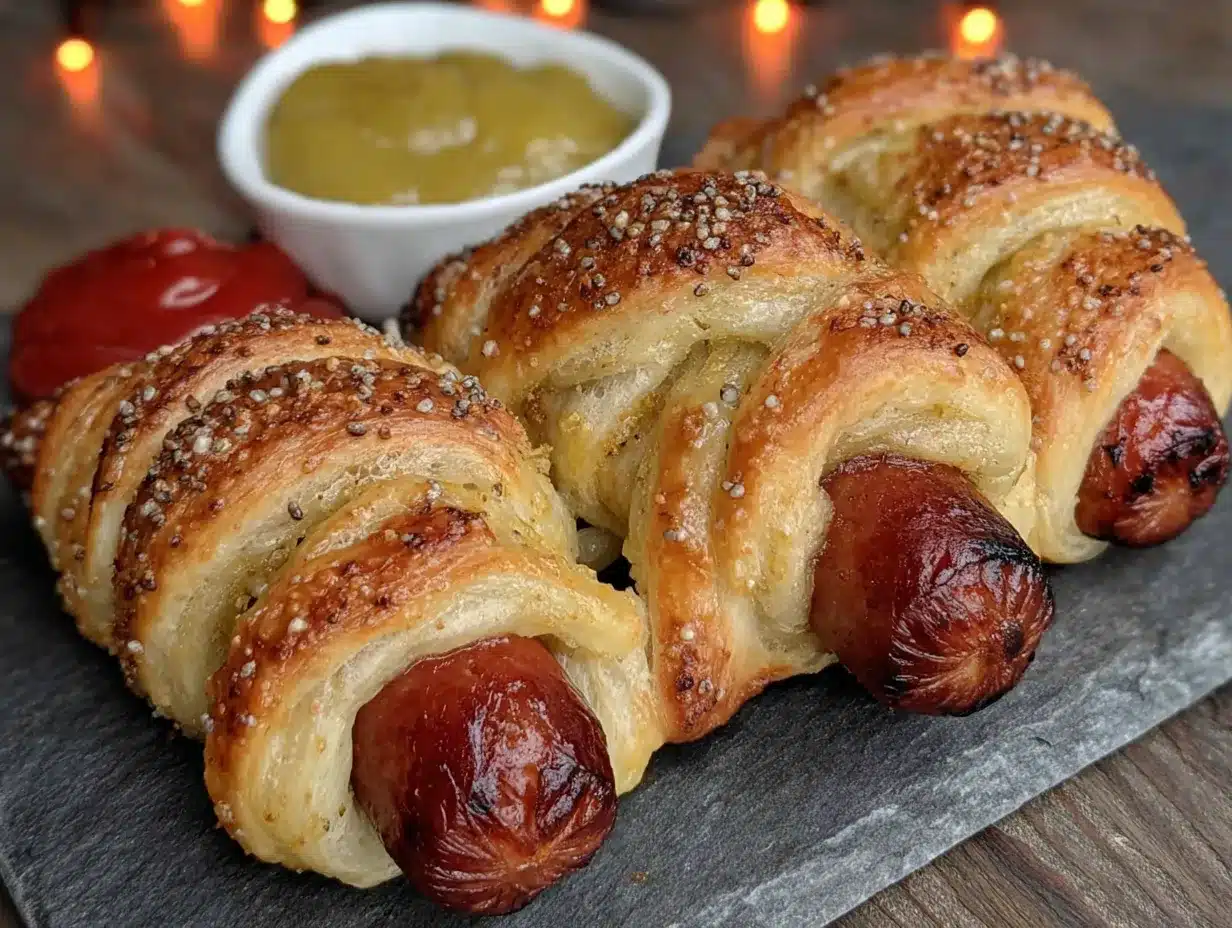
Alright, let’s make some mummies. This process is straightforward, but I’ve included all the little details that make the difference between good mummies and great mummies.
Step 1: Preheat and Prep
Preheat your oven to 375°F (190°C). Line your baking sheet with parchment paper or a silicone mat. While the oven is heating, take your crescent dough out of the fridge and let it sit on the counter for about 5 minutes. Cold dough is harder to separate without tearing, so letting it warm up just a touch makes a big difference.
Step 2: Separate the Dough
Carefully unroll the crescent dough and separate it along the perforated lines. You should have 8 triangles. If the dough tears a little at the seams, don’t panic—just press it back together gently. I’ve had cans where the dough was stuck together like glue, and I just used a knife to gently pry the layers apart.
Step 3: Cut the Strips
Take each triangle and cut it lengthwise into 3-4 thin strips using your pizza cutter or knife. The strips should be about ¼ to ½ inch wide. Here’s the trick I learned after my first batch of “blizzard mummies”: wider strips (about ½ inch) give you a more substantial wrap that looks cleaner. Narrower strips (¼ inch) create a more bandage-like, mummy effect. I usually do a mix of both for visual variety. You should end up with about 24-32 strips total.
Step 4: Wrap the Sausages
Take a cocktail sausage and start wrapping a dough strip around it, leaving a small gap at the top for the eyes. Don’t wrap it too tightly—the dough will expand as it bakes, and you want a little breathing room so it doesn’t burst. Overlap the strips slightly as you go, like you’re bandaging a tiny, delicious patient. Leave the top ¼ of the sausage exposed. Press the end of the strip gently to seal it against the wrap. Repeat with all sausages and strips. You’ll get about 8-10 mummies per can of dough, depending on how many strips you cut.
Step 5: Apply the Egg Wash
In your small bowl, whisk together the egg and 1 tablespoon of water until well combined. Using your pastry brush, lightly brush each mummy with the egg wash. Don’t soak them—just a light, even coating. This is what gives them that gorgeous golden-brown color. If you’re adding sesame seeds or seasonings, sprinkle them on now while the egg wash is still tacky.
Step 6: Bake
Place the mummies on your prepared baking sheet, spacing them about 1 inch apart. Bake at 375°F (190°C) for 12-15 minutes, or until the dough is golden brown and puffed up. The sausages should be heated through. Your kitchen is going to smell incredible at this point—like buttery, savory goodness with a hint of smoky sausage.
Step 7: Add the Eyes
Let the mummies cool on the baking sheet for 2-3 minutes—they’re too hot to handle right away, and the eyes will just slide off. Once they’re cool enough to touch, use a toothpick to dot a tiny amount of mustard onto the exposed sausage for each eye. Or, if you’re using candy eyes, press them gently into the egg wash residue. The heat from the sausage will help them stick. I like to give each mummy slightly different eye positions—some looking left, some looking right, some cross-eyed. It adds personality.
Step 8: Serve Immediately
Transfer the mummies to a serving platter and watch them disappear. They’re best enjoyed warm, within 15-20 minutes of coming out of the oven. The dough is flakiest and the sausages are juiciest at this point.
Cooking Tips & Techniques
I’ve made these mummies enough times to have a few tricks up my sleeve. Let me save you from my early mistakes.
Don’t overwork the dough. Crescent dough is delicate. The more you handle it, the tougher it gets. If your dough starts feeling sticky or tearing, pop it in the fridge for 5 minutes to firm up. I learned this the hard way when I made a batch for a Halloween potluck and ended up with dense, chewy wrappers instead of flaky ones. Not my finest moment.
Space them out on the baking sheet. These mummies expand as they bake. If you crowd them, they’ll bake into each other and lose their individual mummy shape. Leave at least an inch between each one. If you’re making a big batch, use two baking sheets or bake in batches.
Watch the oven like a hawk for the last 3 minutes. Every oven runs a little differently. My friend’s oven bakes these perfectly at 13 minutes, while mine needs a full 15. Start checking at the 10-minute mark. You’re looking for a deep golden brown—not pale, not burnt. The difference between underdone and perfect is about 90 seconds.
Make the eyes ahead of time. If you’re making these for a party, you can prep the mustard dots on a piece of parchment paper in advance. Just pipe or dot the mustard onto the paper, freeze it for 10 minutes, and then peel them off like little mustard stickers. This is a game-changer for efficiency. I did this for a party of 30 people and it saved me so much time.
Keep the leftovers (if there are any) in a specific way. Store leftover mummies in an airtight container in the fridge for up to 3 days. To reheat, pop them in a 350°F oven for 5-7 minutes. Don’t microwave them—the dough gets rubbery and the sausages turn into little rubber bullets. Trust me on this one.
Multitasking strategy: While the first batch is baking, prep your second batch on a separate sheet of parchment paper. That way, you can slide the second batch onto the hot baking sheet as soon as the first one comes out. This cuts your total time in half.
Variations & Adaptations
One of the best things about this recipe is how endlessly adaptable it is. Here are some variations I’ve tried and loved.
Spicy Mummy Sausages: Use spicy andouille sausages or add a dash of cayenne pepper to the egg wash. For an extra kick, mix sriracha with the mustard for the eyes. I made these for a Halloween party with a “Scoville scale” theme, and they were a huge hit with the spice lovers.
Cheesy Mummies: Before wrapping the sausage, cut a small slit lengthwise and stuff it with a thin strip of cheddar or mozzarella cheese. The cheese oozes out during baking and looks like mummy guts. It’s gross in the best possible way. Just be careful—the cheese gets extremely hot, so let them cool for an extra minute before serving.
Vegetarian Mummies: Swap the cocktail sausages for vegetarian cocktail sausages or even small chunks of halloumi cheese. Halloumi holds its shape well and gets beautifully golden when baked. I’ve also used pre-cooked meatless meatballs with great results.
Breakfast Mummies: Use breakfast sausage links instead of cocktail sausages, and serve with a side of maple syrup for dipping. These are perfect for a Halloween morning breakfast or a spooky brunch. The sweet-and-savory combo is absolutely killer.
Pizza Mummies: Brush the wrapped sausages with a little pizza sauce before baking, and sprinkle with shredded mozzarella during the last 2 minutes of baking. Serve with extra marinara for dipping. This is my nephew’s absolute favorite variation—he calls them “pizza ghosts.”
Sweet Mummies: Use the same technique but with hot dogs and a sweet glaze made from powdered sugar and milk. Skip the mustard eyes and use mini chocolate chips or candy eyes instead. These are great for a dessert table or a kid’s Halloween party where you want something less savory.
Serving & Storage Suggestions
These mummies are at their absolute best when served warm, right after the eyes are applied. The contrast between the hot, flaky dough and the cool mustard or candy eyes is part of the magic. Arrange them on a dark-colored platter or a black serving board to make the golden-brown color pop. I like to scatter a few fake spiderwebs or plastic spiders around the platter for extra Halloween vibes.
Dipping sauces take these to the next level. Here are my favorites:
- Honey mustard (classic and always a winner)
- Spicy ketchup (mix ketchup with a dash of sriracha)
- Ranch dressing (especially good with the cheesy variation)
- BBQ sauce (smoky and sweet—perfect with the smoky sausages)
- Queso or cheese sauce (for the pizza mummies)
Storage: If you somehow have leftovers (unlikely, but possible), store them in an airtight container in the refrigerator for up to 3 days. The dough will soften slightly, but they’re still delicious. For longer storage, you can freeze the baked, un-eyed mummies for up to 2 months. Just lay them flat on a baking sheet, freeze until solid, then transfer to a freezer bag. To reheat, bake directly from frozen at 350°F for 10-12 minutes, then add the eyes after they cool slightly.
Make-ahead tip: You can assemble the mummies completely (minus the egg wash and eyes) up to 24 hours in advance. Keep them covered in the refrigerator, then brush with egg wash and bake just before serving. This is my go-to strategy for Halloween parties—I do all the wrapping the night before, and then I just have to bake and add eyes while guests are arriving.
Flavor development note: These really are best fresh from the oven. The dough loses its crispiness within about 30 minutes, and the sausages start to dry out. If you’re serving them at a party, I recommend baking them in batches every 20 minutes so there’s always a fresh, hot batch available. Your guests will think you’re a culinary genius.
Nutritional Information & Benefits
Let’s be real—these are a treat, not a health food. But knowing what’s in them helps you plan your overall meal. Here’s the estimated nutritional breakdown per mummy (based on 8 mummies per batch):
| Nutrient | Amount per Mummy |
|---|---|
| Calories | 110-130 |
| Total Fat | 8-9g |
| Saturated Fat | 3-4g |
| Cholesterol | 25-30mg |
| Sodium | 300-350mg |
| Total Carbohydrates | 8-10g |
| Protein | 4-5g |
Health benefits of key ingredients: Cocktail sausages are a good source of protein and B vitamins, which help with energy metabolism. Crescent dough provides quick energy from carbohydrates. Mustard seeds (in the mustard) contain antioxidants and anti-inflammatory compounds. And the egg wash adds a small amount of high-quality protein.
Dietary considerations: This recipe is not gluten-free (unless you use gluten-free dough) and contains dairy (in the crescent dough). It is nut-free and egg-free if you skip the egg wash. For a lower-sodium version, look for reduced-sodium cocktail sausages and use a light hand with the mustard.
My personal perspective: I don’t make these every day, and I don’t pretend they’re a health food. But for a special occasion like Halloween, they’re a fun, indulgent treat that brings people together. I balance them out with a big veggie platter and some fruit on the side. Everything in moderation, right?
FAQs
1. Can I use hot dogs instead of cocktail sausages?
Absolutely! Just cut each hot dog into 3-4 pieces before wrapping. You’ll need to adjust the baking time slightly—add 2-3 minutes since the pieces are larger. I’ve done this for Super Bowl parties and it works great.
2. Why did my dough strips tear when I tried to wrap them?
This usually happens when the dough is too cold. Let it sit at room temperature for 5-7 minutes before cutting. If it still tears, don’t stress—just press the torn edges together. The egg wash will help seal any gaps during baking. Imperfect mummies are still delicious mummies.
3. Can I make these in an air fryer?
Yes! Preheat your air fryer to 350°F (175°C). Place the mummies in a single layer in the basket (don’t overcrowd) and cook for 8-10 minutes, flipping halfway through. The air fryer version comes out extra crispy. Just watch them closely—air fryers can vary wildly in cooking time.
4. How do I get the mustard eyes to look perfect every time?
Use a toothpick or a small piping tip to dot the mustard. Dip the toothpick into the mustard, then gently touch it to the sausage. For perfectly round dots, use the tip of a round piping tip (like a Wilton #2 or #3) as a stamp. Or just embrace the imperfection—I’ve had mummies with squinty eyes that looked even cuter than the perfect ones.
5. Can I freeze the unbaked mummies?
Yes! Assemble the mummies completely (without egg wash or eyes), place them on a baking sheet, and freeze until solid. Transfer to a freezer bag and store for up to 3 months. To bake, place frozen mummies on a lined baking sheet, brush with egg wash, and bake at 375°F for 15-18 minutes. Add eyes after cooling slightly. This is my favorite meal prep hack for Halloween week.
Conclusion
These Easy Mummy Wrapped Sausages are proof that Halloween appetizers don’t have to be complicated to be memorable. They’re quick, fun, and absolutely delicious—the kind of recipe that makes you look like a Halloween hero without spending hours in the kitchen. Whether you’re hosting a costume party, sending treats to a school celebration, or just looking for a fun way to get your kids excited about cooking, these mummies deliver every single time.
I love this recipe because it reminds me that the best food memories often come from the simplest moments. That first Halloween party where my neighbor surprised me with these little guys? I still think about it every time I make them. They’re more than just an appetizer—they’re a little piece of Halloween magic that brings people together.
Now I want to see your mummies! Tag me in your photos, leave a comment below with your favorite variation, or tell me about the weirdest place you’ve ever found a recipe. Did you get one from a neighbor too? A taxi driver? A plumber? I want to hear all about it. Until then, happy Halloween, and may your mummies always be perfectly wrapped.
Pin This Recipe!
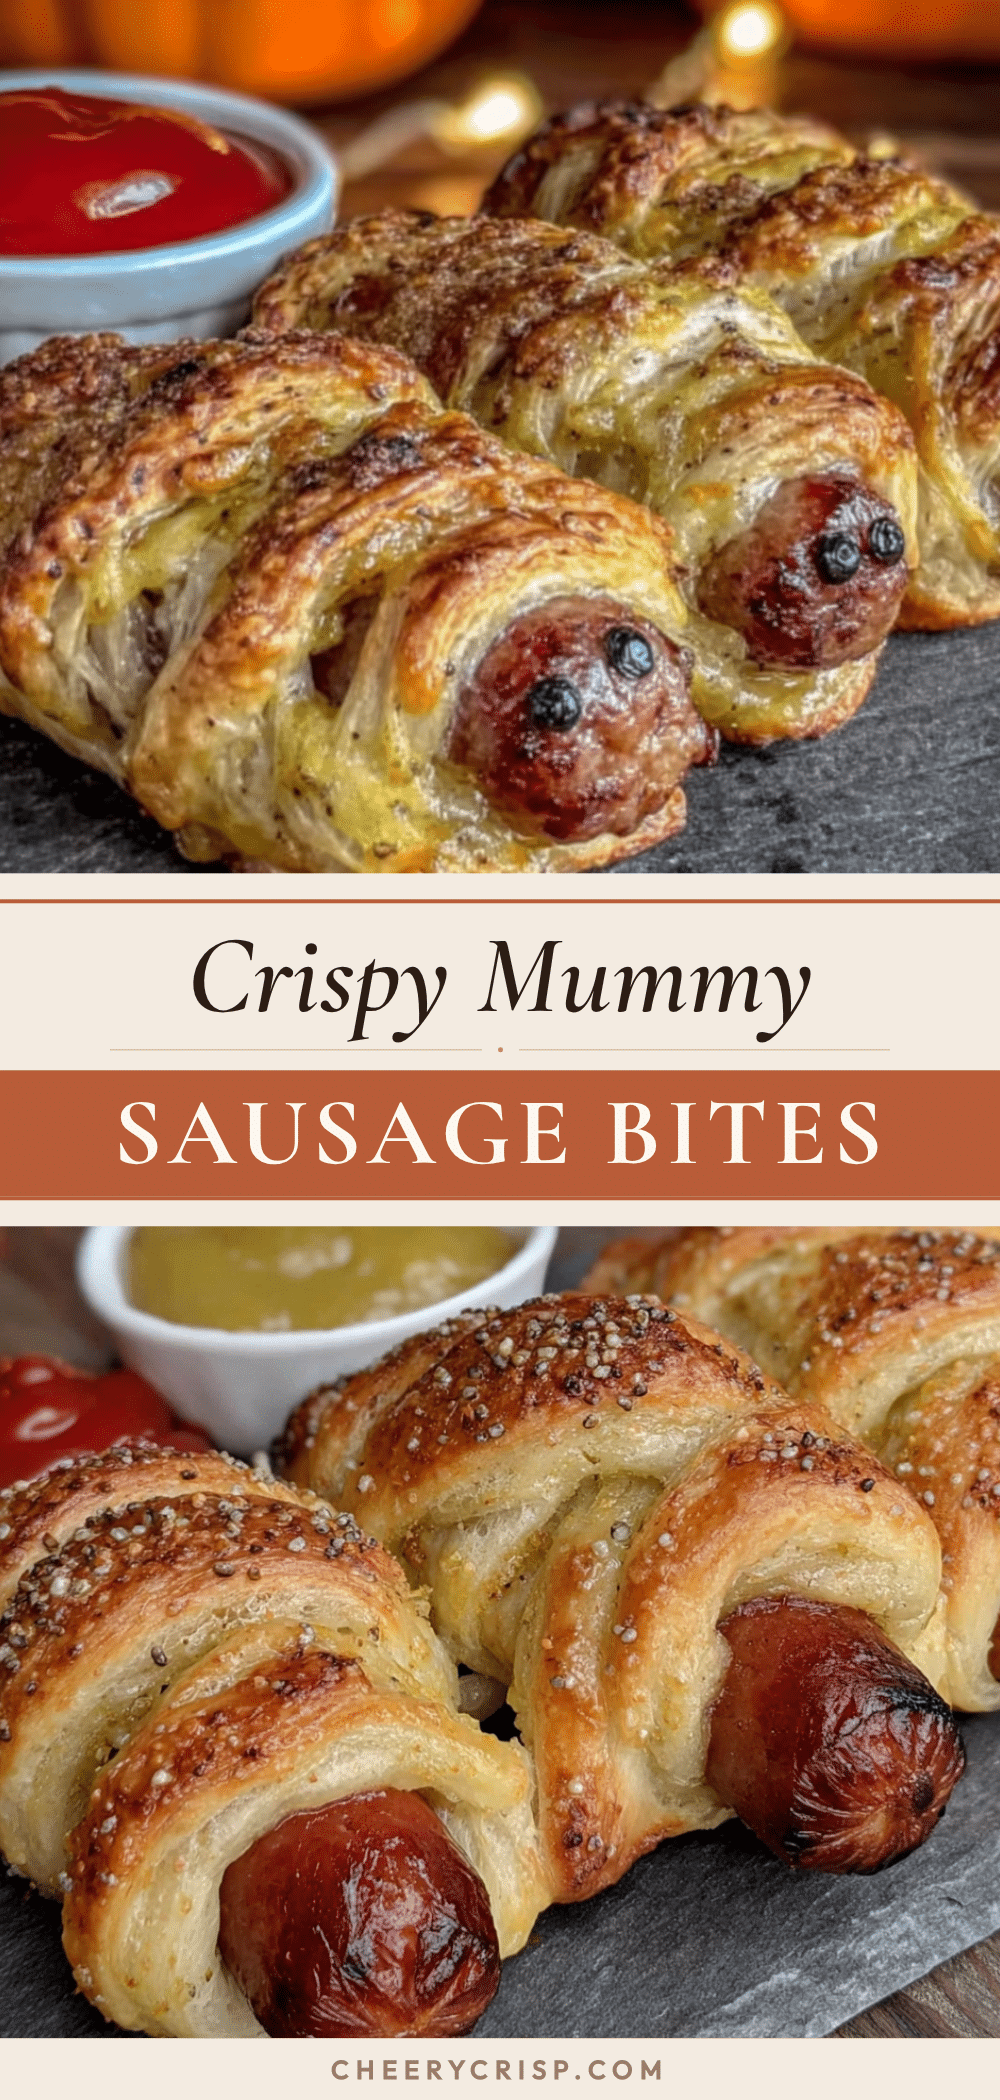
Easy Mummy Wrapped Sausage: Best Halloween Appetizer

These Easy Mummy Wrapped Sausages are the kind of recipe that makes you look like you tried way harder than you actually did. They’re creepy-cute, totally delicious, and come together in under 25 minutes.
- Prep Time: 10 minutes
- Cook Time: 15 minutes
- Total Time: 25 minutes
- Yield: 8 servings 1x
- Category: Appetizer
- Cuisine: American
Ingredients
- 1 can (8 ounces) crescent roll dough (original or butter flavor)
- 1 package (14 ounces) cocktail sausages or lil’ smokies
- Mustard (yellow or Dijon) for eyes
- 1 large egg
- 1 tablespoon water
- Optional: candy eyes, sesame seeds, poppy seeds, garlic powder, everything bagel seasoning
Instructions
- Preheat oven to 375°F (190°C). Line a baking sheet with parchment paper or a silicone mat. Let crescent dough sit at room temperature for 5 minutes.
- Carefully unroll the crescent dough and separate along perforated lines into 8 triangles.
- Cut each triangle lengthwise into 3-4 thin strips (about ¼ to ½ inch wide) using a pizza cutter or sharp knife.
- Wrap a dough strip around each cocktail sausage, leaving a small gap at the top for eyes. Overlap strips slightly and press ends to seal. Repeat with all sausages and strips.
- In a small bowl, whisk together egg and 1 tablespoon water. Lightly brush each mummy with egg wash. If desired, sprinkle with sesame seeds, poppy seeds, or seasonings.
- Place mummies on prepared baking sheet about 1 inch apart. Bake for 12-15 minutes, until golden brown and puffed.
- Let cool for 2-3 minutes. Use a toothpick to dot mustard onto the exposed sausage for eyes, or press candy eyes into the egg wash residue.
- Serve immediately. Best enjoyed warm within 15-20 minutes.
Notes
For best results, don’t overwork the dough. Space mummies at least 1 inch apart on the baking sheet. Watch the oven closely during the last 3 minutes of baking. Leftovers can be stored in an airtight container in the fridge for up to 3 days; reheat in a 350°F oven for 5-7 minutes (do not microwave). To make ahead, assemble mummies (without egg wash and eyes) up to 24 hours in advance, refrigerate, then brush with egg wash and bake just before serving.
Nutrition
- Serving Size: 1 mummy
- Calories: 120
- Sugar: 2
- Sodium: 325
- Fat: 8.5
- Saturated Fat: 3.5
- Carbohydrates: 9
- Protein: 4.5
Keywords: Halloween appetizer, mummy sausage, pigs in a blanket, easy Halloween recipe, party snack, crescent roll recipe



