Love this? Save it for later!
Share the inspiration with your friends
My niece asked why I couldn’t just use black cocoa powder instead of regular cocoa and then add food coloring. I started to explain why that wouldn’t work — then stopped. Honestly, I had no good reason. I’d just never tried it that way.
Three Octobers ago, I was testing Halloween cupcake recipes for a neighborhood party. My usual method involved adding half a bottle of black gel food coloring to a standard chocolate batter. It worked, but the color was more “charcoal gray” than “midnight sky,” and the batter always tasted faintly like artificial coloring. My niece, who was ten at the time and had been “helping” by licking the spatula, looked at me with that particular mix of confidence and confusion kids have. “Why don’t you just use the black cocoa?” she asked again. “It’s already black.”
I nearly laughed. Black cocoa powder is notoriously tricky — it’s less acidic than regular cocoa, it can make baked goods dry, and it doesn’t always give that deep, dark color people expect. But she wasn’t wrong. I mean, technically, black cocoa is designed to be darker. I grabbed the bag I’d been saving for a “someday” project, measured it out, and held my breath. The batter looked promising — a deep, almost charcoal gray that darkened as it sat. And when those cupcakes came out of the oven? Let me tell you, they were the blackest cupcakes I’d ever made. No food coloring needed. Not a single drop.
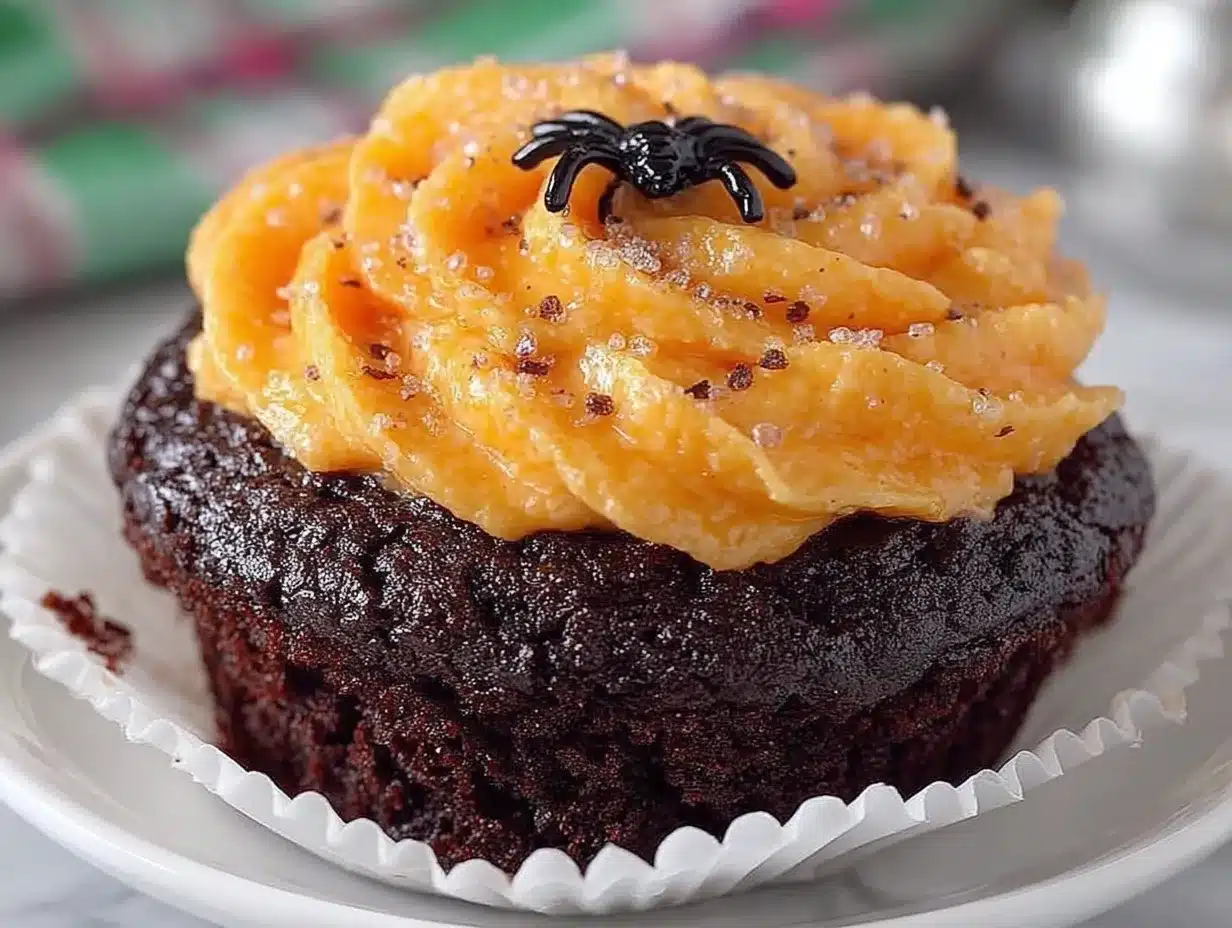
That moment changed how I approach Halloween baking. These Perfect Black Velvet Halloween Cupcakes with Orange Buttercream are the result of my niece’s stubborn curiosity and my willingness to admit I was wrong. They’re rich, tender, and deeply chocolatey with that signature black velvet texture — and the orange buttercream on top is so bright and creamy it practically glows. Maybe you’ve been there, standing in your kitchen, certain a shortcut won’t work, only to discover it actually works better. That’s this recipe. It stayed with me because it proved that sometimes the simplest answer is the right one.
Why You’ll Love This Recipe
These aren’t just another Halloween cupcake. After testing this recipe at least seven times (yes, seven — my coworkers were very patient), I can confidently say these are the best black velvet cupcakes I’ve ever made. Here’s why you’ll love them too:
- Naturally Dark Color : Black cocoa powder does all the work. No artificial coloring, no stained fingers, no worrying about what you’re feeding your family.
- Simple Ingredients : You probably already have most of these in your pantry. The black cocoa is the only specialty item, and it’s easy to find online or at well-stocked grocery stores.
- Perfect for Halloween Parties : These cupcakes are showstoppers. The contrast between the black cake and bright orange buttercream is exactly what you want for a spooky spread.
- Crowd-Pleaser : Kids love the dramatic color, and adults love the rich, not-too-sweet chocolate flavor. I’ve brought these to three different parties now, and they disappear every time.
- Unbelievably Moist : Black cocoa can be drying, but this recipe uses buttermilk and oil to keep the crumb tender and soft. You won’t believe they’re this dark without being dry.
What makes this recipe different from other black velvet cakes is the balance. The black cocoa is intense — almost like Oreo cookies in cake form — but it’s mellowed by the tangy buttermilk and balanced by the sweet, citrusy buttercream. It’s not just another version of a Halloween cupcake. It’s the version I keep coming back to, year after year.
This is the kind of recipe that makes you close your eyes after the first bite. It’s comfort food reimagined — spooky on the outside, but warm and familiar on the inside. Perfect for impressing guests without spending hours in the kitchen, or turning a simple October afternoon into something memorable.
What Ingredients You Will Need
This recipe uses simple, wholesome ingredients to deliver bold flavor and that signature black velvet color. Most of these are pantry staples, and the few specialty items are worth the effort.
For the Cupcakes
- All-purpose flour : 1 ½ cups (180g). Spoon and level for accuracy — scooping directly can pack the flour and make the cupcakes dense.
- Black cocoa powder : ½ cup (50g). This is the star of the show. I recommend King Arthur Flour or Rodelle brand for the deepest color. Regular cocoa won’t give you the same dramatic black hue.
- Granulated sugar : 1 cup (200g). Adds sweetness and helps with browning (even though we’re going for black, the sugar still affects texture).
- Baking soda : 1 teaspoon. Helps the cupcakes rise and reacts with the buttermilk for a tender crumb.
- Salt : ½ teaspoon. Balances the bitterness of the black cocoa.
- Buttermilk : 1 cup (240ml), room temperature. Adds moisture and tang. If you don’t have buttermilk, add 1 tablespoon of lemon juice or vinegar to regular milk and let it sit for 5 minutes.
- Vegetable oil : ½ cup (120ml). Keeps the cupcakes moist. I prefer a neutral oil like canola or grapeseed — olive oil would be too strong here.
- Eggs : 2 large, room temperature. Adds structure and richness.
- Vanilla extract : 2 teaspoons. Enhances the chocolate flavor.
- White vinegar : 1 teaspoon. Reacts with the baking soda for extra lift. Don’t skip this — it helps the cupcakes rise beautifully.
For the Orange Buttercream
- Unsalted butter : 1 cup (226g), softened. I prefer Kerrygold for its rich flavor, but any good-quality butter works.
- Powdered sugar : 3 ½ cups (420g), sifted. Sifting prevents lumps and gives a silky smooth frosting.
- Orange zest : 2 tablespoons (from about 2 large oranges). Use a microplane for the finest zest — avoid the white pith, which is bitter.
- Fresh orange juice : 3 tablespoons (45ml). Adds bright, natural citrus flavor. Bottled juice can work in a pinch, but fresh is noticeably better.
- Vanilla extract : 1 teaspoon.
- Salt : A pinch. Balances the sweetness.
- Orange gel food coloring : A few drops (optional, for a brighter color). I use Americolor brand for consistent, vibrant results.
For Decoration (Optional)
- Halloween sprinkles : Orange, black, or spider-web shapes add a festive touch.
- Edible glitter : A light dusting makes the cupcakes look magical.
- Candy eyeballs : For a fun, spooky look.
Equipment Needed
You don’t need a professional bakery setup for these cupcakes, but a few key tools make the process smoother.
- Muffin tin : Standard 12-cup tin. I prefer a non-stick one for easy release.
- Cupcake liners : Black or orange liners add to the Halloween theme. Avoid white liners — they’ll show the dark cake color through and look a little sad.
- Mixing bowls : At least two medium bowls. One for dry ingredients, one for wet.
- Whisk : For combining dry ingredients and smoothing out any lumps in the cocoa.
- Electric hand mixer or stand mixer : For the buttercream. You can make it by hand, but your arm will thank you for using a mixer.
- Rubber spatula : For scraping down the bowl and folding ingredients.
- Cooling rack : Wire rack for cooling cupcakes completely before frosting.
- Piping bag and star tip : I use a Wilton 1M tip for that classic swirl look. A zip-top bag with the corner snipped off works in a pinch.
- Microplane or zester : For zesting oranges. A box grater works too, but a microplane gives finer, more aromatic zest.
- Sifter or fine-mesh strainer : For sifting powdered sugar and cocoa powder. This step prevents lumps and ensures a smooth batter and frosting.
If you don’t have a piping bag, don’t worry. You can spread the buttercream with a knife or offset spatula for a more rustic look. I’ve done it both ways, and honestly, the rustic version has its own charm.
Preparation Method
Let’s make some magic happen. This recipe takes about 30 minutes of active prep time and 18-20 minutes of baking. The buttercream comes together while the cupcakes cool.
Step 1: Preheat and Prep
Preheat your oven to 350°F (175°C). Line your muffin tin with 12 cupcake liners. If you’re using black liners, check that they’re not too thin — some cheap liners can stick to the cake. I’ve learned this the hard way. Set the tin aside.
Step 2: Combine Dry Ingredients
In a medium bowl, whisk together the flour, black cocoa powder, baking soda, and salt. Whisk for about 30 seconds to aerate everything and break up any cocoa clumps. Black cocoa is notoriously clumpy, so be thorough here. You should see a uniform, dark gray powder with no streaks of lighter cocoa.
Step 3: Mix Wet Ingredients
In a separate larger bowl, whisk together the buttermilk, vegetable oil, eggs, vanilla extract, and white vinegar. Whisk until the eggs are fully incorporated and the mixture looks smooth and slightly frothy. The vinegar might smell a little sharp — don’t worry, it bakes off completely.
Step 4: Combine Wet and Dry
Pour the dry ingredients into the wet ingredients. Use a rubber spatula to fold everything together gently. Stir just until no streaks of flour remain — about 15 to 20 strokes. Overmixing will make the cupcakes tough. The batter will be thin, darker than any chocolate batter you’ve ever seen, and smell intensely like Oreos. That’s exactly right.
Step 5: Fill the Liners
Divide the batter evenly among the 12 cupcake liners. I use a ¼-cup scoop for consistent portions. Each liner should be about ⅔ full. If you overfill, the cupcakes will dome too much and might spill over. Trust me, I’ve had a few sad, flat cupcakes from overfilling.
Step 6: Bake
Bake for 18 to 20 minutes, rotating the pan halfway through. The cupcakes are done when a toothpick inserted into the center comes out clean or with a few moist crumbs. The tops should spring back when lightly pressed. Because the cake is so dark, you can’t rely on visual cues for doneness — the toothpick test is your best friend here.
Step 7: Cool
Let the cupcakes cool in the pan for 5 minutes. Then transfer them to a wire rack to cool completely. Don’t skip this step — frosting warm cupcakes will turn your buttercream into a melty mess. I’ve done it, and it’s not pretty. Wait at least 30 minutes, or until the cupcakes are cool to the touch.
Step 8: Make the Orange Buttercream
While the cupcakes cool, make the frosting. In a large bowl, beat the softened butter with an electric mixer on medium speed for about 2 minutes, until it’s pale and creamy. Scrape down the sides of the bowl. Add the sifted powdered sugar, one cup at a time, beating on low speed after each addition to avoid a sugar cloud. Add the orange zest, orange juice, vanilla extract, and a pinch of salt. Beat on medium-high speed for 3 to 4 minutes, until the frosting is light, fluffy, and spreadable. If it’s too thick, add a teaspoon more orange juice. If it’s too thin, add a tablespoon more powdered sugar. Add a few drops of orange gel food coloring if you want a brighter color.
Step 9: Frost and Decorate
Fit a piping bag with a star tip and fill it with the buttercream. Pipe a swirl onto each cooled cupcake. Start from the outside edge and work your way in, lifting up at the end for that classic peak. Top with Halloween sprinkles, edible glitter, or candy eyeballs if you’re feeling festive.
Cooking Tips & Techniques
Over the years, I’ve made plenty of mistakes with black cocoa. Here’s what I’ve learned so you don’t have to make the same ones.
Don’t overmix the batter. Black cocoa has a lower fat content than regular cocoa, which means the gluten in the flour develops faster. Mix just until combined. A few lumps are fine — they’ll bake out.
Use room temperature ingredients. Cold buttermilk and eggs can cause the batter to seize up or not emulsify properly. Take them out of the fridge about 30 minutes before you start baking. If you forget, place the eggs in a bowl of warm water for 5 minutes and microwave the buttermilk for 15 seconds.
Measure your cocoa carefully. Black cocoa is lighter than regular cocoa, so a cup of black cocoa weighs less than a cup of regular cocoa. Always use a kitchen scale for accuracy, or spoon the cocoa into your measuring cup and level it off. Don’t scoop directly from the bag — you’ll end up with too much and the cupcakes will be dry.
Check your baking soda. This recipe relies on baking soda for lift. If your baking soda is old, the cupcakes won’t rise properly. Test it by dropping a teaspoon into a small bowl of vinegar — if it fizzes vigorously, it’s still good. If not, buy a new box.
Let the cupcakes cool completely. I know it’s tempting to rush, but warm cupcakes will melt your buttercream into a puddle. I once frosted a batch after only 15 minutes of cooling, and the result was a sad, greasy mess. Give them the full 30 minutes on a wire rack.
For the buttercream, cream the butter well. Don’t skimp on the initial beating time. Properly creamed butter traps air, which makes the frosting lighter and fluffier. If your buttercream looks greasy or separated, you may have overmixed it or added the liquid too quickly. Fix it by beating in a tablespoon of powdered sugar at a time until it comes back together.
Variations & Adaptations
This recipe is flexible. Here are a few ways to make it your own.
Gluten-Free Version: Substitute the all-purpose flour with a 1:1 gluten-free baking flour blend that contains xanthan gum. I’ve tested this with King Arthur Measure for Measure flour, and the texture is nearly identical. Don’t use almond flour or coconut flour — they’ll change the texture too much.
Dairy-Free Version: Replace the buttermilk with a dairy-free buttermilk alternative. Add 1 tablespoon of lemon juice to 1 cup of unsweetened almond milk or oat milk, let it sit for 5 minutes, and use as directed. Use a plant-based butter for the frosting — I like Miyoko’s or Earth Balance. Note that the frosting might be slightly softer, so refrigerate the frosted cupcakes for 10 minutes before serving.
Different Frosting Flavors: Orange is classic for Halloween, but you can switch it up. Try a cream cheese frosting for a tangy contrast, a chocolate buttercream for double chocolate decadence, or a cinnamon buttercream for a warm, spicy twist. I made a batch with maple buttercream last year, and they were gone in minutes.
Mini Cupcakes: Use a mini muffin tin and bake for 10 to 12 minutes. This yields about 36 mini cupcakes. Perfect for parties where you want people to try multiple treats.
Black Velvet Cake: This batter also works as a two-layer 8-inch cake. Bake for 25 to 30 minutes, then frost and decorate as desired. The black cake with orange buttercream makes a stunning Halloween centerpiece.
Add Mix-Ins: Fold in ½ cup of chocolate chips, white chocolate chips, or crushed Oreos before baking. I once added a handful of orange-flavored chocolate chips, and the combination was surprisingly good.
Serving & Storage Suggestions
These cupcakes are best served at room temperature. The buttercream softens slightly, and the cake is at its most tender. If you’ve refrigerated them, let them sit out for about 20 minutes before serving.
For a Halloween party, arrange the cupcakes on a black or orange platter. Add some fake spider webs, plastic spiders, or mini pumpkins around the base for a spooky tablescape. I like to serve them alongside a bowl of candy corn or pumpkin-shaped cookies for variety.
Storage: Store unfrosted cupcakes in an airtight container at room temperature for up to 3 days. Frosted cupcakes can be stored in the refrigerator for up to 5 days. The frosting will firm up in the fridge, so let them come to room temperature before serving for the best texture.
Freezing: You can freeze the unfrosted cupcakes for up to 3 months. Wrap each cupcake individually in plastic wrap, then place them in a freezer-safe bag. Thaw at room temperature for about an hour before frosting. The buttercream can also be frozen for up to 3 months. Thaw it in the refrigerator overnight, then re-whip it with a mixer before using.
Reheating: If you prefer your cupcakes slightly warm (I do, especially on a chilly October evening), microwave a single cupcake for 10 to 15 seconds. Don’t overheat — the buttercream will melt.
The flavors actually deepen after a day or two. The black cocoa becomes more mellow, and the orange zest infuses the buttercream more fully. Honestly, these cupcakes might be even better on day two. If you can resist eating them all immediately, that is.
Nutritional Information & Benefits
Let’s be real — these are cupcakes, not health food. But here’s the estimated nutritional breakdown per cupcake (based on 12 servings):
- Calories: Approximately 420
- Fat: 22g
- Carbohydrates: 55g
- Protein: 4g
- Sugar: 40g
- Fiber: 2g
That said, there are a few bright spots. Black cocoa powder is rich in antioxidants — more so than regular cocoa, actually. It’s also lower in fat than standard cocoa, which is why we need the oil and buttermilk for moisture. The orange zest provides a small dose of vitamin C and adds bright, natural flavor without extra sugar.
If you’re watching your sugar intake, you can reduce the sugar in the cupcake batter to ¾ cup without affecting the texture too much. The buttercream is harder to reduce — powdered sugar is essential for structure — but you can use a sugar-free powdered sugar alternative. I haven’t tested this personally, so proceed with caution.
These cupcakes contain dairy, eggs, and gluten. For allergen-friendly versions, see the variations section above.
Conclusion
These Perfect Black Velvet Halloween Cupcakes with Orange Buttercream are everything I want in a Halloween treat — dramatic, delicious, and surprisingly easy to make. They’ve become my go-to for October parties, and every time I make them, I think of my niece and her stubborn, brilliant question that changed how I bake.
I hope you’ll give them a try. Customize the frosting, play with the decorations, make them your own. That’s the beauty of baking — there’s always room for your personal touch. Whether you’re hosting a spooky soirée, bringing treats to a school party, or just want to make a regular Tuesday feel a little more magical, these cupcakes deliver.
If you make them, I’d love to hear about it. Leave a comment below, share a photo on Pinterest, or tag me on social media. Did you try a different frosting? Add a secret ingredient? Let me know — your adaptations might inspire someone else. Happy Halloween, and happy baking!
Frequently Asked Questions
Can I use regular cocoa powder instead of black cocoa?
You can, but the cupcakes won’t be as dark. Regular cocoa will give you a chocolate-brown color, not black. If you don’t have black cocoa, add about 2 tablespoons of black gel food coloring to the batter to deepen the color. The taste will be different — less Oreo-like and more standard chocolate.
Why did my cupcakes turn out dry?
Black cocoa is more absorbent than regular cocoa, so it’s easy to overbake. Check your cupcakes at 18 minutes and use the toothpick test. Also, make sure you measured your flour and cocoa correctly — spoon and level, don’t scoop. If you’re still having issues, add 2 tablespoons of buttermilk to the batter next time.
Can I make these cupcakes ahead of time?
Absolutely. Bake the cupcakes up to 3 days in advance and store them unfrosted in an airtight container. Make the buttercream up to 2 days ahead and refrigerate it. When you’re ready to serve, bring the buttercream to room temperature, re-whip it for a minute, and frost the cupcakes.
How do I get the orange buttercream to be really orange?
Fresh orange zest gives the buttercream a natural orange flavor, but the color will be pale. For a vibrant Halloween orange, add a few drops of orange gel food coloring. Start with one drop, mix, and add more until you’re happy with the color. Gel coloring is more concentrated than liquid, so you’ll use less and it won’t thin the frosting.
Can I use a different type of frosting?
Of course. Cream cheese frosting is a popular choice — the tanginess pairs beautifully with the rich black cocoa. Chocolate buttercream, vanilla buttercream, or even a simple dusting of powdered sugar all work. For a dairy-free option, try a coconut cream frosting or a simple glaze made with powdered sugar and plant-based milk.
Pin This Recipe!
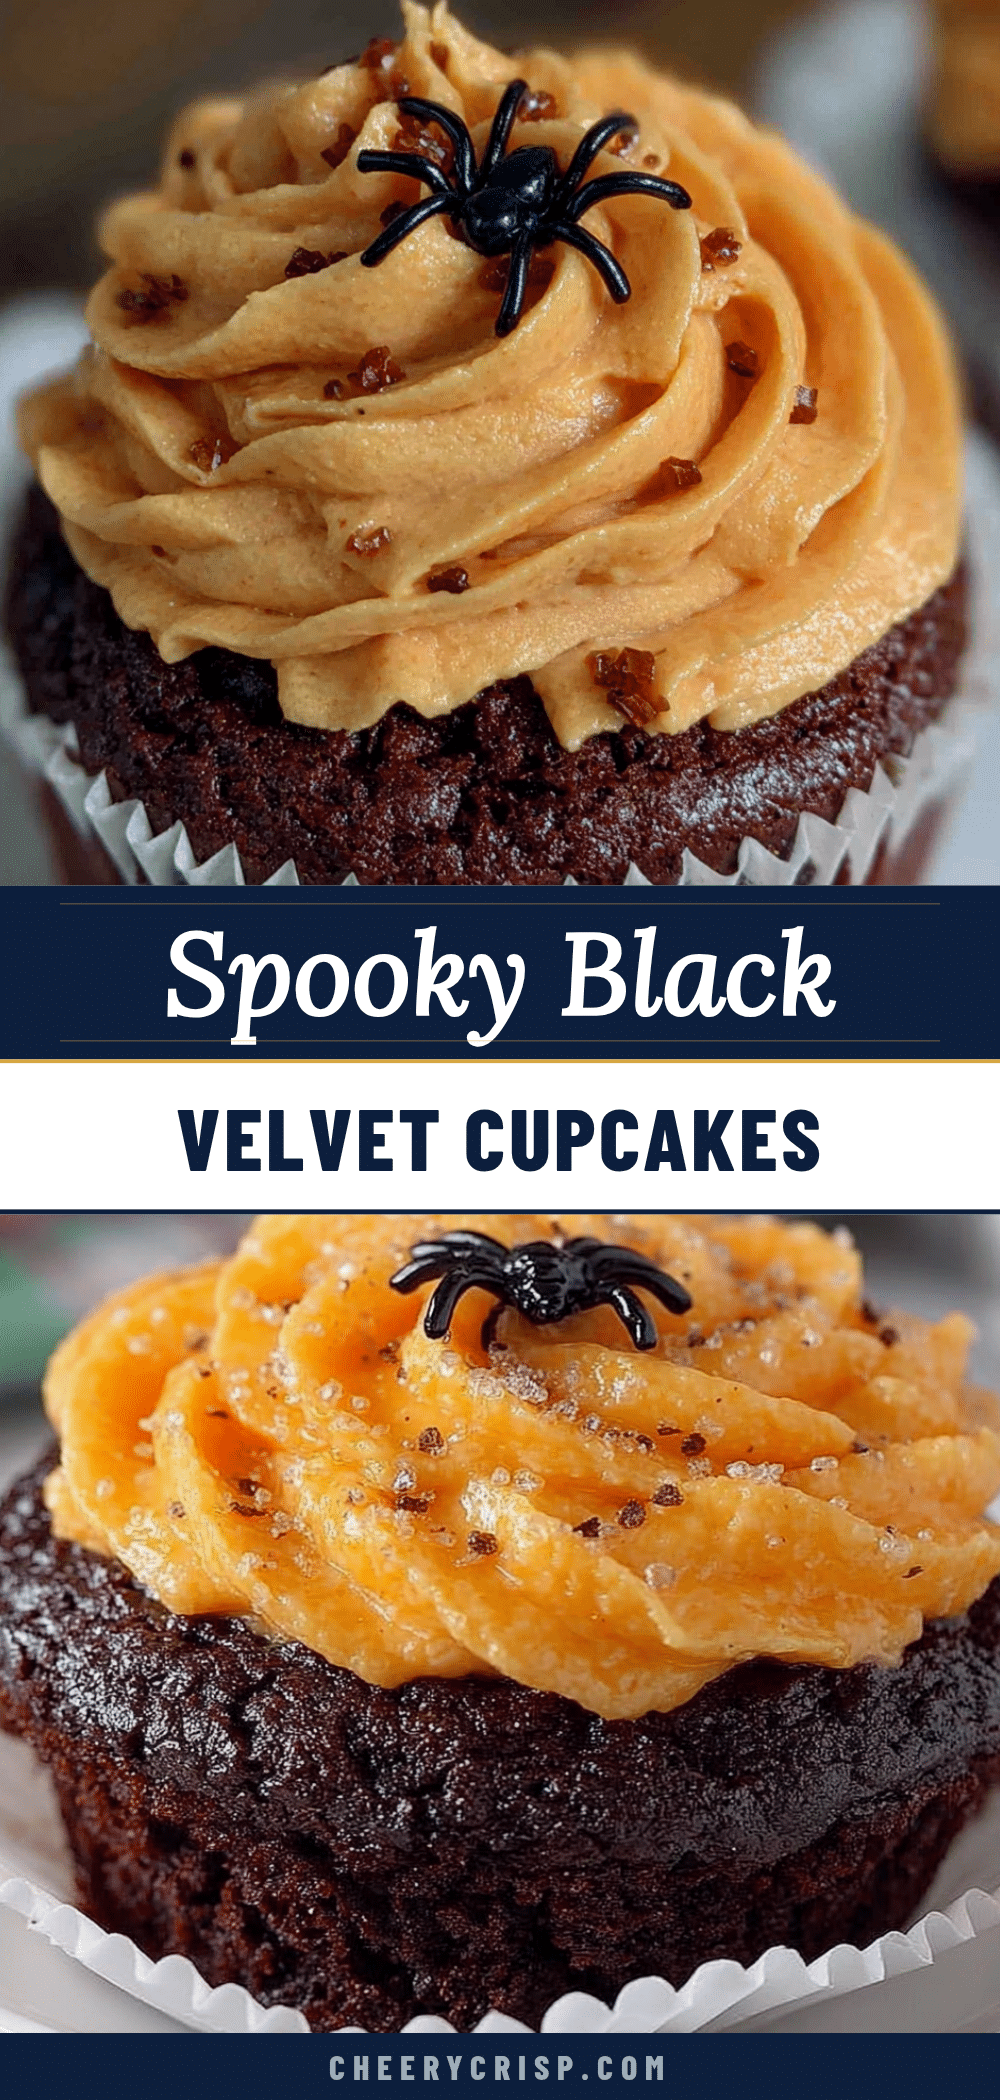
Perfect Black Velvet Cupcakes: Easy Halloween Treat
These rich, tender black velvet cupcakes get their dramatic color from black cocoa powder—no artificial food coloring needed. Topped with a bright orange buttercream, they’re the ultimate Halloween treat that’s surprisingly easy to make.
- Prep Time: 30 minutes
- Cook Time: 20 minutes
- Total Time: 50 minutes
- Yield: 12 cupcakes 1x
- Category: Dessert
- Cuisine: American
Ingredients
- 1 ½ cups (180g) all-purpose flour
- ½ cup (50g) black cocoa powder
- 1 cup (200g) granulated sugar
- 1 teaspoon baking soda
- ½ teaspoon salt
- 1 cup (240ml) buttermilk, room temperature
- ½ cup (120ml) vegetable oil
- 2 large eggs, room temperature
- 2 teaspoons vanilla extract
- 1 teaspoon white vinegar
- 1 cup (226g) unsalted butter, softened
- 3 ½ cups (420g) powdered sugar, sifted
- 2 tablespoons orange zest (from about 2 large oranges)
- 3 tablespoons fresh orange juice
- 1 teaspoon vanilla extract
- A pinch of salt
- A few drops orange gel food coloring (optional)
- Halloween sprinkles (optional)
- Edible glitter (optional)
- Candy eyeballs (optional)
Instructions
- Preheat oven to 350°F (175°C). Line a 12-cup muffin tin with cupcake liners.
- In a medium bowl, whisk together flour, black cocoa powder, baking soda, and salt for about 30 seconds until uniform.
- In a separate larger bowl, whisk together buttermilk, vegetable oil, eggs, vanilla extract, and white vinegar until smooth and slightly frothy.
- Pour dry ingredients into wet ingredients. Fold gently with a rubber spatula until just combined (15-20 strokes). Batter will be thin and dark.
- Divide batter evenly among the 12 liners, filling each about ⅔ full.
- Bake for 18-20 minutes, rotating pan halfway through. Cupcakes are done when a toothpick inserted in the center comes out clean or with a few moist crumbs.
- Let cupcakes cool in the pan for 5 minutes, then transfer to a wire rack to cool completely (at least 30 minutes).
- While cupcakes cool, make the buttercream: In a large bowl, beat softened butter with an electric mixer on medium speed for 2 minutes until pale and creamy.
- Add sifted powdered sugar, one cup at a time, beating on low after each addition. Add orange zest, orange juice, vanilla extract, and a pinch of salt. Beat on medium-high for 3-4 minutes until light and fluffy. Add orange food coloring if desired.
- Fit a piping bag with a star tip and fill with buttercream. Pipe a swirl onto each cooled cupcake. Decorate with sprinkles, glitter, or candy eyeballs as desired.
Notes
Use room temperature ingredients for best results. Don’t overmix the batter. Black cocoa is clumpy, so whisk dry ingredients thoroughly. For dairy-free, use a dairy-free buttermilk alternative and plant-based butter. Cupcakes can be stored unfrosted at room temperature for up to 3 days, or frosted in the refrigerator for up to 5 days. Unfrosted cupcakes can be frozen for up to 3 months.
Nutrition
- Serving Size: 1 cupcake
- Calories: 420
- Sugar: 40
- Fat: 22
- Carbohydrates: 55
- Fiber: 2
- Protein: 4
Keywords: black velvet cupcakes, Halloween cupcakes, black cocoa cupcakes, orange buttercream, Halloween dessert, easy Halloween treat



