Love this? Save it for later!
Share the inspiration with your friends
There used to be a tiny deli on the corner of Elm and 4th in my old neighborhood that made the most incredible dill pickles. When they closed their doors three years ago—just a handwritten sign saying “Thanks for the memories” taped to the glass—I honestly felt a little lost. Those pickles were the reason I’d walk twenty minutes out of my way on a Tuesday afternoon. They were crunchy, garlicky, and had this perfect balance of tang and salt that I couldn’t find anywhere else. After maybe seven or eight tries—some batches were sad, limp disasters, let me tell you—I finally got it. This is that pickle. The one that makes you close the jar and just nod. No canning required, no fancy equipment, just a jar and a little patience. I mean, who knew the best pickles of your life could come from your own fridge?
Why You’ll Love This Recipe
Let’s face it—homemade pickles sound like a project. But these quick refrigerator dill pickles are anything but. They come together in about fifteen minutes of active work, and then your fridge does the rest. No water bath canner, no sealing lids, no stress. You just slice, stir, pour, and wait.
Here is why this recipe stands out:
- Quick & Easy: Ready to eat in 24 to 48 hours, with only 15 minutes of hands-on time. Perfect for when you need pickles for a weekend barbecue or a burger night.
- Simple Ingredients: Cucumbers, vinegar, water, salt, garlic, dill, and peppercorns. You probably have most of these in your pantry right now.
- No Canning Skills Required: If you can boil water and slice a cucumber, you can make these. Seriously.
- Crunchy Every Time: The secret is in the salt and the cold fridge. These stay crisp for weeks—not mushy like some store-bought brands.
- Customizable for Any Palate: Like it spicy? Add chili flakes. Prefer extra garlic? Go ahead and double it. This recipe is a starting point, not a rulebook.
- Crowd-Pleaser: I brought a jar to a potluck last summer, and someone asked for the recipe before they even finished their first pickle. That never gets old.
Honestly, this is the kind of recipe that makes you feel like you pulled off something impressive with almost no effort. And isn’t that the best kind of cooking?
What Ingredients You Will Need
This recipe uses simple, everyday ingredients to create that classic deli-style crunch and tang. Nothing fancy, nothing hard to find—just the good stuff.
For the Pickles
- 1 ½ pounds Kirby cucumbers (or Persian cucumbers)—these are naturally crunchier than English or slicing cucumbers. Look for firm, bumpy ones with no soft spots.
- 3 cloves garlic, peeled and smashed—smashing releases more flavor than slicing. I use a chef’s knife and give them a good whack.
- 4 sprigs fresh dill (or 2 teaspoons dried dill weed)—fresh dill gives that bright, grassy flavor. If using dried, crush it a little between your fingers first.
- 1 teaspoon black peppercorns—whole, not ground. They add a gentle warmth without overwhelming the pickle.
- ½ teaspoon red pepper flakes (optional)—for a little heat. I add these about half the time, depending on my mood.
- 1 bay leaf (optional)—adds a subtle herbal note. I throw one in when I want a more complex flavor.
For the Brine
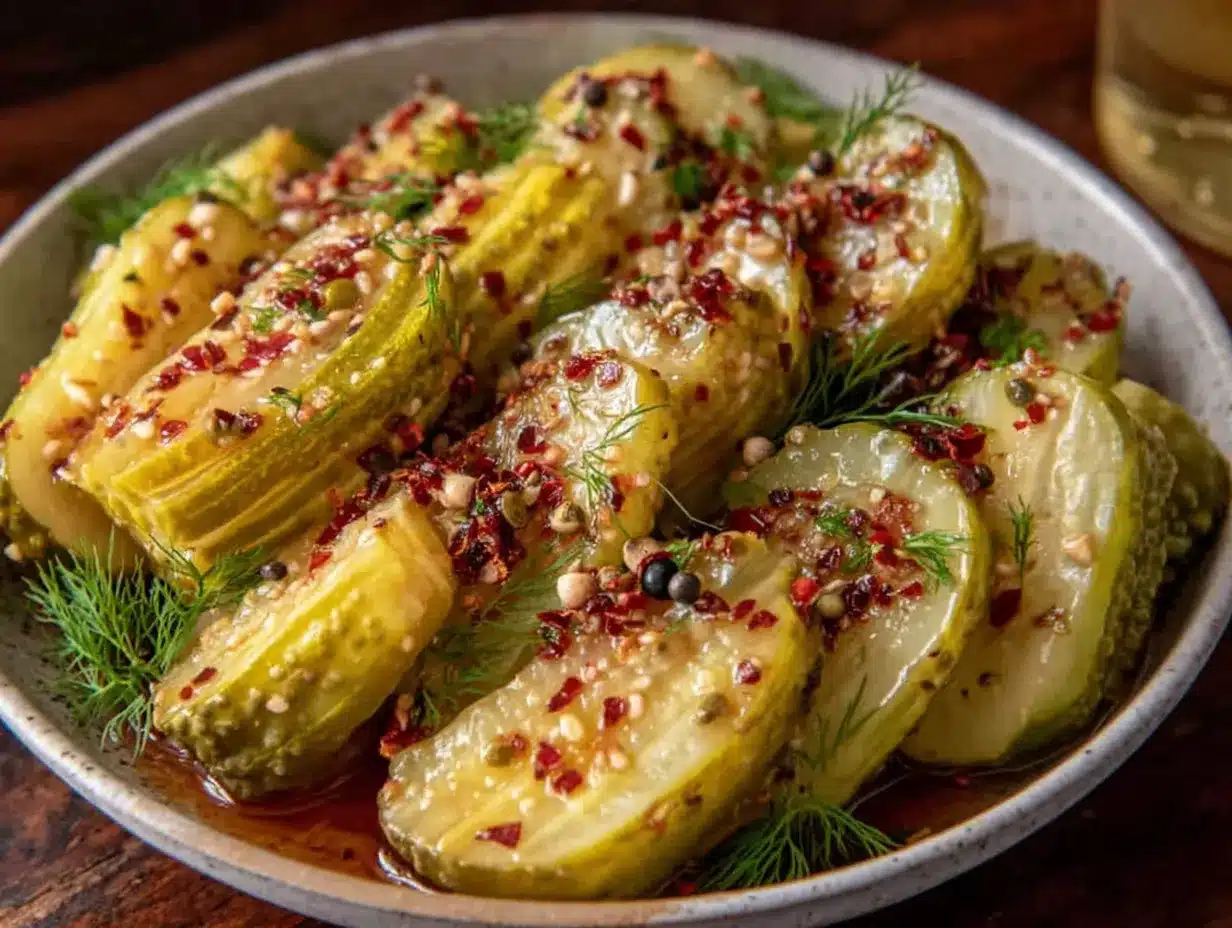
- 1 cup water—filtered or tap, both work. Just don’t use distilled water; it lacks the minerals that help with flavor.
- 1 cup white vinegar (5% acidity)—this is the standard for pickling. Apple cider vinegar works too but will change the flavor slightly.
- 1 tablespoon kosher salt (or 2 teaspoons pickling salt)—do not use iodized table salt. It can make the brine cloudy and affect the taste. I use Diamond Crystal kosher salt for its clean flavor.
- 1 tablespoon granulated sugar—this balances the acidity. You can skip it for a sharper pickle, but I find it rounds out the flavor nicely.
Ingredient Tips from My Kitchen: I’ve tested this with different vinegars—rice vinegar makes a milder pickle, and white wine vinegar adds a fruity note. But for that classic dill pickle taste, stick with white vinegar. Also, don’t skip the salt. It’s not just for flavor; it helps maintain that crunch by drawing out moisture from the cucumbers.
Equipment Needed
You don’t need a lot of gear for this, which is honestly my favorite part.
- 1-quart mason jar (or any glass jar with a tight-fitting lid)—a wide-mouth jar makes packing the cucumbers easier. I use a Ball jar, but any clean glass jar works. Just avoid plastic containers; the vinegar can absorb odors.
- Small saucepan—for heating the brine. Any small pot will do.
- Sharp knife and cutting board—for slicing cucumbers and smashing garlic. A mandoline slicer is nice for even slices, but a steady hand works just fine.
- Measuring cups and spoons—accuracy matters here, especially with salt and vinegar.
- Wooden spoon or whisk—for stirring the brine until the salt dissolves.
Budget-Friendly Tip: If you don’t have a mason jar, reuse a pickle jar or a pasta sauce jar. Just wash it thoroughly with hot soapy water and rinse well. I’ve done this plenty of times, and it works perfectly.
Preparation Method
Here is where the magic happens. Follow these steps, and you’ll have crunchy, tangy pickles in no time.
- Prepare the cucumbers. Wash them thoroughly under cool water. Trim off the blossom end—about ¼ inch—because it contains enzymes that can make pickles mushy. Slice the cucumbers into spears, rounds, or leave them whole if they’re small enough. I prefer spears for snacking and rounds for burgers. Aim for uniform thickness so they pickle evenly.
- Pack the jar. Place the smashed garlic cloves, dill sprigs, peppercorns, red pepper flakes (if using), and bay leaf (if using) at the bottom of your clean jar. Pack the cucumber slices tightly into the jar, leaving about ½ inch of headspace at the top. Don’t be shy—pack them in there. They’ll shrink slightly as they pickle.
- Make the brine. In a small saucepan, combine the water, white vinegar, kosher salt, and sugar. Bring to a boil over medium-high heat, stirring occasionally to dissolve the salt and sugar. Once it’s boiling, remove it from the heat immediately. Don’t let it boil for long—you just want everything dissolved.
- Pour the brine. Carefully pour the hot brine over the cucumbers in the jar, making sure they are completely submerged. Use a chopstick or the handle of a wooden spoon to gently poke around and release any air bubbles. This is important—air bubbles can lead to uneven pickling.
- Cool and seal. Let the jar cool to room temperature on the counter, about 30 minutes to 1 hour. You’ll hear the lid pop slightly as it cools—that’s normal. Once cool, screw the lid on tightly.
- Refrigerate and wait. Place the jar in the refrigerator. Here’s the hard part: wait at least 24 hours before tasting. For the best flavor, wait 48 hours. I know it’s tempting, but trust me—the flavor deepens and the crunch sets in around the 48-hour mark. Give the jar a gentle shake once or twice during the first day to redistribute the spices.
Sensory Cues: When you open the jar after 48 hours, you should smell garlic and dill immediately. The brine should be clear, not cloudy. The pickles should feel firm when you bite into them—a clean snap. If they feel soft, they might need more salt or a shorter brine time next batch.
Cooking Tips & Techniques
After making these quick refrigerator dill pickles more times than I can count, I’ve learned a few things the hard way.
Don’t skip the salt. I once tried to cut the salt in half because I was worried about sodium. Big mistake. The pickles came out limp and flavorless. Salt isn’t just for taste—it helps maintain texture by drawing out moisture and creating that signature crunch.
Use cold cucumbers. If your cucumbers are warm from the farmers market, pop them in the fridge for an hour before slicing. Cold cucumbers stay crisper during the brine process. I learned this after a batch of warm cucumbers turned out sad and floppy.
Keep them submerged. If any cucumber pieces float above the brine, they can get moldy. Use a clean glass weight or a small zip-top bag filled with brine (not water—water will dilute the brine) to keep them down. I’ve used a smaller jar lid as a weight before, and it worked in a pinch.
Taste test after 24 hours. You can adjust the flavor at this point. Too salty? Add a splash of water. Too vinegary? Add a pinch of sugar. Not garlicky enough? Smash another clove and drop it in. The brine is forgiving.
Label your jar. I cannot tell you how many times I’ve opened the fridge and wondered, “Are these the ones from Tuesday or the ones from Thursday?” Use a piece of masking tape and a marker to write the date. Your future self will thank you.
Variations & Adaptations
One of the best things about this recipe is how easy it is to change up. Here are a few variations I’ve tried and loved.
Spicy Garlic Dill Pickles: Add 1 teaspoon of red pepper flakes and 2 extra smashed garlic cloves. I made a batch of these for a Super Bowl party, and they disappeared before the chips. The heat builds slowly—it’s not overwhelming, just a nice warmth.
Sweet Bread and Butter Style: Increase the sugar to ¼ cup and add 1 teaspoon of mustard seeds and ½ teaspoon of turmeric. This gives you that classic sweet-tangy flavor. I like these on sandwiches or chopped up in tuna salad.
Dill Pickle Spears with Onion: Add ½ a red onion, thinly sliced, to the jar along with the cucumbers. The onion pickles alongside the cucumbers and becomes this sweet, tangy, crunchy topping for tacos or burgers. Honestly, I sometimes eat the pickled onions straight from the jar.
Low-Sodium Version: Use 1 ½ teaspoons of kosher salt instead of 1 tablespoon. The pickles will be less crunchy and have a shorter shelf life (about 2 weeks instead of 4), but they still taste great. I made this version for my mom, who watches her salt intake, and she loved them.
Herb-Infused Pickles: Swap the dill for fresh tarragon or thyme. I tried tarragon once on a whim, and it gave the pickles this anise-like flavor that was surprisingly good with grilled fish. Fresh dill is classic, but don’t be afraid to experiment.
Serving & Storage Suggestions
These pickles are incredibly versatile. Here is how I like to serve and store them.
Serving: Serve them cold straight from the fridge. They’re perfect on a charcuterie board, alongside a grilled cheese sandwich, chopped into potato salad, or just eaten out of the jar with your fingers (no judgment here). I’ve also used them in bloody marys—just skewer a spear and drop it in. The flavor is incredible.
Storage: Keep the jar tightly sealed in the refrigerator. These pickles will stay crunchy and flavorful for up to 4 weeks. After that, they start to lose their crunch, but they’re still safe to eat for another week or two. The brine will become slightly cloudy over time—that’s normal and safe.
Reheating: Don’t. These are cold pickles. If you want warm pickles (which is a thing, apparently), you can heat them gently in a saucepan, but I wouldn’t recommend it. The crunch disappears, and the texture gets weird.
Flavor Development: The pickles are at their peak between days 2 and 10. After that, the garlic flavor mellows, and the dill fades a bit. If you want to extend the fresh flavor, you can remove the dill sprigs after 5 days. I’ve done this, and it helps keep the flavor bright.
Nutritional Information & Benefits
Here is the approximate nutritional breakdown for a serving of about 3 pickle spears (roughly 30 grams).
- Calories: 10
- Total Fat: 0g
- Sodium: 350mg (varies based on salt used)
- Total Carbohydrates: 2g
- Dietary Fiber: 0g
- Total Sugars: 1g
- Protein: 0g
Health Benefits: Dill pickles are low in calories and fat-free, making them a great snack for weight management. They also contain small amounts of vitamin K and potassium from the cucumbers. The vinegar in the brine may help with blood sugar regulation after meals, though this effect is modest. Plus, the probiotics from fermentation? Well, these are fermented with vinegar, not naturally fermented, so they don’t contain live probiotics. But they do offer a satisfying crunch that can help curb cravings for less healthy snacks.
Dietary Considerations: This recipe is naturally gluten-free, dairy-free, and vegan. The main allergen concern is the sodium content, so if you’re on a low-sodium diet, adjust the salt as mentioned in the variations section.
Conclusion
These quick refrigerator dill pickles have become a staple in my kitchen, and I think they’ll become one in yours too. They’re easy, they’re crunchy, and they taste like something you’d get from that little deli you miss. The best part? You can tweak them until they’re exactly what you want. More garlic? Go for it. Extra dill? Absolutely. A little heat? Why not.
I love that this recipe makes me feel like I’ve done something special with almost no effort. And honestly, isn’t that the best kind of recipe? The one that makes you look like a hero in the kitchen without actually working like one.
Give these a try, and let me know how they turn out. Did you add something unexpected? Did they disappear faster than you thought? Drop a comment below—I’d love to hear your pickle stories. And if you found a variation that blew your mind, share it. We’re all in this together.
Happy pickling!
Frequently Asked Questions
Can I use English cucumbers instead of Kirby cucumbers?
You can, but they won’t be as crunchy. English cucumbers have a higher water content and thinner skin, which means they can turn mushy faster. If that’s all you have, try cutting them into thick rounds and reduce the brine time to 12 hours. They’ll still be good, just not as crisp.
How long do these pickles last in the fridge?
They stay crunchy and flavorful for about 4 weeks when stored properly in a sealed jar. After that, they’re still safe to eat for another week or two, but the texture will soften. I’ve never had a jar last that long in my house, though—they disappear too fast.
Can I reuse the brine for another batch?
Technically yes, but I wouldn’t recommend it. The brine loses its potency after one use, and the pickles won’t be as flavorful. Plus, the brine absorbs moisture and flavor compounds from the first batch, so the second batch will taste weaker. Better to make fresh brine each time.
Why are my pickles soft instead of crunchy?
Several reasons: you might have used the wrong type of cucumber (slicing cucumbers are softer), you might have skipped the salt, or you might have let them sit at room temperature too long before refrigerating. Also, make sure you trimmed the blossom end—that little tip contains enzymes that soften pickles. Try again with Kirby cucumbers and fresh brine.
Can I can these pickles for long-term storage?
This recipe is specifically designed for refrigerator storage, not water bath canning. The vinegar-to-water ratio and processing time for safe canning are different. If you want shelf-stable pickles, you’ll need to follow a tested canning recipe from a reliable source like the National Center for Home Food Preservation. Don’t just wing it—food safety matters.
Pin This Recipe!
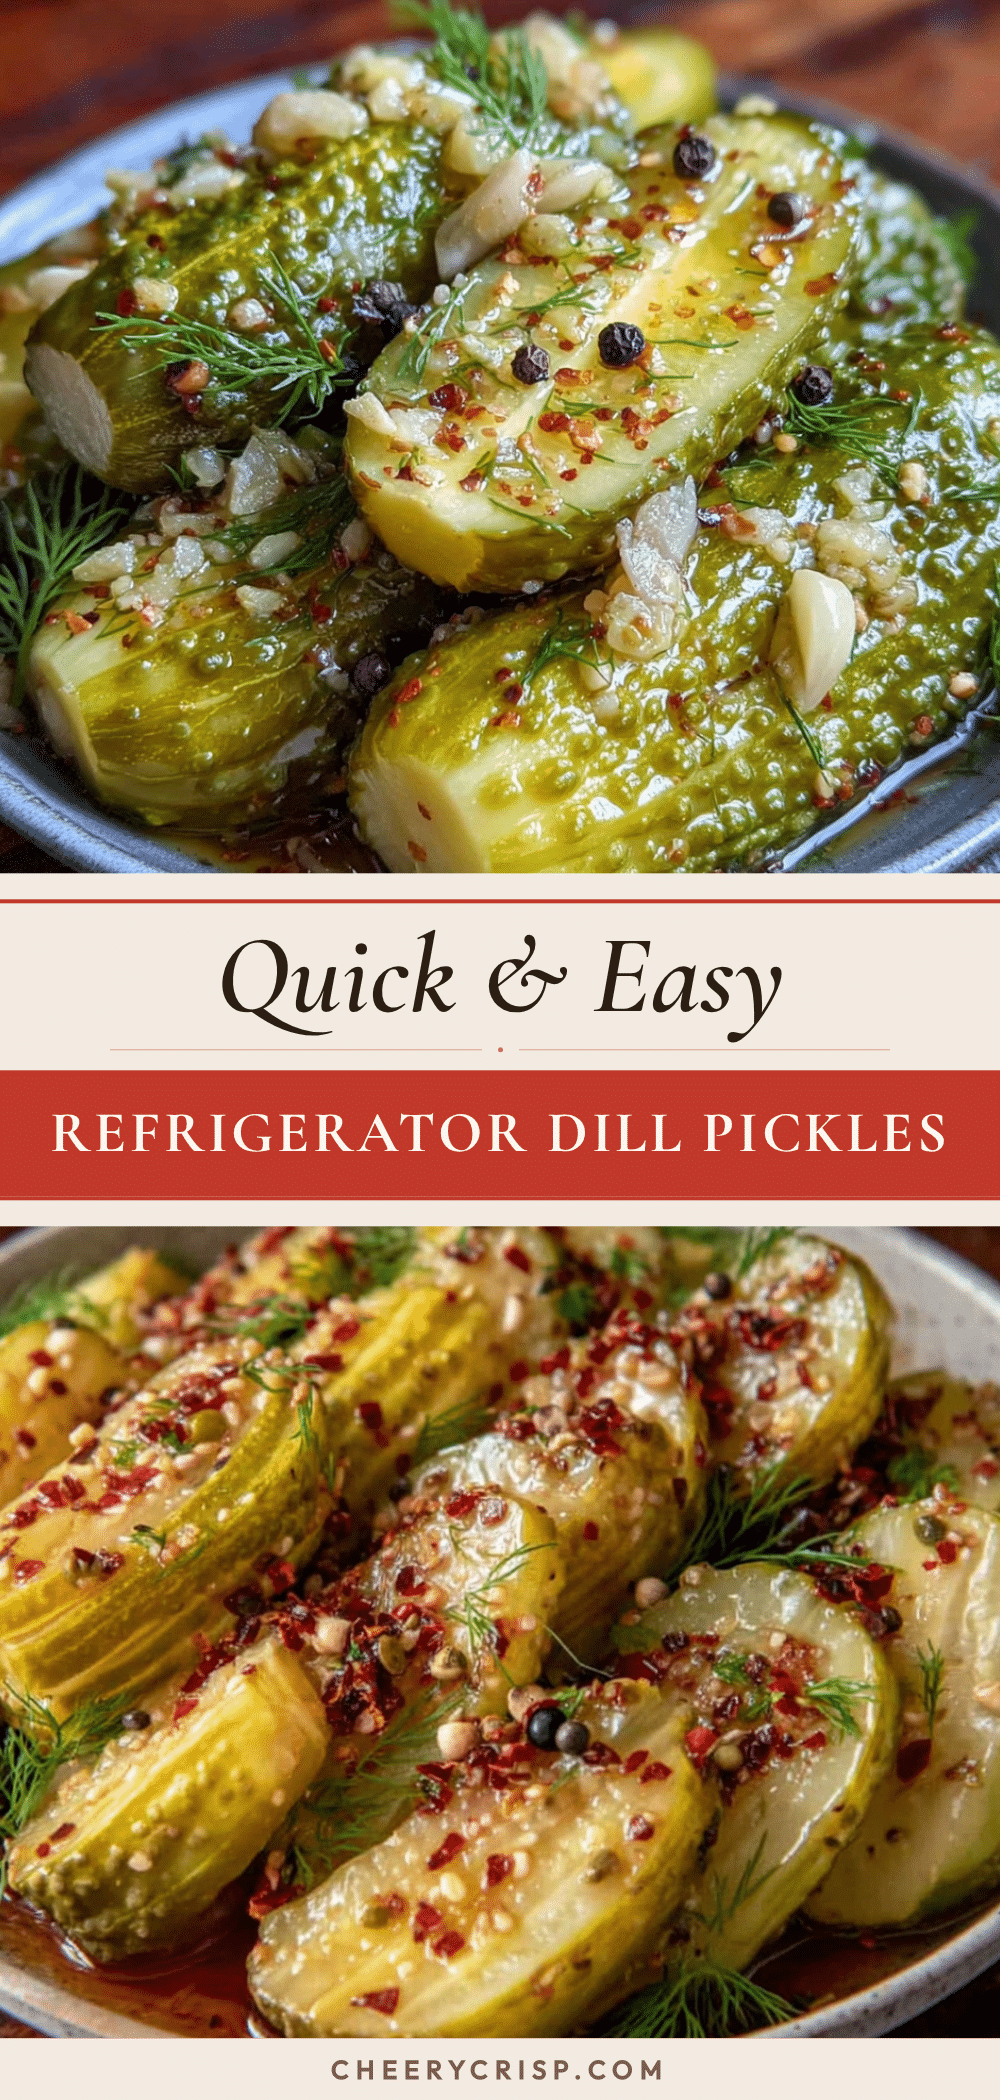
Easy Refrigerator Dill Pickles: The Best No-Canning Recipe
These quick refrigerator dill pickles are crunchy, garlicky, and tangy, with no canning required. Ready in 24 to 48 hours with just 15 minutes of hands-on time, they’re perfect for snacking, burgers, or potlucks.
- Prep Time: 15 minutes
- Cook Time: 5 minutes
- Total Time: 20 minutes (plus 24-48 hours refrigeration)
- Yield: 4 servings 1x
- Category: Appetizer
- Cuisine: American
Ingredients
- 1 ½ pounds Kirby cucumbers (or Persian cucumbers)
- 3 cloves garlic, peeled and smashed
- 4 sprigs fresh dill (or 2 teaspoons dried dill weed)
- 1 teaspoon black peppercorns
- ½ teaspoon red pepper flakes (optional)
- 1 bay leaf (optional)
- 1 cup water
- 1 cup white vinegar (5% acidity)
- 1 tablespoon kosher salt (or 2 teaspoons pickling salt)
- 1 tablespoon granulated sugar
Instructions
- Wash cucumbers thoroughly. Trim off the blossom end (about ¼ inch). Slice into spears, rounds, or leave whole if small.
- Place smashed garlic, dill sprigs, peppercorns, red pepper flakes (if using), and bay leaf (if using) at the bottom of a clean 1-quart mason jar. Pack cucumber slices tightly into the jar, leaving about ½ inch headspace.
- In a small saucepan, combine water, white vinegar, kosher salt, and sugar. Bring to a boil over medium-high heat, stirring to dissolve salt and sugar. Remove from heat immediately.
- Pour hot brine over cucumbers, ensuring they are completely submerged. Use a chopstick or spoon handle to release air bubbles.
- Let the jar cool to room temperature (about 30 minutes to 1 hour). Once cool, screw the lid on tightly.
- Refrigerate for at least 24 hours before tasting. For best flavor, wait 48 hours. Shake the jar gently once or twice during the first day to redistribute spices.
Notes
Don’t skip the salt—it helps maintain crunch. Use cold cucumbers for best texture. Keep pickles submerged in brine to prevent mold. Label jar with date. Pickles are at their peak between days 2 and 10. For longer fresh flavor, remove dill sprigs after 5 days.
Nutrition
- Serving Size: 3 pickle spears (abo
- Calories: 10
- Sugar: 1
- Sodium: 350
- Carbohydrates: 2
Keywords: refrigerator pickles, dill pickles, no-canning pickles, quick pickles, homemade pickles, easy pickles



