Love this? Save it for later!
Share the inspiration with your friends
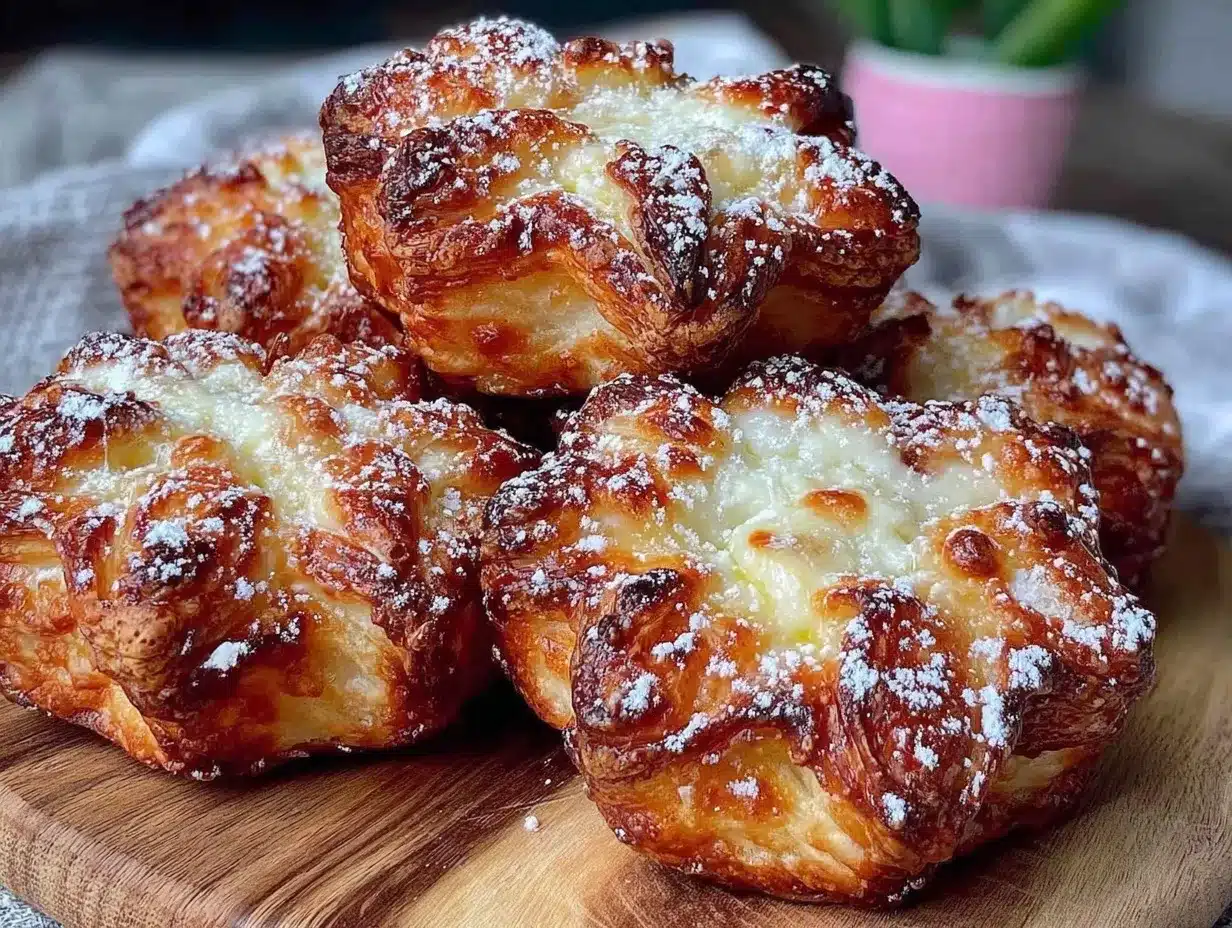
“Hand me that rolling pin,” my neighbor Hannah said casually as I stepped into her kitchen last Sunday morning. I was just there to drop off some borrowed tools, but before I even took off my coat, the buttery, sweet scent of cream cheese Danish pastries drifted out from the oven. Hannah wasn’t making a big deal of it—just popping something together like it was nothing. Honestly, it felt like the kind of effortless magic only years of quietly cooking alongside family could create. The star-shaped pastries she pulled from the oven looked almost too pretty to eat, yet I couldn’t wait to dig in.
Maybe you’ve been there—that moment when a simple recipe surprises you with how special it feels. I forgot my phone on the counter and got totally distracted by the flaky layers and tangy cream cheese filling. Watching Hannah shape each star with a few swift twists reminded me that sometimes the best recipes come from people who aren’t trying to impress at all. They just make something delicious because they love the process and the sharing.
This flaky star-shaped cream cheese Danish pastry recipe stuck with me because it’s genuinely easy for beginners, but the texture and flavor feel truly next-level. You don’t need fancy ingredients or complicated steps, just a little patience and a good rolling pin. If you like pastries that combine a tender, flaky crust with a rich, creamy center that’s not too sweet, this recipe will quickly become your go-to weekend treat or unexpected brunch delight.
Why You’ll Love This Recipe
If you’ve tried making Danish pastries before, you know they can be intimidating, right? This recipe takes that worry away with a straightforward method that’s truly beginner-friendly. After testing it multiple times and tweaking a few steps, I’m confident this is one of the easiest ways to get flaky, buttery pastries without breaking a sweat.
- Quick & Easy: Comes together in about 45 minutes, making it perfect for busy mornings or last-minute guests.
- Simple Ingredients: Uses pantry staples like puff pastry sheets and cream cheese—no fancy imports or rare finds needed.
- Perfect for Brunch & Holidays: These star-shaped pastries add a festive, homemade touch to any gathering without stress.
- Crowd-Pleaser: Kids and adults rave about the balance of flaky crust and creamy filling every time.
- Unbelievably Delicious: The combination of light, crispy layers and tangy cream cheese is comfort food at its best.
This isn’t just any cream cheese Danish—what sets it apart is the star shape and the way the dough folds to create those flaky, buttery layers. I like to think of it as pastry meets art, but honestly, it’s just a clever twist that makes the whole experience feel special. Whether you’re baking for yourself or impressing friends, this recipe delivers that wow factor with very little fuss.
What Ingredients You Will Need
This recipe uses simple, wholesome ingredients to deliver bold flavor and satisfying texture without the fuss. Most of these you might already have in your kitchen, and the rest are easy to find at any grocery store.
- Puff Pastry Sheets: 2 sheets, thawed (I recommend Pepperidge Farm for consistent flakiness)
- Cream Cheese: 8 oz (225g), softened (full fat for best creaminess)
- Granulated Sugar: 1/4 cup (50g), to sweeten the filling just right
- Vanilla Extract: 1 tsp, for a warm flavor lift
- Lemon Zest: 1 tsp, freshly grated (adds brightness to the cream cheese)
- Egg: 1 large, beaten (for egg wash to get that golden shine)
- Powdered Sugar: 1/4 cup (30g), for optional glaze
- Milk or Water: 1-2 tbsp (to mix with powdered sugar for glaze)
For seasonal twists, try swapping the lemon zest with orange or adding a handful of fresh berries on top before baking. For a dairy-free version, use vegan cream cheese and a plant-based puff pastry. Honestly, the ingredients make this recipe flexible without losing its classic charm.
Equipment Needed
- Rolling Pin: Essential for gently rolling out the puff pastry sheets to the right thickness. A smooth wooden one works great, but silicone rollers are easy to clean.
- Baking Sheet: A rimmed sheet pan lined with parchment paper to prevent sticking and catch any melting cream cheese.
- Sharp Knife or Pizza Cutter: For cutting the puff pastry into star shapes and precise edges.
- Mixing Bowl: For combining the cream cheese filling ingredients smoothly.
- Pastry Brush: To apply the egg wash evenly, giving the pastries that perfect golden finish.
- Cooling Rack: Helps cool the pastries evenly without sogginess.
If you don’t have a pastry brush, a clean kitchen towel or even your fingers can dab on the egg wash. And if you want to get fancy, star-shaped cookie cutters can speed up the shaping, but don’t worry if you want to freehand them like Hannah did—it adds a charming homemade look.
Preparation Method
- Prepare the Filling: In a medium bowl, beat together 8 oz (225g) softened cream cheese, 1/4 cup (50g) granulated sugar, 1 tsp vanilla extract, and 1 tsp lemon zest until smooth and creamy. This should take about 3-5 minutes with a hand mixer or whisk.
- Preheat the Oven: Set to 400°F (200°C) and line a baking sheet with parchment paper to keep the pastries from sticking.
- Roll Out Puff Pastry: Lightly flour your surface and roll out each sheet to about 12 x 12 inches (30 x 30 cm). The dough should be thin but not tearing. If it’s too cold and stiff, let it sit at room temperature for a few minutes.
- Cut Star Shapes: Using a sharp knife or star-shaped cookie cutter, cut the pastry sheets into stars about 4 inches (10 cm) wide. You should get roughly 8 stars per sheet. Don’t worry if some edges aren’t perfect—this is part of the charm.
- Add Filling: Place a heaping teaspoon of cream cheese mixture in the center of each star. Be careful not to overfill or the cheese might leak out.
- Shape the Stars: Gently fold the points of each star towards the center over the filling, slightly overlapping the tips. Pinch lightly to hold the shape but don’t press too hard or the dough won’t puff up properly.
- Apply Egg Wash: Brush each pastry with beaten egg for a shiny, golden crust. Be sure to cover all exposed dough for even browning.
- Bake: Place the baking sheet in the oven and bake for 15-18 minutes or until the pastries are puffed and golden brown. Keep an eye on them—every oven is a bit different.
- Cool & Glaze: Let the pastries cool on a rack for 5-10 minutes. If you want, whisk together powdered sugar and 1-2 tablespoons of milk or water until smooth and drizzle over the warm pastries for a sweet finish.
Pro tip: If your kitchen is warm, work quickly with the puff pastry to avoid it getting too soft. Also, avoid overhandling the dough—that’s a common rookie mistake that can make pastries tough instead of flaky.
Cooking Tips & Techniques
Honestly, the secret to flaky Danish pastries lies in handling the dough gently and keeping everything cool. Puff pastry is sensitive and loves a bit of chill.
- Keep Ingredients Cold: Cold dough means better puff. If your kitchen is warm, pop the dough back in the fridge for a few minutes before shaping.
- Don’t Overfill: Too much cream cheese can leak and make a mess. Use just enough to get a creamy center without spills.
- Use Egg Wash Liberally: It’s the golden ticket to that perfect crust color and shine.
- Watch Your Oven: Puff pastries bake fast! Check at 12 minutes to avoid burning, especially if your oven runs hot.
- Freezing Tips: You can freeze shaped but unbaked pastries on a tray, then transfer to a bag. Bake straight from frozen, adding a few extra minutes to the time.
I learned the hard way that rushing or overworking the dough kills the fluff. Also, one time I forgot the egg wash and ended up with pale, sad pastries—never again! Trust me, those little details make all the difference.
Variations & Adaptations
Want to mix things up? This recipe is really forgiving and easy to adapt for different tastes and dietary needs.
- Fruit-Filled: Add a small dollop of jam (apricot or raspberry works great) on top of the cream cheese before folding the star points.
- Nutty Twist: Sprinkle chopped toasted almonds or pecans on the filling for a crunchy texture.
- Gluten-Free: Use a store-bought gluten-free puff pastry (brands like Schär are reliable) to make the recipe suitable for gluten sensitivities.
- Vegan Version: Swap cream cheese for a plant-based alternative and use vegan puff pastry, then brush with a mix of plant milk and maple syrup instead of egg wash.
- Spiced Flavor: Add a pinch of cinnamon or cardamom to the cream cheese filling for a cozy twist.
Personally, I tried adding a thin layer of Nutella beneath the cream cheese once—it was dangerously good. Just keep in mind that the more you add, the less flaky the pastry might stay, so balance is key.
Serving & Storage Suggestions
These star-shaped Danish pastries are best served warm, fresh from the oven. The flaky layers and creamy filling really shine when slightly cooled but still soft. I like to serve them with a cup of black coffee or a lightly brewed tea to balance the richness.
If you have leftovers (which is rare!), store them in an airtight container at room temperature for up to 2 days. For longer storage, freeze wrapped pastries in a sealed bag for up to 1 month. To reheat, pop them in a 350°F (175°C) oven for 5-7 minutes to revive the crispiness.
Letting the pastries sit overnight isn’t ideal, as puff pastry loses its crispness, but they still taste fine warmed up. The cream cheese filling softens and melds with the dough beautifully if you want a more tender bite.
Nutritional Information & Benefits
Each flaky star-shaped cream cheese Danish pastry contains approximately:
| Nutrient | Per Pastry (1 star) |
|---|---|
| Calories | 220 kcal |
| Fat | 14g |
| Carbohydrates | 18g |
| Protein | 4g |
| Sugar | 5g |
The cream cheese provides a good source of calcium and protein, while the puff pastry contributes mainly carbohydrates and fats. This recipe is not low-fat or low-carb, but it fits well as an occasional treat or weekend indulgence.
For those with lactose intolerance, swapping to lactose-free cream cheese or dairy-free options works well. The recipe is naturally gluten-containing unless using a gluten-free pastry alternative. It’s free from nuts unless you add them as a variation.
From my perspective, these pastries are a little moment of joy that balances indulgence with simple ingredients—perfect for treating yourself without fuss.
Conclusion
Flaky star-shaped cream cheese Danish pastries are proof that you don’t need to be a pastry chef to make something truly special. This recipe is approachable for beginners but delivers that irresistible combination of buttery layers and creamy, tangy filling that feels like a hug in pastry form. I love how it turns a casual morning into a moment worth savoring, just like that unexpected Sunday at Hannah’s kitchen.
Feel free to customize the filling, shapes, or toppings to make it your own. Whether you’re baking for family, friends, or just yourself, these Danish pastries are sure to bring a smile. I’d love to hear how your batch turns out or if you added your own twist—drop a comment below and share your experience!
Now, go ahead and give these beautiful, flaky pastries a try. You might just find your new favorite homemade treat.
FAQs
Can I use homemade puff pastry for this recipe?
Absolutely! Homemade puff pastry works beautifully, but it requires more time and practice. Store-bought sheets are a great shortcut for beginners.
How do I prevent the cream cheese filling from leaking?
Use a moderate amount of filling and avoid overfilling. Also, gently fold and pinch the pastry points without pressing too hard to maintain puffiness.
Can I prepare these pastries ahead of time?
Yes, you can assemble them and freeze before baking. Bake directly from frozen, adding a few extra minutes to the baking time.
What’s the best way to store leftover Danish pastries?
Store at room temperature in an airtight container for up to 2 days or freeze for longer storage. Reheat in the oven to restore flakiness.
Is there a vegan version of this recipe?
Yes! Use vegan puff pastry and plant-based cream cheese, and substitute egg wash with a mix of plant milk and maple syrup for shine.
Pin This Recipe!
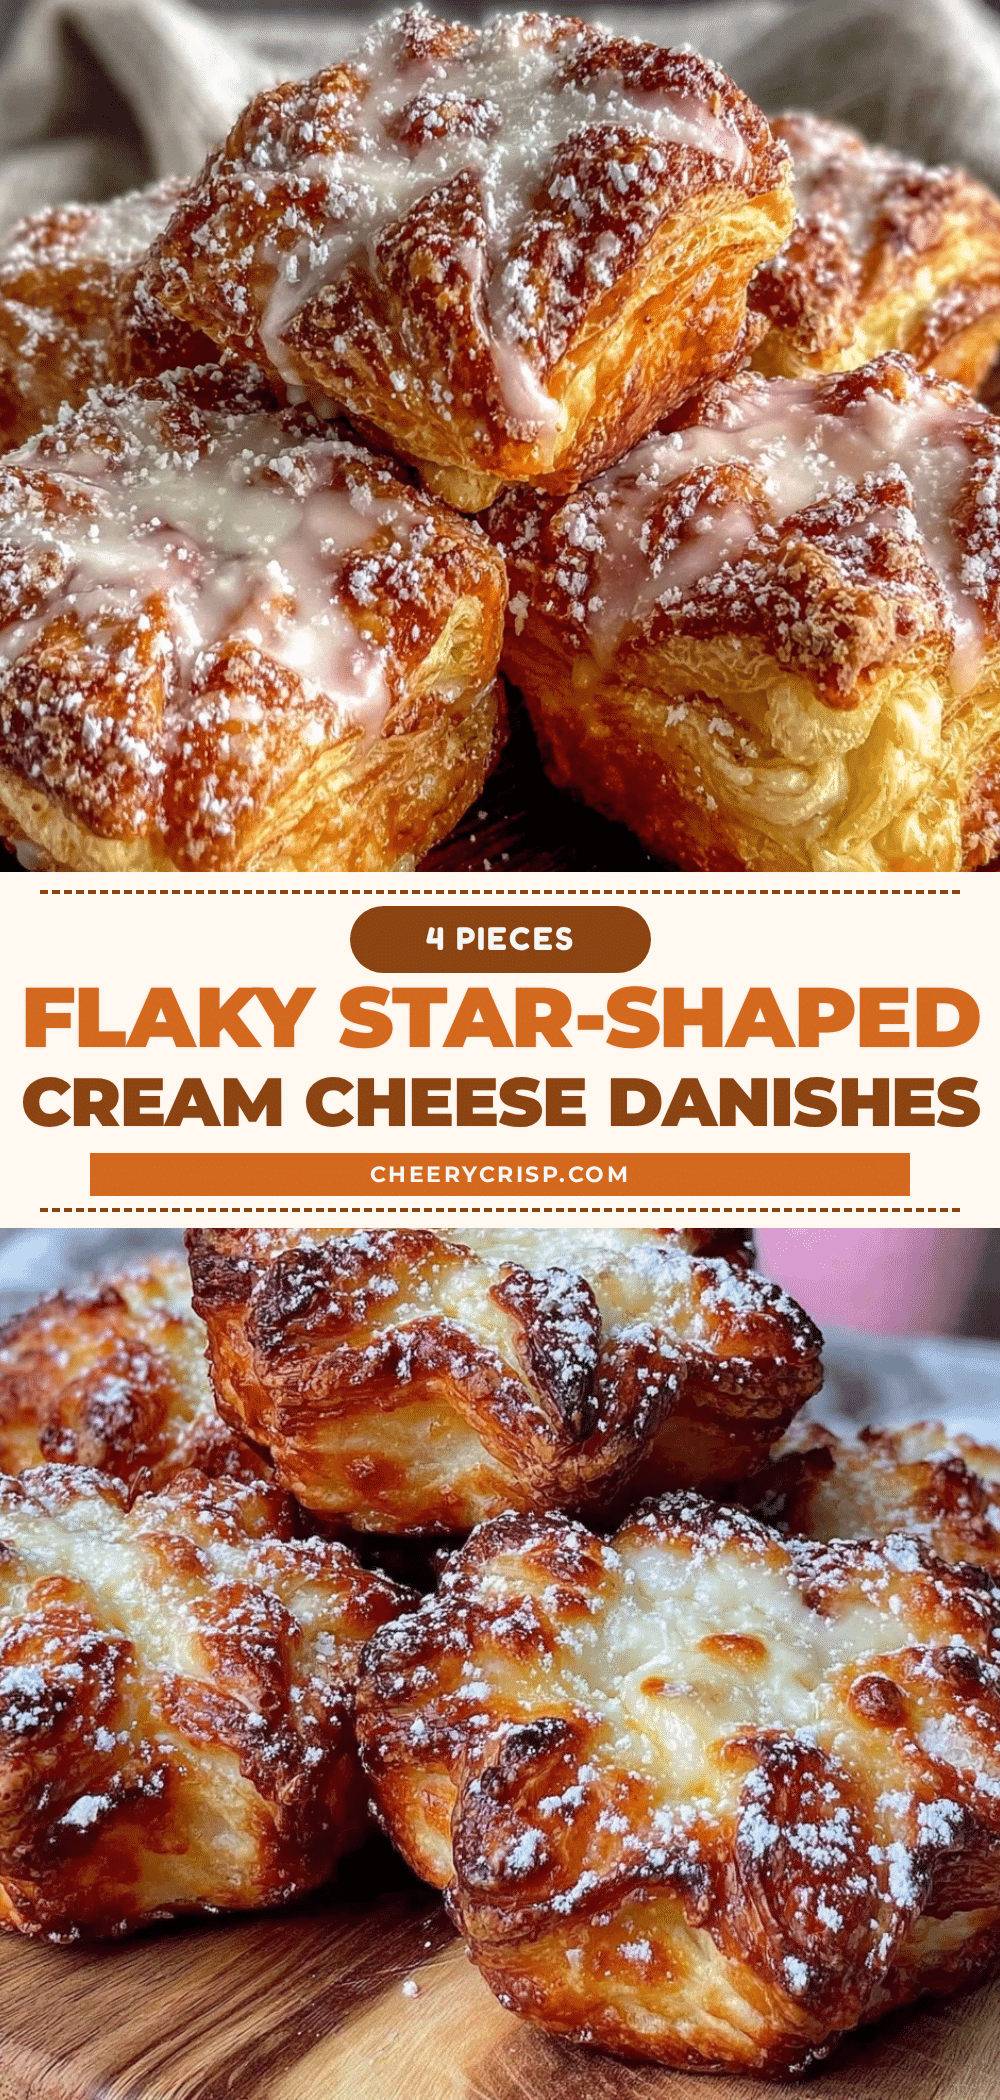
Flaky Star-Shaped Cream Cheese Danish Pastries
An easy and beginner-friendly recipe for flaky, buttery Danish pastries filled with a tangy cream cheese mixture, shaped into charming stars perfect for brunch or holidays.
- Prep Time: 15 minutes
- Cook Time: 18 minutes
- Total Time: 33 minutes
- Yield: 16 pastries 1x
- Category: Dessert
- Cuisine: European
Ingredients
- 2 sheets puff pastry, thawed (about 9 x 9 inches each)
- 8 oz (225g) cream cheese, softened (full fat recommended)
- 1/4 cup (50g) granulated sugar
- 1 tsp vanilla extract
- 1 tsp lemon zest, freshly grated
- 1 large egg, beaten (for egg wash)
- 1/4 cup (30g) powdered sugar (optional, for glaze)
- 1–2 tbsp milk or water (to mix with powdered sugar for glaze)
Instructions
- In a medium bowl, beat together softened cream cheese, granulated sugar, vanilla extract, and lemon zest until smooth and creamy, about 3-5 minutes.
- Preheat oven to 400°F (200°C) and line a baking sheet with parchment paper.
- Lightly flour your surface and roll out each puff pastry sheet to about 12 x 12 inches (30 x 30 cm).
- Cut the pastry sheets into star shapes about 4 inches (10 cm) wide, approximately 8 stars per sheet.
- Place a heaping teaspoon of cream cheese mixture in the center of each star, avoiding overfilling.
- Gently fold the points of each star towards the center over the filling, slightly overlapping the tips, and pinch lightly to hold the shape.
- Brush each pastry with beaten egg for a golden, shiny crust.
- Bake for 15-18 minutes or until pastries are puffed and golden brown, watching closely to avoid burning.
- Cool pastries on a rack for 5-10 minutes.
- Optional: Whisk powdered sugar with milk or water until smooth and drizzle over warm pastries.
Notes
Keep ingredients cold to ensure puffiness. Avoid overfilling the cream cheese to prevent leaks. Use egg wash liberally for a golden crust. Check oven at 12 minutes to avoid burning. Pastries can be frozen before baking and baked from frozen with extra time.
Nutrition
- Serving Size: 1 pastry
- Calories: 220
- Sugar: 5
- Fat: 14
- Carbohydrates: 18
- Protein: 4
Keywords: cream cheese Danish, star-shaped pastries, puff pastry, easy Danish recipe, beginner pastry, brunch pastries, flaky pastries



