Love this? Save it for later!
Share the inspiration with your friends
Introduction
“You know that moment when you crave ice cream but realize your machine is nowhere to be found? Yeah, that was me last Saturday night. I had invited a few friends over for a casual get-together, and just as I was prepping dessert, I realized my ice cream maker had been packed away months ago during a kitchen remodel. Honestly, I almost gave up on the idea—until I remembered a quirky tip a barista at my local coffee shop once shared while we chatted about summer treats. She swore by a creamy simple ice cream no machine recipe that anyone could whip up with just a few ingredients and zero fancy gadgets. Skeptical but desperate, I gave it a shot. The result? A luxuriously smooth homemade ice cream that rivaled any store-bought pint, and it didn’t even require churning! Sure, I forgot to set the timer the first time, and the texture got a bit icy, but after a couple of tweaks, this recipe stuck. Maybe you’ve been there too—wanting that perfect scoop without the fuss. Let me tell you, this recipe has become my go-to, especially when I want to impress friends without breaking a sweat.”
Why You’ll Love This Recipe
From my years of kitchen experiments and countless late-night cravings, this creamy simple ice cream no machine recipe has proven itself time and again. Here’s why it’s a standout:
- Quick & Easy: Ready in under 30 minutes, perfect for those spontaneous dessert urges or last-minute celebrations.
- Simple Ingredients: No exotic items required—just staples like heavy cream, sweetened condensed milk, and vanilla extract.
- Perfect for Any Occasion: Whether it’s a casual family dinner or a summer picnic, this recipe fits right in.
- Crowd-Pleaser: Kids and adults alike have given it rave reviews, often asking for seconds.
- Unbelievably Delicious: The texture is creamy without being heavy, and the flavor profile is beautifully balanced, making it comfort food at its best.
What makes this recipe different? Well, instead of relying on an ice cream maker, it uses whipped cream folded gently into condensed milk, creating an airy, smooth texture that’s surprisingly indulgent. I even like to add a pinch of salt sometimes to make the sweetness pop just right. Honestly, it’s the kind of dessert that makes you close your eyes after the first bite and smile. This ice cream isn’t just a treat; it’s a little moment of joy that’s easy to make and impossible to forget.
What Ingredients You Will Need
This recipe uses simple, wholesome ingredients to deliver a rich yet light ice cream without the fuss. Most of these are pantry staples or easy to find in any grocery store.
- Heavy Cream (2 cups / 480 ml): The backbone of the creaminess. I recommend using full-fat for the best texture.
- Sweetened Condensed Milk (1 can, 14 oz / 396 g): Adds sweetness and body—go for a trusted brand like Eagle Brand for consistent results.
- Pure Vanilla Extract (1 teaspoon): This gives the ice cream its classic vanilla flavor; feel free to use Madagascar vanilla for a richer taste.
- Pinch of Salt: Just a tiny bit to balance the sweetness and enhance flavor complexity.
Optional Ingredients:
- Mix-ins: Chocolate chips, chopped nuts, fresh berries, or cookie crumbles can be folded in after mixing.
- Flavor Variations: Swap vanilla for almond extract or add a tablespoon of cocoa powder for chocolate ice cream.
Keep in mind, this recipe shines because of its simplicity, so I encourage sticking to quality ingredients rather than complicated substitutions. But if you need a dairy-free version, swapping the heavy cream with coconut cream and using sweetened condensed coconut milk works surprisingly well.
Equipment Needed
- Mixing Bowls: A large bowl for whipping cream and a medium bowl for mixing condensed milk and flavorings.
- Electric Mixer: A hand mixer or stand mixer works best for whipping the cream to the right consistency. You can also whip by hand with a whisk, but it takes more effort and time.
- Spatula: For folding the whipped cream gently into the condensed milk mixture without deflating it.
- Freezer-Safe Container: An airtight container to store the ice cream while it freezes. I prefer a glass or sturdy plastic container with a tight-fitting lid.
If you don’t have an electric mixer, a whisk and some patience will do in a pinch—just be ready for a workout! Also, I learned the hard way that using a cold bowl and beaters helps whip the cream faster and fluffier, so pop them in the freezer for 10 minutes before starting.
Preparation Method
- Chill Your Equipment: Place your mixing bowl and beaters in the freezer for about 10-15 minutes. Cold equipment whips cream better and faster.
- Whip the Heavy Cream: Pour 2 cups (480 ml) of heavy cream into the chilled bowl. Using a hand or stand mixer, whip on medium-high speed until stiff peaks form—this usually takes about 3-5 minutes. You’ll know it’s ready when the cream holds its shape and doesn’t slump when you lift the beaters.
- Mix Condensed Milk and Flavorings: In a separate bowl, combine one 14 oz (396 g) can of sweetened condensed milk, 1 teaspoon of pure vanilla extract, and a pinch of salt. Stir gently until blended. This mixture provides sweetness and a creamy base.
- Fold Ingredients Together: Carefully fold the whipped cream into the condensed milk mixture with a spatula. Take your time and use gentle, sweeping motions to keep the airiness intact. This step is crucial for achieving that perfect creamy texture.
- Freeze and Set: Transfer the mixture to a freezer-safe container, smooth the top with the spatula, and seal with a lid. Freeze for at least 4-6 hours or overnight. For best texture, stir the ice cream halfway through freezing to prevent ice crystals (I admit I sometimes forget this step and still get great results, but it does help!).
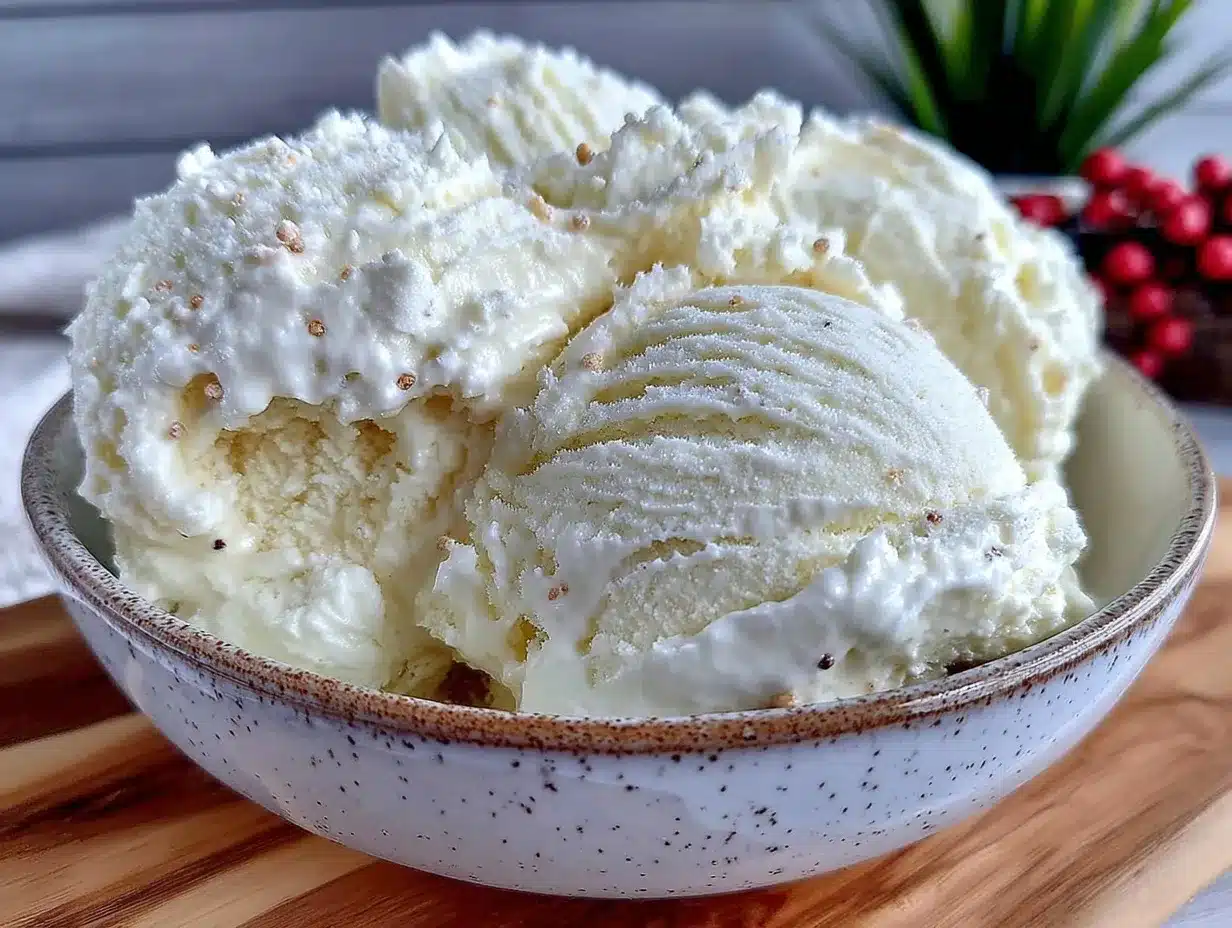
Once set, scoop and enjoy. The ice cream should be creamy and smooth, with a delightful vanilla flavor and a soft, airy texture that feels just right.
Cooking Tips & Techniques
Making homemade ice cream without a machine might seem tricky, but honestly, once you get the hang of it, it’s a breeze. Here are some tips from my experience:
- Whipping Cream to Perfection: Make sure your cream is cold, and don’t over-whip. Stiff peaks mean you can lift the beaters and the cream holds its shape, but if you go too far, it turns grainy and starts to separate into butter.
- Folding Gently: This is where many recipes go wrong. Folding too vigorously knocks out the air, resulting in denser ice cream. I like to fold in thirds, rotating the bowl slowly to keep as much fluff as possible.
- Freezing Tips: If you have time, stirring the ice cream once or twice during the freezing process helps keep it creamy by breaking up ice crystals. I usually set a timer on my phone so I don’t forget.
- Serving Temperature: Let your ice cream sit at room temperature for 5 minutes before scooping. It softens just enough for easier scooping without losing its shape.
- Don’t Rush Ingredients: Try to use quality heavy cream and sweetened condensed milk for the best flavor and texture. Cheap substitutes can make the ice cream icy or bland.
Variations & Adaptations
One of the best things about this creamy simple ice cream no machine recipe is how versatile it is. Here are some variations I’ve tried and loved:
- Chocolate Twist: Add 2 tablespoons of unsweetened cocoa powder to the condensed milk mixture before folding in the whipped cream. It makes a rich chocolate ice cream that’s always a hit.
- Berry Swirl: Fold in 1 cup of mashed fresh or frozen berries (thawed) at the end for a fruity burst. I usually use strawberries or blueberries, depending on what’s fresh at the market.
- Dairy-Free Version: Swap heavy cream with chilled coconut cream and use sweetened condensed coconut milk for a creamy, tropical-flavored dairy-free treat.
- Nutty Delight: Stir in chopped toasted nuts like almonds or pecans after folding for added crunch and flavor contrast.
If you prefer softer textures, try freezing the ice cream in smaller containers or popsicle molds to reduce freezing time. You can also experiment with adding a splash of bourbon or coffee extract for an adult twist!
Serving & Storage Suggestions
This ice cream is best served fresh from the freezer but not rock hard. Let it rest at room temperature for 5-10 minutes to soften slightly before scooping—trust me, this little step makes all the difference.
Pair it with warm desserts like homemade brownies, fruit crisps, or even a simple drizzle of honey and fresh berries. For a fun brunch, try topping it with crushed crispy garlic chicken—well, maybe not the chicken, but it does go great with sweet treats you can find on the site!
Store leftovers in an airtight container in the freezer. Homemade ice cream like this keeps well for up to 2 weeks. Avoid repeated thawing and refreezing to maintain creaminess. If it gets icy, a quick stir can help smooth it out before serving again.
Nutritional Information & Benefits
Each serving (about 1/2 cup or 125 ml) provides roughly 250-300 calories, mainly from fat and sugar. The heavy cream offers a good dose of calcium and vitamin A, while the sweetened condensed milk contributes protein and energy.
While this recipe does contain dairy and sugar, it’s free from artificial additives and preservatives commonly found in commercial ice creams. Plus, you control the ingredients, which means no weird stabilizers or fillers.
For those watching carbs, this recipe is moderately high in sugar, but you can experiment with sugar-free sweetened condensed milk or add natural flavorings like cinnamon or nutmeg to reduce sweetness while keeping flavor.
Conclusion
If you’re looking for a creamy simple ice cream no machine recipe that’s fuss-free but still impresses, this is it. The ease of mixing just a few ingredients and freezing them without any special equipment makes it perfect for spontaneous cravings or when you want to whip up a crowd-pleaser quickly.
Honestly, I love how this recipe lets me get creative—whether adding mix-ins or trying new flavor twists—and still results in that velvety, dreamy texture every time. You might find yourself making it on repeat, just like I do.
Give it a try, and don’t be shy about sharing your own variations or tips in the comments below. I’d love to hear how you make it your own. Here’s to homemade ice cream magic without the machine—happy scooping!
FAQs
Can I make this ice cream without heavy cream?
Heavy cream is key for the creamy texture, but you can try using full-fat coconut cream for a dairy-free alternative. Just keep in mind the texture and flavor will be a bit different.
How long does the ice cream need to freeze?
Freeze for at least 4-6 hours or overnight to allow it to set properly. Stirring halfway through helps keep it smooth.
Can I add mix-ins like chocolate chips or fruit?
Absolutely! Fold them in gently after mixing the base but before freezing for even distribution.
What if my ice cream turns out icy?
This usually happens if the cream isn’t whipped enough or if the ice cream freezes too long without stirring. Try stirring it a couple of times during freezing to break up ice crystals.
Is this recipe suitable for kids?
Yes, it’s a kid-friendly treat made with simple, wholesome ingredients and no artificial additives.
Pin This Recipe!
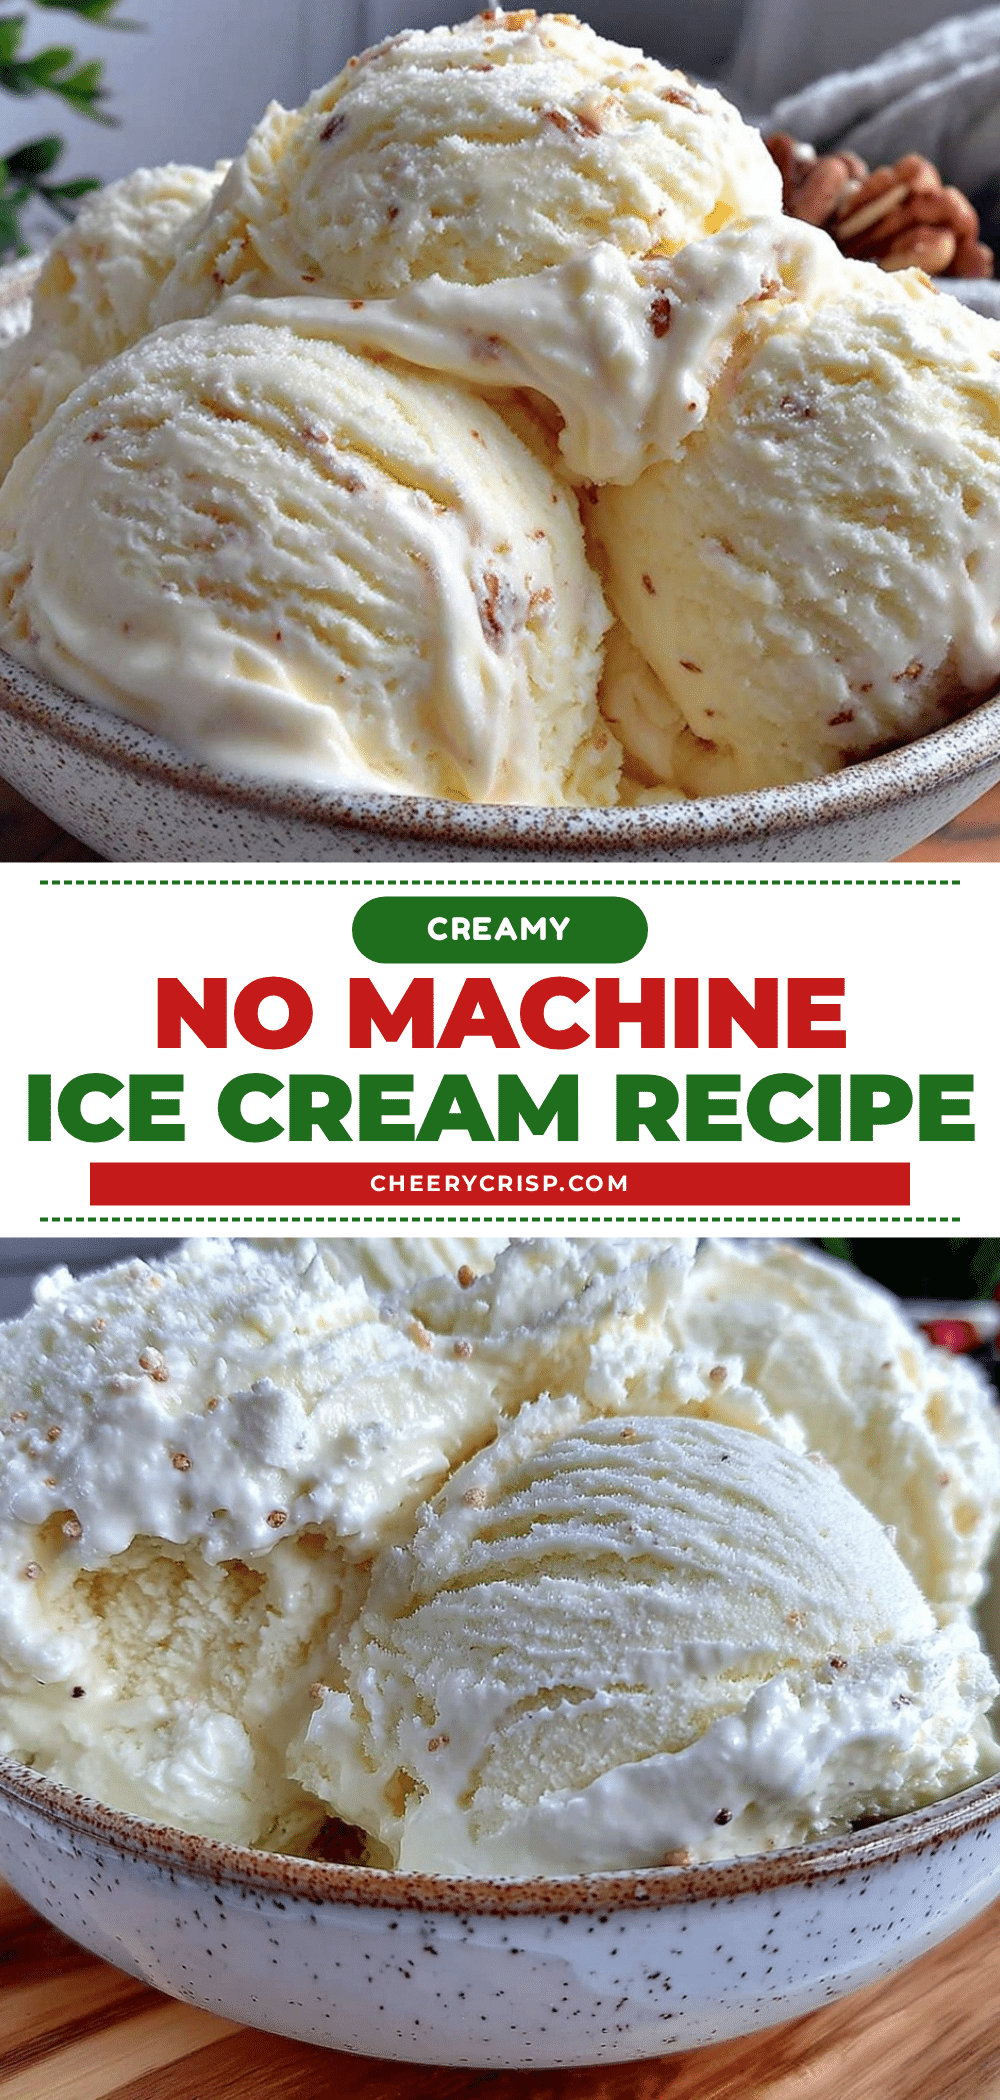
Creamy Simple Ice Cream No Machine Recipe

A quick and easy homemade ice cream recipe that requires no ice cream maker, using just heavy cream, sweetened condensed milk, and vanilla extract for a creamy, smooth texture.
- Prep Time: 15 minutes
- Cook Time: 0 minutes
- Total Time: 4 hours 15 minutes
- Yield: 8 servings 1x
- Category: Dessert
- Cuisine: American
Ingredients
- 2 cups (480 ml) heavy cream, full-fat
- 1 can (14 oz / 396 g) sweetened condensed milk
- 1 teaspoon pure vanilla extract
- Pinch of salt
- Optional mix-ins: chocolate chips, chopped nuts, fresh berries, cookie crumbles
- Optional flavor variations: almond extract, 1 tablespoon cocoa powder
Instructions
- Chill your mixing bowl and beaters in the freezer for 10-15 minutes to help whip the cream faster and fluffier.
- Pour 2 cups (480 ml) of heavy cream into the chilled bowl and whip on medium-high speed with a hand or stand mixer until stiff peaks form, about 3-5 minutes.
- In a separate bowl, combine 1 can (14 oz / 396 g) sweetened condensed milk, 1 teaspoon pure vanilla extract, and a pinch of salt. Stir gently until blended.
- Carefully fold the whipped cream into the condensed milk mixture using a spatula with gentle, sweeping motions to keep the mixture airy and light.
- Transfer the mixture to a freezer-safe airtight container, smooth the top, seal with a lid, and freeze for at least 4-6 hours or overnight. Stir halfway through freezing to prevent ice crystals if possible.
- Before serving, let the ice cream sit at room temperature for 5-10 minutes to soften slightly for easier scooping.
Notes
Use cold equipment to whip cream faster and fluffier. Fold whipped cream gently to maintain airiness. Stir ice cream once or twice during freezing to prevent ice crystals. Let ice cream soften at room temperature before scooping. For dairy-free version, substitute heavy cream with coconut cream and sweetened condensed milk with sweetened condensed coconut milk.
Nutrition
- Serving Size: 1/2 cup (125 ml)
- Calories: 275
- Sugar: 24
- Sodium: 55
- Fat: 18
- Saturated Fat: 11
- Carbohydrates: 25
- Protein: 3
Keywords: homemade ice cream, no machine ice cream, easy ice cream recipe, creamy ice cream, vanilla ice cream, no churn ice cream