Love this? Save it for later!
Share the inspiration with your friends
The first time I made this bread, I honestly didn’t think it would work. I mean, a dough so wet you can barely handle it, no kneading, just sitting around for hours—how could that possibly produce a bakery-quality loaf? I was skeptical. But my kitchen was cold, the pantry was bare of good bread, and I had exactly four ingredients to my name. So I mixed, I waited, and I hoped for the best.
That first loaf came out of the oven looking like something from a French boulangerie. The crust was golden brown and crackling, the inside was soft and airy with those beautiful irregular holes you pay top dollar for. I stood there holding this warm loaf, steam rising, and I felt like I had discovered some kind of cooking magic. And honestly? I kind of had.
This no-knead artisan bread is the recipe that taught me you don’t need fancy equipment or years of practice to make incredible bread at home. It’s patient, forgiving, and rewards you with something that tastes like you spent all day working on it. I’ve made it for lazy Sundays, for dinner parties where I needed to look impressive, and for those quiet mornings when all you want is a slice of warm bread with butter. It never lets me down.
Why You’ll Love This Recipe
Let me tell you why this crusty no-knead artisan bread has become my most-requested recipe from friends and family. It’s not just good—it’s the kind of bread that makes people close their eyes after the first bite.
- Incredibly Easy : No kneading, no stand mixer, no special skills required. Just mix, wait, and bake. It’s practically foolproof.
- Simple Ingredients : You probably have everything in your pantry right now. Flour, salt, yeast, and water. That’s it. No fancy starters or hard-to-find flours.
- Bakery-Quality Results : That shatteringly crisp crust and soft, chewy interior with beautiful air pockets? You get all of that at home, for pennies.
- Perfect for Any Occasion : Serve it with soup, use it for sandwiches, toast it for breakfast, or just eat it warm with butter. It fits everywhere.
- Make-Ahead Friendly : The dough rests in the fridge for up to a week, so you can have fresh bread whenever you want with almost no notice.
- Impressive Without Stress : People will think you’re a bread wizard. You don’t have to tell them how easy it is. Your secret is safe with me.
This recipe is different because it focuses on technique over effort. The long fermentation does all the work for you, developing flavor and structure while you go about your day. It’s comfort food reimagined—simpler, more accessible, but with the same soul-soothing satisfaction of tearing into a perfect piece of bread.
What Ingredients You Will Need
This recipe uses simple, wholesome ingredients to deliver bold flavor and satisfying texture without the fuss. Most of these are pantry staples, which is exactly why I love this recipe so much.
- All-purpose flour , 3 cups (375 grams) – I use King Arthur Flour for consistent results, but any brand works. Bread flour will give you a chewier texture if you have it on hand.
- Warm water , 1 ½ cups (355 ml) – About 105-110°F. Too hot will kill the yeast, too cold and it won’t activate properly. Think warm bath temperature.
- Active dry yeast , 1 teaspoon (3 grams) – I prefer Red Star or Fleischmann’s. Instant yeast works too, just skip the proofing step and mix it directly with the flour.
- Salt , 1 ½ teaspoons (9 grams) – Use fine sea salt or kosher salt. Don’t skip this—it’s crucial for flavor and structure.
- Extra flour for dusting – Rice flour works best for dusting the proofing basket because it doesn’t absorb moisture, but all-purpose is fine too.
Ingredient Selection Tips : For the best crust, use unbleached all-purpose flour. The bleaching process can affect gluten development slightly. And please, don’t use table salt with iodine—it can leave a metallic taste. I learned that the hard way with my first few loaves.
Substitution Guidance : You can substitute up to 1 cup of the all-purpose flour with whole wheat flour for a nuttier flavor, but your loaf will be denser. For a gluten-free version, I recommend a good 1-to-1 gluten-free flour blend, though the texture will be different. I’ve tried it with oat flour and it was… not great. Stick with wheat-based flours for best results.
Equipment Needed
You don’t need much for this recipe, which is part of its beauty. Here’s what you’ll need:
- Large mixing bowl – Any bowl works, but glass or ceramic is ideal because they don’t react with the dough.
- Dutch oven or heavy pot with lid – This is the secret to that amazing crust. The pot traps steam and creates a mini-oven environment. I use a 6-quart Lodge cast iron dutch oven, and it’s perfect. No dutch oven? A heavy roasting pan with a tight-fitting lid works too.
- Parchment paper – Makes transferring the dough so much easier. Trust me on this one.
- Plastic wrap or a clean kitchen towel – For covering the dough while it rises.
- Banneton or proofing basket – Optional but helpful for shaping. I use a simple 9-inch round banneton from Amazon, and it gives the bread that beautiful spiral pattern. A bowl lined with a floured towel works just as well.
- Sharp knife or razor blade – For scoring the bread. A serrated knife works in a pinch, but a lame (bread scoring tool) gives you cleaner cuts.
- Cooling rack – Essential for letting the bread cool properly. Don’t skip this, or the bottom will get soggy.
Budget-Friendly Options : If you don’t have a dutch oven, use a heavy cast iron skillet with an inverted stainless steel bowl on top. I’ve done this in a pinch, and it works surprisingly well. Also, skip the banneton—a colander lined with a floured dish towel is a perfect substitute.
Preparation Method

- Proof the yeast (if using active dry) – In a small bowl, combine the warm water and yeast. Let it sit for 5-10 minutes until it becomes foamy. If it doesn’t foam, your yeast is dead. Start over with fresh yeast. I’ve made this mistake more times than I’d like to admit.
- Mix the dough – In your large mixing bowl, combine the flour and salt. Pour in the yeast mixture (or just the water if using instant yeast) and stir with a wooden spoon until a shaggy, sticky dough forms. It will look messy and wet—that’s exactly what you want. Don’t be tempted to add more flour.
- First rise (bulk fermentation) – Cover the bowl with plastic wrap or a clean kitchen towel. Let it sit at room temperature (70-75°F) for 12-18 hours. Yes, that long! The dough should double in size and be covered with bubbles. I usually mix it before bed and bake it the next morning.
- Shape the dough – Turn the dough out onto a heavily floured surface. It will be very sticky, so don’t skimp on the flour here. Fold the edges toward the center to form a rough ball. Flip it seam-side down and gently shape it into a round loaf by rotating it on the floured surface. Don’t overwork it—you want to keep those air bubbles intact.
- Second rise (proofing) – Place the shaped dough seam-side down into a floured banneton or a bowl lined with a floured towel. Cover and let it rise for 1-2 hours at room temperature, or until it’s puffy and nearly doubled. Alternatively, you can refrigerate it for up to 12 hours for a more developed flavor.
- Preheat the oven – About 30 minutes before baking, place your dutch oven (with lid) in the oven and preheat to 450°F (230°C). The pot needs to be screaming hot for that perfect crust.
- Transfer and score – Carefully remove the hot dutch oven from the oven. Place a piece of parchment paper on top of the dough, then invert the banneton so the dough falls onto the parchment. Use a sharp knife or razor to score the top with a deep slash (about ½ inch deep). This controls where the bread expands.
- Bake covered – Lift the parchment with the dough and lower it into the hot dutch oven. Put the lid on and bake for 30 minutes. The covered baking creates steam, which is what gives you that incredible crust.
- Bake uncovered – Remove the lid and bake for another 15-20 minutes, until the crust is deep golden brown and the internal temperature reaches 200-210°F. The bread should sound hollow when tapped on the bottom.
- Cool completely – Transfer the bread to a cooling rack and let it cool for at least 1 hour before slicing. I know it’s tempting, but cutting into hot bread will give you a gummy interior. Patience, my friend.
Cooking Tips & Techniques
I’ve made this recipe dozens of times, and I’ve learned a few things along the way. Here are my best tips for perfect no-knead bread every time.
The Water Temperature Matters – I killed my yeast with hot water more times than I’d like to admit. The water should feel warm to your wrist, like a comfortable bath. If it’s too hot, it will kill the yeast. Too cold, and the fermentation will take forever. Aim for 105-110°F if you want to be precise.
Don’t Skip the Long Rise – The 12-18 hour rise isn’t just for convenience—it’s where the magic happens. During this time, the gluten develops naturally, and the flavor becomes complex and slightly tangy. I’ve tried rushing it with a 4-hour rise, and the bread was flat and flavorless. Trust the process.
The Dough Should Be Wet – If you’re used to making kneaded bread, this dough will feel alarmingly wet. That’s normal. Resist the urge to add more flour. The high hydration is what creates those beautiful air pockets and the chewy texture. It’s supposed to be sticky.
Preheat Your Pot Properly – The dutch oven needs to be in the oven for at least 30 minutes before baking. I once tried to speed this up and ended up with a pale, soft crust. The thermal shock of hitting that hot pot is what creates the steam and the crust.
Scoring is Non-Negotiable – Without a score, the bread will burst randomly as it expands. A clean slash gives you control over where the bread opens up, and it looks beautiful. I use a simple single slash down the center, but you can get creative with patterns once you’re comfortable.
My Biggest Failure – I once forgot to put the parchment paper under the dough before lowering it into the pot. The dough stuck to the bottom, and I spent 20 minutes scraping burnt bread out of my dutch oven. Always use parchment. Always.
Variations & Adaptations
This recipe is incredibly versatile. Here are some of my favorite ways to change it up.
Herb and Garlic Bread – Add 2 tablespoons of dried rosemary or thyme and 4 minced garlic cloves to the flour mixture before adding the water. The garlic gets mellow and sweet during the long fermentation. I make this version to serve alongside a hearty bowl of cozy slow cooker butternut squash soup with sage, and it’s a match made in heaven.
Cheese and Jalapeño Bread – Fold in 1 cup of shredded sharp cheddar and 2 diced jalapeños (seeds removed for less heat) during the shaping step. The cheese gets crispy on the outside and gooey on the inside. This is my go-to for game day—it’s amazing alongside best buffalo chicken tailgate dip.
Olive and Rosemary Bread – Add ½ cup of chopped Kalamata olives and 1 tablespoon of fresh rosemary during shaping. The briny olives pair perfectly with the rustic bread. I love serving this with a simple pasta dinner like easy ground beef and rice skillet for soaking up all the juices.
Whole Wheat Variation – Substitute 1 cup of all-purpose flour with whole wheat flour. You’ll need to add an extra 2-3 tablespoons of water because whole wheat absorbs more moisture. The bread will be denser but has a lovely nutty flavor.
Gluten-Free Adaptation – Use a good 1-to-1 gluten-free flour blend and add 1 teaspoon of xanthan gum if it’s not already in the blend. The texture won’t be exactly the same—it’ll be a bit more cake-like—but it’s still delicious. I’ve had good results with Bob’s Red Mill 1-to-1 Baking Flour.
Serving & Storage Suggestions
This bread is best served warm, fresh from the oven. That first slice with melting butter is pure heaven. But let’s talk about how to handle the leftovers (if there are any).
Serving Temperature – Serve at room temperature or warmed slightly. To reheat, wrap the bread in foil and place it in a 350°F oven for 10 minutes. This brings back the crisp crust without drying out the interior. Don’t microwave it—you’ll end up with a rubbery mess.
What to Serve With It – This bread is incredibly versatile. Slather it with butter and jam for breakfast, use it for sandwiches, or serve it alongside soups and stews. I love it with a bowl of easy slow cooker football Sunday chili for dipping. The crust holds up perfectly to hearty dishes.
Storage Instructions – Store the bread at room temperature wrapped in a clean kitchen towel. Do not store it in plastic—the crust will become soft and chewy. It will keep for 2-3 days, though it’s best on day one. If the crust gets soft, just pop it in a 350°F oven for 5 minutes to re-crisp it.
Freezer Tips – This bread freezes beautifully. Slice it first, then wrap the slices tightly in plastic wrap and place them in a freezer bag. They’ll keep for up to 3 months. Toast slices directly from frozen for the best results. I always keep a stash in the freezer for last-minute dinner needs.
Flavor Development – The flavor actually improves after a day or two. The crust softens slightly, but the interior becomes more complex and slightly tangy. It’s perfect for making toast or croutons on day two.
Nutritional Information & Benefits
Here’s the nutritional breakdown for one slice (assuming 12 slices per loaf):
| Nutrient | Amount per Slice |
|---|---|
| Calories | 150 |
| Total Fat | 0.5g |
| Saturated Fat | 0g |
| Cholesterol | 0mg |
| Sodium | 290mg |
| Total Carbohydrates | 31g |
| Dietary Fiber | 1g |
| Sugars | 0g |
| Protein | 4g |
Health Benefits – This bread is naturally low in fat and contains no added sugars. The long fermentation process breaks down some of the gluten and phytic acid, making the nutrients more bioavailable. It’s also a good source of complex carbohydrates for sustained energy. If you use whole wheat flour, you’ll get additional fiber and B vitamins.
Dietary Considerations – This recipe is vegan, dairy-free, and egg-free. It contains gluten, so it’s not suitable for celiac disease. For a lower-sodium option, you can reduce the salt to 1 teaspoon, but the bread will be less flavorful and the structure may be slightly affected.
Conclusion
This crusty no-knead artisan bread has become a staple in my kitchen for a reason. It’s proof that you don’t need fancy equipment, years of experience, or complicated techniques to make incredible bread at home. Just four ingredients, a little patience, and you get something that rivals anything from a bakery.
I love how forgiving this recipe is. You can rush it a little, let it ferment longer, add mix-ins, or change the flour—and it still works. It’s the kind of recipe that builds confidence in the kitchen, and it’s perfect for beginners and experienced bakers alike.
I’d love to hear how your bread turns out! Did you add any mix-ins? Serve it with something special? Drop a comment below and share your experience. And if you loved this recipe, share it with a friend who needs a little bread magic in their life. Happy baking!
Frequently Asked Questions
Can I use instant yeast instead of active dry yeast?
Absolutely! Instant yeast is more potent, so you can use slightly less—about ¾ teaspoon instead of 1 teaspoon. The best part is you don’t need to proof it. Just mix it directly with the flour and salt, then add the warm water. The rise time might be slightly shorter, so keep an eye on it.
Why is my dough so sticky? Am I doing something wrong?
Nope, you’re doing it right! This is a high-hydration dough, which means it’s intentionally wet and sticky. That stickiness is what creates the beautiful airy texture and crispy crust. Resist the urge to add more flour. Use well-floured hands and a floured surface when shaping, and you’ll be fine.
Can I bake this without a dutch oven?
Yes, you can! If you don’t have a dutch oven, place a baking sheet or pizza stone on the middle rack and a shallow metal pan on the bottom rack. Preheat everything. When you’re ready to bake, slide the dough onto the hot baking sheet and pour 1 cup of hot water into the bottom pan to create steam. Close the oven door quickly to trap the steam.
How do I know when the bread is fully baked?
The best way is to use an instant-read thermometer. The internal temperature should reach 200-210°F. If you don’t have a thermometer, tap the bottom of the loaf—it should sound hollow. The crust should be deep golden brown and feel firm to the touch. If it looks pale, give it a few more minutes.
Can I refrigerate the dough overnight?
Yes, and I actually recommend it! After the first 12-18 hour rise, you can shape the dough and place it in the refrigerator for up to 12 hours. The cold slows down fermentation, which develops even more flavor. Just take it out of the fridge while the oven preheats, score it, and bake directly from cold. You might need to add 5 minutes to the baking time.
Pin This Recipe!
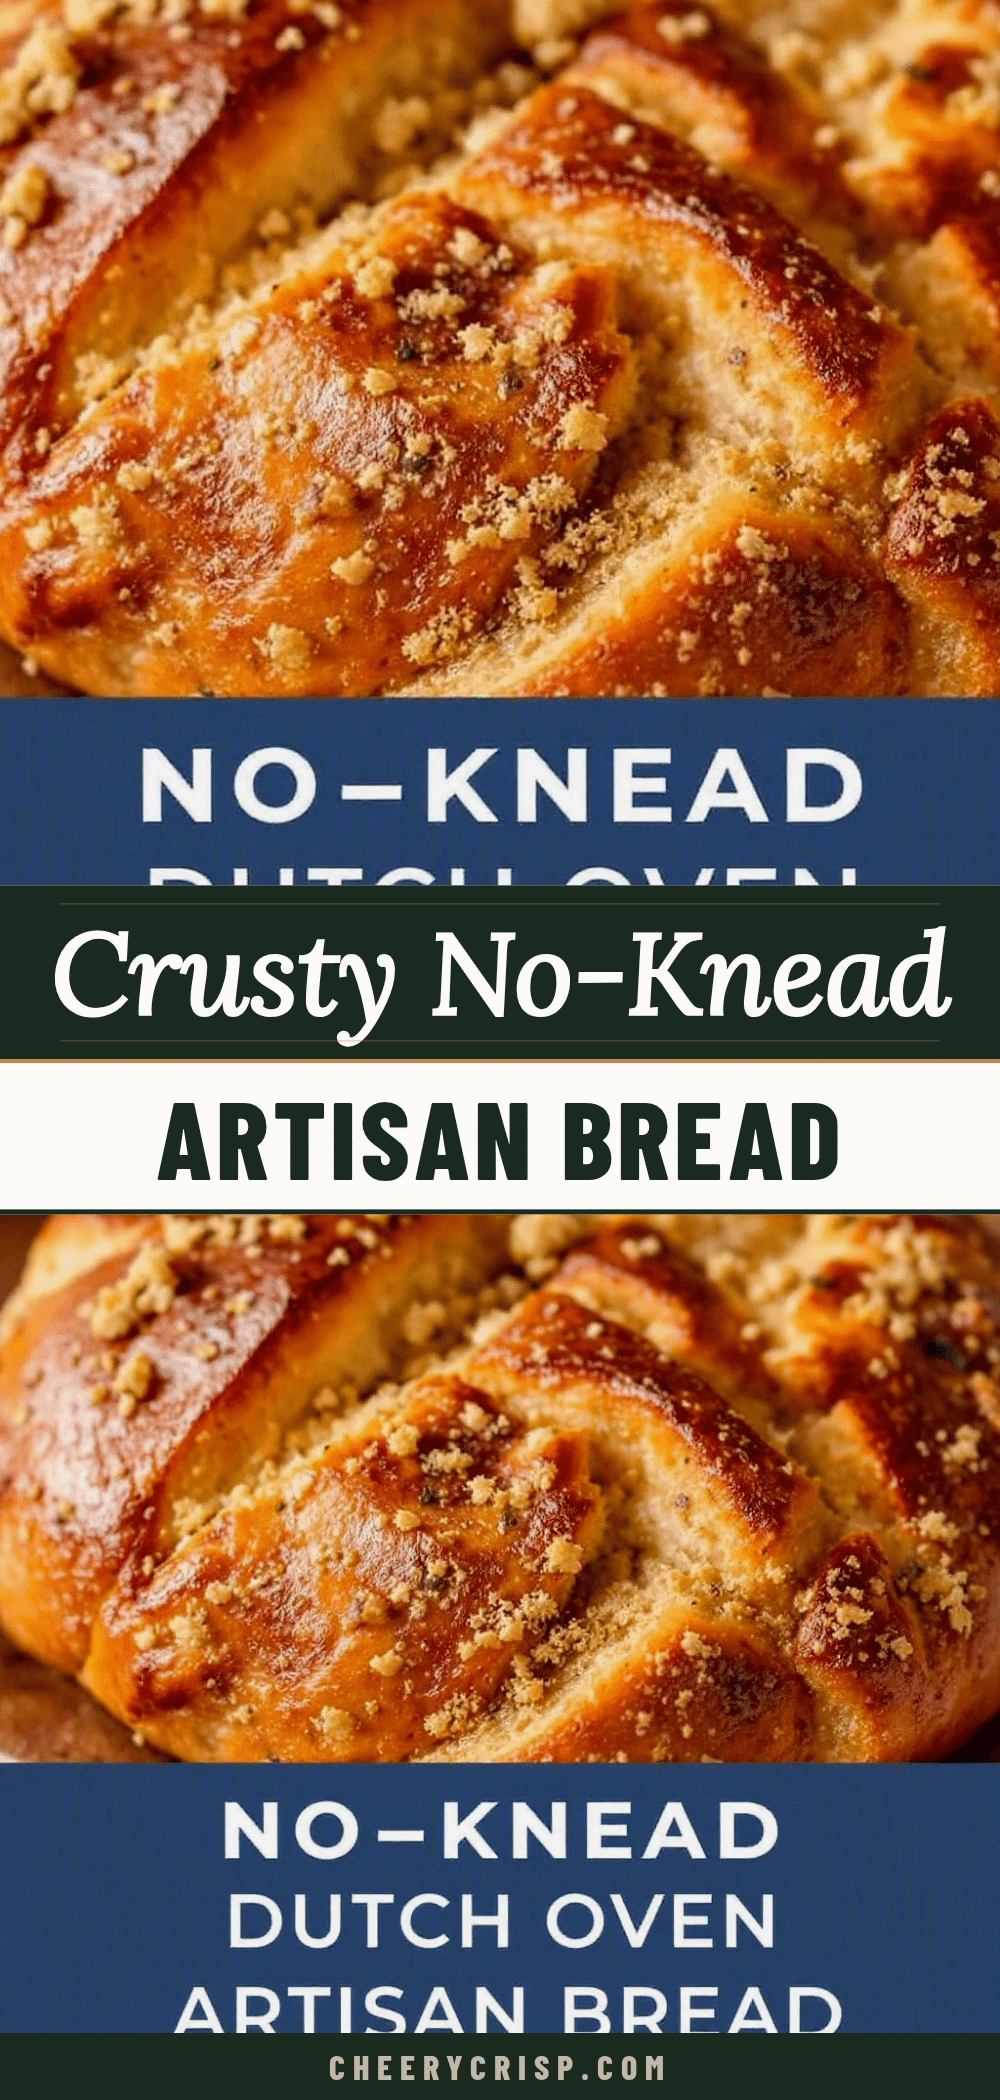
Best Easy Crusty No-Knead Artisan Bread Recipe

This no-knead artisan bread is incredibly easy to make with just four ingredients and delivers a bakery-quality loaf with a shatteringly crisp crust and soft, chewy interior. Perfect for any occasion, it’s a forgiving recipe that builds confidence in the kitchen.
- Prep Time: 15 minutes
- Cook Time: 45 minutes
- Total Time: 13 hours 15 minutes (includes 12-18 hour rise)
- Yield: 12 servings 1x
- Category: Bread
- Cuisine: French
Ingredients
- 3 cups (375 grams) all-purpose flour
- 1 ½ cups (355 ml) warm water (105-110°F)
- 1 teaspoon (3 grams) active dry yeast
- 1 ½ teaspoons (9 grams) fine sea salt or kosher salt
- Extra flour for dusting (rice flour preferred)
Instructions
- Proof the yeast (if using active dry): In a small bowl, combine the warm water and yeast. Let it sit for 5-10 minutes until foamy. If it doesn’t foam, start over with fresh yeast.
- Mix the dough: In a large mixing bowl, combine the flour and salt. Pour in the yeast mixture (or just the water if using instant yeast) and stir with a wooden spoon until a shaggy, sticky dough forms. Do not add more flour.
- First rise (bulk fermentation): Cover the bowl with plastic wrap or a clean kitchen towel. Let it sit at room temperature (70-75°F) for 12-18 hours until doubled in size and covered with bubbles.
- Shape the dough: Turn the dough out onto a heavily floured surface. Fold the edges toward the center to form a rough ball. Flip it seam-side down and gently shape into a round loaf by rotating it on the floured surface. Do not overwork.
- Second rise (proofing): Place the shaped dough seam-side down into a floured banneton or a bowl lined with a floured towel. Cover and let rise for 1-2 hours at room temperature until puffy and nearly doubled. Alternatively, refrigerate for up to 12 hours.
- Preheat the oven: About 30 minutes before baking, place a Dutch oven (with lid) in the oven and preheat to 450°F (230°C).
- Transfer and score: Carefully remove the hot Dutch oven from the oven. Place a piece of parchment paper on top of the dough, then invert the banneton so the dough falls onto the parchment. Use a sharp knife or razor to score the top with a deep slash (about ½ inch deep).
- Bake covered: Lift the parchment with the dough and lower it into the hot Dutch oven. Put the lid on and bake for 30 minutes.
- Bake uncovered: Remove the lid and bake for another 15-20 minutes until the crust is deep golden brown and the internal temperature reaches 200-210°F. The bread should sound hollow when tapped on the bottom.
- Cool completely: Transfer the bread to a cooling rack and let it cool for at least 1 hour before slicing.
Notes
The dough should be very wet and sticky—resist adding more flour. The long rise is essential for flavor and structure. Preheat the Dutch oven for at least 30 minutes. Always use parchment paper to prevent sticking. Let the bread cool completely before slicing to avoid a gummy interior.
Nutrition
- Serving Size: 1 slice
- Calories: 150
- Sodium: 290
- Fat: 0.5
- Carbohydrates: 31
- Fiber: 1
- Protein: 4
Keywords: no-knead bread, artisan bread, crusty bread, easy bread recipe, homemade bread, Dutch oven bread



