Love this? Save it for later!
Share the inspiration with your friends
My sister called me on a Tuesday, panicked. Her daughter’s birthday was in three days, and the bakery had just canceled. She needed a cake, and she needed it to look like it came from a shop, not from my tiny, flour-dusted kitchen. I said yes, obviously, but my stomach dropped. I am not a decorator. I can bake a decent layer cake, sure, but piping? That is a whole other skill set. I spent that night scrolling through tutorials, convinced I was about to present a six-year-old with something that looked like a abstract painting gone wrong.
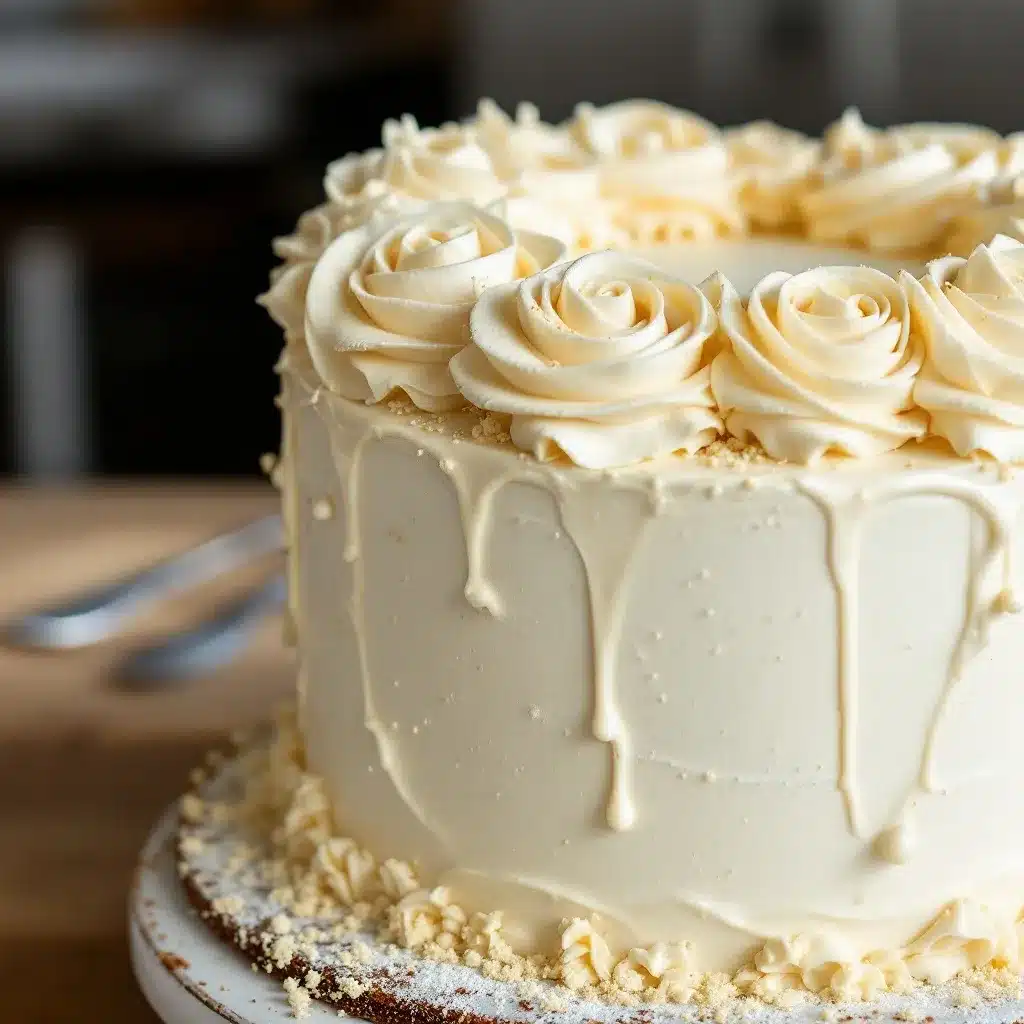
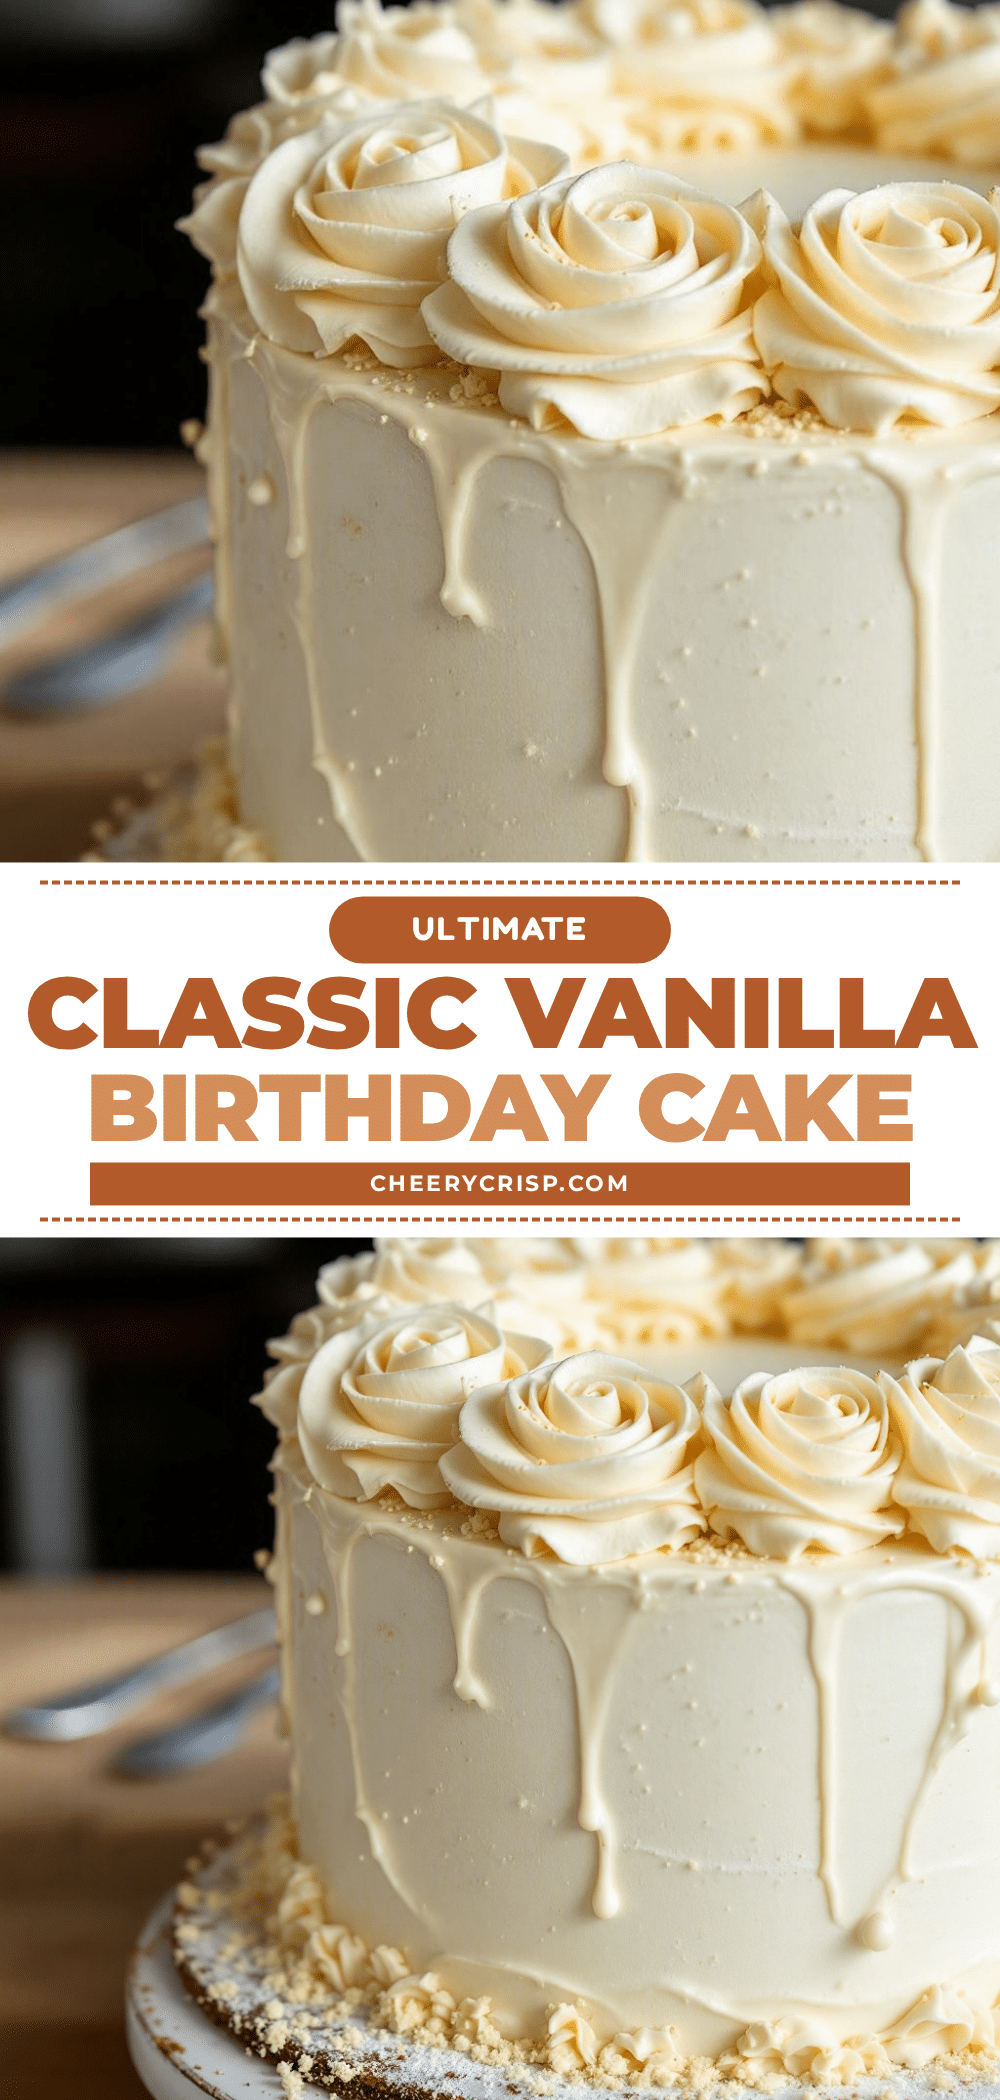
But here is the thing about necessity—it forces you to simplify. I decided to skip the complicated basketweave and the fancy borders. I focused on one thing: buttercream roses. I figured if I could get those right, the rest of the cake could be a simple, rustic masterpiece. And honestly? It worked. The cake was a tall, proud tower of classic vanilla, wrapped in a cloud of soft buttercream, with a cluster of those roses on top. My niece’s face when she saw it? That is a memory I will keep forever.
That is the magic of this classic vanilla birthday cake with easy buttercream roses. It is not about being a professional pastry chef. It is about making something that looks and tastes like a celebration, using a method that anyone can learn in an afternoon. If I can do it, you definitely can. And the best part? It tastes exactly like a birthday should—simple, sweet, and completely unforgettable.
Why You’ll Love This Recipe
I have tested this cake more times than I care to count. I have made it with different flours, different fats, and different baking times. This version is the one that works every single time. It is the cake I bring to every family gathering, and the one people ask for by name. Here is why it is a keeper:
- Foolproof Vanilla Flavor: This is not a dry, crumbly cake. It is moist, tender, and packed with real vanilla flavor. The secret is using both vanilla extract and a little vanilla bean paste for those beautiful specks.
- Simple Buttercream: The buttercream is a classic American style—just butter, powdered sugar, and cream. It is incredibly stable for piping, holds its shape beautifully, and tastes like sweet, creamy heaven.
- Easy Rose Technique: You do not need a dozen piping tips. Just one large star tip and a little practice. I will show you exactly how to pipe those roses so they look like they came from a bakery.
- Perfect for Celebrations: This is the cake for birthdays, anniversaries, or any day you want to feel special. It is impressive without being stressful.
- Crowd-Pleasing Classic: Everyone loves a good vanilla cake. It is the safe bet that always wins. Kids and adults both go back for seconds.
This recipe is different because it focuses on a single, high-impact decorating technique. Instead of trying to do everything, you master one thing—the buttercream rose—and let it be the star. It is a lesson in restraint that yields the most beautiful results. Honestly, it is the kind of cake that makes you close your eyes after the first bite. It is comfort food, reimagined as a celebration.
What Ingredients You Will Need
This recipe uses simple, pantry-friendly ingredients to create a cake that tastes anything but basic. The key is using the right kind of each ingredient for the best texture and flavor.
For the Vanilla Cake
- Unsalted Butter (1 cup / 226 grams), softened: I always use unsalted so I can control the salt level. Let it sit out for at least an hour to get truly soft. You want it to give easily when you press it.
- Granulated Sugar (2 cups / 400 grams): This sweetens the cake and helps create a tender crumb. Do not substitute with a different sugar.
- Large Eggs (4), room temperature: Room temperature eggs emulsify into the batter much better than cold ones. If you forget to take them out, place them in a bowl of warm water for 5 minutes.
- Vanilla Extract (2 teaspoons) & Vanilla Bean Paste (1 teaspoon): The extract gives the classic flavor, and the paste adds those beautiful little black specks that make the cake look homemade and fancy. I recommend Nielsen-Massey for both.
- All-Purpose Flour (3 cups / 360 grams): Spoon and level your flour. Do not scoop directly from the bag, or you will end up with a dry cake.
- Baking Powder (1 tablespoon): This is the leavening agent that makes the cake rise. Make sure it is fresh.
- Salt (1/2 teaspoon): Balances the sweetness and enhances the vanilla flavor.
- Buttermilk (1 cup / 240 ml), room temperature: This is the secret to a moist, tender cake. The acid in the buttermilk reacts with the baking powder and tenderizes the gluten. You can make a quick substitute by adding 1 tablespoon of lemon juice or white vinegar to 1 cup of milk and letting it sit for 5 minutes.
For the Buttercream Frosting
- Unsalted Butter (2 cups / 452 grams), slightly softened: The butter should be cool but pliable. If it is too soft, the frosting will be a mess. If it is too cold, it will be lumpy.
- Powdered Sugar (6 cups / 720 grams), sifted: Sifting is non-negotiable. It removes lumps and creates a silky-smooth frosting. I use a fine-mesh sieve directly over the mixing bowl.
- Heavy Cream (1/4 cup / 60 ml), plus more as needed: This thins the frosting to the perfect piping consistency. You can also use whole milk.
- Vanilla Extract (2 teaspoons): For that classic buttercream flavor.
- Salt (1/4 teaspoon): Cuts the sweetness and makes the flavor more complex.
- Gel Food Coloring (optional): I prefer gel colors because they are concentrated and do not thin the frosting like liquid colors do. Wilton brand works great.
Equipment Needed
You do not need a fancy kitchen to make this cake, but the right tools make everything easier. Here is what you will need:
- Three 8-inch round cake pans: I love my Fat Daddio’s anodized aluminum pans. They conduct heat evenly and produce perfectly flat cakes. If you only have two pans, you can bake the layers in batches.
- Electric hand mixer or stand mixer: A stand mixer with the paddle attachment is a lifesaver for the frosting, but a hand mixer works just fine for the cake batter.
- Large mixing bowls: You will need at least two.
- Whisk: For sifting and mixing dry ingredients.
- Rubber spatula: For scraping down the bowl and folding in the last bits of flour.
- Cooling rack: Essential for letting the cake layers cool completely before frosting.
- Serrated knife or cake leveler: To trim the domes off the cake layers for a flat, even stack.
- Turntable (optional but highly recommended): Makes frosting and decorating so much easier. You can find a cheap plastic one online.
- Offset spatula: For spreading the frosting smoothly.
- Piping bags (disposable or reusable): I use disposable plastic bags for easy cleanup.
- Large star piping tip (Wilton 1M or Ateco 848): This is the only tip you need for the roses.
- Petal or flower nail (optional): Helps when piping individual roses, but you can also pipe them directly onto the cake.
Preparation Method
Take your time with this. Baking a cake is a process, and rushing leads to mistakes. I have made all the mistakes so you do not have to. Here is the exact method I use every time.
Step 1: Prep Your Pans and Preheat
Preheat your oven to 350°F (175°C). Grease the bottoms and sides of your three 8-inch cake pans with butter or non-stick spray. Then, line the bottoms with a circle of parchment paper. This is the only way to guarantee the cakes will release perfectly. Trust me on this.
Step 2: Cream the Butter and Sugar
In a large bowl, beat the softened butter and granulated sugar together on medium speed for 3-5 minutes. You want it to be light, fluffy, and pale in color. Scrape down the sides of the bowl halfway through. This step is crucial for a tender cake—do not skip it.
Step 3: Add the Eggs and Vanilla
Add the eggs one at a time, beating well after each addition. The mixture might look a little curdled at this point—that is normal. Add the vanilla extract and vanilla bean paste and mix until combined.
Step 4: Combine Dry and Wet Ingredients
In a separate bowl, whisk together the flour, baking powder, and salt. With the mixer on low speed, add the flour mixture in three additions, alternating with the buttermilk. Start and end with the flour. Mix until just combined. Do not overmix! Overmixing develops the gluten and makes the cake tough. Use a rubber spatula to give the batter a final fold, making sure everything is incorporated from the bottom of the bowl.
Step 5: Bake the Layers
Divide the batter evenly between the three prepared pans. I like to use a kitchen scale to make sure each pan gets the same amount—about 500 grams per pan. Bake for 22-28 minutes, or until a toothpick inserted into the center comes out clean or with a few moist crumbs. The cakes should be golden brown and spring back when lightly touched.
Step 6: Cool Completely
Let the cakes cool in the pans for 10 minutes. Then, run a knife around the edges and turn them out onto a cooling rack. Peel off the parchment paper and let them cool completely. This can take 1-2 hours. Do not even think about frosting a warm cake—it will be a disaster.
Step 7: Make the Buttercream
While the cakes cool, make the frosting. In a large bowl, beat the slightly softened butter on medium speed for 2-3 minutes until it is smooth and creamy. It should look pale and fluffy. Gradually add the sifted powdered sugar, one cup at a time, mixing on low speed. Add the heavy cream, vanilla extract, and salt. Increase the speed to medium-high and beat for 3-5 minutes until the frosting is light, fluffy, and spreadable. If it is too thick, add a little more cream. If it is too thin, add a little more powdered sugar.
Step 8: Level and Fill the Cakes
Once the cakes are completely cool, use a serrated knife to level the domed tops. Place one layer on your cake board or serving plate. Spread about 1 cup of buttercream evenly on top. Repeat with the second layer. Place the third layer on top, cut-side down. Apply a thin layer of frosting all over the cake—this is the crumb coat. It does not have to be perfect. Refrigerate the cake for 20 minutes to set the crumb coat.
Step 9: Frost the Cake
After the crumb coat is set, apply a thicker, final layer of frosting. Use your offset spatula to smooth the sides and top. You can leave it rustic or make it perfectly smooth. I like a slightly rustic look for this cake.
Step 10: Pipe the Buttercream Roses
This is the fun part. Fill a piping bag fitted with the large star tip (Wilton 1M) with your remaining buttercream. Hold the bag straight up and down, with the tip about 1/4 inch from the surface of the cake. Squeeze the bag while making a small, tight circle to create the center of the rose. Then, without stopping the pressure, make a larger circle around the center to form the outer petals. Stop squeezing and pull the tip away. You have made a rose! Practice on a piece of parchment paper first. Pipe roses all over the top of the cake, and a few on the bottom edge if you like.
Cooking Tips & Techniques
I have learned a few things the hard way so you do not have to. Here are my best tips for success.
The Butter Temperature Trap: This is the number one mistake. For the cake, the butter needs to be truly soft—room temperature. For the frosting, it needs to be cool but pliable. If your frosting looks greasy or soupy, the butter was too warm. Pop the bowl in the fridge for 10 minutes, then re-whip it.
The Flour Scoop Mistake: Do not scoop your measuring cup into the flour bag. It packs the flour down and you will end up with way too much. Always spoon the flour into the cup and level it off with a knife. A kitchen scale is even better and more accurate.
The Overmixing Panic: I have ruined many cakes by overmixing. Once you add the flour, mix only until it disappears. A few streaks of flour are better than a tough cake.
The Piping Practice: Your first few roses will look a little wonky. That is okay. Pipe a few practice roses on a piece of parchment paper before you go near the cake. You can scrape them back into the bowl and reuse the frosting. It is a zero-waste way to learn.
The Chilling Hack: A chilled cake is much easier to frost and decorate. After the crumb coat, let the cake sit in the fridge for a solid 20-30 minutes. It makes the final layer of frosting go on like a dream.
The Consistency Check: Your buttercream should be thick enough to hold its shape when piped, but not so stiff that it is hard to squeeze. If it is too stiff, add a teaspoon of cream. If it is too runny, add a half cup of powdered sugar.
Variations & Adaptations
This cake is a wonderful base for all kinds of creativity. Here are some of my favorite ways to change it up.
Chocolate Lovers’ Version
Replace 1/2 cup of the all-purpose flour with 1/2 cup of unsweetened cocoa powder. Add 1/2 teaspoon of espresso powder to deepen the chocolate flavor. Follow the rest of the recipe as written. The buttercream can stay vanilla, or you can add 1/2 cup of melted and cooled dark chocolate to it.
Lemon or Citrus Twist
Add the zest of 2 lemons or oranges to the sugar and rub it in with your fingers before creaming the butter. The oils from the zest will infuse the sugar. Replace the vanilla extract in the cake with 1 teaspoon of lemon extract. For the frosting, replace the vanilla extract with 1 teaspoon of lemon juice and 1/2 teaspoon of lemon zest.
Gluten-Free Adaptation
I have made this with a gluten-free all-purpose flour blend (like King Arthur Measure for Measure) with great results. Do not use a single flour like almond or coconut flour. The texture will be slightly more delicate, but the flavor is still fantastic. Let the batter rest for 15 minutes before baking to allow the gluten-free flour to hydrate.
Funfetti Celebration Cake
Fold 1/2 cup of rainbow sprinkles into the batter at the very end, just before pouring it into the pans. Use a gentle hand so the colors do not bleed. This is a guaranteed kid-pleaser.
Serving & Storage Suggestions
This cake is best served at room temperature. The buttercream softens beautifully, and the cake is at its most tender. Take it out of the fridge about 30 minutes before you plan to serve it.
For serving, a sharp chef’s knife works better than a serrated knife for clean slices. Dip the knife in hot water and wipe it dry between cuts for the neatest slices. This cake pairs perfectly with a scoop of vanilla ice cream or a dollop of fresh whipped cream. A glass of cold milk is the classic beverage pairing, but a cup of coffee or a hot tea works wonderfully too.
For storage, this cake keeps beautifully in the fridge for up to 5 days. Place it in a cake carrier or cover it loosely with plastic wrap. The flavors actually meld together and get even better after a day. To freeze, place the unfrosted cake layers in a freezer-safe bag for up to 2 months. Thaw them in the fridge overnight before frosting. You can also freeze the frosted cake for up to a month. Thaw it in the fridge overnight and let it come to room temperature before serving.
Nutritional Information & Benefits
Let’s be honest—this is a celebration cake. It is not a health food, and that is perfectly okay. It is made with real, whole ingredients like butter, eggs, and flour. The butter provides a good source of vitamin A, and the eggs offer high-quality protein. The buttermilk adds a little calcium and helps create a tender crumb without needing extra fat.
Here is an estimated nutritional breakdown per slice (based on 12 slices):
| Nutrient | Amount |
|---|---|
| Calories | 520 |
| Fat | 28g |
| Saturated Fat | 17g |
| Cholesterol | 115mg |
| Sodium | 210mg |
| Carbohydrates | 65g |
| Sugar | 48g |
| Protein | 5g |
This recipe contains dairy, eggs, and gluten. For a dairy-free version, use a high-quality vegan butter and a plant-based milk for the buttermilk substitute. For a gluten-free version, use the adaptation mentioned above. It is a treat, meant to be enjoyed in moderation as part of a balanced life.
Conclusion
This classic vanilla birthday cake with easy buttercream roses is more than just a recipe—it is a celebration in a pan. It is the cake you make when you want to show someone you care. It is the cake that turns a regular Tuesday into a special occasion. I love this recipe because it is forgiving, it is beautiful, and it tastes like pure joy.
I want you to try it. Do not be afraid of the piping. Your first rose might not be perfect, but your second one will be better, and by the time you are done, you will have a cake that looks like a work of art. And honestly, the imperfections are what make it beautiful. That is the whole point.
If you make this cake, I would love to see it. Tag me in your photos, leave a comment below, and let me know how it turned out. Did you make any fun variations? I am always looking for new ideas. Happy baking, friend. You have got this.
Frequently Asked Questions
Can I use a different size pan?
Yes, you can. For two 9-inch pans, bake for 25-30 minutes. For a 9×13 sheet cake, bake for 30-35 minutes. The baking time will vary, so keep an eye on it.
Why did my cake sink in the middle?
This usually happens if the oven door is opened too early, the oven temperature is too low, or the cake is underbaked. Make sure your oven is at the right temperature and resist the urge to open the door for the first 20 minutes.
Can I make the frosting ahead of time?
Absolutely. You can make the buttercream up to 3 days in advance. Store it in an airtight container in the fridge. When you are ready to use it, let it come to room temperature and re-whip it in the mixer for a few minutes until it is smooth and fluffy again.
How do I get my buttercream roses to be more defined?
Make sure your buttercream is not too soft. If it is too warm, the petals will lose their shape. If it is too cold, it will be hard to pipe. The perfect consistency is like a thick, spreadable paste. Practice your pressure and speed—a steady, even squeeze creates the best petals.
Can I use this recipe for cupcakes?
Yes, this recipe makes about 24-30 standard cupcakes. Fill the liners about 2/3 full and bake at 350°F (175°C) for 18-22 minutes. The buttercream recipe will frost them all generously.
Pin This Recipe!
Classic Vanilla Birthday Cake with Easy Buttercream Roses
A moist, tender vanilla layer cake with a simple American buttercream, decorated with easy-to-pipe buttercream roses. Perfect for celebrations and designed to impress without requiring professional decorating skills.
- Prep Time: 30 minutes
- Cook Time: 25 minutes
- Total Time: 2 hours 55 minutes
- Yield: 12 servings 1x
- Category: Dessert
- Cuisine: American
Ingredients
- 1 cup (226 g) unsalted butter, softened
- 2 cups (400 g) granulated sugar
- 4 large eggs, room temperature
- 2 teaspoons vanilla extract
- 1 teaspoon vanilla bean paste
- 3 cups (360 g) all-purpose flour, spooned and leveled
- 1 tablespoon baking powder
- 1/2 teaspoon salt
- 1 cup (240 ml) buttermilk, room temperature
- 2 cups (452 g) unsalted butter, slightly softened (for frosting)
- 6 cups (720 g) powdered sugar, sifted
- 1/4 cup (60 ml) heavy cream, plus more as needed
- 2 teaspoons vanilla extract (for frosting)
- 1/4 teaspoon salt (for frosting)
- Gel food coloring (optional)
Instructions
- Preheat oven to 350°F (175°C). Grease three 8-inch round cake pans and line bottoms with parchment paper.
- In a large bowl, beat softened butter and granulated sugar on medium speed for 3-5 minutes until light, fluffy, and pale. Scrape down sides halfway through.
- Add eggs one at a time, beating well after each. Add vanilla extract and vanilla bean paste; mix until combined.
- In a separate bowl, whisk together flour, baking powder, and salt. With mixer on low, add flour mixture in three additions, alternating with buttermilk, starting and ending with flour. Mix until just combined; do not overmix. Fold batter with a rubber spatula.
- Divide batter evenly among prepared pans (about 500 g each). Bake for 22-28 minutes until a toothpick inserted in center comes out clean or with a few moist crumbs. Cool in pans for 10 minutes, then turn out onto a cooling rack; remove parchment and cool completely (1-2 hours).
- For buttercream: In a large bowl, beat slightly softened butter on medium speed for 2-3 minutes until smooth and creamy. Gradually add sifted powdered sugar, one cup at a time, on low speed. Add heavy cream, vanilla extract, and salt. Increase speed to medium-high and beat for 3-5 minutes until light, fluffy, and spreadable. Adjust consistency with more cream or powdered sugar as needed.
- Level cooled cake layers with a serrated knife. Place one layer on a cake board or plate; spread about 1 cup buttercream evenly on top. Repeat with second layer. Place third layer on top, cut-side down. Apply a thin crumb coat of frosting all over; refrigerate for 20 minutes.
- After crumb coat is set, apply a thicker final layer of frosting, smoothing sides and top with an offset spatula.
- Fill a piping bag fitted with a large star tip (Wilton 1M) with remaining buttercream. Hold bag straight up and down, tip 1/4 inch from cake surface. Squeeze while making a small tight circle for the rose center, then a larger circle around it for petals. Stop squeezing and pull away. Pipe roses all over the top of the cake and a few on the bottom edge if desired.
Notes
Butter temperature is critical: for cake, butter should be truly soft (room temperature); for frosting, cool but pliable. Spoon and level flour to avoid dry cake. Do not overmix after adding flour. Practice piping roses on parchment first; you can scrape and reuse frosting. Chill cake after crumb coat for easier final frosting. For best texture, serve at room temperature.
Nutrition
- Serving Size: 1 slice
- Calories: 520
- Sugar: 48
- Sodium: 210
- Fat: 28
- Saturated Fat: 17
- Carbohydrates: 65
- Protein: 5
Keywords: vanilla cake, birthday cake, buttercream roses, layer cake, celebration cake, easy decorating



