Love this? Save it for later!
Share the inspiration with your friends
I had this whole plan for a Pinterest-worthy Halloween snack board. Beautifully arranged, color-coordinated, the kind of thing you screenshot and save for later. It took about ten minutes of my toddler “helping” in the kitchen for that plan to fall apart completely. He grabbed an apple slice, slathered it with peanut butter, and stuck a few sunflower seeds on top for teeth. It looked ridiculous and honestly, a little bit terrifying. But he was so proud. He called it a monster. And you know what? It was the most fun I’d had in the kitchen all week. Those perfectly styled boards? Overrated. This messy, happy, slightly unhinged little creation? That was the keeper. It’s the snack that finally made Halloween feel fun instead of frantic—a way to say yes to the holiday chaos without sending my kids’ blood sugar (or my sanity) into a tailspin.
Why You’ll Love This Recipe
Let’s be real for a second. Halloween snacks are usually a sugar bomb disguised as a ghost. These Healthy Apple Monster Bites flip that script completely. They’re the snack you can feel genuinely good about handing over—whether it’s for a school party, an after-school treat, or a pre-trick-or-treating fuel-up. I’ve tested these with my own kids, with picky nephews, and even at a playdate where one mom was convinced her child would never eat an apple “for fun.” She was wrong, by the way.
- Quick & Easy: You can whip up a whole platter of these in under 15 minutes. Seriously. No baking, no waiting, no complicated steps.
- Simple Ingredients: You probably have everything you need in your fridge and pantry right now. No weird specialty items required.
- Perfect for Halloween: They’re festive and fun without the sugar crash. Great for classroom parties, Halloween playdates, or just a silly snack at home.
- Crowd-Pleaser: Kids absolutely love building their own monsters. It’s interactive and gives them a sense of control (which, let’s face it, is half the battle with kids and food).
- Unbelievably Delicious: That combination of crisp apple, creamy nut butter, and crunchy seeds? It’s a classic for a reason. It’s satisfying and actually filling.
What makes these different from every other apple “monster” out there? It’s the little details. The way the sunflower seeds are angled to look like crooked teeth. The use of a simple strawberry slice for a goofy tongue. It’s not just an apple with stuff on it—it’s a character. And that makes all the difference when you’re trying to get a kid to eat something healthy. This recipe is comfort food reimagined for the Halloween season—healthier, faster, but with the same soul-soothing satisfaction of a shared, silly moment.
What Ingredients You Will Need
This recipe uses simple, wholesome ingredients to deliver big flavor and a whole lot of fun without the fuss. Most of these are pantry staples or easy to find at any grocery store. The beauty is in how you put them together.
- Apples: (2-3 large, any variety) You want firm, crisp apples that will hold up to the toppings. Granny Smith are great for a tart contrast to the sweet peanut butter, but Honeycrisp or Fuji work beautifully too. I personally prefer a mix of red and green for a more colorful monster platter.
- Peanut Butter: (¼ cup, creamy or crunchy) This acts as the “glue” for your monster’s face. Creamy peanut butter spreads more smoothly, but crunchy adds a fun texture. Use a natural peanut butter that’s just peanuts and salt for the best flavor—it’s less runny and sticks to the apple better.
- Sunflower Seeds: (¼ cup, shelled) These are your monster’s teeth. They’re the perfect size and shape. I like to use roasted and salted ones for extra flavor.
- Strawberries: (2-3 large) You’ll cut these into thin slices to make the monster tongues. The red color is so vibrant and fun. You could also use raspberries for a similar effect.
- Chocolate Chips: (2 tablespoons, mini or regular) For the eyes. Mini chocolate chips look a bit more proportional, but regular ones work fine. I’ve also used small candy eyes (the kind you find for baking) in a pinch, but chocolate chips are my go-to.
- Optional Toppings: Shredded coconut for “hair,” a drizzle of honey or maple syrup for extra sweetness, or a few pomegranate arils for more monster “zits” or details.
One quick note on the peanut butter—if you have a nut allergy in the house, sunflower seed butter (sunbutter) or even cream cheese works perfectly as a substitute. I’ve tested it with sunbutter and it’s just as delicious, though it might turn a slightly different color (that’s just a chemical reaction, totally normal). For a truly nut-free, school-safe option, use a seed butter or a thick dairy-free yogurt.
Equipment Needed
You don’t need anything fancy for this recipe, which is part of the charm. A sharp knife and a cutting board are really all you need to get started.
- Cutting Board: A sturdy, large cutting board makes slicing the apples and strawberries much easier.
- Sharp Knife: A good chef’s knife or a paring knife will do the trick. You need it for slicing the apples and strawberries cleanly.
- Apple Corer (Optional but Helpful): If you want perfectly round apple slices, an apple corer is your best friend. You can also just core the apple with a knife—it’s a bit more work but totally doable.
- Small Spreading Knife or Butter Knife: For spreading the peanut butter onto the apple slices. A small offset spatula works great too.
- Serving Platter: Any large plate or platter will work. I like using a white platter to make the colors of the monsters pop.
Honestly, don’t overthink the equipment. If you have a knife and a plate, you’re pretty much set. I’ve made these on a paper plate at a friend’s house before and they turned out just as cute. The apple corer is nice, but it’s not a dealbreaker. If you’re making these with kids, a plastic or kid-safe knife for spreading the peanut butter is a great idea.
Preparation Method
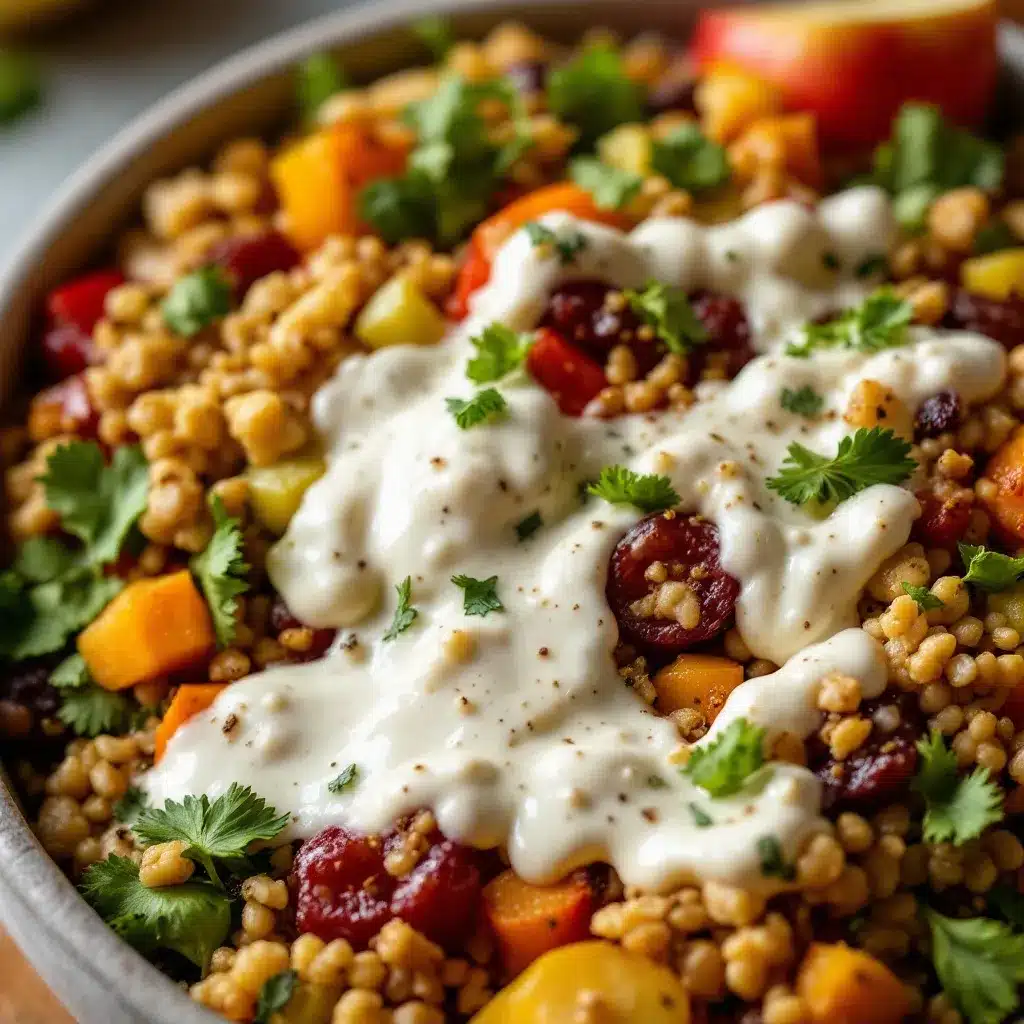
This is where the fun really begins. Don’t stress about making them perfect—the slightly crooked teeth and mismatched eyes are what make them look like real monsters. That’s the whole point!
- Prep the Apples (5 minutes): Wash and dry your apples thoroughly. If you have an apple corer, use it to remove the core completely. If you’re using a knife, cut the apple in half from top to bottom, then carefully cut out the core and seeds from each half. Slice the apple crosswise into rounds about ¼-inch thick. You’ll get about 4-5 good slices per apple. Aim for the middle slices—the end pieces are too small and don’t have a good “face” shape.
- Prep the Toppings (3 minutes): Rinse the strawberries and pat them dry. Slice them into thin rounds, about ⅛-inch thick. You’ll use these for the tongues. Set out your chocolate chips and sunflower seeds in small bowls so they’re easy to grab.
- Spread the “Glue” (2 minutes): Take each apple slice and spread a thin, even layer of peanut butter over one side. Don’t go too thick or the toppings will slide off. You want just enough to make everything stick. A thin layer is all you need.
- Build the Faces (5 minutes): This is the creative part. Place two chocolate chips near the top center of the peanut butter for the eyes. Press them in gently so they stay put. For the mouth, take about 4-6 sunflower seeds and arrange them in a jagged line about halfway down the slice. Angle them slightly so they look like crooked monster teeth—some pointing up, some pointing down. It’s okay if they overlap a little.
- Add the Tongue (1 minute): Take a strawberry slice and place it just below the “teeth” so it sticks out like a silly tongue. You can cut a small slit in the apple slice if you want the tongue to look like it’s coming out of the mouth, but just laying it on top works perfectly fine.
- Get Creative with Details (2 minutes): Want to add hair? Sprinkle a little shredded coconut on the top edge of the apple slice. Want extra monster bumps? Add a few pomegranate arils or a tiny dab of peanut butter with a sunflower seed on top. There are no rules here.
- Serve Immediately or Chill (5 minutes): These are best served right away so the apples stay crisp and the peanut butter doesn’t get too warm. If you need to make them ahead, arrange them on a platter, cover with plastic wrap, and store in the fridge for up to 2 hours. The apples might brown slightly, but a quick spritz of lemon juice on the cut side before adding the peanut butter will help prevent that.
One thing I learned the hard way—don’t assemble these too far in advance. The moisture from the apples can make the peanut butter slide off after a few hours. They’re really a “make and serve” kind of snack. But honestly, the assembly is so quick that it’s not a problem at all.
Cooking Tips & Techniques
This recipe is so simple, but there are a few little tricks I’ve picked up from making these dozens of times. Trust me, a few small adjustments make a big difference.
Preventing Apple Browning: This is the number one question I get. Apples start to brown as soon as they’re cut due to oxidation. To keep your monsters looking fresh and bright, toss the apple slices in a bowl with a tablespoon of lemon juice or lime juice before you start building. Let them sit for about a minute, then pat them dry. The citric acid stops the browning process without making the apples taste sour. I’ve also used a splash of pineapple juice in a pinch—it works just as well and adds a hint of sweetness.
The Peanut Butter Consistency Trap: If your peanut butter is too runny, it’s a nightmare to work with. The toppings just slide right off. If your natural peanut butter has separated, stir it really well before using. Or, use a processed peanut butter like Jif or Skippy for a thicker, more stable spread. I know, I know, natural is healthier, but for this recipe, a little processed peanut butter makes the assembly so much easier. It’s a trade-off I’m willing to make for a less frustrating experience.
Getting the Teeth Right: The sunflower seeds are tiny and they like to roll away. I’ve lost more than a few to the floor. My trick is to use a pair of tweezers or even a clean pair of eyebrow tweezers to place them precisely. It sounds silly, but it makes the process so much faster and less fiddly. If you’re making these with kids, don’t even bother with tweezers—just let them go wild with their fingers. The messier they are, the cuter the monsters turn out.
Timing and Multitasking: This is a great recipe to prep in stages. Slice all your apples and strawberries first. Set up a little assembly line with your bowls of seeds and chocolate chips. Then, spread the peanut butter on all the slices at once before you start adding the faces. It’s much faster than doing one monster at a time from start to finish.
I once tried to make these with a group of six kids at a Halloween party. I thought I was being smart by prepping everything. What I didn’t account for was the chaos. The peanut butter got everywhere, the chocolate chips ended up in someone’s hair, and we had monsters with three eyes and no teeth. Honestly? It was the best part of the party. The kids were so proud of their creations, even the ones that looked like abstract art. So don’t stress about perfection. Embrace the mess.
Variations & Adaptations
These apple monster bites are endlessly adaptable. Once you get the basic idea down, you can customize them for any dietary need, any season, or any flavor preference. Here are a few of my favorite twists.
Nut-Free School Snack: This is the most common adaptation I get asked for. Simply swap the peanut butter for sunflower seed butter (sunbutter), wow butter (made from soy), or even a thick cream cheese. For a dairy-free option, use a vegan cream cheese or a thick coconut yogurt. The texture will be slightly different, but the fun factor is exactly the same. I’ve made these for my son’s nut-free classroom and used sunbutter—they were a huge hit.
Vegan & Dairy-Free: This recipe is already mostly vegan if you use a plant-based nut or seed butter. Make sure your chocolate chips are dairy-free (many dark chocolate chips are). That’s it! You’ve got a totally plant-based Halloween snack that everyone can enjoy.
Low-Sugar / Keto-Friendly: If you’re watching your sugar intake, use a sugar-free nut butter and skip the chocolate chips. Use a few black sesame seeds or a tiny sliver of a sugar-free dark chocolate bar for the eyes instead. Granny Smith apples are naturally lower in sugar than other varieties, so they’re a great choice here.
Fun Flavor Twists: Instead of peanut butter, try almond butter, cashew butter, or even a chocolate-hazelnut spread (like Nutella) for a more decadent treat. For the teeth, you can use sliced almonds instead of sunflower seeds. For the tongue, try a slice of mango or a dried apricot for a different color and flavor. I once made a “zombie” version using green apple slices, pistachio butter, and a few dried cranberries for brains—it was delightfully gross.
Other Cooking Methods: While this is a no-cook recipe, you can take it in a different direction by using the same concept on a stick! Thread apple chunks, strawberry slices, and marshmallows onto a skewer to make “monster kabobs.” It’s a fun, portable option for a Halloween party or a school event. I’ve also seen people use the same toppings on a rice cake spread with peanut butter for a totally different base texture.
Serving & Storage Suggestions
These apple monster bites are best served immediately, but with a few tricks, you can make them work for a party or a packed lunch.
Serving Temperature and Presentation: Serve these at room temperature or slightly chilled. Arrange them on a large platter in a single layer so the faces are visible. I like to put them out on a white or black platter for a spooky contrast. You can also serve them on a bed of fresh spinach or kale for a “swamp” effect. If you’re feeling extra festive, add a few gummy worms crawling around the platter for a fun, creepy touch.
Complementary Dishes or Beverages: These pair perfectly with a warm, cozy drink. A homemade pumpkin spice latte or a pumpkin chai latte would be amazing for an adult Halloween gathering. For kids, serve them alongside a peanut butter protein smoothie bowl or a glass of cold milk. They’re also a great addition to a Halloween snack board alongside mummy-wrapped sausages and black velvet cupcakes.
Storage Instructions: If you have leftovers (unlikely, but possible!), store the assembled monsters in an airtight container in the refrigerator. Place a slightly damp paper towel in the container to help keep the apples from drying out. They’ll last for about 4-6 hours, but the apples will start to brown and the peanut butter may get a bit weepy. For best results, store the components separately—sliced apples in one container (tossed with lemon juice), and the toppings in another. Assemble fresh when you’re ready to serve.
Reheating Methods: You don’t reheat these! They’re meant to be served cold or at room temperature. If you’ve stored them in the fridge, just let them sit out for about 10 minutes before serving to take the chill off.
How Flavors Develop Over Time: Honestly, these are best fresh. The magic is in the contrast between the crisp apple and the creamy peanut butter. Over time, the apple softens slightly and the peanut butter can make the apple a little soggy. That’s why I always recommend making them as close to serving time as possible. But even a slightly soft monster is still a delicious monster.
Nutritional Information & Benefits
Let’s be honest—this is one of the healthiest Halloween snacks you’ll ever make. And it doesn’t taste like it at all, which is the whole point.
Estimated Nutritional Values (per monster bite, using 1 tbsp peanut butter):
- Calories: ~120-150
- Fat: 8-10g (healthy fats from peanut butter and seeds)
- Carbohydrates: 12-15g (mostly from the apple)
- Fiber: 3-4g
- Sugar: 8-10g (natural sugars from the apple)
- Protein: 4-5g
Health Benefits of Key Ingredients: Apples are packed with fiber and vitamin C. The fiber keeps kids full and satisfied, which is a lifesaver when you’re trying to avoid a pre-Halloween sugar meltdown. Peanut butter provides healthy fats and protein, which also helps with satiety. Sunflower seeds are a great source of vitamin E and magnesium. Even the chocolate chips offer a little antioxidant boost (hey, it’s dark chocolate!).
Dietary Considerations: This recipe is naturally gluten-free and vegetarian. With a simple swap of the peanut butter for a seed butter, it becomes nut-free and school-safe. It’s also easily made vegan and dairy-free. The only potential allergen is peanuts (and tree nuts if you use almond butter), so be aware of that if you’re serving a crowd.
Personal Wellness Perspective: I love this recipe because it feels like a win-win. My kids get a fun, festive Halloween treat that they’re genuinely excited about. I get the peace of mind knowing they’re eating something that’s actually good for them. It’s not about deprivation—it’s about finding the sweet spot where healthy and fun overlap. And for Halloween, that’s the sweetest spot of all.
Conclusion
These Healthy Apple Monster Bites are proof that Halloween snacks don’t have to be a sugar-laden nightmare to be fun. They’re quick, easy, and endlessly customizable—the kind of recipe you’ll come back to year after year. I love that they give kids a sense of ownership over their food. When they build their own monster, they’re so much more likely to eat it. And honestly, isn’t that the real parenting win?
I really hope you give these a try. Don’t be afraid to get creative with your toppings or to let the kids take the lead. The monsters that look the most ridiculous are always the ones that get eaten the fastest. If you make them, I’d love to hear about it! Leave a comment below and tell me what kind of monster your family created. Did you use a funny tongue? Weird hair? Three eyes? Share your creations—I can’t wait to see them. And if you’re looking for more fun, healthy snack ideas, check out our crispy apple nachos with peanut butter drizzle for another apple-based treat!
Frequently Asked Questions
Can I make these apple monster bites the night before a Halloween party?
You can, but they’re best made the same day. The apples will start to brown and the peanut butter can make them a little soggy overnight. If you absolutely must prep ahead, slice the apples and toss them in lemon juice, then store them in a sealed bag in the fridge. Prep all your toppings in separate bowls. Assemble them the morning of the party or just before serving for the best results.
What kind of apples work best for this recipe?
Firm, crisp apples are your best bet. Granny Smith apples are a top choice because they’re tart and hold their shape really well. Honeycrisp, Fuji, and Pink Lady are also excellent options. Avoid softer apples like Red Delicious or McIntosh—they’re too mealy and will fall apart when you try to spread the peanut butter.
My child has a peanut allergy. What can I use instead of peanut butter?
There are so many great alternatives! Sunflower seed butter (sunbutter) is my top recommendation—it has a very similar texture and taste. Wow butter (made from soy) is another excellent option that’s school-safe. You can also use cream cheese, a dairy-free cream cheese, or even a thick Greek yogurt for a different flavor profile. Just make sure whatever you use is thick enough to hold the toppings in place.
How do I stop the apple slices from turning brown?
The simplest method is to toss the apple slices in a bowl with a tablespoon of lemon juice or lime juice. Let them sit for about a minute, then pat them dry with a paper towel before you start building. You can also use a commercial product like Fruit-Fresh (ascorbic acid) or even a splash of pineapple juice. The citric acid in these liquids stops the oxidation process that causes browning.
Can I use other fruits for these monster bites?
Absolutely! While apples are the classic base, you can use thick slices of pear, firm banana slices, or even large strawberry halves. The key is to use a fruit that’s firm enough to hold the spread and toppings without falling apart. Pears work beautifully, especially Bosc or Anjou pears. Just be aware that bananas will brown faster than apples, so they need to be served even sooner.
Pin This Recipe!
Healthy Apple Monster Bites: Easy Halloween Snack

These Healthy Apple Monster Bites are a quick, fun, and nutritious Halloween snack that kids love to build themselves. Made with crisp apples, creamy peanut butter, and simple toppings, they’re the perfect festive treat without the sugar crash.
- Prep Time: 15 minutes
- Cook Time: 0 minutes
- Total Time: 15 minutes
- Yield: 4 servings 1x
- Category: Snack
- Cuisine: American
Ingredients
- 2–3 large apples (Granny Smith, Honeycrisp, or Fuji)
- ¼ cup peanut butter (creamy or crunchy)
- ¼ cup shelled sunflower seeds (roasted and salted)
- 2–3 large strawberries
- 2 tablespoons mini or regular chocolate chips
- Optional: shredded coconut for hair, honey or maple syrup for sweetness, pomegranate arils for details
Instructions
- Wash and dry the apples. Core them using an apple corer or by cutting in half and removing the core with a knife. Slice crosswise into ¼-inch thick rounds (about 4-5 slices per apple).
- Rinse and pat dry the strawberries. Slice them into thin rounds, about ⅛-inch thick, for the tongues.
- Spread a thin, even layer of peanut butter over one side of each apple slice.
- Place two chocolate chips near the top center of the peanut butter for the eyes, pressing gently.
- Arrange 4-6 sunflower seeds in a jagged line about halfway down the slice for teeth, angling some up and some down.
- Place a strawberry slice just below the teeth for the tongue.
- Add optional details like shredded coconut for hair or pomegranate arils for bumps.
- Serve immediately, or arrange on a platter, cover with plastic wrap, and refrigerate for up to 2 hours.
Notes
For best results, assemble just before serving to prevent apple browning and sogginess. To prevent browning, toss apple slices in lemon juice and pat dry. If peanut butter is too runny, use a processed brand for better stability. For nut-free version, use sunflower seed butter or cream cheese.
Nutrition
- Serving Size: 1 monster bite (1 ap
- Calories: 120150
- Sugar: 810
- Sodium: 5080
- Fat: 810
- Saturated Fat: 1.52
- Carbohydrates: 1215
- Fiber: 34
- Protein: 45
Keywords: Halloween snack, apple monster bites, healthy Halloween treat, kid-friendly snack, no-bake snack, apple recipe, peanut butter apple snack



