Love this? Save it for later!
Share the inspiration with your friends
“Mom, can we have something creepy but not gross?” My niece looked at me with that serious face kids get when they’re negotiating. It was the week before Halloween, and she’d already rejected three “gross” snack ideas I’d thrown her way. Bloody finger cookies? Too scary. Spider deviled eggs? “Eggs are weird, Auntie.” I was running out of ideas, honestly.
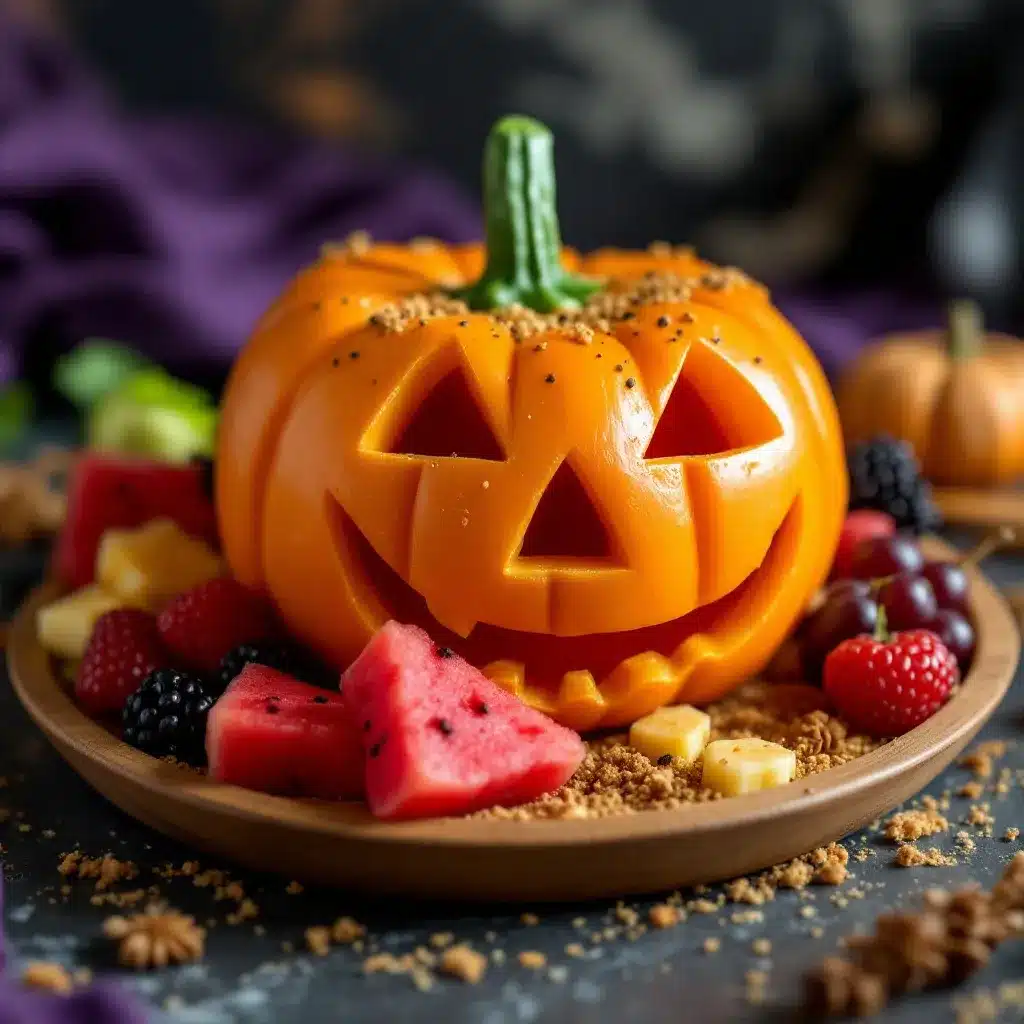
Then I saw the watermelon sitting on my counter, and something clicked. What if I could make something that looked spooky but was actually just… fruit? The kind of thing you’d actually want to eat, not just look at. I grabbed a knife and started carving before I could talk myself out of it. Twenty minutes later, I had a pumpkin-shaped watermelon grinning back at me, surrounded by creepy-crawly fruit creatures that my niece actually squealed over (in a good way, for once).
That’s how this spooky Halloween fruit tray with pumpkin watermelon was born. It’s the snack that finally got a thumbs-up from a picky eight-year-old, and honestly, it’s been my go-to for every Halloween party since. No weird ingredients, no complicated baking, just fruit that looks like it came straight out of a haunted house. And the best part? You don’t need to be a professional carver to pull it off. I promise.
Why You’ll Love This Recipe
Let me tell you why this Halloween fruit tray has become my most-requested party trick. It’s not just about the wow factor (though there’s plenty of that).
- Comes together in under 30 minutes : Seriously, once you’ve done it once, you can whip this up faster than you can say “trick or treat.” Perfect for those last-minute Halloween plans.
- Uses simple, everyday ingredients : No fancy grocery store runs needed. You probably already have most of the fruit sitting in your kitchen right now.
- Perfect for Halloween parties : Whether it’s a classroom celebration, a work potluck, or your own spooky gathering, this tray fits right in.
- Crowd-pleaser for all ages : Kids love the fun shapes, and adults appreciate having a healthy option among all the candy. It’s the snack that bridges the gap.
- Unbelievably delicious : Fresh fruit tastes amazing, obviously, but there’s something about eating a “pumpkin” watermelon that makes it taste even better. It’s science, probably.
What makes this recipe different from all those other Halloween snack boards out there? It’s the pumpkin watermelon centerpiece. I’ve tested a dozen ways to carve it, and I’ve figured out the trick to making it look like a real jack-o-lantern without falling apart. Plus, the fruit “creatures” I’ll show you how to make are actually fun to eat, not just decorative. This isn’t one of those trays where you’re afraid to touch anything. You’re supposed to dig in.
This is the kind of snack that makes people stop and take pictures before they even grab a plate. But more importantly, it’s the kind that makes you feel good about serving it. No guilt, just juicy, fresh goodness that happens to look like it crawled out of a haunted forest.
What Ingredients You Will Need
This recipe is all about fresh, simple ingredients that work together to create something spooky and delicious. Here’s what you’ll need to build your Halloween fruit tray:
For the Pumpkin Watermelon Centerpiece
- 1 large seedless watermelon (oval-shaped works best for pumpkin look) – look for one that’s firm and heavy for its size
- 1 small piece of celery or a pretzel stick – this becomes the pumpkin stem
For the Spooky Fruit Creatures
- 2-3 bananas – peeled and cut in half crosswise for ghost shapes
- 1 cup green grapes – these become creepy eyeballs or slimy fingers
- 1 cup red grapes – perfect for little spider bodies
- 1 pint fresh strawberries – slice them to look like little hearts or bat wings
- 2-3 kiwis – peeled and sliced for monster scales or witch’s warts
- 1 cup blueberries – use these for tiny spider heads or decoration
- 1 large apple (any color) – cut into wedges for monster teeth
- 1 orange – sliced into rounds for pumpkin faces (optional, but fun)
For the Creepy Decorations
- 2 tablespoons white chocolate chips – melted for ghost eyes and spider webs
- 1 tablespoon black decorating gel – for drawing faces on fruit
- Pretzel sticks – broken in half for spider legs
- Edible googly eyes (optional) – these are super fun for kids
For the Dip (Optional but Recommended)
- 1 cup Greek yogurt (plain or vanilla) – this becomes your “ghost dip”
- 2 tablespoons honey – for sweetness
- 1 teaspoon vanilla extract
- Few drops of orange food coloring (optional) – to make it Halloween-themed
I like to use organic fruit when I can, especially for the watermelon since it’s the star of the show. But honestly, whatever looks freshest at your store will work perfectly. The key is getting fruit that’s ripe but still firm enough to hold its shape when you cut it. Nobody wants a mushy ghost banana, trust me.
Equipment Needed
You don’t need a fancy carving kit for this Halloween fruit tray. Here’s what I use:
- Sharp chef’s knife – for cutting the watermelon. A good, sharp knife makes all the difference.
- Small paring knife – for detail work on the pumpkin face and fruit creatures
- Melon baller – optional, but great for making creepy eyeballs from melon
- Cutting board – a large one that won’t slip around
- Large serving platter or tray – something with a rim to catch juice
- Small cookie cutters (bat, ghost, pumpkin shapes) – totally optional but fun if you have them
- Piping bag or small zip-top bag – for the white chocolate and decorating gel
- Paper towels – for patting fruit dry so decorations stick better
I’ve made this with just a chef’s knife and a paring knife plenty of times, so don’t stress if you don’t have specialty tools. The melon baller is nice for making perfect little eyeballs, but you can also just use a small spoon. And if you don’t have cookie cutters, you can freehand shapes with your paring knife. It adds to the “homemade” charm, honestly.
Preparation Method
Alright, let’s get spooky! Here’s how to build your pumpkin watermelon fruit tray step by step.
Step 1: Make the Pumpkin Watermelon (10 minutes)
- Wash your watermelon thoroughly and pat it dry.
- Place the watermelon on its side on your cutting board. You want it sitting like an oval, not standing up tall.
- Using your chef’s knife, carefully slice off the bottom quarter-inch of the watermelon so it sits flat on your tray. Don’t cut too deep – you just need a stable base.
- Now, starting from the top, use your paring knife to score lines running from top to bottom, about 2 inches apart. These will be the ridges of your pumpkin. Make them about 1/4 inch deep – just deep enough to see.
- Using your chef’s knife, carefully cut a circle around the top of the watermelon, about 3 inches in diameter. This is where your stem will go. Remove the small piece of rind.
- Insert your celery or pretzel stick into the hole for the stem. It should fit snugly.
- Now for the face! Using your paring knife, cut out jack-o-lantern eyes (triangles), a nose (small triangle), and a mouth (a jagged smile). Cut all the way through the rind into the flesh. The cuts should be about 1/2 inch deep.
- Gently pop out the cut pieces of rind. You’ll see the red flesh underneath – that’s your pumpkin face!
Pro tip: If you’re nervous about carving, draw the face on the watermelon with a dry-erase marker first. It wipes right off.
Step 2: Make the Fruit Ghosts (5 minutes)
- Peel your bananas and cut them in half crosswise.
- Stand each banana half upright on your cutting board. Using a small knife, cut a slight curve at the top to make it look like a ghost’s head.
- For the eyes: melt your white chocolate chips in the microwave (30-second intervals, stirring in between). Dip a toothpick into the melted chocolate and dot two eyes on each banana ghost. Let them set for 2 minutes.
- You can also use the black decorating gel to make little mouths – just a small curved line.
Step 3: Make the Grape Spiders (5 minutes)
- Take your green and red grapes. For each spider, you’ll need one grape for the body and half a blueberry for the head.
- Cut a small slit in the side of each grape – just big enough to insert the blueberry half.
- Break your pretzel sticks into 1-inch pieces. Insert four pieces on each side of the grape for legs. They should stick out like spider legs.
- Use a tiny dot of black decorating gel to make eyes on the blueberry.
Step 4: Make the Monster Apple Teeth (3 minutes)
- Cut your apple into wedges, removing the core and seeds.
- On each wedge, use your paring knife to cut a zigzag pattern along the curved edge. This creates monster teeth.
- You can leave the peel on for color, or peel them for a spooky white look.
Step 5: Assemble the Tray (5 minutes)
- Place your pumpkin watermelon in the center of your serving tray. It should be the star of the show.
- Arrange the banana ghosts around the pumpkin, facing outward so their faces are visible.
- Place the grape spiders in clusters – they look creepiest in groups.
- Add the monster apple teeth around the edges, pointing inward toward the pumpkin.
- Scatter the kiwi slices (monster scales) and strawberry slices (bat wings) around the tray.
- Fill in any empty spaces with blueberries and extra grapes.
- If you made the ghost dip, place it in a small bowl and set it on the tray. You can draw a ghost face on the bowl with black decorating gel.
Step 6: Final Decorations (2 minutes)
- Use the remaining white chocolate to drizzle “spider webs” between pieces of fruit. Just zigzag the melted chocolate back and forth.
- Place edible googly eyes on any fruit that doesn’t have a face yet – kiwi slices look hilarious with googly eyes.
- Give everything a final look. Make sure the pumpkin face is clearly visible and all the creatures are arranged nicely.
Sensory cue: Your watermelon pumpkin should feel firm and cool to the touch. The banana ghosts should be pale and smooth, with chocolate eyes that have set completely. The whole tray should look like a spooky garden scene.
Cooking Tips & Techniques
After making this Halloween fruit tray about a dozen times (including one memorable disaster where my watermelon rolled off the counter), I’ve learned a few things. Let me save you the trouble.
Pick the right watermelon. An oval-shaped watermelon looks more like a pumpkin than a round one. Also, make sure it’s seedless – nobody wants to be picking seeds out of their spooky snack. I learned this the hard way when I used a seeded watermelon for a kids’ party. The horror was real, just not the kind I was going for.
Keep your fruit dry. After washing everything, pat it all dry with paper towels. Wet fruit makes the chocolate decorations slide right off. I ruined an entire batch of banana ghosts this way – their eyes just melted into sad little puddles.
Don’t carve too deep. When you’re making the pumpkin face, you only need to cut about 1/2 inch into the rind. If you go too deep, the watermelon will start leaking juice everywhere. Trust me, a leaky pumpkin is not a happy pumpkin.
Work in stages. Don’t try to do everything at once. Carve the watermelon first, then move on to the fruit creatures. If you try to multitask too much, you’ll end up with chocolate everywhere and half-carved grapes. Ask me how I know.
Use a damp paper towel under the watermelon. This keeps it from sliding around on your tray. Nothing worse than your centerpiece tipping over mid-party.
Chill everything before serving. Cold fruit holds its shape better and tastes better too. Pop the whole tray in the fridge for 15 minutes before you bring it out. The chocolate will set faster, and the fruit will stay crisp longer.
Variations & Adaptations
One of the best things about this spooky Halloween fruit tray is how easy it is to customize. Here are some of my favorite variations:
Dairy-Free Version
Skip the white chocolate and use dairy-free dark chocolate or just stick with the black decorating gel for faces. The ghost dip can be made with coconut yogurt instead of Greek yogurt – it’s actually really tasty.
Low-Sugar Option
Leave out the honey in the dip and use plain yogurt. The fruit is sweet enough on its own, honestly. You can also skip the white chocolate decorations entirely and just use the black decorating gel for faces.
Seasonal Twist
In the fall, swap some of the fruit for seasonal options. Pears make great ghost shapes, and pomegranate seeds look like little creepy eyeballs scattered around the tray. I’ve also used sliced persimmons for a different kind of pumpkin look.
Extra Spooky Version
Add some cut-up dragon fruit (the pink kind with white flesh and black seeds) for a truly alien look. It’s naturally creepy! You can also use star fruit slices for little creepy stars.
Kid-Friendly Assembly
Let the kids help! Set up a “fruit creature station” with pre-cut fruit and decorations. They can make their own grape spiders and banana ghosts. It’s a great activity for Halloween parties, and they’re more likely to eat something they made themselves.
I once made a version where I used a small honeydew melon instead of watermelon for the pumpkin. It was smaller and cuter, but honestly, the watermelon version is more impressive. The honeydew didn’t have the same “wow” factor when people saw it.
Serving & Storage Suggestions
This Halloween fruit tray is best served cold, right after you’ve assembled it. The chocolate decorations will be set, the fruit will be crisp, and everything will look its spookiest.
How to serve: Place the tray on a table where everyone can see it. Let people grab a plate and help themselves. I like to put out small bowls for the dip and extra napkins (fruit can be messy, especially for kids).
What to serve with it: This tray pairs beautifully with other Halloween snacks. For a full spread, consider adding some mummy wrapped sausages for a savory option, or some black velvet cupcakes for a sweet treat. If you’re hosting a Halloween brunch, a pumpkin spice latte would be perfect alongside this fruit tray.
Storage: If you have leftovers (unlikely, but possible), store the fruit in an airtight container in the refrigerator. The watermelon pumpkin will last for 2-3 days, though it might start to leak a little. The banana ghosts will brown after a few hours, so they’re best eaten the same day. The grape spiders actually hold up pretty well for a day or two.
Reheating: You don’t need to reheat anything, but if the chocolate decorations start to soften, just pop the tray in the fridge for 10 minutes to firm them up again.
Flavor development: Honestly, fresh fruit doesn’t really “develop” flavors the way a stew or soup does. It’s best eaten fresh. But I’ve found that the dip actually tastes better after sitting in the fridge for an hour – the flavors meld together nicely.
Nutritional Information & Benefits
This Halloween fruit tray is packed with good-for-you ingredients that make it a guilt-free addition to any Halloween celebration. Here’s a rough breakdown per serving (about 1 cup of assorted fruit):
- Calories: 80-120 (depending on fruit choices)
- Carbohydrates: 20-30g
- Fiber: 2-4g
- Sugar: 15-20g (natural fruit sugars)
- Vitamin C: 30-50% of daily value (from watermelon, strawberries, kiwi)
- Potassium: 200-300mg (from bananas and watermelon)
- Antioxidants: High (from berries and watermelon)
Health benefits: Watermelon is incredibly hydrating (it’s 92% water!) and contains lycopene, an antioxidant linked to heart health. Bananas provide potassium for muscle function, and berries are packed with immune-boosting vitamin C. The Greek yogurt dip adds protein and probiotics for gut health.
Dietary considerations: This recipe is naturally gluten-free, dairy-free (if you skip the yogurt dip and white chocolate), and vegan-friendly (with the same modifications). It’s also nut-free, making it safe for school parties. The only potential allergen is dairy in the white chocolate and yogurt dip.
I love that I can serve something this fun and festive without worrying about sugar crashes or artificial ingredients. It’s the kind of snack that makes you feel good about indulging – because you’re really just eating fruit, but it looks like a party.
Conclusion
This spooky Halloween fruit tray with pumpkin watermelon has become a tradition in my house, and I think it’s about to become one in yours too. It’s the perfect combination of fun and healthy – something that’s surprisingly hard to find during Halloween season.
I love how this recipe lets you be creative without needing any special skills. You don’t have to be a professional carver or a pastry chef. You just need some fruit, a sharp knife, and a little bit of imagination. And honestly, even if your pumpkin face comes out a little crooked, that just adds to the charm. Imperfect fruit creatures are way more fun than perfect ones.
I’d love to see how your Halloween fruit tray turns out! Leave a comment below and tell me about your spooky creations. Did you add any fun variations? Did your kids help? Did your grape spiders escape? (Mine did once. It was terrifying and hilarious.)
Don’t forget to share this recipe with your friends and family – because everyone deserves a little healthy spooky fun in their life. Happy Halloween, and happy snacking!
Frequently Asked Questions
How far in advance can I make this Halloween fruit tray?
You can carve the watermelon pumpkin up to 24 hours in advance – just wrap it tightly in plastic wrap and keep it in the fridge. The rest of the fruit is best cut and assembled within 2-3 hours of serving to keep everything fresh and crisp. The banana ghosts will start to brown after a few hours, so save those for last.
Can I use a different fruit for the pumpkin centerpiece?
Absolutely! A honeydew melon or cantaloupe works great for a smaller pumpkin. You could even use a pineapple for a different look. Just make sure whatever fruit you choose is firm enough to hold its shape when carved. Soft fruits won’t work as well.
How do I keep the banana ghosts from turning brown?
Brush them with a little lemon juice or pineapple juice – it slows down the browning process. You can also dip them in the white chocolate completely (like a coating) to seal them. But honestly, a little browning is natural, and it actually makes them look more ghostly and creepy!
Can I make this nut-free for school parties?
Yes! This recipe is naturally nut-free as long as you don’t add any nuts. The white chocolate and yogurt dip are both nut-free (just check the labels to be sure). The pretzel sticks are usually nut-free too, but double-check the brand you buy.
What if I don’t have white chocolate for the decorations?
No problem! You can use black decorating gel (found at most grocery stores) to draw faces directly on the fruit. Or skip the decorations altogether and just arrange the fruit in fun shapes. Sometimes the simplest versions are the most charming. You could also use small pieces of dried fruit (like raisins or dried cranberries) for eyes.
Pin This Recipe!
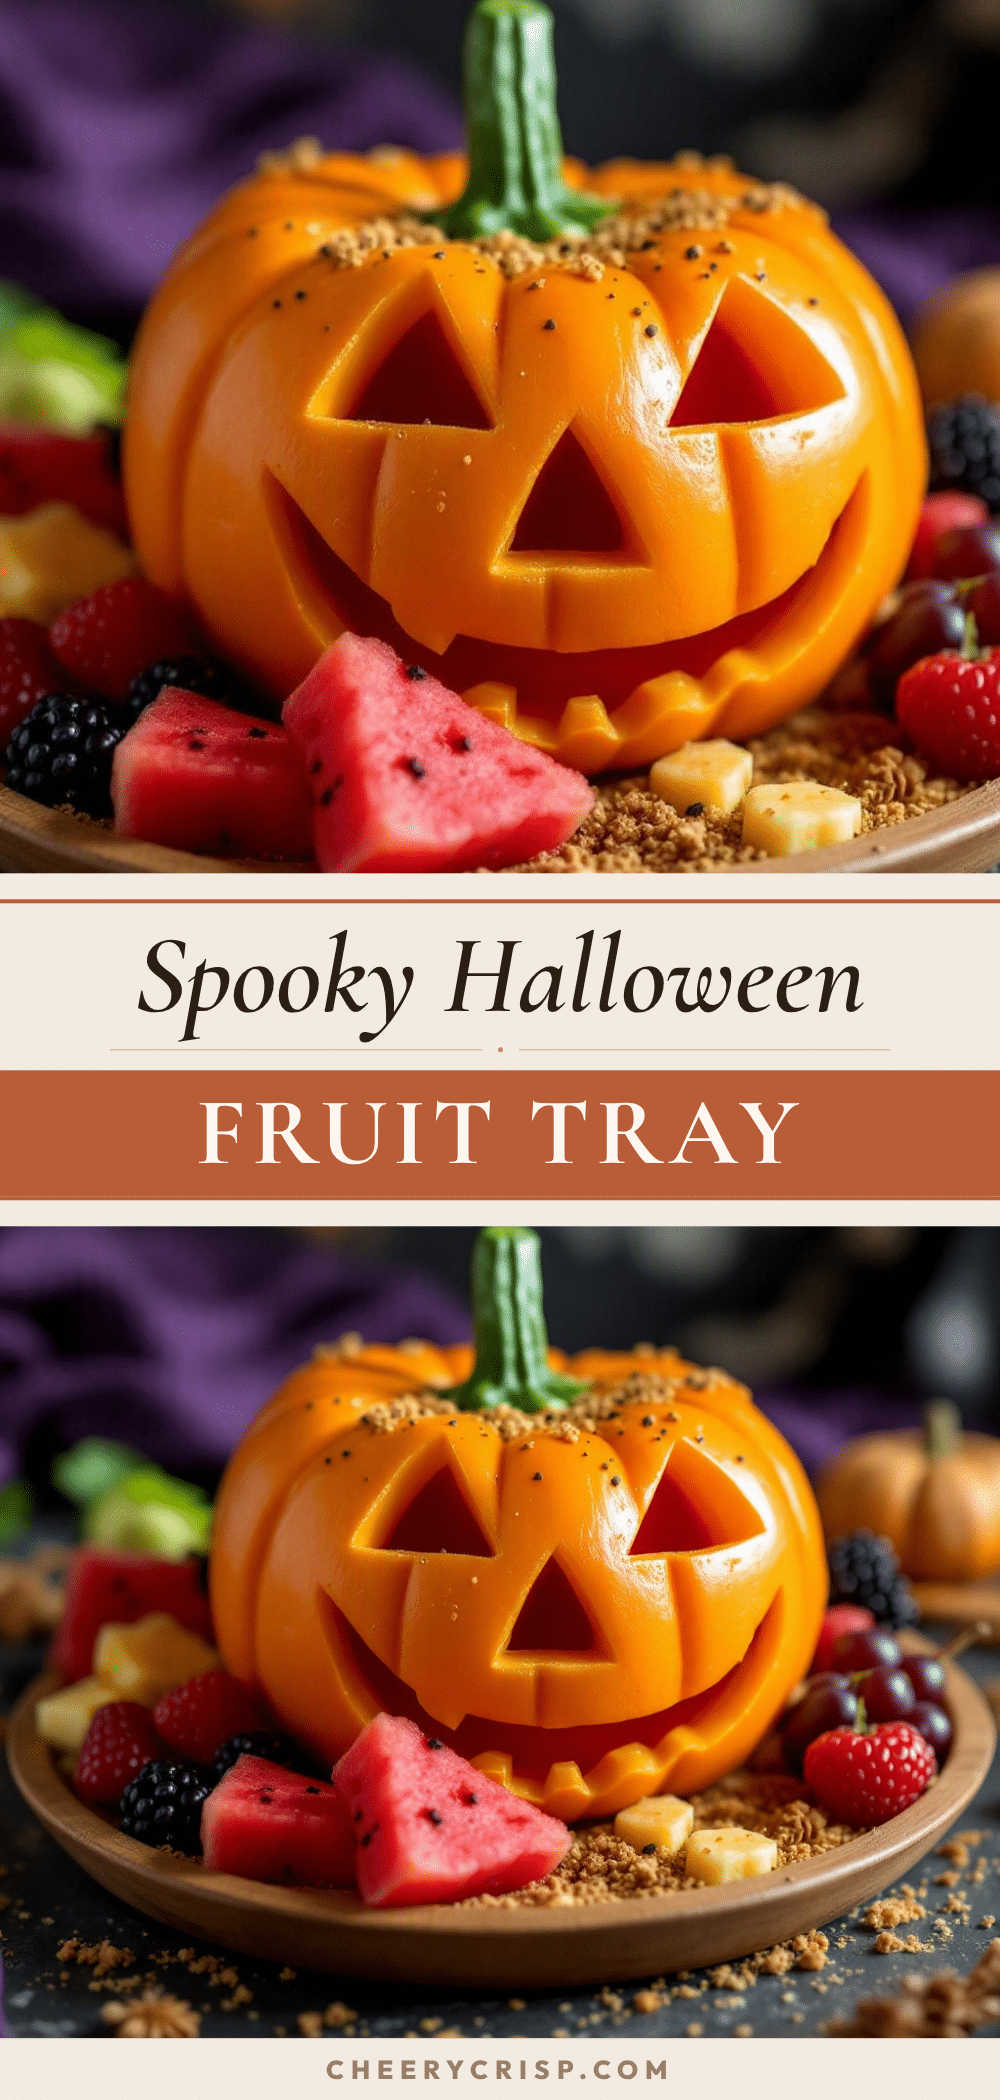
Easy Halloween Fruit Tray: Spooky Pumpkin Watermelon
A spooky yet healthy Halloween fruit tray featuring a carved pumpkin watermelon centerpiece surrounded by creepy-crawly fruit creatures like banana ghosts and grape spiders. Perfect for parties and picky eaters.
- Prep Time: 20 minutes
- Cook Time: 0 minutes
- Total Time: 20 minutes
- Yield: 8 servings 1x
- Category: Appetizer
- Cuisine: American
Ingredients
- 1 large seedless watermelon (oval-shaped)
- 1 small piece of celery or a pretzel stick
- 2–3 bananas
- 1 cup green grapes
- 1 cup red grapes
- 1 pint fresh strawberries
- 2–3 kiwis
- 1 cup blueberries
- 1 large apple (any color)
- 1 orange (optional)
- 2 tablespoons white chocolate chips
- 1 tablespoon black decorating gel
- Pretzel sticks (broken in half for spider legs)
- Edible googly eyes (optional)
- 1 cup Greek yogurt (plain or vanilla)
- 2 tablespoons honey
- 1 teaspoon vanilla extract
- Few drops of orange food coloring (optional)
Instructions
- Wash the watermelon and pat dry. Place it on its side on a cutting board. Slice off the bottom quarter-inch so it sits flat.
- Using a paring knife, score lines from top to bottom about 2 inches apart and 1/4 inch deep to create pumpkin ridges.
- Cut a circle around the top of the watermelon about 3 inches in diameter. Remove the small piece of rind and insert the celery or pretzel stick for the stem.
- Carve jack-o-lantern eyes, nose, and mouth into the rind about 1/2 inch deep. Gently pop out the cut pieces to reveal the red flesh.
- Peel bananas and cut them in half crosswise. Stand each half upright and cut a slight curve at the top for a ghost head.
- Melt white chocolate chips in the microwave in 30-second intervals. Dip a toothpick into the melted chocolate and dot two eyes on each banana ghost. Let set for 2 minutes. Use black decorating gel to make mouths.
- For grape spiders: cut a small slit in each grape and insert half a blueberry for the head. Break pretzel sticks into 1-inch pieces and insert four on each side for legs. Add eyes with black decorating gel.
- Cut the apple into wedges, removing core and seeds. On each wedge, cut a zigzag pattern along the curved edge to create monster teeth.
- Place the pumpkin watermelon in the center of a large serving tray. Arrange banana ghosts around it facing outward. Place grape spiders in clusters. Add monster apple teeth around the edges pointing inward.
- Scatter kiwi slices and strawberry slices around the tray. Fill empty spaces with blueberries and extra grapes. Place the ghost dip (if made) in a small bowl on the tray.
- Drizzle remaining white chocolate to create spider webs between fruit pieces. Place edible googly eyes on any fruit without faces. Serve immediately or chill for 15 minutes.
Notes
For best results, use an oval-shaped seedless watermelon. Keep fruit dry so chocolate decorations stick. Don’t carve deeper than 1/2 inch into the rind to prevent leaking. Chill the tray for 15 minutes before serving to set chocolate and keep fruit crisp. Banana ghosts will brown after a few hours; brush with lemon juice to slow browning.
Nutrition
- Serving Size: 1 cup of assorted fr
- Calories: 100
- Sugar: 18
- Sodium: 10
- Fat: 1
- Saturated Fat: 0.5
- Carbohydrates: 25
- Fiber: 3
- Protein: 2
Keywords: Halloween fruit tray, pumpkin watermelon, spooky fruit, healthy Halloween snack, fruit creatures, banana ghosts, grape spiders



