Love this? Save it for later!
Share the inspiration with your friends
Crumbling a block of feta into a bowl of roasted red peppers when I realized I had zero actual Halloween appetizers planned. The party was in six hours, and I was staring at a fridge full of cheese, cured meats, and olives — basically the makings of a very sad adult lunchable. But then my eyes landed on a skull-shaped silicone mold I’d impulse-bought last October and never used. And that’s when it hit me — what if I made charcuterie look like skulls? Not sweet skulls, not dessert skulls. Savory charcuterie skulls that could sit on a board and actually get eaten.
Honestly, I thought it would look ridiculous. Maybe even a little gross (which, okay, for Halloween that’s kind of the point). But I pressed that cheese and meat mixture into the mold, popped it out, and let me tell you — it was terrifyingly good. The kind of thing that makes people stop mid-conversation, point, and say “Wait, is that a skull made of prosciutto?” And then they eat it. Which is really the whole point of a savory charcuterie skulls for Halloween parties recipe — it looks like a decoration but tastes like a snack board.
There’s something deeply satisfying about watching guests hesitate for half a second before grabbing a piece of what looks like a creepy appetizer. Then they take a bite, their eyes go wide, and suddenly everyone wants to know how you did it. It’s not complicated. It’s not fussy. It’s just clever — and a little bit spooky. Which, let’s face it, is exactly what a Halloween party needs.
So if you’re looking for a way to stand out at your Halloween gathering without spending all day in the kitchen, this is it. These savory charcuterie skulls are the appetizer that does double duty — they look like decor and taste like your favorite cheese board. And once you see how easy they are, you’ll wonder why you ever bought those sad plastic trays of pre-cut cheese cubes.
Why You’ll Love This Recipe
I’ve tested this recipe more times than I care to admit — mostly because I kept eating the test batches. But also because I wanted to make sure the texture was right, the flavor was balanced, and the skulls held their shape without crumbling. Here’s why this one’s a keeper:
- Quick & Easy: From fridge to party platter in under 20 minutes. No cooking required. Seriously.
- Simple Ingredients: You probably already have most of these in your fridge. Cream cheese, cheddar, deli meats, and a few seasonings.
- Perfect for Halloween Parties: It’s spooky, savory, and totally unexpected. Your guests will talk about it all night.
- Crowd-Pleaser: Even people who swear they don’t like “fancy” appetizers go back for seconds (and thirds).
- Unbelievably Delicious: The combination of creamy cheese, salty meat, and subtle spices is next-level comfort food in skull form.
What makes this recipe different from the other Halloween appetizers out there? It’s not sweet. It’s not complicated. And it actually tastes like something you’d want to eat beyond October 31st. I’ve made these for game day parties too — just use a different mold shape and nobody knows they were originally skulls. Speaking of game day, if you love crowd-pleasing appetizers, you should definitely try my football-shaped buffalo chicken dip bites — same spooky-but-delicious energy, different shape.
This recipe isn’t just good — it’s the kind that makes people close their eyes after the first bite. It’s comfort food reimagined — spooky, savory, and with the same soul-soothing satisfaction as your favorite dip. Perfect for impressing guests without stress, or turning a simple party snack into something memorable.
What Ingredients You Will Need
This recipe uses simple, everyday ingredients to deliver bold flavor and satisfying texture without the fuss. Most of these are pantry and fridge staples, which means you can throw these together even if the Halloween store was out of everything but candy corn.
- Cream cheese (8 oz, softened): This is the base that holds everything together. Make sure it’s at room temperature so it blends smoothly. I prefer Philadelphia brand for the creamiest texture, but any block-style cream cheese works.
- Sharp cheddar cheese (1 cup, shredded): Adds that savory, tangy flavor that balances the richness. Shred it yourself from a block if you can — pre-shredded cheese has anti-caking agents that can make the mixture grainy.
- Provolone cheese (1/2 cup, finely diced): This adds a mild, buttery note and helps the skulls hold their shape. You can substitute with mozzarella if that’s what you have.
- Prosciutto (4 oz, finely chopped): The saltiness of prosciutto cuts through the cream cheese beautifully. You can also use salami or ham — just make sure it’s chopped very fine so it distributes evenly.
- Salami (4 oz, finely chopped): Adds a little spice and texture. I like using Genoa salami for its peppery kick.
- Fresh chives (2 tbsp, minced): For a mild oniony freshness that brightens the whole mixture. Green onions work in a pinch.
- Fresh parsley (1 tbsp, minced): Adds color and a hint of earthiness. Flat-leaf parsley is best, but curly works too.
- Garlic powder (1/2 tsp): Don’t skip this — it adds depth without overpowering. Fresh garlic can make the mixture too watery.
- Onion powder (1/2 tsp): Complements the garlic and rounds out the savory flavor.
- Black pepper (1/4 tsp, freshly ground): A little warmth and bite. Adjust to your taste.
- Salt (a pinch, optional): The meats and cheeses are already salty, so taste before adding any extra salt.
- Olives (for decoration, optional): Sliced black olives make perfect skull eye sockets. You can also use capers or small pieces of roasted red pepper.
- Fresh rosemary sprigs (for garnish, optional): Adds a creepy “graveyard” vibe to your serving board.
For the best texture, make sure all your ingredients are finely chopped. Nobody wants a chunk of salami falling out of their skull’s nose hole. And if you’re looking for a dairy-free version, use vegan cream cheese and shredded vegan cheddar — just note that the texture will be slightly softer.
Equipment Needed
You don’t need much for this recipe, which is part of the beauty. Here’s what you’ll want to have on hand:
- Skull-shaped silicone mold: This is the star of the show. You can find these at craft stores, online, or in the Halloween section of most grocery stores. I got mine on Amazon for under $10. Make sure it’s food-grade silicone.
- Mixing bowl: Any medium-sized bowl will do. Glass or stainless steel works best for easy cleanup.
- Cheese grater: For shredding your own cheddar. A box grater is perfect.
- Sharp knife and cutting board: For chopping meats and herbs. A sharp knife makes all the difference when you’re dicing prosciutto.
- Spatula or wooden spoon: For mixing everything together. A rubber spatula helps scrape every last bit out of the bowl.
- Plastic wrap: To cover the mold while it chills. Parchment paper works too.
- Serving platter or board: For the final presentation. A dark slate or wooden board really makes the skulls pop.
If you don’t have a skull mold, you can use any small-shaped silicone mold — pumpkins, ghosts, or even a mini loaf pan that you cut into shapes later. I’ve also pressed the mixture into a small bowl and called it a “brain” for a different kind of creepy. Get creative!
One tip I learned the hard way: wash your silicone mold thoroughly before first use. Some of them have a slight plastic smell that can transfer to the cheese. A quick soak in hot soapy water takes care of it.
Preparation Method
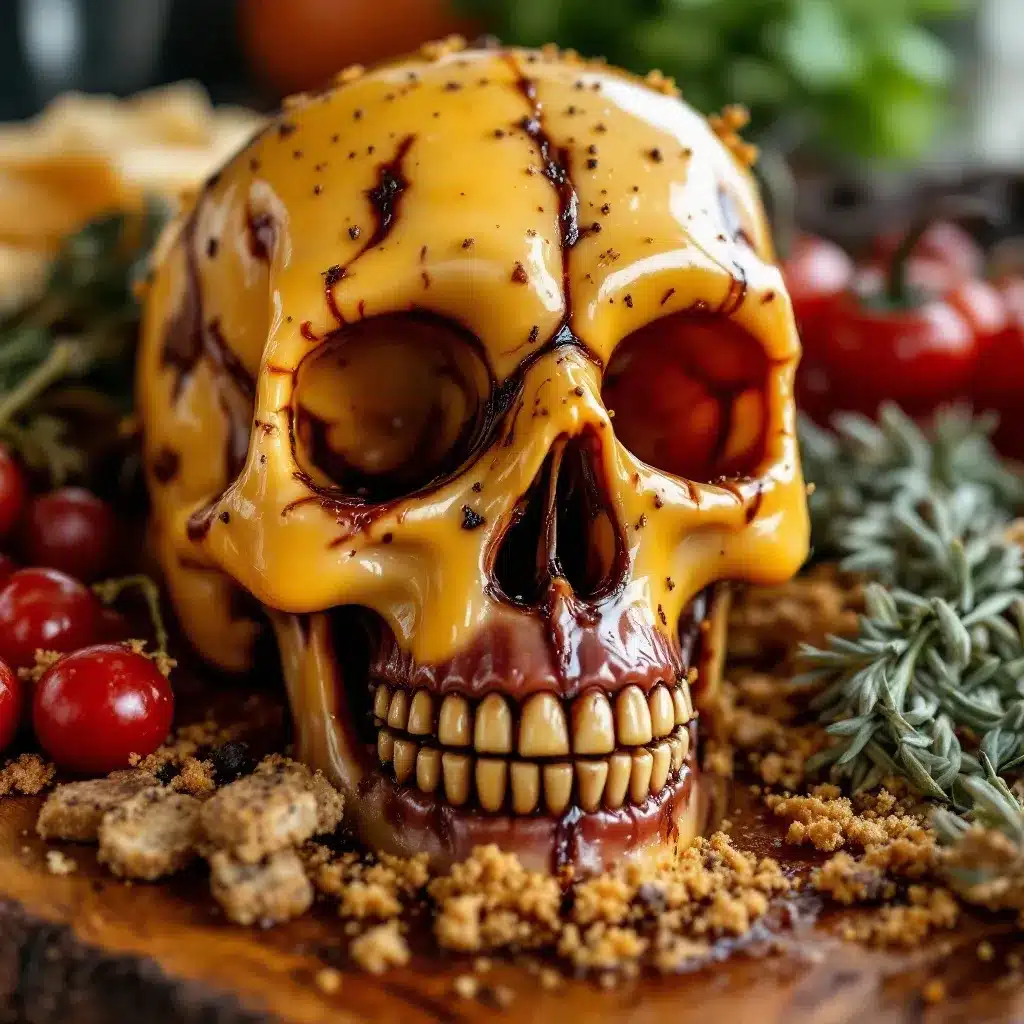
This is where the magic happens. Follow these steps, and you’ll have a platter of savory charcuterie skulls that look like they came from a professional caterer — but really came from your kitchen in under 30 minutes.
- Soften the cream cheese (5 minutes): Take your cream cheese out of the fridge about 30 minutes before you start, or microwave it in 10-second bursts until it’s soft but not melted. You want it to be spreadable, not runny. If it’s too cold, the mixture won’t blend evenly.
- Prep your ingredients (10 minutes): Shred the cheddar cheese if you haven’t already. Finely dice the provolone into tiny cubes — think pea-sized or smaller. Chop the prosciutto and salami into very fine pieces. Mince the chives and parsley. Trust me on the fine chopping — bigger chunks will make the skulls look lumpy and fall apart when you unmold them.
- Mix the base (5 minutes): In your mixing bowl, combine the softened cream cheese, shredded cheddar, diced provolone, chopped prosciutto, chopped salami, minced chives, minced parsley, garlic powder, onion powder, and black pepper. Stir until everything is evenly distributed. The mixture should be thick and slightly sticky, like a dense cheese ball. Taste a tiny bit and add salt only if needed — the meats usually provide enough.
- Pack the mold (5 minutes): Take your clean, dry skull mold and start pressing the cheese mixture firmly into each cavity. Use your fingers or the back of a spoon to really pack it in — you don’t want any air pockets. Overfill slightly so the top is flush with the mold. Smooth the backs with a spatula or your finger. If you’re using a mold with multiple cavities, work one at a time to keep the pressure even.
- Chill (at least 2 hours, or overnight): Cover the filled mold with plastic wrap and place it in the refrigerator. This step is crucial — the skulls need time to firm up so they hold their shape when you pop them out. I usually make these the night before a party and let them chill overnight. If you’re in a rush, 2 hours is the absolute minimum.
- Unmold (2 minutes): When you’re ready to serve, remove the plastic wrap and gently press on the back of each cavity to release the skull. If they’re stubborn, run the bottom of the mold under warm water for a few seconds — not too long, or the edges will start to melt. Place each skull on your serving platter as you go.
- Decorate (5 minutes): This is where you get to have fun. Press sliced black olives into the eye sockets for that classic skull look. You can also add a tiny piece of roasted red pepper for the nose cavity, or leave it empty for a more skeletal vibe. Arrange fresh rosemary sprigs around the skulls to look like creepy graveyard foliage. A sprinkle of flaky sea salt on top adds a nice finishing touch.
- Serve immediately or keep chilled: These are best served cold or at room temperature. If you’re setting them out for a party, they can sit out for up to 2 hours safely. Just keep an eye on them — if the room is warm, the cheese might start to soften.
One thing I learned the hard way: don’t skip the chilling step. I once tried to rush this and the skulls basically collapsed into a sad pile of cheese on my cutting board. It still tasted good, but it looked like a crime scene — and not in a fun Halloween way.
Cooking Tips & Techniques
After making these savory charcuterie skulls more times than I can count (and yes, I’ve made some mistakes along the way), here are my best tips for getting perfect results every time:
- Temperature matters: Cold cream cheese doesn’t blend well. Warm cream cheese makes the mixture too soft to hold its shape. Room temperature is the sweet spot. Set it out 30-45 minutes before you start.
- Chop everything fine: I cannot stress this enough. Big chunks of meat or cheese will create weak spots in the skulls. Think of it like making a meatball — you want everything uniform so it holds together.
- Pack it tight: When you’re filling the mold, really press the mixture in. Use your knuckles or the back of a spoon. Air pockets lead to cracked skulls.
- Don’t overmix: Stir just until everything is combined. Overmixing can make the cream cheese too soft and greasy.
- Use a non-stick mold: Silicone is your best friend here. If you’re using a plastic mold, give it a light spray with cooking oil before filling.
- Test one first: Before you unmold all the skulls, pop one out to check the texture. If it’s too soft, give them more chill time. If it’s too hard, let them sit at room temperature for 10 minutes.
- Make ahead friendly: These actually taste better after a day in the fridge — the flavors meld together beautifully. Just keep them covered so they don’t dry out.
I once made these for a Halloween party and forgot to chill them long enough. The first guest who tried to pick one up ended up with a handful of cheese crumbles. We laughed about it, but I learned my lesson. Now I always make them the night before.
If you’re looking for another make-ahead appetizer that’s perfect for parties, check out my mummy-wrapped sausages — they’re equally spooky and just as easy to prep ahead of time.
Variations & Adaptations
One of the best things about this recipe is how flexible it is. Here are some variations I’ve tried and loved:
- Spicy Version: Add 1/4 cup of finely chopped pickled jalapeños or a teaspoon of red pepper flakes to the mixture. The heat pairs beautifully with the creamy cheese. I made this for a game day party and it disappeared faster than the regular version.
- Smoky Version: Use smoked gouda instead of provolone and add 1/2 teaspoon of smoked paprika. The smoky flavor gives the skulls a deeper, almost bacon-like taste. Perfect for fall gatherings.
- Herb Garden Version: Swap the chives and parsley for a mix of fresh dill, basil, and thyme. This is lighter and brighter — great for a Halloween brunch or afternoon party.
- Dietary Adaptations: For a gluten-free version, this recipe is naturally gluten-free as written. For dairy-free, use vegan cream cheese and vegan shredded cheddar — just know the texture will be softer and they may not hold their shape as well. For a lower-fat version, use reduced-fat cream cheese and skip the provolone.
- Different Meats: Not a fan of prosciutto? Use all salami, or swap in finely chopped ham, turkey, or even pepperoni. Just make sure whatever you use is finely chopped.
- Cheese Board Style: Instead of forming skulls, press the mixture into a small bowl and serve it as a dip with crackers and veggies. It’s less spooky but just as delicious.
My personal favorite variation? The smoky version with a few drops of liquid smoke added to the cream cheese. It tastes like someone smoked a cheese ball over a campfire — in the best way possible. I served those at a Halloween party and someone asked if I’d actually smoked the cheese myself. Nope. Just a little paprika and liquid smoke magic.
Serving & Storage Suggestions
These savory charcuterie skulls are incredibly versatile when it comes to serving. Here’s how to make them shine:
- Serving Temperature: Serve them cold or at room temperature. If they’ve been in the fridge, let them sit out for 15-20 minutes before serving so the flavors open up. They’re best within the first 2 hours of being out.
- Presentation Ideas: Arrange the skulls on a dark slate board or black platter for maximum spooky effect. Surround them with crackers, breadsticks, and fresh veggies. Add rosemary sprigs to look like graveyard foliage, and scatter a few whole olives around for contrast. For an extra creepy touch, place them on a bed of crushed black crackers (look for “black charcoal crackers” online).
- What to Serve With: These pair beautifully with crisp crackers, sliced baguette, celery sticks, carrot sticks, and grape tomatoes. For drinks, a bold red wine or a dark beer complements the savory flavors. If you’re serving a full Halloween spread, these go great alongside my bacon-wrapped smokies for a sweet-and-savory combo.
- Storage: Store any leftover skulls in an airtight container in the refrigerator for up to 5 days. Place a piece of plastic wrap directly on the surface to prevent them from drying out. They actually taste even better the next day as the flavors meld together.
- Freezing: You can freeze these for up to 2 months. Wrap each skull individually in plastic wrap, then place them in a freezer bag. Thaw in the refrigerator overnight before serving. Note that the texture may be slightly softer after freezing, but the flavor is still great.
- Reheating: These are best served cold, so reheating isn’t necessary. If you prefer them slightly softened, let them sit at room temperature for 10-15 minutes before serving.
One thing I love about this recipe is how the flavors develop over time. The first day, they’re good. The second day, they’re incredible. The garlic and herbs really settle in and make everything taste even more savory. So don’t be afraid to make these a day or two ahead.
Nutritional Information & Benefits
While these savory charcuterie skulls are definitely a treat, they do offer some nutritional benefits:
| Nutrient | Amount per Skull (approx) |
|---|---|
| Calories | 120-150 |
| Protein | 8-10g |
| Fat | 9-11g |
| Carbohydrates | 2-3g |
| Fiber | 0g |
| Sugar | 1g |
| Sodium | 350-400mg |
Health Benefits: The cheese provides calcium and protein, while the meats add B vitamins and iron. The herbs contribute antioxidants and fresh flavor without extra calories. This is a high-protein, low-carb option that fits nicely into keto or low-carb diets — just serve with veggie sticks instead of crackers.
Dietary Considerations: This recipe is naturally gluten-free. It contains dairy and meat, so it’s not suitable for vegans or vegetarians. For a dairy-free version, use vegan cream cheese and vegan shredded cheese — just be aware the texture will be softer.
Allergens: Contains dairy. If you have a dairy allergy, this recipe isn’t for you in its current form. The meats are generally allergen-friendly, but always check labels for hidden ingredients.
From a wellness perspective, I love that this appetizer feels indulgent but isn’t loaded with sugar or empty carbs. It’s the kind of party food that actually satisfies you — not just something that fills space on a plate. Plus, it’s portion-controlled since each skull is a perfect single serving.
Conclusion
These savory charcuterie skulls are the Halloween appetizer you didn’t know you needed — until now. They’re spooky enough to impress your guests, easy enough to make in a pinch, and delicious enough to become a new tradition. No complicated techniques, no obscure ingredients, no hours in the kitchen. Just a clever twist on a classic cheese ball that happens to look like it crawled out of a graveyard.
What I love most about this recipe is how it brings people together. There’s something about food that looks a little bit scary that makes everyone want to try it. Kids love it. Adults love it. Even people who claim they “don’t do Halloween” end up reaching for one. And when they take that first bite and realize it’s actually amazing — that’s the moment that makes it all worth it.
So go ahead and give these a try. Customize them with your favorite cheeses and meats. Make them spicy, make them smoky, make them your own. And when you do, I’d love to hear about it. Leave a comment below and tell me how your skulls turned out — or better yet, share a photo on social media and tag me. There’s nothing I love more than seeing these creepy little creations out in the wild.
Happy Halloween, and happy snacking!
Frequently Asked Questions
Can I make these savory charcuterie skulls without a skull mold?
Yes! You can use any small-shaped silicone mold — pumpkins, ghosts, or even a mini loaf pan. If you don’t have a mold, press the mixture into a small bowl and serve it as a dip. It won’t look like skulls, but it’ll taste just as good.
How far in advance can I make these?
You can make them up to 3 days ahead of time. Store them in an airtight container in the refrigerator. The flavors actually get better after a day or two. Just add the olive eyes and rosemary garnish right before serving so they look fresh.
Can I use pre-shredded cheese?
You can, but I don’t recommend it. Pre-shredded cheese has anti-caking agents that can make the mixture grainy and prevent it from holding together well. Shredding your own cheese from a block takes just a few extra minutes and makes a big difference in texture.
What if my skulls fall apart when I unmold them?
This usually means they weren’t chilled long enough or the mixture wasn’t packed tightly enough. Pop them back in the fridge for another 30 minutes, then try again. If they still fall apart, just crumble the mixture and serve it as a dip — nobody will know it wasn’t the plan all along.
Can I add vegetables to the mixture?
Absolutely! Finely chopped roasted red peppers, sun-dried tomatoes, or even finely minced mushrooms work well. Just make sure any vegetables are very finely chopped and not too wet, or they’ll make the mixture too soft to hold its shape.
Pin This Recipe!
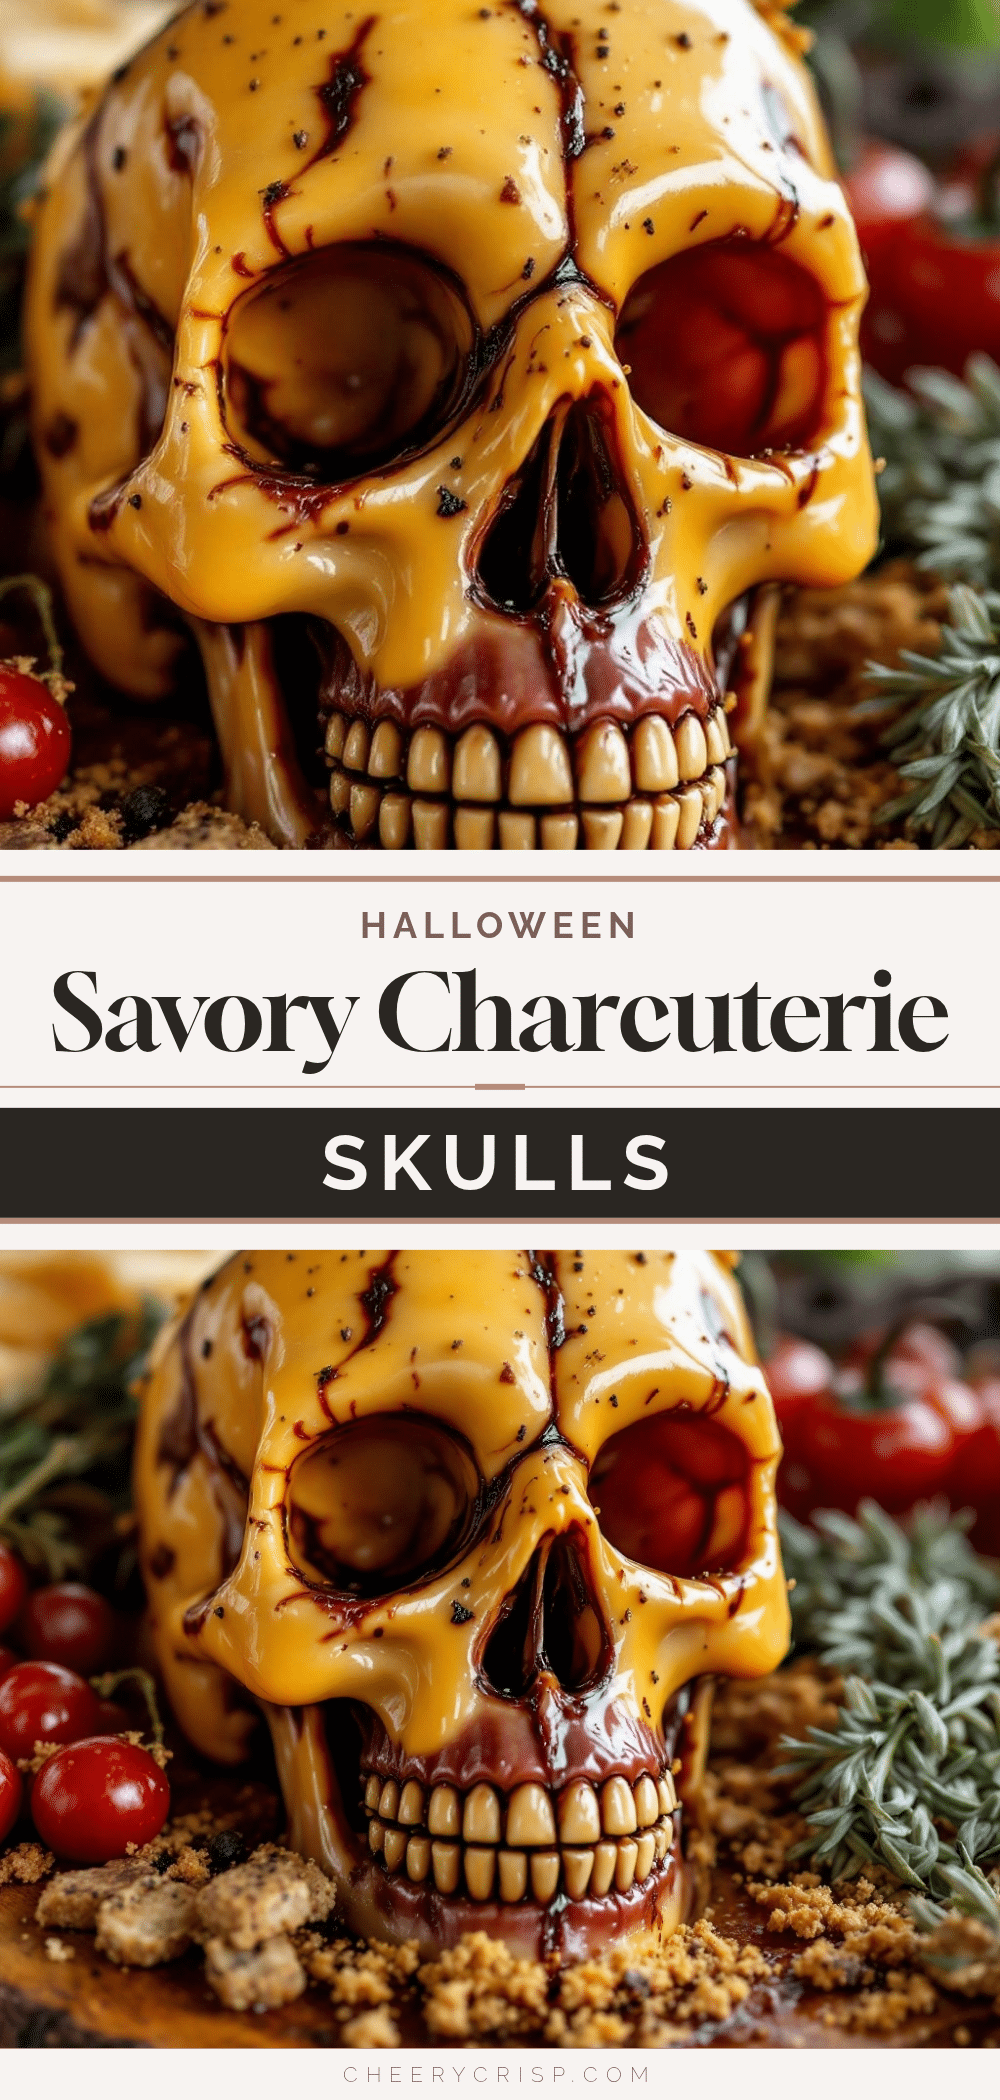
Savory Charcuterie Skulls: Easy & Best Halloween Party Appetizer

These savory charcuterie skulls are a spooky, savory Halloween appetizer that looks like a decoration but tastes like a cheese board. Made with cream cheese, cheddar, provolone, prosciutto, and salami, they’re quick, easy, and perfect for parties.
- Prep Time: 20 minutes
- Cook Time: 0 minutes
- Total Time: 2 hours 20 minutes (includes chilling)
- Yield: 8 servings 1x
- Category: Appetizer
- Cuisine: American
Ingredients
- 8 oz cream cheese, softened
- 1 cup sharp cheddar cheese, shredded
- 1/2 cup provolone cheese, finely diced
- 4 oz prosciutto, finely chopped
- 4 oz salami, finely chopped
- 2 tbsp fresh chives, minced
- 1 tbsp fresh parsley, minced
- 1/2 tsp garlic powder
- 1/2 tsp onion powder
- 1/4 tsp black pepper, freshly ground
- a pinch of salt (optional)
- olives for decoration (optional)
- fresh rosemary sprigs for garnish (optional)
Instructions
- Soften the cream cheese: Take cream cheese out of fridge 30 minutes before starting, or microwave in 10-second bursts until soft but not melted.
- Prep ingredients: Shred cheddar, finely dice provolone, chop prosciutto and salami into very fine pieces, mince chives and parsley.
- Mix the base: In a mixing bowl, combine softened cream cheese, shredded cheddar, diced provolone, chopped prosciutto, chopped salami, minced chives, minced parsley, garlic powder, onion powder, and black pepper. Stir until evenly distributed. Taste and add salt only if needed.
- Pack the mold: Press the cheese mixture firmly into a clean, dry skull-shaped silicone mold, filling each cavity completely and smoothing the backs.
- Chill: Cover the filled mold with plastic wrap and refrigerate for at least 2 hours, or overnight.
- Unmold: Remove plastic wrap and gently press on the back of each cavity to release the skulls. If stubborn, run the bottom of the mold under warm water for a few seconds.
- Decorate: Press sliced black olives into eye sockets. Add rosemary sprigs around the skulls for a graveyard look. Sprinkle with flaky sea salt if desired.
- Serve immediately or keep chilled. Best served cold or at room temperature.
Notes
Chilling is crucial for the skulls to hold their shape. Chop all ingredients very finely to avoid weak spots. Make ahead up to 3 days; flavors improve. For dairy-free, use vegan cream cheese and vegan cheddar (texture will be softer).
Nutrition
- Serving Size: 1 skull
- Calories: 135
- Sugar: 1
- Sodium: 375
- Fat: 10
- Saturated Fat: 5
- Carbohydrates: 2.5
- Protein: 9
Keywords: Halloween appetizer, charcuterie skulls, savory skulls, cheese skulls, party appetizer, spooky snack, easy Halloween recipe



