Love this? Save it for later!
Share the inspiration with your friends
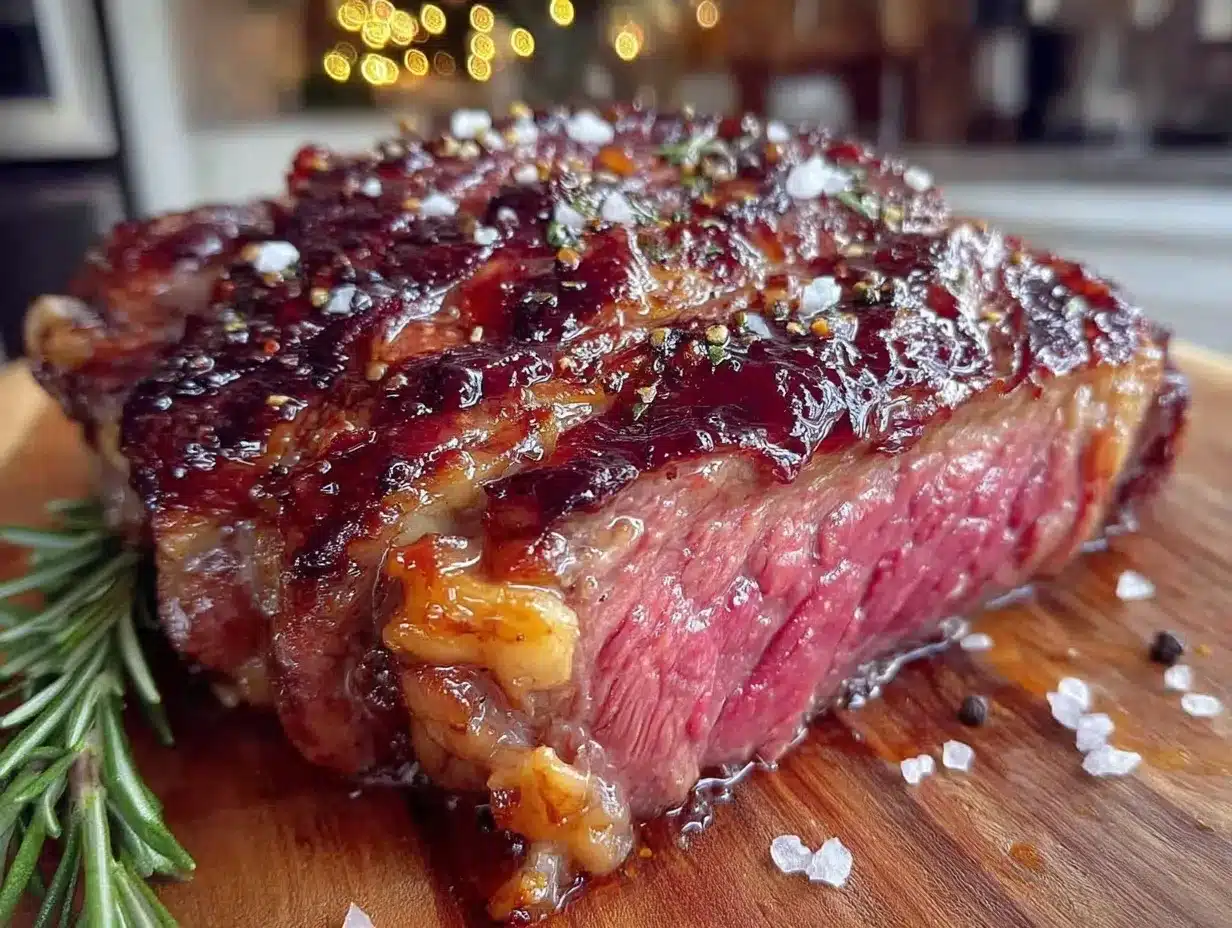
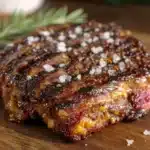
“Last Friday night, I found myself standing in my tiny kitchen, staring at a slab of dry-aged ribeye that was way too nice for my usual weeknight dinner experiments. I wasn’t exactly planning a steakhouse experience at home, but honestly, that steak called for something special. I’d heard whispers about the reverse sear method from a butcher at the local market—he swore it was the secret behind every perfectly crusted, juicy steak he ever made. So, there I was, trying to wrangle my oven and cast iron skillet in a dance I wasn’t entirely sure I knew the steps to yet.
You know that feeling when everything’s on edge—the timer’s ticking, the phone rings, and you might have forgotten to season the steak just right? Yeah, that was me, juggling the whole thing while my neighbor’s dog howled outside. But when that crust finally formed and I cut into the ribeye, the flavor was nothing short of unforgettable. It had this deep, nutty richness from the dry-aging, wrapped up in a smoky, tender bite that made me close my eyes and just savor it.
Maybe you’ve been there—wanting that steakhouse-quality ribeye without the stuffy atmosphere or the hefty bill. That’s exactly why this perfect dry-aged steakhouse ribeye with the reverse sear method has stuck with me. It’s not just about the technique but the way it turns a special cut into a showstopper right in your own kitchen. Let me tell you, once you nail this, your steak game will never be the same.”
Why You’ll Love This Recipe
This recipe is truly a game-changer for anyone who loves steak but wants to skip the guesswork and fuss. After countless trials and a few “almost there” moments, I perfected this method to get that tender interior and crispy crust every time. Here’s why it stands out:
- Quick & Easy: The reverse sear method takes about 45 minutes total, perfect for a weekend treat or a special occasion dinner.
- Simple Ingredients: Just a few quality staples — dry-aged ribeye, salt, pepper, and a bit of butter or oil for searing. No mystery spices or secret sauces needed.
- Perfect for Special Dinners: Whether it’s a date night or celebrating a small win, this steak feels fancy without the fuss.
- Crowd-Pleaser: This steak consistently gets “Wow!” reactions, even from the most serious meat lovers.
- Unbelievably Delicious: Dry-aging adds that complex, earthy depth, while reverse searing locks in juiciness and builds a crust that’s just right.
This isn’t just another steak recipe—you’re looking at a method that honors the quality of your dry-aged ribeye and brings out its best. The slow oven process gently cooks the steak through before the hot sear crisps it up, so no more burnt edges or undercooked centers. Honestly, it’s like having a steakhouse chef in your kitchen.
What Ingredients You Will Need
For this recipe, the ingredients list is wonderfully short but purposeful. Each one plays a role in highlighting the natural flavors and texture of the dry-aged ribeye.
- Dry-aged ribeye steak: about 1.5 to 2 inches thick, 16-20 oz (450-570g). The dry-aging develops a nutty, beefy flavor you just can’t skip.
- Coarse kosher salt: for seasoning, helps form the savory crust (Diamond Crystal is my go-to).
- Freshly ground black pepper: added just before searing to keep its bold aroma.
- High smoke point oil: such as grapeseed or avocado oil, about 1 tablespoon, for searing without burning.
- Unsalted butter: 2 tablespoons, added at the end of searing for richness and a glossy finish.
- Optional aromatics: a few sprigs of fresh thyme or rosemary and 2 cloves garlic, lightly crushed, to infuse subtle fragrance during the butter baste.
Pro tip: If you can’t find dry-aged ribeye, a well-marbled regular ribeye will still work, but you’ll miss the unique depth that comes from aging. Also, try to get a steak that’s evenly thick for more consistent cooking.
Equipment Needed
To pull off the reverse sear method perfectly, you don’t need a kitchen full of fancy gadgets. Here’s what I found essential:
- Oven: For the low-and-slow cooking step to evenly bring the steak to temperature.
- Cast iron skillet: The star of the searing process. It holds heat beautifully and creates that irresistible crust.
- Meat thermometer: A reliable instant-read or digital probe thermometer is a must. Guesswork in steak doneness is a recipe for disappointment.
- Wire rack and baking sheet: Allows air circulation around the steak in the oven for even cooking.
- Tongs: For flipping the steak without piercing it and losing juices.
If you don’t have cast iron, a heavy stainless steel skillet works, but avoid nonstick for searing. For budget-conscious cooks, a simple oven-safe wire rack and thermometer combo can be found easily online or at kitchen stores. I’ve tried different setups, and trust me, investing in a good meat thermometer changes everything.
Preparation Method
- Bring the steak to room temperature (about 30 minutes): Take your dry-aged ribeye out of the fridge and let it rest on the counter. This step helps the steak cook evenly. Don’t skip it—cold meat in a hot pan leads to uneven doneness.
- Preheat your oven to 275°F (135°C): This low temperature ensures slow, gentle cooking.
- Season the steak generously with kosher salt: Coat all sides evenly. You can add pepper later to avoid burning during the oven stage.
- Place the steak on a wire rack over a baking sheet: This setup allows hot air to circulate and cooks the steak uniformly.
- Insert your meat thermometer probe into the thickest part of the steak: Aim for an internal temperature of 115°F (46°C) for rare, 125°F (52°C) for medium-rare. This usually takes 20-30 minutes depending on thickness.
- Once the target temp is reached, remove the steak from the oven: Now’s the time to add freshly ground black pepper to both sides.
- Heat your cast iron skillet over high heat: Let it get smoking hot—this step is key for a proper crust.
- Add oil to the skillet: Swirl to coat the surface quickly.
- Sear the steak for about 1-2 minutes per side: Use tongs to flip, watching for that deep brown crust forming. Don’t forget the edges—stand the steak on its side and give those a quick flash too.
- Add butter, garlic, and herbs: Tilt the pan and spoon the melted butter over the steak repeatedly for about 30 seconds. This bastes the steak and adds incredible flavor.
- Remove the steak and let it rest for 5-10 minutes: Resting keeps the juices locked in. Resist the urge to cut too soon!
Pro tip: If your steak isn’t browning well, your pan probably isn’t hot enough. Patience here pays off big time. Also, keep an eye on your thermometer during searing to avoid overshooting the doneness.
Cooking Tips & Techniques
The reverse sear method can feel a bit fancy, but a few tricks from experience make it foolproof:
- Pat your steak dry: Before seasoning, use paper towels to remove surface moisture. Wet steak won’t brown properly.
- Don’t rush the oven stage: Slow cooking allows the steak to warm evenly, which is why the reverse sear produces such a perfect medium-rare.
- Use a thermometer you trust: I’ve learned the hard way that cheap models can be wildly off. A good digital probe is worth every penny.
- Keep the skillet smoking hot: Preheat for at least 5 minutes on high heat before adding oil.
- Flip only once: Let that crust form undisturbed, flipping too often disrupts it.
- Rest is non-negotiable: Cutting into a steak too soon wastes precious juices and leaves you with a dry bite.
Honestly, my first attempts were a mess—overcooked centers, burnt edges, and a smoky kitchen. But once I nailed the timing and heat, I was hooked. Multitasking helps here; while the steak’s in the oven, you can prep sides or clean up. That way, you’re ready to focus on the quick sear at the end.
Variations & Adaptations
This recipe is pretty classic, but I love throwing in little tweaks to keep it fresh:
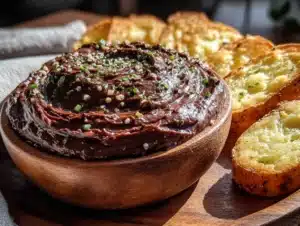
- Herb Butter Finish: Mix softened butter with minced garlic, parsley, and a squeeze of lemon juice. Dollop on the steak after resting for an herby, tangy twist.
- Spicy Crust: Add smoked paprika and cayenne pepper to your salt and pepper rub before cooking for a subtle heat kick.
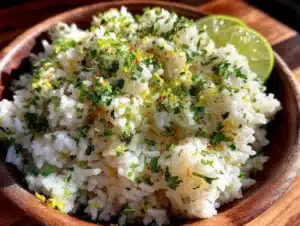
- Oven Roasted Vegetables: Pop some rosemary potatoes or asparagus in the oven alongside the steak for an easy one-pan meal.
- Grill Instead of Pan: After the oven, finish the steak on a very hot grill for that smoky char if you prefer outdoor cooking.
- Allergen-Free Tip: Skip the butter and baste with olive oil and fresh herbs if dairy-free.
Last winter, I tried finishing the steak with a quick blowtorch sear — it sounds fancy, but it gave the crust a beautifully even char without flipping. Not for everyone, but an interesting experiment!
Serving & Storage Suggestions
Serve your perfect dry-aged ribeye right after resting, sliced against the grain to maximize tenderness. I like to plate it simply—maybe a sprinkle of flaky sea salt on top and a side of garlic mashed potatoes or a fresh arugula salad to cut through the richness.
As for beverages, a bold red wine like Cabernet Sauvignon or Malbec complements the steak’s deep flavors beautifully. If you’re more of a beer person, a rich stout pairs surprisingly well too.
Leftovers? Wrap the steak tightly in foil and store it in the fridge for up to 3 days. Reheat gently in a low oven (about 250°F/120°C) covered with foil to preserve juiciness. Avoid microwaving, which tends to dry steak out.
Over time, the flavors mellow slightly, making leftover slices great for steak sandwiches or salads. Just don’t expect that fresh sear crust after reheating—though the taste remains fantastic.
Nutritional Information & Benefits
This ribeye recipe is rich and indulgent but also offers valuable nutrients. A 6-ounce (170g) serving of dry-aged ribeye provides about 450 calories, 35g of protein, and 35g of fat—mostly from the marbling that keeps the steak juicy.
Beef is an excellent source of bioavailable iron, zinc, and B vitamins, essential for energy and immune support. Dry-aging concentrates flavor but doesn’t significantly change nutrition.
For those watching fat intake, trimming the edges or choosing a leaner cut works fine, but you’ll miss some of that buttery texture. This recipe is naturally gluten-free and dairy-free if you skip the butter or swap it with a plant-based fat.
Personally, I enjoy this steak as a treat—balancing it with plenty of veggies and whole grains during the week keeps everything in check.
Conclusion
Making the perfect dry-aged steakhouse ribeye at home using the reverse sear method is one of those rare wins that feels like a small culinary celebration. With just a handful of ingredients and a bit of patience, you can get a steak that’s tender, flavorful, and crusted to perfection.
Feel free to customize the seasonings, sides, or finishing touches to suit your taste. Honestly, once you get this down, you’ll find yourself reaching for the ribeye whenever you want to impress or just treat yourself.
If you try this recipe, I’d love to hear how your steak turned out—drop a comment below or share your own tips! Cooking steak at home doesn’t have to be intimidating, and this method makes it approachable and rewarding. Here’s to many juicy, mouthwatering meals ahead!
Frequently Asked Questions
- What is the reverse sear method?
It’s a cooking technique where you slowly cook the steak in a low oven first, then finish by searing it in a hot pan to get a perfect crust. - Why use dry-aged ribeye?
Dry-aging concentrates the beef’s flavor and tenderizes the meat, giving it a unique, rich taste not found in fresh cuts. - Can I use a regular ribeye?
Yes, but it won’t have the same depth of flavor as dry-aged. The method still works great with any thick-cut ribeye. - How do I know when the steak is done?
Using a meat thermometer is best. Aim for 125°F (52°C) for medium-rare before searing. - Can I reverse sear on a grill?
Absolutely! Cook the steak slowly on indirect heat, then finish over high direct heat for the crust.
Pin This Recipe!

Perfect Dry-Aged Steakhouse Ribeye Recipe with Easy Reverse Sear Method
This recipe uses the reverse sear method to create a tender, juicy dry-aged ribeye steak with a perfect crust, ideal for steakhouse-quality results at home.
- Prep Time: 30 minutes
- Cook Time: 15 minutes
- Total Time: 45 minutes
- Yield: 1 steak (serves 1-2)
- Category: Main Course
- Cuisine: American
Ingredients
- Dry-aged ribeye steak, 16-20 oz (1.5 to 2 inches thick)
- Coarse kosher salt
- Freshly ground black pepper
- High smoke point oil (grapeseed or avocado oil), 1 tablespoon
- Unsalted butter, 2 tablespoons
- Optional aromatics: fresh thyme or rosemary sprigs, 2 cloves garlic (lightly crushed)
Instructions
- Bring the steak to room temperature for about 30 minutes.
- Preheat oven to 275°F (135°C).
- Season the steak generously with coarse kosher salt on all sides.
- Place the steak on a wire rack over a baking sheet.
- Insert a meat thermometer probe into the thickest part of the steak and cook in the oven until internal temperature reaches 115°F (46°C) for rare or 125°F (52°C) for medium-rare, about 20-30 minutes.
- Remove the steak from the oven and season both sides with freshly ground black pepper.
- Heat a cast iron skillet over high heat until smoking hot.
- Add 1 tablespoon of high smoke point oil to the skillet and swirl to coat.
- Sear the steak for 1-2 minutes per side, including the edges, using tongs to flip.
- Add 2 tablespoons unsalted butter, garlic, and herbs to the skillet; tilt the pan and spoon melted butter over the steak repeatedly for about 30 seconds.
- Remove the steak from the skillet and let it rest for 5-10 minutes before slicing.
Notes
Pat steak dry before seasoning to ensure proper browning. Use a reliable meat thermometer to avoid overcooking. Rest steak for 5-10 minutes after searing to lock in juices. If dairy-free, skip butter and baste with olive oil and fresh herbs instead.
Nutrition
- Serving Size: 6 oz (170g) cooked s
- Calories: 450
- Fat: 35
- Protein: 35
Keywords: dry-aged ribeye, reverse sear, steakhouse steak, ribeye recipe, easy steak recipe, cast iron steak, juicy steak, steak dinner