Love this? Save it for later!
Share the inspiration with your friends
I was standing in the grocery store aisle last Tuesday, staring at the brightly colored boxes of pre-made lunch kits, when the price tag hit me like a brick. Five dollars for a tiny circle of bread, some sauce, and a handful of cheese? I mean, come on. My wallet actually winced. And then, out of nowhere, I was ten years old again, sitting at my neighbor Mrs. Kowalski’s kitchen table, watching her pull a baking sheet of homemade mini pizzas out of the oven for her grandkids. She always had a smear of flour on her cheek and never used a recipe—just a pinch of this and a handful of that. The smell of melted cheese and warm dough filled her tiny kitchen, and I remember thinking, “This is way better than anything that comes in a box.”
That memory stuck with me, honestly, more than I expected. So I grabbed some English muffins, a jar of sauce, and a block of mozzarella, determined to recreate that feeling. The first batch? A bit of a mess, let me tell you. I used too much sauce and the muffins got soggy. But the second batch? That was the one. And somewhere between the third and fourth attempts, I realized I had stumbled onto something even better than Mrs. Kowalski’s version—a make-ahead system that saves time, money, and sanity. These easy make-ahead mini pizza Lunchables are the result of that grocery store moment, and they have completely changed how I handle lunch prep.
Maybe you have been there, too—staring at those overpriced kits, wondering if there is a better way. There is. And honestly, it tastes a whole lot better. This recipe is simple, budget-friendly, and the kind of thing you will actually look forward to making on a Sunday afternoon. It is comfort food you can pack in a lunchbox, and that is pretty special.
Why You Will Love This Recipe
Let me be real with you for a second. I have tested this recipe about a dozen times, tweaking the bake time, the sauce ratio, and even the type of cheese. I wanted it to be perfect for busy parents, meal preppers, and anyone who loves a good pizza but does not have time to make dough from scratch. Here is why these mini pizza Lunchables work so well:
- Quick and Easy: You can have a batch of these assembled in under 15 minutes. No yeast, no rising time, no complicated techniques.
- Simple Ingredients: Everything is a pantry staple. English muffins, pizza sauce, shredded cheese, and your favorite toppings. That is it.
- Perfect for Lunch Prep: Make a batch on Sunday, and you have lunches sorted for the whole week. They pack beautifully and taste great cold or reheated.
- Crowd-Pleaser: Kids love them, adults love them, and picky eaters cannot resist the mini pizza vibe.
- Unbelievably Delicious: The texture is spot on—crispy edges, soft center, melty cheese. It is comfort food at its finest, minus the hassle.
What makes this recipe different from the hundreds of other mini pizza ideas out there? It is the method. Instead of baking the pizzas fully and then reheating them (which can turn them into sad, soggy discs), I par-bake the English muffins first. This little trick ensures they stay crispy even after a few days in the fridge. I learned this the hard way after my first batch turned into a cheesy mess. Trust me, that extra five minutes makes all the difference.
This recipe is not just good—it is the kind that makes you close your eyes after the first bite. It is lunchbox comfort food reimagined: faster, cheaper, and with the same soul-soothing satisfaction as a full-sized pizza. Perfect for impressing your kids without breaking a sweat, or turning a simple weekday lunch into something memorable.
What Ingredients You Will Need
This recipe uses simple, wholesome ingredients to deliver bold flavor and satisfying texture without the fuss. Most of these are pantry staples, so you probably have everything on hand already. Here is what you need:
For the Base
- 6 English muffins (split in half) — I recommend Thomas’ or a good bakery brand for the best texture. Look for ones that are firm, not too airy.
- 1/2 cup pizza sauce — Use your favorite jarred sauce, or make a quick homemade version with canned tomatoes and Italian seasoning. Rao’s is my go-to for a clean ingredient list.
- 1 1/2 cups shredded mozzarella cheese — Low-moisture, part-skim mozzarella melts the best and does not make the pizzas greasy. You can also use fresh mozzarella, but pat it dry first.
- 1/4 cup grated Parmesan cheese (optional but recommended) — Adds a salty, nutty kick that takes these to the next level.
Topping Ideas
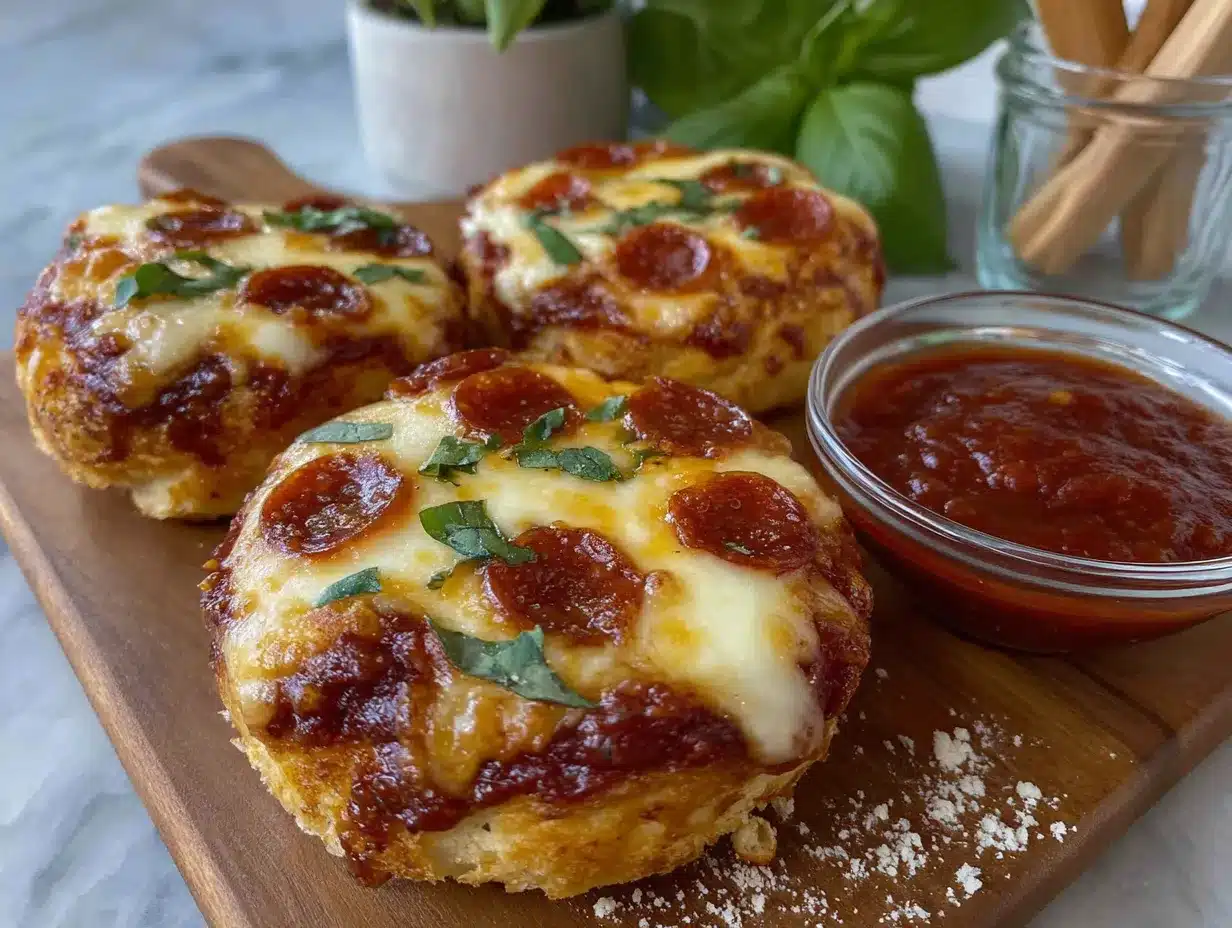
- Pepperoni slices (about 24 slices) — I like Boar’s Head or Applegate for a cleaner option.
- Cooked Italian sausage or ground beef — Crumble and drain well before adding.
- Diced bell peppers, mushrooms, or olives — Chop small so they fit nicely on the mini pizzas.
- Fresh basil leaves — Adds a pop of color and freshness after baking.
For Assembly and Storage
- Olive oil or cooking spray — For lightly toasting the muffins.
- Parchment paper or silicone baking mat — Makes cleanup a breeze.
- Reusable containers or zip-top bags — For storing the assembled Lunchables.
Ingredient Selection Tips: For the best results, use English muffins that are slightly stale or have been sitting in the pantry for a day or two. They hold up better to the sauce and cheese. If you are using fresh muffins, toast them a little longer in the oven. For the cheese, avoid pre-shredded bags if you can—they contain anti-caking agents that prevent smooth melting. Shred your own block of mozzarella for that gooey, stretchy texture we all love.
Substitution Guidance: Need a gluten-free option? Use gluten-free English muffins or even gluten-free bagels. For a dairy-free version, swap the mozzarella with a plant-based shred that melts well (I like Miyoko’s or Violife). You can also use a dairy-free pesto in place of pizza sauce for a different flavor profile. And if you are watching your sodium, opt for low-sodium sauce and skip the pepperoni.
Equipment Needed
You do not need fancy equipment for this recipe, which is part of the beauty. Here is what you will need:
- Baking sheet (half-sheet pan works great) — I use a Nordic Ware aluminum sheet for even heating.
- Parchment paper or silicone baking mat — Prevents sticking and makes cleanup easy.
- Small offset spatula or butter knife — For spreading the sauce evenly.
- Cheese grater — If you are shredding your own cheese (which I highly recommend).
- Cooling rack — Helps the pizzas cool evenly without getting soggy on the bottom.
- Sharp knife or pizza cutter — For cutting the assembled pizzas if you want smaller pieces for little hands.
- Reusable containers or compartment lunch boxes — For storing the make-ahead kits. I love the Bentgo brand for portion control.
If you do not have a cooling rack, no worries—just transfer the pizzas to a plate lined with paper towels to absorb any excess moisture. And if you are using a dark non-stick baking sheet, keep an eye on the bake time as they tend to brown faster. I learned that one the hard way when my first batch came out a little too toasty!
Preparation Method
Alright, let us get cooking. This method is straightforward, but I have included some tips and sensory cues to help you nail it every time.
- Preheat your oven to 375°F (190°C). Line a baking sheet with parchment paper or a silicone mat. This is your canvas, so make sure it is ready to go.
- Split the English muffins in half using a fork or your fingers. Do not use a knife—using a fork creates those craggy edges that get beautifully crispy in the oven. Arrange the muffin halves cut-side up on the prepared baking sheet.
- Par-bake the muffins for 5 minutes. This is the secret step that makes all the difference. Pop the baking sheet into the oven and bake the muffins until they are just starting to turn golden around the edges. You will notice a faint toasty smell—that is your cue. Pull them out and let them cool for a minute or two. Do not skip this step, or you will end up with soggy bottoms.
- Spread the sauce. Using your offset spatula or a spoon, spread about 1 tablespoon of pizza sauce onto each muffin half. Leave a small border around the edge so the sauce does not run off. You want an even, thin layer—too much sauce will make the muffin soggy.
- Add the cheese. Sprinkle about 2 tablespoons of shredded mozzarella onto each saucy muffin. If you are using Parmesan, add a pinch on top of the mozzarella. The cheese should cover the sauce completely but not be piled too high—think of it as a cozy blanket, not a mountain.
- Add your toppings. Now is the time to get creative. Add 2-3 pepperoni slices per pizza, or a spoonful of cooked sausage, or a few small veggie pieces. Do not overload them—remember, these are mini pizzas, and too many toppings can make them fall apart.
- Bake for 10-12 minutes. Place the baking sheet back in the oven and bake until the cheese is melted and bubbly and the edges of the muffins are golden brown and crispy. You will know they are done when the cheese starts to brown in spots and you can smell that irresistible pizza aroma filling your kitchen.
- Cool completely on a wire rack. This step is crucial if you are making these ahead of time. If you pack them while they are still warm, condensation will make them soggy. Let them sit for at least 15-20 minutes. Trust me on this—I learned the hard way after a sad, steamy lunchbox incident.
- Assemble the Lunchables. Once cooled, place each mini pizza in a compartment lunch container or a zip-top bag. If you are packing them for the week, I recommend separating layers with parchment paper to prevent sticking.
- Store in the refrigerator. These will keep for up to 5 days in the fridge. For longer storage, you can freeze them for up to 3 months. Just thaw overnight in the fridge before serving.
Pro Tip: If you want to prep these even faster, you can assemble the pizzas on the baking sheet, cover them with plastic wrap, and refrigerate them for up to 24 hours before baking. Just add 2-3 minutes to the bake time since they will be starting from cold.
Cooking Tips and Techniques
After making these mini pizza Lunchables about a dozen times, I have picked up a few tricks that make the process smoother and the results better. Here is what I have learned:
The Par-Bake is Non-Negotiable. I know it adds an extra step, but it is the difference between a crispy, satisfying mini pizza and a sad, soggy disc. Think of it as giving the English muffins a head start. They need that initial blast of heat to dry out the interior and create a barrier against the sauce.
Watch Your Sauce Ratio. This was my biggest mistake in the beginning. I love sauce, so I piled it on, thinking more is better. Nope. The muffins can only absorb so much moisture before they turn into a mushy mess. Stick to about 1 tablespoon per muffin half. If you want extra sauce flavor, brush a little olive oil on the muffins before par-baking—it adds a subtle richness without the sogginess.
Cheese Matters. Low-moisture mozzarella is your best friend here. Fresh mozzarella has too much water content and will make the pizzas wet. If you only have fresh mozzarella, slice it and let it sit on a paper towel for 15 minutes to draw out excess moisture before using.
Multitask Like a Pro. While the muffins are par-baking, shred your cheese and prep your toppings. That way, everything is ready to go when the muffins come out. I keep a small bowl of pepperoni and a dish of shredded cheese in the fridge at all times during prep week—it makes assembly a breeze.
Do Not Overbake. The cheese should be melted and bubbly, not browned and crispy. Overbaking dries out the muffins and makes them hard. Pull them out when the cheese just starts to show a few golden spots.
My Biggest Failure: I once tried to make these in a toaster oven to save time. Big mistake. The heat distribution was uneven, and half the batch came out burned while the other half was undercooked. Stick with the oven—it is worth the extra few minutes.
Consistency Tip: If you are making a large batch for the week, write the bake date on the container with a piece of tape. That way, you know which ones to eat first. I learned this after finding a forgotten container in the back of the fridge that was a week past its prime. Not my finest moment.
Variations and Adaptations
One of the best things about this recipe is how customizable it is. Here are some variations I have tried and loved:
Dietary Variations
- Gluten-Free: Use gluten-free English muffins or small gluten-free bagels. Par-bake them a minute or two longer since gluten-free bread tends to be denser.
- Dairy-Free: Swap the mozzarella with a plant-based shred that melts well. I have had good luck with Daiya and Follow Your Heart. Add a sprinkle of nutritional yeast for a cheesy flavor boost.
- Low-Carb/Keto: Use portobello mushroom caps or large bell pepper halves as the base. Roast them for 5 minutes first to remove excess moisture, then add sauce and cheese and bake until bubbly.
Flavor Variations
- BBQ Chicken: Swap the pizza sauce for BBQ sauce, top with shredded cooked chicken, red onion, and cheddar cheese. Bake as directed.
- Hawaiian: Add diced ham and pineapple chunks (pat the pineapple dry first to avoid sogginess).
- Veggie Supreme: Load up with sliced mushrooms, bell peppers, red onion, and black olives. Sprinkle with dried oregano before baking.
- Pesto and Tomato: Use pesto instead of pizza sauce, top with cherry tomato halves and fresh mozzarella. Bake until bubbly and garnish with fresh basil.
Customization Tips
My personal favorite variation is the BBQ chicken version. I made it one night when I had leftover rotisserie chicken and a bottle of Sweet Baby Ray’s in the fridge. It was so good that my husband asked me to make it again the next week. The smoky sweetness of the BBQ sauce pairs perfectly with the crispy muffin base.
If you are packing these for picky eaters, let them choose their own toppings. Set up a little assembly line with bowls of different ingredients and let everyone build their own mini pizza. It turns lunch prep into a fun activity, and kids are more likely to eat something they helped create.
Serving and Storage Suggestions
These mini pizza Lunchables are designed to be served at room temperature or cold, straight from the lunchbox. But if you want to warm them up, here is how:
- Microwave: Place on a microwave-safe plate and heat for 30-45 seconds. The cheese will get melty again, but the muffin will lose some of its crispiness.
- Toaster Oven: This is my preferred method. Toast at 350°F (175°C) for 5-7 minutes. The muffin gets crispy again, and the cheese stays gooey.
- Air Fryer: Air fry at 350°F (175°C) for 3-4 minutes. This gives the crispiest results and is super fast.
Storage Instructions: Store the assembled mini pizzas in an airtight container in the refrigerator for up to 5 days. If you are stacking them, place a piece of parchment paper between layers to prevent the cheese from sticking. For freezing, arrange the cooled pizzas in a single layer on a baking sheet and freeze for 1 hour, then transfer to a freezer-safe bag or container. They will keep for up to 3 months. Thaw overnight in the fridge before serving.
Flavor Development: Here is a little secret—these pizzas actually taste better on day two. The flavors have time to meld together, and the muffin softens just slightly while still maintaining a good texture. So do not be afraid to make them a few days ahead.
What to Serve With Them: Pair these mini pizzas with a side of baby carrots, apple slices, or a small salad for a balanced lunch. A handful of grapes or a yogurt tube also makes a great addition. For a fun treat, throw in a small cookie or a piece of dark chocolate.
Nutritional Information and Benefits
Here is the approximate nutritional breakdown for one mini pizza (made with standard ingredients, no extra toppings):
| Nutrient | Amount per Serving |
|---|---|
| Calories | 180 |
| Total Fat | 7g |
| Saturated Fat | 3.5g |
| Cholesterol | 15mg |
| Sodium | 420mg |
| Total Carbohydrates | 22g |
| Dietary Fiber | 1g |
| Sugars | 3g |
| Protein | 9g |
Health Benefits: These mini pizzas offer a good balance of carbohydrates for energy, protein for satiety, and calcium from the cheese for bone health. If you use whole wheat English muffins, you will get an extra boost of fiber. Adding veggie toppings increases the vitamin and mineral content, making this a more nutritious option than store-bought lunch kits that are often loaded with preservatives and artificial ingredients.
Dietary Considerations: This recipe can easily be adapted for gluten-free, dairy-free, or low-carb diets (see variations above). It is nut-free as written, making it a safe option for school lunches. The sodium content can be reduced by using low-sodium sauce and skipping the pepperoni.
From a wellness perspective, I love that this recipe puts me in control of what goes into my family’s food. No mystery ingredients, no artificial colors, no high-fructose corn syrup. Just real food that tastes great and makes lunchtime a little more special.
Conclusion
These easy make-ahead mini pizza Lunchables have honestly become a staple in our house. They save money, they save time, and they bring a little bit of joy to an otherwise ordinary lunch. Whether you are packing them for school, work, or a picnic, they are guaranteed to put a smile on your face.
I hope you give this recipe a try and make it your own. Add your favorite toppings, experiment with different sauces, and do not be afraid to get creative. That is the beauty of cooking—there is always room for a little personal touch.
I would love to hear how yours turn out! Drop a comment below and let me know what toppings you used, or share a photo of your mini pizza creations. And if you have a variation that you absolutely love, please share it—I am always looking for new ideas to try. Happy cooking, friends!
Frequently Asked Questions
Can I use regular bread instead of English muffins?
You can, but the texture will be different. English muffins have a sturdy, slightly chewy texture that holds up well to the sauce and cheese. Regular bread tends to get soggy more easily. If you use bread, toast it first and use less sauce.
How do I keep the mini pizzas from getting soggy in the lunchbox?
The key is to let them cool completely before packing. Any residual heat will create condensation inside the container, leading to sogginess. Also, make sure to par-bake the muffins as directed—that extra step creates a barrier against moisture.
Can I freeze these mini pizza Lunchables?
Absolutely! Freeze them in a single layer on a baking sheet for 1 hour, then transfer to a freezer-safe bag or container. They will keep for up to 3 months. Thaw overnight in the fridge before serving, or reheat directly from frozen in a toaster oven or air fryer.
What is the best cheese to use for these mini pizzas?
Low-moisture, part-skim mozzarella is the best choice. It melts smoothly without making the pizzas greasy. Avoid fresh mozzarella as it contains too much water. If you want extra flavor, mix in a little provolone or cheddar.
Can I make these mini pizzas in an air fryer instead of the oven?
Yes, you can! Preheat your air fryer to 350°F (175°C). Par-bake the muffins for 3 minutes, then add sauce, cheese, and toppings. Air fry for 5-7 minutes until the cheese is bubbly and the edges are crispy. Keep an eye on them as air fryers cook faster than ovens.
Pin This Recipe!
Best Easy Make-Ahead Mini Pizza Lunchables
These easy make-ahead mini pizza Lunchables are a budget-friendly, time-saving alternative to store-bought kits. Made with English muffins, pizza sauce, and mozzarella, they are perfect for lunch prep and taste great cold or reheated.
- Prep Time: 15 minutes
- Cook Time: 15 minutes
- Total Time: 30 minutes
- Yield: 12 servings 1x
- Category: Main Course
- Cuisine: American
Ingredients
- 6 English muffins (split in half)
- 1/2 cup pizza sauce
- 1 1/2 cups shredded low-moisture mozzarella cheese
- 1/4 cup grated Parmesan cheese (optional)
- Pepperoni slices (about 24 slices, optional)
- Cooked Italian sausage or ground beef (optional)
- Diced bell peppers, mushrooms, or olives (optional)
- Fresh basil leaves (optional)
- Olive oil or cooking spray
- Parchment paper or silicone baking mat
Instructions
- Preheat your oven to 375°F (190°C). Line a baking sheet with parchment paper or a silicone mat.
- Split the English muffins in half using a fork or your fingers. Arrange the muffin halves cut-side up on the prepared baking sheet.
- Par-bake the muffins for 5 minutes until they are just starting to turn golden around the edges. Remove from the oven and let cool for a minute or two.
- Spread about 1 tablespoon of pizza sauce onto each muffin half, leaving a small border around the edge.
- Sprinkle about 2 tablespoons of shredded mozzarella onto each saucy muffin. If using Parmesan, add a pinch on top.
- Add your desired toppings (e.g., 2-3 pepperoni slices per pizza, or a spoonful of cooked sausage, or a few small veggie pieces).
- Bake for 10-12 minutes until the cheese is melted and bubbly and the edges of the muffins are golden brown and crispy.
- Cool completely on a wire rack for at least 15-20 minutes.
- Once cooled, place each mini pizza in a compartment lunch container or a zip-top bag. If packing for the week, separate layers with parchment paper.
- Store in the refrigerator for up to 5 days, or freeze for up to 3 months. Thaw overnight in the fridge before serving.
Notes
Par-baking the English muffins is the secret to keeping them crispy. Let the pizzas cool completely before packing to avoid sogginess. For faster prep, assemble the pizzas on the baking sheet, cover with plastic wrap, and refrigerate for up to 24 hours before baking (add 2-3 minutes to bake time).
Nutrition
- Serving Size: 1 mini pizza
- Calories: 180
- Sugar: 3
- Sodium: 420
- Fat: 7
- Saturated Fat: 3.5
- Carbohydrates: 22
- Fiber: 1
- Protein: 9
Keywords: mini pizza, lunchables, make-ahead, meal prep, English muffin pizza, kid-friendly lunch



