Love this? Save it for later!
Share the inspiration with your friends
I wasn’t expecting lunchbox advice from my accountant, but there I was, knee-deep in tax paperwork, listening to Mr. Henderson describe exactly how to make turkey pinwheel wraps. The man who usually talks about depreciation schedules was suddenly animated about cream cheese and flour tortillas. He told me his wife had been making these for their kids for years, and they still requested them even as teenagers. I scribbled the basic idea on a sticky note, honestly not sure if I’d ever actually make them. But the image stuck with me—those perfect little spirals of turkey and cream cheese, packed tight and sliced into bite-sized rounds. I mean, who would have thought my tax guy would be the source of my new favorite lunchbox recipe?
That first batch I made was a bit of a mess, let me tell you. I overstuffed the tortillas, and the cream cheese squished out the sides like a bad sandwich accident. But even those ugly ones tasted amazing. My kids devoured them, and my husband kept sneaking them from the fridge when he thought I wasn’t looking. There’s something about the combination of creamy, savory, and slightly tangy that just works. Plus, they’re cold, which makes them perfect for lunchboxes—no reheating required.
Maybe you’ve been there, staring at the same old sandwich options, wondering how to make lunch exciting again. These easy turkey pinwheel wraps are the answer. They look fancy enough to impress at a party but are simple enough for a Tuesday lunch. The best part? You can prep them the night before, and they actually taste better after sitting in the fridge for a few hours. The flavors meld together, and the tortillas soften just enough to roll perfectly. Honestly, I’ve been making these every week since that tax appointment, and I’m still not tired of them. That’s how you know a recipe is a keeper.
Why You’ll Love This Recipe
Let me walk you through why these turkey pinwheel wraps have become my go-to for just about every occasion. I’ve tested this recipe at least a dozen times, tweaking the cream cheese ratio and trying different fillings until it was just right. Trust me when I say this version is the one.
- Quick & Easy: From start to finish, you’re looking at about 15 minutes of active prep time. No cooking, no complicated techniques—just spread, layer, roll, and slice. Perfect for those mornings when you’re running late.
- Simple Ingredients: You probably already have cream cheese and tortillas in your kitchen right now. The rest is just turkey and a few add-ins. No fancy grocery store trips required.
- Perfect for Lunchboxes: These hold up beautifully in a lunchbox. No sogginess, no falling apart. They’re sturdy enough for school lunches, work lunches, or even picnics.
- Crowd-Pleaser: I’ve served these at playdates, potlucks, and holiday parties. Kids and adults alike grab them up. They’re somehow both kid-friendly and adult-approved.
- Unbelievably Delicious: The cream cheese spread is the secret weapon here. It binds everything together and adds this rich, tangy flavor that makes every bite satisfying.
What makes this recipe different from all the other pinwheel recipes out there? It’s the cream cheese technique. Instead of just slathering it on, I let it come to room temperature first and whip it with a fork until it’s fluffy. This small step makes the spread easier to work with and creates a lighter texture in the final wrap. Plus, I add a pinch of seasoning to the cream cheese—something most recipes skip. It makes a world of difference.
This isn’t just another lunch idea. It’s the kind of recipe that makes you feel like you’ve got your act together, even on chaotic mornings. The first time you slice into that perfect spiral and see the layers, you’ll understand why I keep making them. Comfort food that’s actually good for you, fast enough for busy days, and pretty enough to be proud of. That’s a win in my book.
What Ingredients You Will Need
This recipe uses simple, wholesome ingredients to deliver big flavor without the fuss. Most of these are pantry staples, and the ones that aren’t are easy to find at any grocery store.
- 8 oz cream cheese, softened to room temperature (Use full-fat for best flavor and texture. I prefer Philadelphia brand—it spreads the creamiest.)
- 1/2 teaspoon garlic powder (Adds a subtle savory note without being overpowering.)
- 1/4 teaspoon onion powder (Optional, but I love the extra depth it brings.)
- 1/4 teaspoon black pepper, freshly ground (Skip the pre-ground stuff if you can—fresh makes a difference.)
- 1/4 teaspoon salt (Just a pinch to bring everything together.)
- 4 large flour tortillas (10-inch) (Look for burrito-sized tortillas. Spinach or sun-dried tomato flavored ones add nice color.)
- 12 slices deli turkey breast (I like oven-roasted turkey for its mild flavor. Get it sliced thin but not shaved.)
- 1/2 cup shredded cheddar cheese (Sharp cheddar gives the best tang. You could also use provolone or mozzarella.)
- 1/2 cup fresh spinach leaves, washed and dried (Optional, but adds a nice crunch and color. Pat them really dry so they don’t make the wrap soggy.)
- 1/4 cup sun-dried tomatoes, chopped (Optional. I use the oil-packed kind, drained well. They add a sweet-tangy pop.)
For the cream cheese spread, letting it come to room temperature is non-negotiable. Cold cream cheese will tear your tortillas and leave lumpy spots. I take mine out about 30 minutes before I start. If you’re in a hurry, you can microwave it for 10-15 seconds, but watch it carefully—you don’t want it melted.
If you’re looking for substitutions, Greek yogurt cream cheese works well for a lighter version. I’ve also used dairy-free cream cheese with good results, though the texture is slightly less creamy. For a gluten-free option, use gluten-free tortillas. They tend to be more delicate, so roll them gently.
Equipment Needed
You don’t need much for this recipe, which is part of its charm. Here’s what I use:
- Cutting board (A large one gives you room to work.)
- Chef’s knife or serrated knife (A serrated knife works best for slicing through the wraps without squishing them. I learned this after ruining a few with my dull chef’s knife.)
- Small mixing bowl (For whipping the cream cheese.)
- Rubber spatula or butter knife (For spreading the cream cheese mixture evenly.)
- Plastic wrap (Essential for wrapping the rolls tightly before chilling.)
- Baking sheet or large plate (To hold the wrapped rolls in the fridge.)
- Toothpicks (Optional, for securing the rolls if they seem loose.)
If you don’t have plastic wrap, you can use beeswax wraps or even a damp paper towel. The key is to keep the rolls tight while they chill. I’ve also used a parchment paper roll, but it doesn’t stick as well. Honestly, plastic wrap works best here.
For the knife, invest in a good serrated one if you make these often. It makes clean slices without dragging the filling out. I picked mine up at a kitchen supply store for about $15, and it’s been worth every penny.
Preparation Method

Let me walk you through this step by step. I’ve included all the little details I wish someone had told me the first time I made these.
- Soften the cream cheese. Take the cream cheese out of the fridge about 30 minutes before you start. If you’re short on time, unwrap it and microwave on low power for 10 seconds. Check it—it should be soft to the touch but not warm. You want it spreadable, not melted.
- Make the cream cheese spread. In a small bowl, combine the softened cream cheese with garlic powder, onion powder, black pepper, and salt. Stir with a rubber spatula or fork until smooth and fluffy. This takes about 2 minutes. Taste it—you should get a hint of garlic without it being overwhelming. Adjust the seasoning if needed.
- Prepare your workspace. Clear a large area on your counter. Lay out one tortilla flat on your cutting board. Make sure it’s at room temperature—cold tortillas crack when you roll them. If they’ve been in the fridge, let them sit out for 5 minutes.
- Spread the cream cheese mixture. Using your spatula, spread about 2 tablespoons of the cream cheese mixture evenly over the entire surface of the tortilla. Go all the way to the edges—this helps the wrap stick together later. Don’t use too much, or it will squish out when you roll. I learned this the hard way after a cream cheese explosion on my first attempt.
- Layer the turkey. Place 3 slices of turkey breast over the cream cheese, overlapping them slightly. Make sure they cover the tortilla evenly. Leave about 1/2 inch of the far edge uncovered—this gives you a clean seal when you roll.
- Add the extras. Sprinkle about 2 tablespoons of shredded cheddar cheese over the turkey. If you’re using spinach, lay a few leaves on top. Add a sprinkle of chopped sun-dried tomatoes if you like. Don’t overload it—less is more here. You want the roll to be tight, not bulging.
- Roll it up tight. Starting from the edge closest to you, begin rolling the tortilla away from you. Use your fingers to keep the filling tucked in as you go. Roll firmly but gently—you want it snug without tearing the tortilla. When you reach the end, press down lightly to seal the edge. The cream cheese acts like glue here.
- Wrap in plastic. Place the rolled tortilla on a piece of plastic wrap. Roll it up tightly, twisting the ends like a candy wrapper. This keeps the roll compact while it chills. Repeat with the remaining tortillas.
- Chill for at least 1 hour. Place the wrapped rolls on a baking sheet or plate and refrigerate for at least 1 hour. Overnight is even better. The chilling time allows the cream cheese to firm up, which makes slicing much easier. I’ve tried slicing them immediately, and it was a disaster—the filling oozed out everywhere.
- Slice and serve. When you’re ready to eat, unwrap one roll at a time. Using a serrated knife, slice the roll into 1-inch rounds. Use a gentle sawing motion—don’t press straight down. You should get about 6-8 pinwheels per tortilla. Arrange them on a plate and serve cold.
If the pinwheels seem loose after slicing, you can secure each one with a toothpick. This is especially helpful if you’re serving them at a party where people will be picking them up. The toothpicks also make them look a bit fancier, honestly.
Cooking Tips & Techniques
After making these dozens of times, I’ve picked up a few tricks that make a real difference. Let me share them so you don’t have to learn the hard way.
Don’t overfill. This is the number one mistake I see people make. It’s tempting to pile on the turkey and cheese, but too much filling makes the roll impossible to close. Stick to 3 slices of turkey and a light sprinkle of cheese. You want the spiral to be tight and clean, not bulging and messy.
Use room temperature tortillas. Cold tortillas crack and tear when you try to roll them. Let them sit out for 5-10 minutes before you start. If you’re in a rush, you can microwave them for 10 seconds to warm them up slightly. They should be pliable but not hot.
Chill time is non-negotiable. I know it’s tempting to skip this step when you’re hungry, but trust me—don’t. The chilling time allows the cream cheese to firm up, which makes slicing clean and easy. Without it, you’ll end up with squished, messy pinwheels. One hour is the minimum, but overnight is ideal. I usually make these the night before and slice them in the morning.
Use a serrated knife for slicing. A sharp serrated knife cuts through the tortilla without squishing the filling. Use a gentle sawing motion, and don’t press down hard. If your knife is dull, you’ll drag the filling out and end up with ragged edges. I ruined my first batch with a dull chef’s knife—never again.
Keep the rolls wrapped until slicing. If you unwrap all the rolls at once, they start to dry out and lose their shape. Slice one roll at a time, keeping the others wrapped in the fridge. This keeps them fresh and tight.
Double the recipe for meal prep. These freeze beautifully, so I often make a double batch. Just wrap the uncut rolls tightly in plastic wrap and then in foil. Freeze for up to 3 months. When you’re ready, thaw them in the fridge overnight and slice as usual. It’s a lifesaver for busy weeks.
Variations & Adaptations
One of the best things about this recipe is how adaptable it is. I’ve tried several variations, and they’ve all been hits. Here are some of my favorites.
Vegetarian Version: Skip the turkey and use roasted red peppers, cucumber strips, and avocado slices instead. The cream cheese still holds everything together, and the vegetables add a fresh crunch. I made this for a vegetarian friend, and she asked for the recipe immediately.
Spicy Southwest Twist: Add 1/4 cup of canned black beans (rinsed and drained) and 2 tablespoons of diced jalapeños to the filling. Use pepper jack cheese instead of cheddar. The cream cheese tones down the heat, so it’s flavorful without being overwhelming. This version is great for game day snacks.
Everything Bagel Style: Mix 1 tablespoon of everything bagel seasoning into the cream cheese spread. Use smoked turkey and add a thin layer of cream cheese on the outside of the roll before slicing. Roll the sliced pinwheels in more everything seasoning. It tastes just like an everything bagel, but in pinwheel form. My kids call these “the fancy ones.”
Low-Carb Option: Use large lettuce leaves (like romaine or butter lettuce) instead of tortillas. Spread the cream cheese mixture on the lettuce, layer the turkey, and roll carefully. These are more delicate, so use toothpicks to hold them together. They’re perfect for keto diets or anyone watching their carbs.
Breakfast Pinwheels: Swap the turkey for crispy bacon or ham, and add a scrambled egg layer. Use a milder cheese like mozzarella. These make a great grab-and-go breakfast. I’ve packed them for road trips, and they hold up beautifully.
Serving & Storage Suggestions
These turkey pinwheel wraps are best served cold, straight from the fridge. The cream cheese should be firm but not hard, and the tortilla should be soft and pliable. I like to arrange them on a platter in a single layer, with the spiral facing up so you can see the layers.
For a lunchbox, pack the pinwheels in a container with a tight-fitting lid. Add a small ice pack to keep them cold if you’re not refrigerating them. They pair beautifully with fresh fruit, baby carrots, or a small salad. My kids love them with apple slices and a handful of grapes.
If you’re serving them at a party, arrange them on a large plate with a bowl of ranch dip or honey mustard in the center. They’re always the first thing to disappear. I’ve also served them as part of a brunch spread alongside quiche and fresh fruit.
Storage Instructions: Keep the uncut rolls wrapped tightly in plastic wrap in the refrigerator for up to 5 days. Once sliced, they’re best eaten within 24 hours. The exposed edges can dry out over time. If you have leftovers, store them in an airtight container in the fridge for up to 2 days.
Freezing Instructions: Wrap the uncut rolls tightly in plastic wrap, then in aluminum foil. Freeze for up to 3 months. To thaw, transfer to the refrigerator overnight. Slice and serve cold. Do not refreeze after thawing.
Reheating Note: These are meant to be eaten cold. If you prefer them warm, you can microwave a few pinwheels for 10-15 seconds, but the texture won’t be as good. Honestly, they’re best straight from the fridge.
Nutritional Information & Benefits
Each serving (about 6 pinwheels) contains approximately 320 calories, 18g protein, 22g carbohydrates, and 16g fat. These are estimates and will vary based on your specific ingredients and portion sizes.
These pinwheels offer a good balance of protein from the turkey and cream cheese, along with calcium from the cheese. The spinach adds iron and vitamins A and C, while the sun-dried tomatoes provide lycopene and antioxidants. If you use whole wheat tortillas, you’ll get extra fiber.
For those watching their sodium, look for low-sodium turkey breast and use reduced-fat cream cheese. You can also skip the added salt in the cream cheese spread. The garlic and onion powder provide plenty of flavor without extra sodium.
This recipe is naturally nut-free and egg-free, making it safe for many common allergies. If you’re dairy-free, use dairy-free cream cheese and cheese alternatives. The texture will be slightly different, but the flavor is still great.
I love that these pinwheels feel indulgent but are actually pretty balanced. They keep me full until dinner without that heavy, weighed-down feeling. It’s comfort food that works with your health goals, not against them.
Conclusion
These easy turkey pinwheel wraps have become a staple in my kitchen for good reason. They’re quick, simple, and endlessly adaptable. Whether you’re packing lunchboxes, hosting a party, or just need a satisfying snack, these little spirals deliver every time.
I love how they bring people together. Every time I make them, someone asks for the recipe. They’re that kind of dish—unassuming but unforgettable. The cream cheese spread is the secret, and once you’ve mastered it, you’ll find yourself making them for every occasion.
Don’t be afraid to make them your own. Swap in your favorite fillings, adjust the seasonings, or try one of the variations I shared. That’s the beauty of this recipe—it’s a canvas for your creativity. And honestly, the imperfect ones taste just as good as the perfect ones.
I’d love to hear how yours turn out. Drop a comment below and let me know what fillings you used, or tag me in your photos on social media. Happy rolling, friends!
Frequently Asked Questions
Can I make these turkey pinwheel wraps the night before?
Absolutely! In fact, I recommend it. Making them the night before gives the cream cheese time to firm up, which makes slicing much easier. Just keep the rolls wrapped tightly in plastic wrap in the fridge, and slice them in the morning before packing.
How do I keep the pinwheels from unrolling?
The cream cheese acts as glue to hold the roll together. Make sure you spread it all the way to the edges of the tortilla. Chilling the rolls for at least an hour also helps them hold their shape. If they still seem loose, use a toothpick to secure each pinwheel.
Can I use flavored tortillas?
Yes! Spinach, sun-dried tomato, or whole wheat tortillas work great. They add color and a subtle flavor boost. Just make sure they’re large enough (10-inch burrito size) to hold the filling without tearing.
What’s the best way to slice these without squishing them?
Use a sharp serrated knife and a gentle sawing motion. Don’t press straight down—that squishes the filling out. If your knife is dull, the tortilla will drag and tear. I learned this after ruining a few batches with a cheap knife.
Can I freeze these turkey pinwheel wraps?
Yes! Wrap the uncut rolls tightly in plastic wrap and then in aluminum foil. Freeze for up to 3 months. Thaw in the refrigerator overnight before slicing. Do not refreeze after thawing. They’re perfect for meal prep this way.
Pin This Recipe!
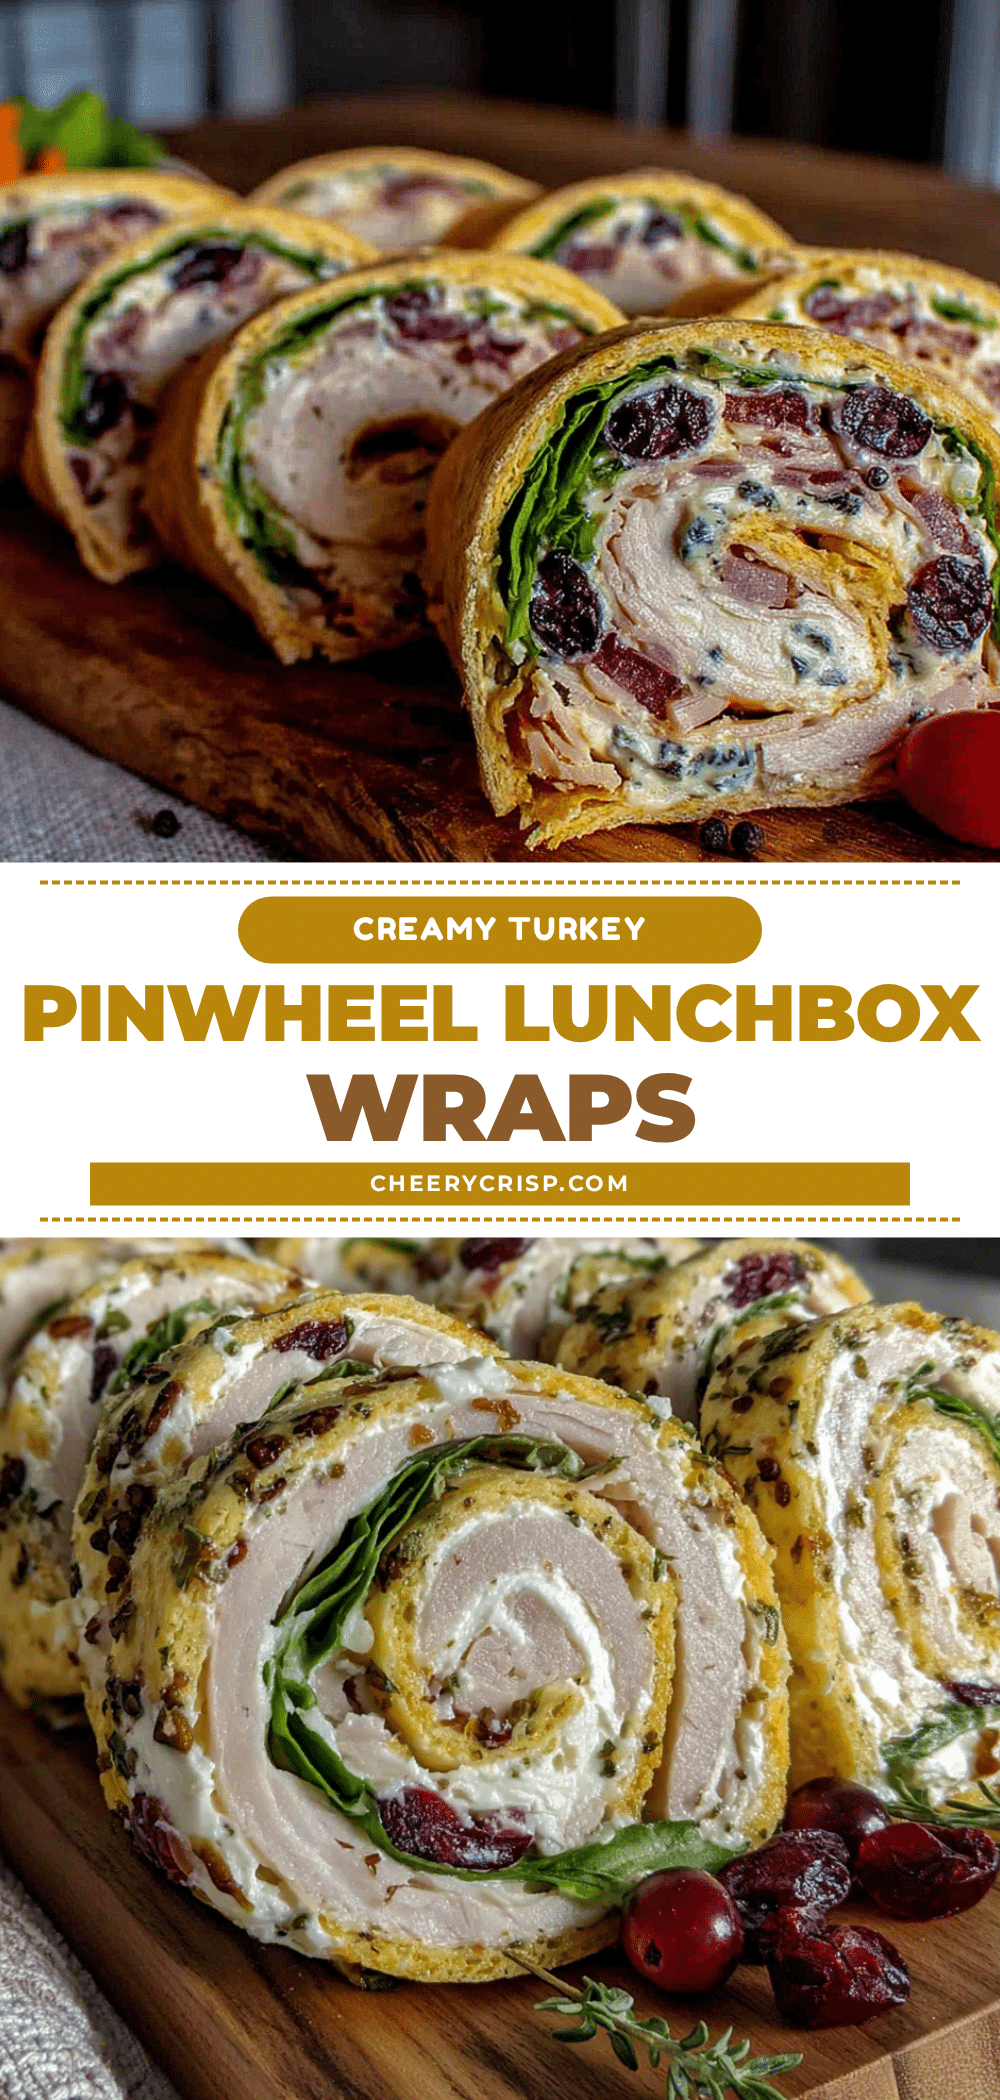
Easy Turkey Pinwheel Wraps: Best Lunchbox Recipe

These easy turkey pinwheel wraps are perfect for lunchboxes, parties, or a quick snack. Made with a creamy, seasoned cream cheese spread, deli turkey, and your favorite add-ins, they’re simple to make and endlessly adaptable.
- Prep Time: 15 minutes
- Cook Time: 0 minutes
- Total Time: 1 hour 15 minutes
- Yield: 4 servings 1x
- Category: Appetizer
- Cuisine: American
Ingredients
- 8 oz cream cheese, softened to room temperature
- 1/2 teaspoon garlic powder
- 1/4 teaspoon onion powder
- 1/4 teaspoon black pepper, freshly ground
- 1/4 teaspoon salt
- 4 large flour tortillas (10-inch)
- 12 slices deli turkey breast
- 1/2 cup shredded cheddar cheese
- 1/2 cup fresh spinach leaves, washed and dried
- 1/4 cup sun-dried tomatoes, chopped
Instructions
- Soften the cream cheese. Take the cream cheese out of the fridge about 30 minutes before you start. If you’re short on time, unwrap it and microwave on low power for 10 seconds. Check it—it should be soft to the touch but not warm. You want it spreadable, not melted.
- Make the cream cheese spread. In a small bowl, combine the softened cream cheese with garlic powder, onion powder, black pepper, and salt. Stir with a rubber spatula or fork until smooth and fluffy. This takes about 2 minutes. Taste it—you should get a hint of garlic without it being overwhelming. Adjust the seasoning if needed.
- Prepare your workspace. Clear a large area on your counter. Lay out one tortilla flat on your cutting board. Make sure it’s at room temperature—cold tortillas crack when you roll them. If they’ve been in the fridge, let them sit out for 5 minutes.
- Spread the cream cheese mixture. Using your spatula, spread about 2 tablespoons of the cream cheese mixture evenly over the entire surface of the tortilla. Go all the way to the edges—this helps the wrap stick together later. Don’t use too much, or it will squish out when you roll.
- Layer the turkey. Place 3 slices of turkey breast over the cream cheese, overlapping them slightly. Make sure they cover the tortilla evenly. Leave about 1/2 inch of the far edge uncovered—this gives you a clean seal when you roll.
- Add the extras. Sprinkle about 2 tablespoons of shredded cheddar cheese over the turkey. If you’re using spinach, lay a few leaves on top. Add a sprinkle of chopped sun-dried tomatoes if you like. Don’t overload it—less is more here.
- Roll it up tight. Starting from the edge closest to you, begin rolling the tortilla away from you. Use your fingers to keep the filling tucked in as you go. Roll firmly but gently—you want it snug without tearing the tortilla. When you reach the end, press down lightly to seal the edge.
- Wrap in plastic. Place the rolled tortilla on a piece of plastic wrap. Roll it up tightly, twisting the ends like a candy wrapper. This keeps the roll compact while it chills. Repeat with the remaining tortillas.
- Chill for at least 1 hour. Place the wrapped rolls on a baking sheet or plate and refrigerate for at least 1 hour. Overnight is even better. The chilling time allows the cream cheese to firm up, which makes slicing much easier.
- Slice and serve. When you’re ready to eat, unwrap one roll at a time. Using a serrated knife, slice the roll into 1-inch rounds. Use a gentle sawing motion—don’t press straight down. You should get about 6-8 pinwheels per tortilla. Arrange them on a plate and serve cold.
Notes
Let cream cheese come to room temperature for easy spreading. Chill rolls for at least 1 hour before slicing for clean cuts. Use a serrated knife for best results. These can be made ahead and stored in the fridge for up to 5 days (uncut) or frozen for up to 3 months.
Nutrition
- Serving Size: 6 pinwheels
- Calories: 320
- Sugar: 3
- Sodium: 680
- Fat: 16
- Saturated Fat: 9
- Carbohydrates: 22
- Fiber: 2
- Protein: 18
Keywords: turkey pinwheel wraps, lunchbox recipe, easy appetizer, cold wraps, cream cheese pinwheels



