Love this? Save it for later!
Share the inspiration with your friends
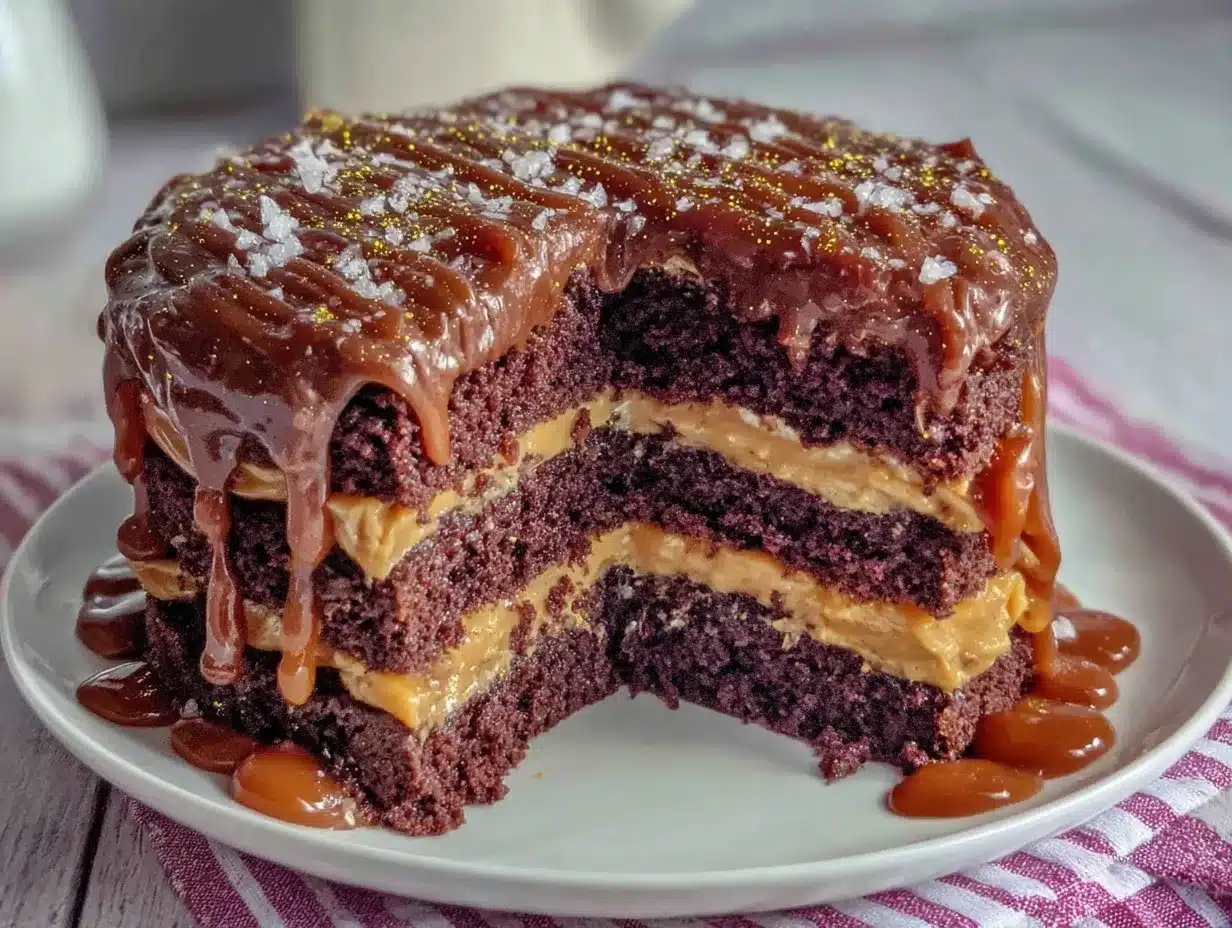
The neighborhood block party was in less than four hours, and I’d completely blanked on the birthday cake. Everyone else was bringing these multi-tiered masterpieces, with intricate decorations that looked like they took days to perfect. Meanwhile, my kitchen had nothing but a few basic baking staples and a half-empty jar of caramel sauce. Honestly, I thought I was doomed to show up empty-handed—or worse, with something store-bought. But then, in a frantic attempt fueled by sheer panic and a cracked mixing bowl (don’t ask), I whipped up what turned out to be the Perfect Leo Birthday Chocolate Gold Layer Cake with Salted Caramel Buttercream. The golden shimmer on the frosting? Pure improvisation with edible gold dust I found buried in the back of my spice drawer. That cake didn’t just make it to the party; it stole the spotlight.
Maybe you’ve been there too—scrambling last minute, wondering if you can pull off something impressive without a million ingredients or hours of prep. Let me tell you, this chocolate gold layer cake is exactly that kind of recipe. It’s rich yet light, with a salted caramel buttercream that hits just the right note between sweet and salty. I keep making it for birthdays, especially for anyone born under Leo’s fierce, fun-loving sign. It carries that perfect mix of bold flavor and sparkling flair that feels like a celebration all on its own. And if I can do it on a hair-raising deadline, you can absolutely conquer this cake for your next special occasion.
Why You’ll Love This Recipe
I’m a bit of an accidental cake champ, and this recipe is one of my proudest “last-minute wins.” It’s been through countless kitchen tests, tweaks, and enthusiastic family taste tests. Here’s why this chocolate gold layer cake deserves a spot in your baking rotation:
- Quick & Easy: Comes together in under 90 minutes, perfect when you’ve got that “I forgot” moment but still want to impress.
- Simple Ingredients: No obscure baking supplies needed—just pantry basics and a splash of edible gold for that wow factor.
- Perfect for Birthdays & Celebrations: Especially suited for Leos or anyone who loves a little glamour on their cake.
- Crowd-Pleaser: The chocolate layers are moist and tender, and the salted caramel buttercream gets rave reviews from kids and grown-ups alike.
- Unbelievably Delicious: The balance of rich chocolate with the buttery caramel frosting is just next-level comfort food with a fancy twist.
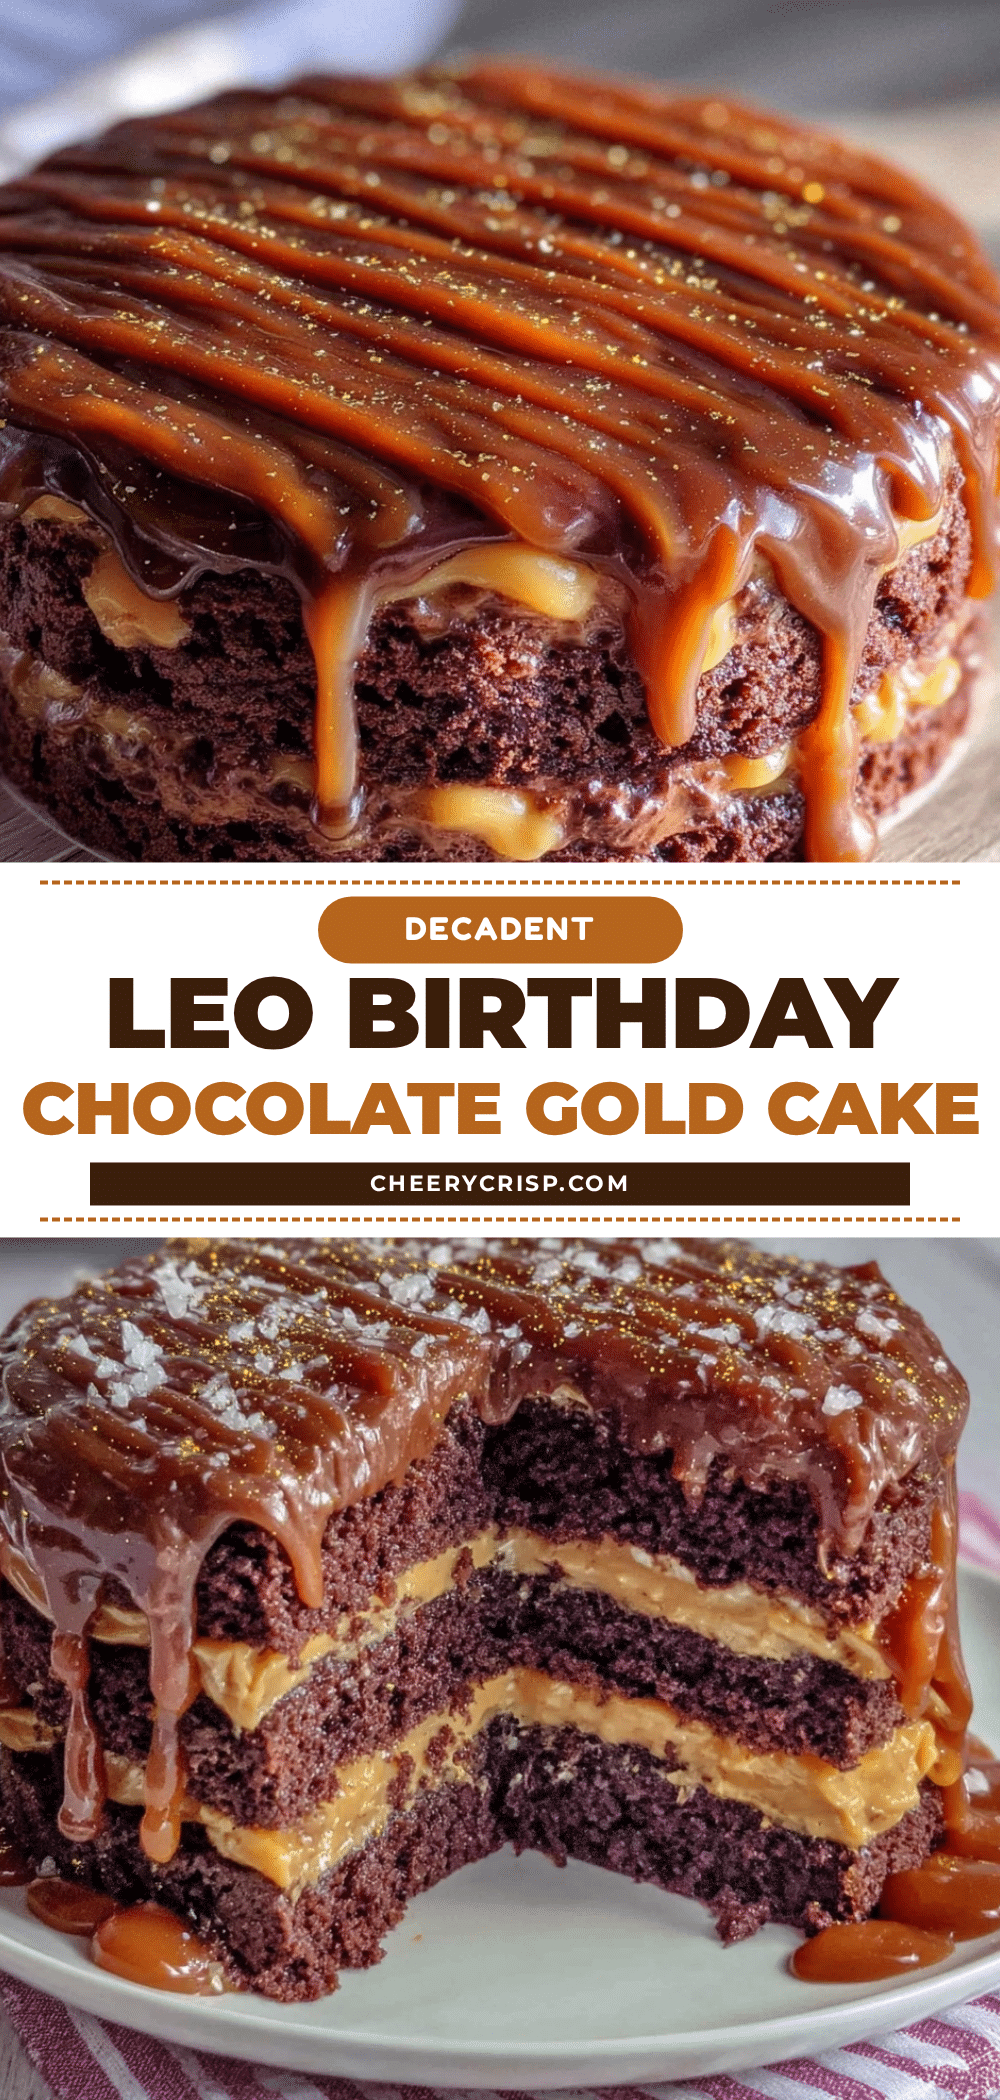
This isn’t just another chocolate layer cake. The secret lies in the silky salted caramel buttercream that’s whipped to just the right fluffiness, paired with a golden shimmer that feels festive but isn’t over the top. I’ve tried versions with regular frosting, but this combo hits the perfect note for a Leo’s bold and radiant personality. It’s the kind of cake that makes you pause mid-bite and smile—honestly, it’s a little celebration in every forkful. Whether you’re surprising a birthday star or just craving a homemade treat that looks like you put in ten times the effort, this cake’s got your back.
What Ingredients You Will Need
This recipe uses simple, wholesome ingredients to deliver bold flavor and satisfying texture without the fuss. Most are pantry staples, and there’s some wiggle room for substitutions if needed.
- For the Chocolate Cake Layers:
- 1 ½ cups (190g) all-purpose flour (I prefer Gold Medal for consistent texture)
- 1 ½ cups (300g) granulated sugar
- ¾ cup (65g) unsweetened cocoa powder (natural, not Dutch-processed)
- 1 ½ tsp baking powder
- 1 ½ tsp baking soda
- 1 tsp salt
- 2 large eggs, room temperature
- 1 cup (240ml) whole milk (or dairy-free milk like oat or almond for a twist)
- ½ cup (120ml) vegetable oil (neutral flavor)
- 2 tsp pure vanilla extract
- 1 cup (240ml) boiling water
- For the Salted Caramel Buttercream:
- 1 cup (227g) unsalted butter, softened (I use Plugrá for creaminess)
- 3 cups (360g) powdered sugar, sifted
- ½ cup (160g) homemade or store-bought salted caramel sauce (adjust saltiness to taste)
- 2 tbsp heavy cream or milk (use coconut cream for dairy-free)
- 1 tsp vanilla extract
- ½ tsp sea salt (optional, to boost the salted caramel flavor)
- For the Decoration:
- Edible gold dust or gold leaf sheets (a tiny jar lasts forever)
- Optional: chocolate shavings or gold sprinkles for extra glam
If you can’t find edible gold, a light dusting of cocoa powder or a drizzle of caramel sauce works fine too. In summer, swapping the salted caramel for a fresh berry compote adds a fruity brightness that’s delightful. And if you’re gluten-free, almond flour can replace half the all-purpose flour for a tender crumb.
Equipment Needed
- Two 8-inch (20 cm) round cake pans – non-stick or well-greased
- Mixing bowls – medium and large
- Electric mixer (hand or stand) for the buttercream – makes the frosting silky and light
- Measuring cups and spoons – accuracy matters for baking success
- Spatula and whisk – for mixing and folding
- Cooling racks – to let the cakes cool evenly without sogginess
- Offset spatula or butter knife – for smooth frosting application
If you don’t have two cake pans, baking the layers one at a time works fine but adds time. I’ve also used silicone pans, which clean up easily, but they sometimes need extra greasing. For the gold dust, a small, soft brush helps you apply it delicately without wasting any sparkle. Honestly, this cake comes together well even with basic kitchen tools, so no need to buy anything fancy if you’re just starting out.
Preparation Method
- Preheat your oven to 350°F (175°C). Grease and flour your two 8-inch cake pans or line them with parchment paper. This step is crucial to prevent sticking.
- Mix the dry ingredients: In a large bowl, sift together the flour, cocoa powder, sugar, baking powder, baking soda, and salt. This ensures the cocoa is evenly distributed and prevents lumps.
- Add wet ingredients: Crack in the eggs, pour in the milk, vegetable oil, and vanilla extract. Using a whisk or electric mixer, combine until the batter is smooth and free of lumps, about 2 minutes. The batter will be thick but pourable.
- Carefully add boiling water: Slowly pour the boiling water into the batter while stirring gently. The batter will thin out—that’s exactly right. This step makes the cake super moist.
- Divide and bake: Pour the batter evenly into the prepared pans. Tap the pans lightly on the counter to release any air bubbles. Bake for 30–35 minutes, or until a toothpick inserted in the center comes out clean.
- Cool completely: Let the cakes cool in the pans for 10 minutes, then run a knife around the edges and invert onto cooling racks. Cooling fully before frosting is key to avoid melting the buttercream.
- Make the salted caramel buttercream: Beat the softened butter with an electric mixer on medium speed until creamy, about 2 minutes. Gradually add powdered sugar, mixing well. Pour in the salted caramel sauce, vanilla, salted, and cream, and continue beating until fluffy and spreadable, roughly 3–5 minutes. Taste and adjust salt or caramel to preference.
- Assemble the cake: Place one cake layer on your serving plate. Spread a generous layer of buttercream on top. Add the second cake layer and frost the top and sides evenly. Use an offset spatula for smooth edges or a rustic look if you prefer.
- Add gold shimmer: Using a clean, dry brush, lightly dust edible gold over the top and sides. You can also add chocolate shavings or gold sprinkles for a festive touch.
- Chill for 30 minutes: This helps the buttercream set, making slicing neater. Bring back to room temperature before serving for best flavor.
If your batter seems too thin or thick at any point, double-check measurements—baking is a bit like chemistry. I once skipped sifting and got a lumpy batter that still baked fine but looked less polished. Don’t stress the little things—the taste is what really counts.
Cooking Tips & Techniques
One thing I learned early on is that the boiling water in the batter is a game-changer. It might feel odd adding hot water to your cake mix, but trust me—it keeps the chocolate flavor intense and the crumb moist. Don’t skip it, even if you’re in a rush.
For the salted caramel buttercream, using homemade caramel sauce makes a big difference, but good-quality store-bought works too. The key is to balance the saltiness so it doesn’t overpower the sweetness. Taste as you go.
When frosting, chill your cake layers if they feel too warm. Warm cake plus buttercream equals a melty mess. Also, spreading a thin crumb coat first traps crumbs and helps you get that smooth final finish.
I’ve made this cake dozens of times and usually refrigerate it overnight before serving. That resting time lets the flavors meld beautifully, and the cake slices cleanly. If you’re multitasking, prepare the cake layers a day ahead and store wrapped tightly—makes party day less stressful.
Variations & Adaptations
- Dairy-Free Version: Swap whole milk for almond or oat milk and use coconut cream in the buttercream. Use dairy-free butter alternatives for the frosting.
- Seasonal Twist: In summer, add fresh raspberries between layers or swirl in raspberry jam for a fruity surprise that pairs beautifully with chocolate.
- Spiced Chocolate: Add ½ tsp cinnamon and a pinch of cayenne pepper to the dry ingredients for a subtle warm kick.
- Gluten-Free Option: Use a gluten-free all-purpose blend that can substitute cup-for-cup, like Bob’s Red Mill. The texture might be slightly different but still delicious.
- Personal Variation: Once, I swapped the salted caramel buttercream for a rich espresso buttercream to surprise my coffee-loving friend. The espresso really amps up the chocolate, creating a grown-up twist.
Serving & Storage Suggestions
This cake is best served at room temperature to let all the flavors shine. I like to slice it up and serve it alongside a cup of strong black coffee or a creamy chai latte—that salted caramel buttercream pairs amazingly with warm drinks.
Store leftover cake covered in the fridge for up to 4 days. Before serving again, let slices warm at room temperature for about 20 minutes. The buttercream firms up in the fridge, so warming helps it soften back to that luscious texture.
For longer storage, you can freeze individual slices wrapped tightly in plastic wrap and foil for up to 2 months. Thaw overnight in the fridge and bring to room temperature before serving.
Flavors actually deepen and mellow after a day or two in the fridge, so this cake is great to make ahead for parties. The gold shimmer stays intact and keeps that celebratory vibe alive.
Nutritional Information & Benefits
Per serving (based on 12 slices), this cake delivers approximately 420 calories, 25g fat, 50g carbohydrates, and 4g protein. The salted caramel buttercream contains added sugars and fats, so moderation is key for balanced eating.
Chocolate brings antioxidants, and using real butter and whole milk contributes to richer flavor and texture. Choosing dark cocoa powder adds a deeper chocolate intensity, which means a little goes a long way to satisfy sweet cravings.
If you’re looking for a gluten-free or dairy-free birthday cake, the recipe’s flexible substitutions make it easy to adapt without losing that homemade celebration feel. Just be mindful of any food allergies or intolerances when sharing.
Conclusion
The Perfect Leo Birthday Chocolate Gold Layer Cake with Salted Caramel Buttercream is more than just a cake—it’s a little miracle for those moments when time is scarce but you still want to impress. Its rich chocolate layers, luscious salted caramel frosting, and shimmering golden finish make it ideal for birthdays or any festive occasion.
Feel free to tweak it to your taste—add spices, swap milks, or try different decorations. I love this cake because it’s forgiving, quick, and always a crowd-pleaser, even when I’m baking under pressure (which, let’s face it, is often!).
Go on, give it a try, and share how you make it your own. I’d love to hear your twists and stories in the comments!
FAQs
Can I make this cake ahead of time?
Yes! You can bake the cake layers a day or two in advance, tightly wrapped at room temperature or refrigerated. Assemble and frost the day you want to serve for best freshness.
What if I don’t have edible gold dust?
No worries. You can skip the gold or substitute with chocolate shavings, caramel drizzle, or colorful sprinkles for a festive look.
How do I store leftover cake?
Store in an airtight container in the fridge for up to 4 days. Bring to room temperature before serving for the best texture.
Can I freeze this cake?
Yes, freeze individual slices wrapped well for up to 2 months. Thaw in the fridge overnight before enjoying.
Is the salted caramel buttercream difficult to make?
Not at all! Using store-bought caramel sauce simplifies the process, and whipping the buttercream until fluffy is straightforward with an electric mixer.
Pin This Recipe!
Perfect Leo Birthday Chocolate Gold Layer Cake with Salted Caramel Buttercream
A rich yet light chocolate layer cake with a luscious salted caramel buttercream and a festive edible gold shimmer, perfect for birthdays and celebrations.
- Prep Time: 20 minutes
- Cook Time: 35 minutes
- Total Time: 55 minutes
- Yield: 12 servings 1x
- Category: Dessert
- Cuisine: American
Ingredients
- 1 1/2 cups (190g) all-purpose flour
- 1 1/2 cups (300g) granulated sugar
- 3/4 cup (65g) unsweetened cocoa powder (natural, not Dutch-processed)
- 1 1/2 tsp baking powder
- 1 1/2 tsp baking soda
- 1 tsp salt
- 2 large eggs, room temperature
- 1 cup (240ml) whole milk or dairy-free milk like oat or almond
- 1/2 cup (120ml) vegetable oil (neutral flavor)
- 2 tsp pure vanilla extract
- 1 cup (240ml) boiling water
- 1 cup (227g) unsalted butter, softened
- 3 cups (360g) powdered sugar, sifted
- 1/2 cup (160g) homemade or store-bought salted caramel sauce
- 2 tbsp heavy cream or milk (or coconut cream for dairy-free)
- 1 tsp vanilla extract
- 1/2 tsp sea salt (optional)
- Edible gold dust or gold leaf sheets
- Optional: chocolate shavings or gold sprinkles for decoration
Instructions
- Preheat oven to 350°F (175°C). Grease and flour two 8-inch cake pans or line with parchment paper.
- In a large bowl, sift together flour, cocoa powder, sugar, baking powder, baking soda, and salt.
- Add eggs, milk, vegetable oil, and vanilla extract. Mix with a whisk or electric mixer until smooth, about 2 minutes.
- Slowly pour in boiling water while stirring gently; batter will thin out.
- Divide batter evenly between pans. Tap pans to release air bubbles.
- Bake for 30–35 minutes or until a toothpick inserted in the center comes out clean.
- Cool cakes in pans for 10 minutes, then invert onto cooling racks to cool completely.
- For buttercream: Beat softened butter with electric mixer on medium speed until creamy, about 2 minutes.
- Gradually add powdered sugar, mixing well.
- Add salted caramel sauce, vanilla, sea salt (if using), and cream; beat until fluffy and spreadable, about 3–5 minutes.
- Place one cake layer on serving plate. Spread a generous layer of buttercream on top.
- Add second cake layer and frost top and sides evenly.
- Lightly dust edible gold over cake using a clean, dry brush. Add chocolate shavings or gold sprinkles if desired.
- Chill cake for 30 minutes to set buttercream. Bring to room temperature before serving.
Notes
Boiling water in the batter intensifies chocolate flavor and keeps the cake moist. Chill cake layers before frosting to prevent melting buttercream. The cake can be made a day ahead and stored wrapped tightly. For dairy-free, substitute milk and butter accordingly. Edible gold dust can be substituted with chocolate shavings or sprinkles.
Nutrition
- Serving Size: 1 slice (1/12 of cak
- Calories: 420
- Fat: 25
- Carbohydrates: 50
- Protein: 4
Keywords: chocolate cake, salted caramel buttercream, birthday cake, celebration cake, easy chocolate cake, gold dust cake, layered cake



