Love this? Save it for later!
Share the inspiration with your friends
The summer I turned twenty-five, I was wandering through the bustling aisles of a neighborhood farmers market when the sharp scent of cocoa and vanilla caught me off guard — and suddenly I was eight years old, sitting cross-legged on the floor of Mrs. Jensen’s kitchen, watching her carefully pipe cream cheese frosting on the layers of a cake that looked like a tiny flag. It wasn’t just any cake; it was a red velvet flag cake, vibrant and almost too pretty to touch. I remember the way the frosting glistened under the warm kitchen light, and how a little smudge on the corner of the counter made me giggle because I’d just knocked the bowl over. I mean, you know that feeling when a simple smell or taste can yank you right back to a moment you thought was lost?
Mrs. Jensen, who lived three houses down, was a quiet woman, always humming old tunes while baking. That flag cake wasn’t just a dessert — it was her way of celebrating the Fourth of July, every year without fail. Years later, I finally tracked down her exact recipe, tweaking it just enough to make it my own while chasing that same perfect bite. Honestly, this show-stopping red velvet flag cake with cream cheese frosting has become my go-to for celebrations, because it’s not just about the looks — it’s about the memories and the taste that sticks with you. Maybe you’ve been there, trying to catch a flavor or a feeling that just won’t let go. For me, this cake does exactly that.
Why You’ll Love This Recipe
After testing dozens of red velvet recipes, this one stands out for so many reasons. I’ve found it’s the kind of cake that not only looks impressive — with its bold red and white layers arranged just like a flag — but also delivers on that classic, slightly tangy red velvet taste that everyone loves. Plus, the cream cheese frosting is silky smooth, tangy, and sweet just right. Here’s why this recipe might become your favorite too:
- Quick & Easy: Comes together in under 90 minutes, which is perfect for last-minute party plans or when you want to impress without the fuss.
- Simple Ingredients: No need to hunt down specialty items — most are pantry staples you probably already have.
- Perfect for Celebrations: Whether it’s Independence Day, birthdays, or just because, the flag design makes it a festive centerpiece.
- Crowd-Pleaser: Kids and adults alike can’t get enough of the moist cake layers and rich frosting.
- Unbelievably Delicious: The balance of cocoa, tangy buttermilk, and cream cheese frosting hits all the right notes for a comforting yet fancy dessert.
This isn’t just another red velvet cake recipe floating around the internet. The secret is in the layering and the frosting technique — I blend the cream cheese frosting until it’s ultra-smooth and pipe it carefully between layers for that neat flag effect. Honestly, this cake isn’t just about flavor; it’s a little celebration on a plate, perfect for those moments when you want to wow without stress.
What Ingredients You Will Need
This recipe uses simple, wholesome ingredients to deliver bold flavor and a satisfying texture. You won’t find anything fancy — just classic components that come together beautifully. Here’s what you’ll need:
- For the Red Velvet Cake Layers:
- All-purpose flour – 2 ½ cups (312 g), sifted
- Granulated sugar – 2 cups (400 g)
- Unsweetened cocoa powder – 2 tbsp (15 g), preferably Dutch-processed for a smooth flavor
- Baking soda – 1 tsp (5 g)
- Salt – ½ tsp (3 g)
- Buttermilk – 1 ½ cups (360 ml), room temperature (you can make a substitute with milk and lemon juice if needed)
- Vegetable oil – 1 cup (240 ml), neutral flavor
- Large eggs – 2, room temperature
- Red food coloring – 2 tbsp (30 ml), gel-based for vibrant color without thinning the batter
- Vanilla extract – 1 tsp (5 ml), pure
- White distilled vinegar – 1 tsp (5 ml)
- For the Cream Cheese Frosting:
- Cream cheese – 16 oz (450 g), softened (I recommend Philadelphia brand for best texture)
- Unsalted butter – ½ cup (115 g), softened
- Powdered sugar – 4 cups (480 g), sifted to avoid lumps
- Vanilla extract – 1 tsp (5 ml)
- Salt – a pinch to balance sweetness
For the flag design, you’ll also want to keep in mind the layering and piping tools, but we’ll get to that shortly. If you’re aiming for a gluten-free version, almond flour can replace the all-purpose flour, though the texture will be slightly different. For a dairy-free take, swap the cream cheese and butter for plant-based alternatives like vegan cream cheese and margarine — just know the flavor shifts a bit.
Equipment Needed
To make this show-stopping red velvet flag cake with cream cheese frosting, you’ll want to have some basic and a few specialized tools on hand. Nothing too fancy, but these help make the process smooth and the presentation sharp.
- Two or three 8-inch (20 cm) round cake pans – I like using non-stick pans or lining them with parchment paper for easy release.
- Electric mixer (stand or handheld) – essential for whipping the frosting to that perfect fluffy texture.
- Mixing bowls – medium and large sizes.
- Measuring cups and spoons – accuracy matters here, especially with baking soda and vinegar.
- Rubber spatula and wooden spoon – for folding and scraping.
- Cake leveler or serrated knife – to trim the cake layers evenly.
- Piping bags and round tips – for the frosting dots that create the flag’s stars. If you don’t have piping bags, a sturdy zip-top bag with a corner snipped off works just fine.
- Cooling racks – to let your cakes cool completely before frosting.
If you don’t have a cake leveler, no worries — a serrated knife works just as well, though you might want to go slow and steady. For budget-friendly options, I’ve used silicone baking mats instead of parchment paper and they work great too, cutting down on waste.
Preparation Method
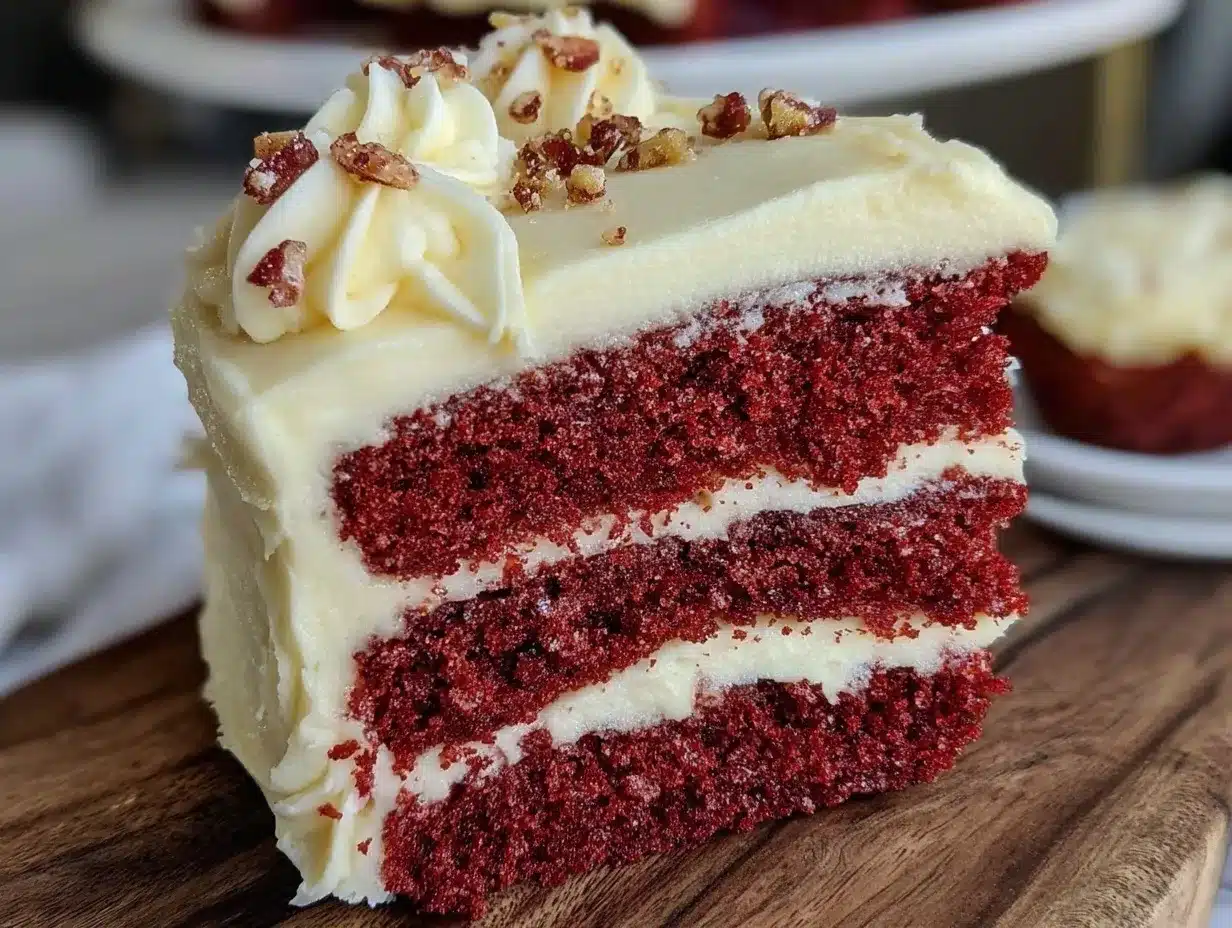
- Preheat and Prep: Preheat your oven to 350°F (175°C). Grease and flour your cake pans or line them with parchment paper. This step takes about 10 minutes.
- Mix Dry Ingredients: In a large bowl, sift together 2 ½ cups (312 g) of all-purpose flour, 2 cups (400 g) sugar, 2 tbsp (15 g) cocoa powder, 1 tsp (5 g) baking soda, and ½ tsp (3 g) salt. Sifting avoids lumps and ensures even mixing.
- Combine Wet Ingredients: In a separate bowl, whisk 1 ½ cups (360 ml) buttermilk, 1 cup (240 ml) vegetable oil, 2 large eggs, 2 tbsp (30 ml) red food coloring, 1 tsp (5 ml) vanilla extract, and 1 tsp (5 ml) white distilled vinegar. Mixing the wet ingredients well helps the color and flavor blend evenly.
- Make the Batter: Slowly add the wet ingredients to the dry mixture while stirring gently with a wooden spoon or spatula. Mix until just combined — overmixing can make the cake dense. Your batter should be smooth and a striking red color. This step takes about 5 minutes.
- Divide and Bake: Pour the batter evenly into your prepared cake pans. Use a kitchen scale if you want to be precise (about 700 g per pan). Bake for 25-30 minutes, or until a toothpick inserted comes out clean. The cakes should spring back lightly when pressed.
- Cool Completely: Let the cakes cool in the pans for 10 minutes, then transfer to a cooling rack. Cooling fully (about 1 hour) prevents the frosting from melting.
- Prepare the Cream Cheese Frosting: Beat 16 oz (450 g) softened cream cheese and ½ cup (115 g) softened butter together until smooth and creamy, about 3-4 minutes. Gradually add 4 cups (480 g) powdered sugar and continue beating. Stir in 1 tsp (5 ml) vanilla extract and a pinch of salt. The frosting should be thick but spreadable.
- Level the Cakes: Using a cake leveler or serrated knife, trim the domed tops of each cake layer so they’re flat and even. This makes stacking easier and your flag design neater.
- Assemble the Flag Layers: Place the first red velvet cake layer on your serving plate. Spread an even layer of cream cheese frosting over it.
- Cut for the Flag Design: To create the stripes, slice the cake horizontally into three layers if you want thinner stripes. For the flag’s “star” section, cut a square from a corner of the cake (about one-third of the width). Use frosting to “paint” the stripes by alternating red velvet layers and frosting, leaving the square corner plain for the stars.
- Frost the Outside: Apply a crumb coat — a thin layer of frosting around the entire cake — and chill for 20 minutes to set. Then, apply a smooth final coat of frosting.
- Pipe the Stars: Fill a piping bag fitted with a small round tip with remaining frosting. Pipe small dots in a star pattern onto the square corner of the cake.
- Chill and Serve: Refrigerate the cake for at least one hour before slicing to let the frosting firm up, which makes clean slices easier. Serve at room temperature for the best flavor.
Cooking Tips & Techniques
Getting that perfect show-stopping red velvet flag cake with cream cheese frosting takes a few insider tips I’ve picked up along the way. First, always use room temperature ingredients for the best mixing results — cold eggs or buttermilk can cause curdling. When you add the food coloring, gel types are your best bet; they provide a vibrant color without thinning the batter.
When mixing the batter, stir gently to avoid overworking the flour, which can make the cake tough. I’ve learned the hard way that overmixing is the enemy of tender crumb! Also, don’t skip sifting the powdered sugar for the frosting — lumps can ruin the smooth texture.
Layering and leveling the cake can be tricky. A serrated knife will do, but a cake leveler makes the job easier and more precise. If you notice the frosting is too soft while piping stars, pop it in the fridge for 10 minutes to firm up. Also, keep your cake chilled between steps to prevent the frosting from sliding off — patience here pays off big time.
Lastly, timing is everything. Bake your layers the day before if possible; this lets them firm up and makes assembly less stressful. I usually multitask by prepping frosting while the cakes cool — saves time and keeps the process flowing smoothly.
Variations & Adaptations
If you want to switch things up, this red velvet flag cake recipe is surprisingly flexible. Here are some ideas I’ve tried or recommend:
- Dietary: For a gluten-free version, substitute the flour with a gluten-free all-purpose blend. Almond flour works, but the texture is a bit denser.
- Seasonal Twist: During berry season, you could add a layer of fresh strawberries or raspberries between the cake layers for a fruity surprise.
- Flavor Variation: Try swapping half the vegetable oil with melted coconut oil for a subtle tropical note. Adding a bit of espresso powder (1 tsp) to the batter can deepen the cocoa flavor.
- Cooking Method: If you don’t have cake pans, baking the batter in a sheet pan and cutting out circles with a cookie cutter is a fun alternative for smaller flag cakes.
- Allergen-Friendly: For dairy-free cream cheese frosting, vegan cream cheese and margarine work well, though the frosting will be slightly less tangy.
My personal favorite variation is adding a thin layer of homemade raspberry jam beneath the frosting for a tart contrast. It’s a little bit of extra work, but the flavor combo is incredible.
Serving & Storage Suggestions
This cake shines best served at room temperature, allowing the cream cheese frosting to be soft and luscious. For presentation, slicing it into neat squares reveals the striking flag pattern inside — always a crowd-pleaser. Pair it with a simple cup of black coffee or a cold glass of milk to balance the richness.
Leftovers store well in the refrigerator, wrapped tightly with plastic wrap or stored in an airtight container. The cake flavors actually deepen overnight, but be sure to bring slices to room temperature before serving for the best texture. You can freeze the cake (without frosting) for up to two months; just thaw in the fridge overnight and refrost before serving.
When reheating, avoid microwaving directly as the frosting can melt. Instead, let slices sit out for 30 minutes or warm gently in an oven set at 300°F (150°C) for 5-7 minutes wrapped in foil.
Nutritional Information & Benefits
One generous slice of this red velvet flag cake with cream cheese frosting has approximately 400-450 calories, with about 20 grams of fat and 45 grams of carbs. The cream cheese provides a bit of protein and calcium, while the buttermilk adds a touch of vitamin B12. Using real buttermilk and unsweetened cocoa powder keeps the flavor authentic without unnecessary additives.
For those watching dietary needs, this recipe can be adapted to gluten-free or dairy-free versions as mentioned, making it accessible for many. Just be mindful that the frosting is rich, so moderation is key.
Personally, I appreciate this cake as a treat that feels homemade and thoughtful, not processed. It’s a special occasion dessert that brings smiles and a sense of tradition, which I think is a kind of nourishment in itself.
Conclusion
If you’re looking for a dessert that’s as stunning as it is delicious, this show-stopping red velvet flag cake with cream cheese frosting is worth every minute of prep. It’s got that perfect balance of rich flavor, moist crumb, and creamy frosting, all wrapped up in a festive design that’s sure to impress. Feel free to tweak the layers, try different frostings, or add your own twist — the magic is in making it yours.
I keep coming back to this recipe because it’s not just cake; it’s a little celebration on a plate, a taste that brings back moments and memories every time. So go ahead, give it a try, and let me know how your cake turned out or what fun variations you came up with. Your kitchen deserves this showstopper!
FAQs
Can I make the red velvet cake layers ahead of time?
Yes! You can bake the layers up to two days in advance. Wrap them tightly in plastic wrap and store in the fridge until ready to assemble.
What if I don’t have buttermilk?
No problem — mix 1 ½ cups (360 ml) milk with 1 ½ tbsp (22 ml) lemon juice or white vinegar and let it sit for 5 minutes. This homemade buttermilk substitute works well in the recipe.
How do I get the red color without using food coloring?
Natural alternatives like beet juice can add color but won’t be as vibrant. For best results, gel food coloring is recommended to get that classic red velvet look.
Can I use a stand mixer for the frosting?
Absolutely! A stand mixer with the paddle attachment makes whipping the cream cheese frosting easy and smooth. Just don’t overbeat to avoid a runny consistency.
How do I store leftover cake with cream cheese frosting?
Keep it covered in the refrigerator, wrapped tightly in plastic wrap or in an airtight container. Bring slices to room temperature before serving for the best flavor and texture.
By the way, if you enjoy classic American desserts, you might appreciate the rich texture of a crispy garlic chicken for your main course or the sweet simplicity of homemade blueberry pie as a companion dessert. Both pair wonderfully with a festive cake like this.
Pin This Recipe!
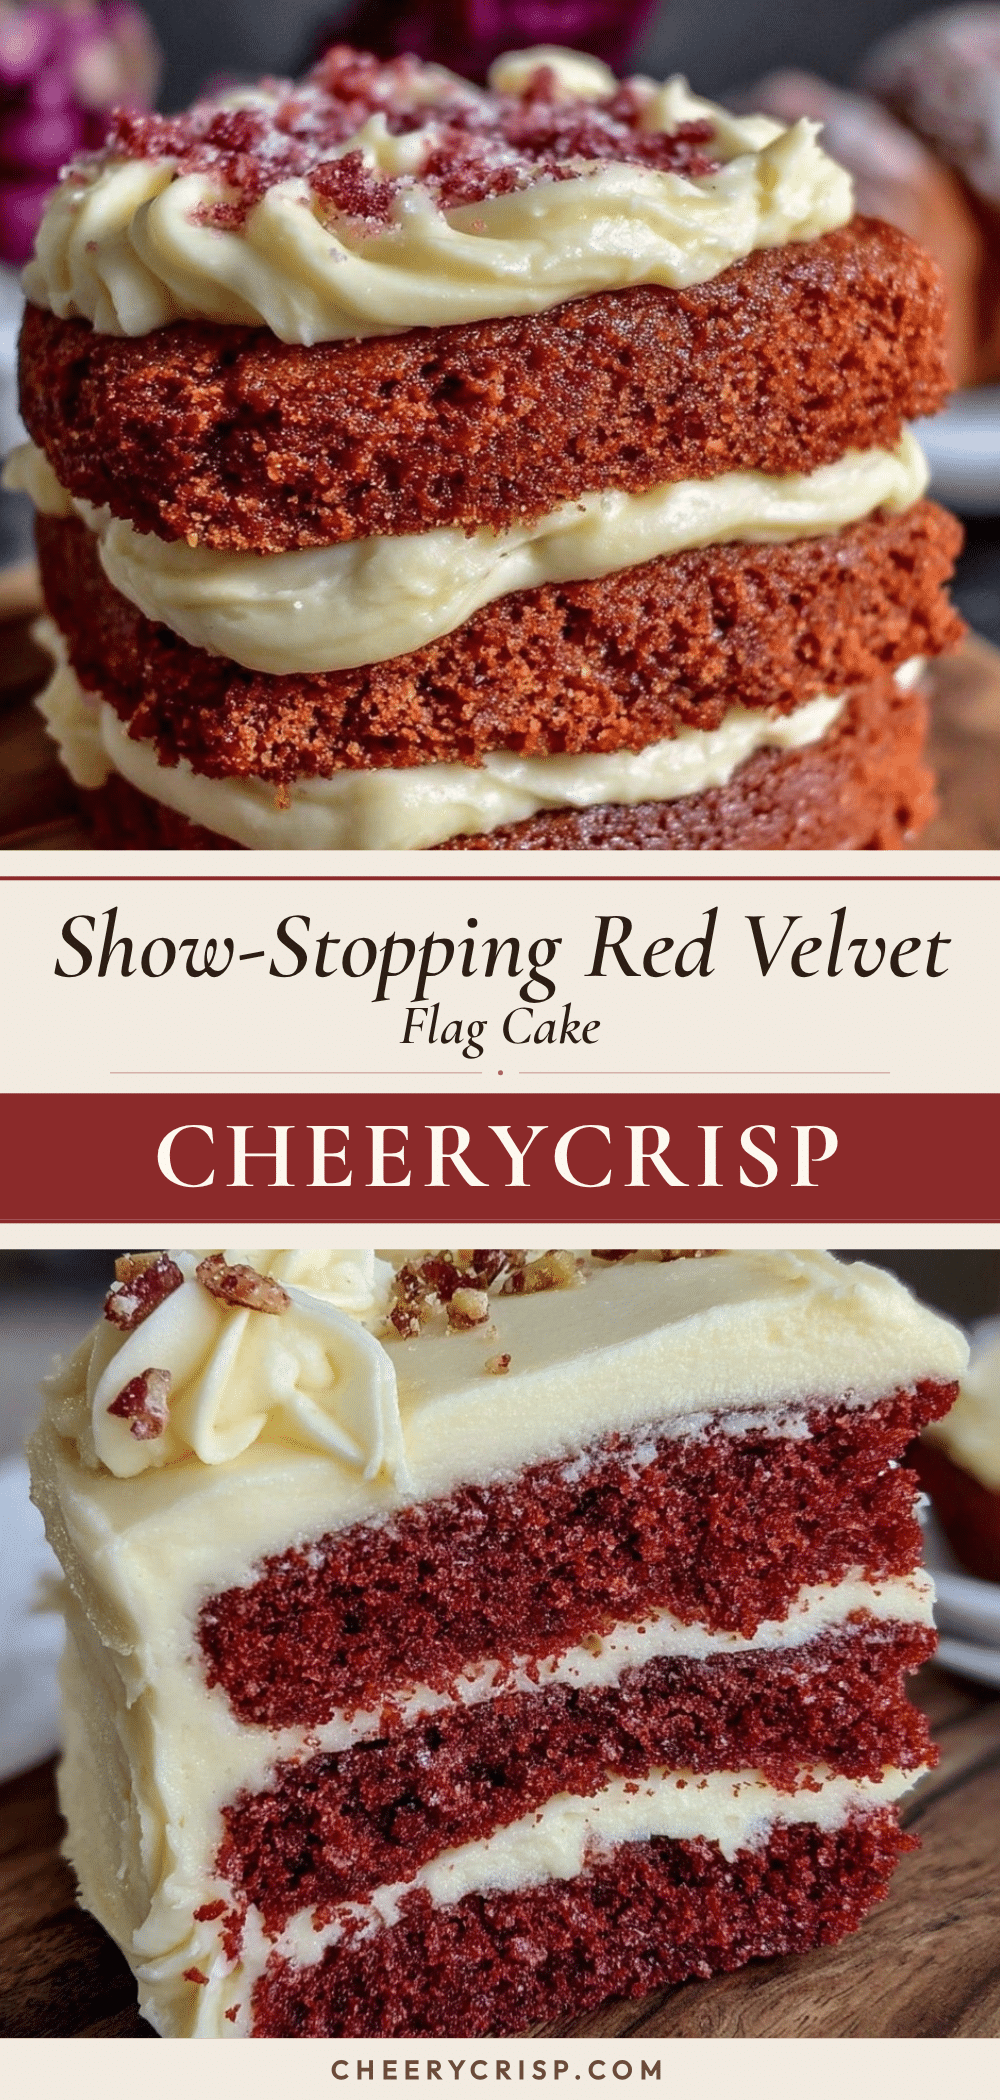
Red Velvet Flag Cake with Cream Cheese Frosting
A show-stopping red velvet flag cake featuring moist, vibrant red layers and silky smooth cream cheese frosting, perfect for celebrations and special occasions.
- Prep Time: 20 minutes
- Cook Time: 30 minutes
- Total Time: 1 hour 50 minutes
- Yield: 12 servings 1x
- Category: Dessert
- Cuisine: American
Ingredients
- 2 ½ cups (312 g) all-purpose flour, sifted
- 2 cups (400 g) granulated sugar
- 2 tbsp (15 g) unsweetened cocoa powder, preferably Dutch-processed
- 1 tsp (5 g) baking soda
- ½ tsp (3 g) salt
- 1 ½ cups (360 ml) buttermilk, room temperature (or substitute with milk and lemon juice)
- 1 cup (240 ml) vegetable oil, neutral flavor
- 2 large eggs, room temperature
- 2 tbsp (30 ml) red food coloring, gel-based
- 1 tsp (5 ml) vanilla extract
- 1 tsp (5 ml) white distilled vinegar
- 16 oz (450 g) cream cheese, softened
- ½ cup (115 g) unsalted butter, softened
- 4 cups (480 g) powdered sugar, sifted
- 1 tsp (5 ml) vanilla extract
- Pinch of salt
Instructions
- Preheat oven to 350°F (175°C). Grease and flour cake pans or line with parchment paper.
- In a large bowl, sift together flour, sugar, cocoa powder, baking soda, and salt.
- In a separate bowl, whisk buttermilk, vegetable oil, eggs, red food coloring, vanilla extract, and vinegar until well combined.
- Slowly add wet ingredients to dry ingredients, stirring gently until just combined. Avoid overmixing.
- Divide batter evenly into prepared pans (about 700 g per pan). Bake for 25-30 minutes or until a toothpick comes out clean.
- Cool cakes in pans for 10 minutes, then transfer to cooling racks and cool completely (about 1 hour).
- Beat cream cheese and butter until smooth and creamy (3-4 minutes). Gradually add powdered sugar, then vanilla and salt, beating until thick and spreadable.
- Level the cake layers using a cake leveler or serrated knife.
- Place first cake layer on serving plate and spread an even layer of frosting.
- Slice cake horizontally into three layers for thinner stripes. Cut a square from one corner (about one-third width) for the star section.
- Alternate layering red velvet cake and frosting to create stripes, leaving the square corner plain for stars.
- Apply a crumb coat of frosting around the cake and chill for 20 minutes.
- Apply a smooth final coat of frosting.
- Fill a piping bag with remaining frosting and pipe small dots in a star pattern on the square corner.
- Refrigerate cake for at least 1 hour before slicing. Serve at room temperature.
Notes
Use room temperature ingredients for best results. Gel-based red food coloring provides vibrant color without thinning the batter. Avoid overmixing to keep cake tender. Chill frosting if too soft for piping stars. Bake layers a day ahead for easier assembly. For gluten-free, substitute flour with gluten-free blend; for dairy-free, use vegan cream cheese and margarine.
Nutrition
- Serving Size: 1 slice
- Calories: 425
- Sugar: 35
- Sodium: 320
- Fat: 20
- Saturated Fat: 8
- Carbohydrates: 45
- Fiber: 1
- Protein: 5
Keywords: red velvet cake, cream cheese frosting, flag cake, Fourth of July dessert, celebration cake, easy red velvet, homemade frosting



