Love this? Save it for later!
Share the inspiration with your friends
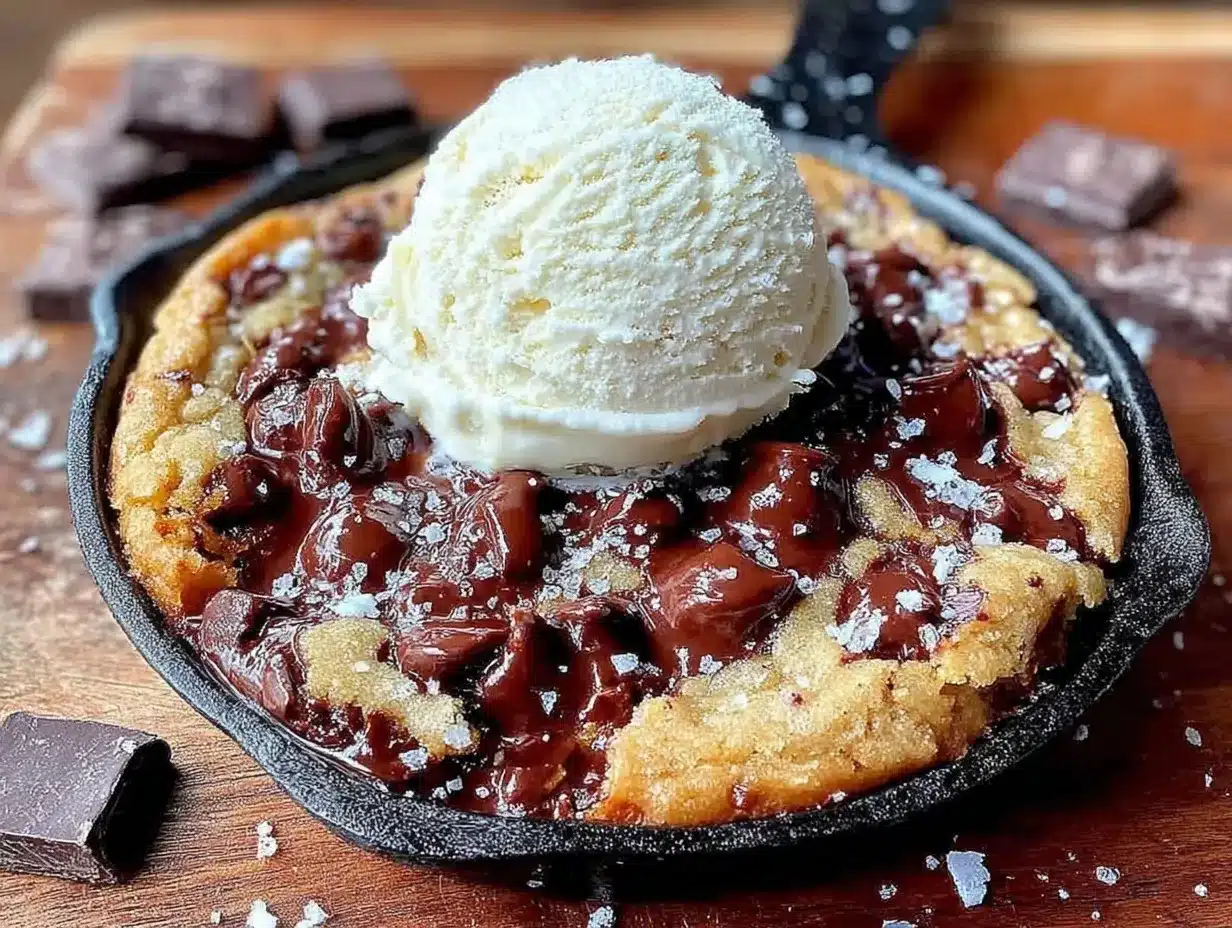
It was 11:47 PM on a random Wednesday, and honestly, I wasn’t expecting much when I opened the fridge. But that night, the craving hit me like a freight train—something warm, gooey, chocolatey, and just a little bit nostalgic. I didn’t have half the ingredients most recipes call for, and my kitchen was a mess from the day’s chaos. Yet, armed with a half-stick of butter, a handful of chocolate chips, and a rustic cast-iron skillet, I set out to create what would become my ultimate brown butter chocolate chip skillet cookie—with a scoop of vanilla bean ice cream on top, because, well, why not?
The sizzle of the browned butter was my soundtrack, filling the kitchen with that nutty, irresistible aroma that makes you stop whatever you’re doing. I have to admit, I forgot to preheat the oven at first and almost gave up when I realized I was out of regular sugar (brown sugar to the rescue!). But sometimes those little slip-ups lead to magic. This cookie was thick, chewy, and had these caramelized edges that just begged to be eaten straight from the pan. I remember sitting on the floor, skillet in lap, ice cream melting over the warm cookie, thinking, “Yep, this is why midnight snacks exist.”
Maybe you’ve been there—craving that perfect dessert but not wanting to fuss with complicated steps or fancy ingredients. This recipe stayed with me because it’s simple but feels fancy, like a little homemade indulgence that hits all the right notes. It’s the kind of dessert you make on a whim but want to share at every gathering. Honestly, it’s become my go-to when I want to impress without stress, and I’m betting it might just become yours, too.
Why You’ll Love This Ultimate Brown Butter Chocolate Chip Skillet Cookie Recipe
After countless late-night experiments and a few near disasters (I’m looking at you, burnt edges), this recipe has been thoroughly taste-tested, kid-approved, and yes, shared at a few casual dinner parties with rave reviews. Here’s what makes it stand out:
- Quick & Easy: From start to finish, you’re looking at about 30 minutes. Perfect for those surprise dessert cravings or last-minute gatherings.
- Simple Ingredients: You probably already have everything in your pantry or fridge (or can grab in a quick run to your local grocery).
- Perfect for Cozy Nights: Whether it’s a chilly evening or a weekend treat, this skillet cookie pairs perfectly with a scoop of rich vanilla bean ice cream.
- Crowd-Pleaser: The blend of nutty brown butter and melty chocolate chips always gets the “Wow, this is amazing!” comments, especially from kids and adults alike.
- Unbelievably Delicious: The texture is just right—crispy edges, chewy center, and that deep, buttery flavor that makes every bite feel like a hug.
What really sets this recipe apart is the brown butter. It’s not just butter melted; it’s butter cooked until it turns golden with a toasty aroma that adds a rich, complex depth to the cookie. Plus, using a cast-iron skillet means you get those perfectly crispy edges and a warm presentation straight to the table. Honestly, it’s the kind of dessert that makes you close your eyes after the first bite and smile because it’s just that good. This isn’t your run-of-the-mill cookie. It’s comfort food with a little extra soul, and the vanilla bean ice cream on top? That’s the cherry on top that makes this recipe unforgettable.
What Ingredients You Will Need
This recipe uses straightforward, wholesome ingredients that come together to create a dessert bursting with flavor and texture—no fancy or hard-to-find items required. Here’s the rundown:
- Unsalted Butter (1 stick / 113g): browned to add that signature nutty flavor—don’t skip this step!
- Light Brown Sugar (3/4 cup / 150g): gives the cookie its caramel undertones and chewy texture.
- Granulated Sugar (1/4 cup / 50g): balances the sweetness and helps with the crisp edges.
- Large Egg (1, room temperature): binds everything together and adds moisture.
- Pure Vanilla Extract (1 teaspoon): enhances the flavor profile.
- All-Purpose Flour (1 cup / 125g): the base of your cookie dough; for a gluten-free option, swap with almond flour but expect a slightly different texture.
- Baking Soda (1/4 teaspoon): helps the cookie rise just enough for that perfect chew.
- Salt (1/2 teaspoon): balances sweetness and brings out the brown butter flavor.
- Semi-Sweet Chocolate Chips (3/4 cup / 130g): I recommend Ghirardelli for a rich, melty chocolate experience.
- Vanilla Bean Ice Cream (for serving): the perfect creamy partner; homemade or store-bought works great.
Optional tweaks: If you want some extra texture, toss in a handful of chopped toasted pecans or walnuts. For a dairy-free version, use coconut oil in place of butter and a dairy-free vanilla ice cream. In summer, fresh berries on the side can add a nice fruity contrast. Honestly, these ingredients are pantry staples for most folks, so it’s easy to whip this up on a whim.
Equipment Needed
- Cast-Iron Skillet (8-inch / 20 cm): This is key for that crispy edge and even cooking. No cast iron? A heavy oven-safe skillet or pie dish will work, but the texture may vary slightly.
- Small Saucepan: For browning the butter. You can’t rush this part, so a heavy-bottomed pan helps prevent burning.
- Mixing Bowls: One for wet ingredients, one for dry. I like glass bowls because they’re easy to clean and don’t retain odors.
- Wooden Spoon or Silicone Spatula: For mixing the dough gently without overworking it.
- Measuring Cups and Spoons: Accurate measurements are key, especially for the flour and baking soda.
- Oven Mitts: Because that skillet gets HOT, seriously hot.
I used a Lodge cast-iron skillet that’s been in my kitchen for years—it’s my workhorse. If you’re new to cast iron, season it regularly and avoid soap when cleaning to keep it non-stick. For budget-friendly options, secondhand stores often have great cast iron for a steal. Honestly, this recipe works best with the right pan, so don’t skip investing in a good skillet if you can.
Preparation Method
- Brown the Butter (5-7 minutes): In a small saucepan over medium heat, melt the unsalted butter. Stir frequently as it foams and then turns a golden brown with a nutty aroma. Watch carefully—the moment you see golden specks and smell toasted nuts, remove it from heat. Pour into a mixing bowl and let cool for about 5 minutes (you want it warm, not hot).
- Mix Sugars and Butter (3 minutes): Add light brown sugar and granulated sugar to the browned butter. Stir until combined and slightly glossy. This mixture is the base of your cookie’s rich flavor and chewy texture.
- Add Egg and Vanilla (2 minutes): Crack in the egg and add pure vanilla extract. Whisk until the mixture is smooth and creamy. If the butter mixture feels too warm, wait a bit longer to avoid cooking the egg.
- Combine Dry Ingredients (2 minutes): In a separate bowl, whisk together all-purpose flour, baking soda, and salt. This ensures even distribution of rising agents and seasoning.
- Mix Dry into Wet (3-4 minutes): Gradually add the dry ingredients to the wet mixture. Stir gently with a wooden spoon or spatula until just combined—don’t overmix! The dough should be thick and sticky but manageable.
- Fold in Chocolate Chips (1-2 minutes): Add the semi-sweet chocolate chips and fold them into the dough evenly. This is where the melty, gooey magic hides.
- Transfer Dough to Skillet (1 minute): Spread the dough evenly in your well-seasoned 8-inch cast-iron skillet. Use the back of a spoon or spatula to smooth the top. The dough will be thick and a little sticky.
- Bake (18-22 minutes): Place the skillet in a preheated 350°F (175°C) oven. Bake until the edges are golden brown and the center is set but still soft—test by gently pressing the center; it should give slightly.
- Cool Slightly and Serve (5 minutes): Let the skillet cookie cool on a wire rack for about 5 minutes (if you can wait). Then, scoop generous portions of vanilla bean ice cream on top while the cookie is still warm. The melting ice cream with warm cookie edges? Absolutely dreamy.
Pro tip: If you find your edges are browning too fast, loosely tent the skillet with foil halfway through baking. Also, don’t skip the rest after baking—it lets flavors settle and texture firm up just right.
Cooking Tips & Techniques
Brown butter is the star here, and getting it right is crucial. You want to keep a close eye on the butter as it melts and foams. It can quickly go from golden brown to burnt if you’re not careful. I learned this the hard way during my first few tries—burnt butter means bitter cookie, so watch closely and remove from heat right when it smells toasty and looks golden.
Mixing is another area where patience pays off. Overmixing the dough activates gluten and can lead to a tougher cookie. Stir just until combined and fold in the chocolate chips gently. You want that tender, chewy texture, not a dense brick.
Baking time can vary with ovens, so start checking around 18 minutes. The cookie should be golden on the edges and soft in the center. Remember, the residual heat continues cooking it after removal.
Lastly, using a cast-iron skillet isn’t just for looks. It holds heat evenly and crisps the edges beautifully. If you don’t have one, a heavy oven-safe pan works, but don’t expect the same caramelized crust. And always use oven mitts—the skillet stays hot long after it’s out of the oven.
Variations & Adaptations
Want to mix things up? Here are some ideas:
- Nutty Twist: Add 1/2 cup chopped pecans or walnuts to the dough for a crunchy contrast that pairs beautifully with the brown butter flavor.
- Salted Caramel Drizzle: Once baked, drizzle warm salted caramel sauce over the cookie before adding ice cream. It takes the indulgence up a notch.
- Gluten-Free Option: Swap all-purpose flour with a gluten-free blend or almond flour. The texture will be a bit different—more crumbly but still delicious.
- Dairy-Free Version: Use coconut oil instead of butter for browning and serve with dairy-free vanilla ice cream. The nutty notes remain, though slightly altered.
- Seasonal Fruit Addition: In spring or summer, fold in fresh raspberries or blueberries for a bright, juicy pop alongside the chocolate chips.
Personally, I once tried adding chopped dried cherries and a pinch of cinnamon—unexpected but surprisingly delightful. Feel free to experiment, but keep the brown butter base intact; that’s the heart of this cookie.
Serving & Storage Suggestions
This skillet cookie is best served warm, straight from the oven, topped with a scoop of creamy vanilla bean ice cream. The contrast between warm and cold is what makes it so irresistible. I like to place the skillet on a wooden trivet and serve it family-style, letting everyone dig in with spoons.
For drinks, a cup of strong coffee or a glass of cold milk complements the rich flavors beautifully. If you’re serving at a party, consider adding a side of fresh berries or a sprinkle of flaky sea salt on top for a gourmet touch.
To store, cover the cooled cookie tightly with plastic wrap or a lid and keep it at room temperature for up to two days. For longer storage, wrap it well and freeze for up to one month. Reheat gently in a low oven (about 300°F / 150°C for 10 minutes) to bring back that fresh-baked warmth before adding ice cream.
Note: The cookie’s flavor deepens after sitting overnight, so leftovers can be even better the next day—just add a quick zap in the microwave and fresh ice cream.
Nutritional Information & Benefits
Per serving (about 1/6 of the skillet cookie with ice cream): approximately 450 calories, 22g fat, 60g carbohydrates, 4g protein.
The brown butter provides rich flavor and is a source of fat-soluble vitamins. Using real vanilla bean ice cream adds a touch of natural sweetness without artificial flavorings. This dessert is naturally gluten-containing but can be adapted for gluten-free diets as mentioned. It’s definitely an indulgence, so best enjoyed as an occasional treat.
From a wellness perspective, the recipe uses real ingredients without preservatives or refined additives common in store-bought sweets. Plus, that hit of chocolate chips brings antioxidants, and the portion control of serving from a skillet encourages mindful eating.
Conclusion
So there it is—the ultimate brown butter chocolate chip skillet cookie with vanilla bean ice cream, a recipe born from a late-night craving and turned into a beloved staple. It’s simple but feels special, quick but satisfying, and endlessly customizable to your taste. I love how it turns an ordinary night into a comforting celebration, and I hope it becomes your go-to dessert for those times when you want something warm, sweet, and just a bit magical.
Try making it your own with tweaks and toppings that speak to you. And hey, if you give it a whirl, I’d love to hear how it turned out—drop a comment or share your version! Sweet treats are better when shared, after all.
Remember, sometimes the best recipes come from those imperfect, messy moments in the kitchen. Happy baking!
Frequently Asked Questions About the Ultimate Brown Butter Chocolate Chip Skillet Cookie
Can I make this recipe without a cast-iron skillet?
Yes, you can use any oven-safe skillet or pie dish, but the texture and crisp edges might not be quite the same. Cast iron distributes heat evenly and crisps the cookie beautifully.
How do I know when the brown butter is ready?
Watch for the butter to foam and turn a light golden brown with a nutty aroma. You’ll see tiny brown specks at the bottom. Remove it quickly to avoid burning.
Can I prepare the dough ahead of time?
Absolutely! You can refrigerate the dough for up to 24 hours. Just bring it back to room temperature before baking for best results.
Is it possible to make this cookie dairy-free?
Yes, substitute the butter with coconut oil for browning and use a dairy-free vanilla ice cream. The flavor will be slightly different but still delicious.
How should I store leftovers?
Cover the skillet cookie tightly and keep at room temperature for up to two days or freeze for longer storage. Reheat gently before serving with fresh ice cream.
Pin This Recipe!
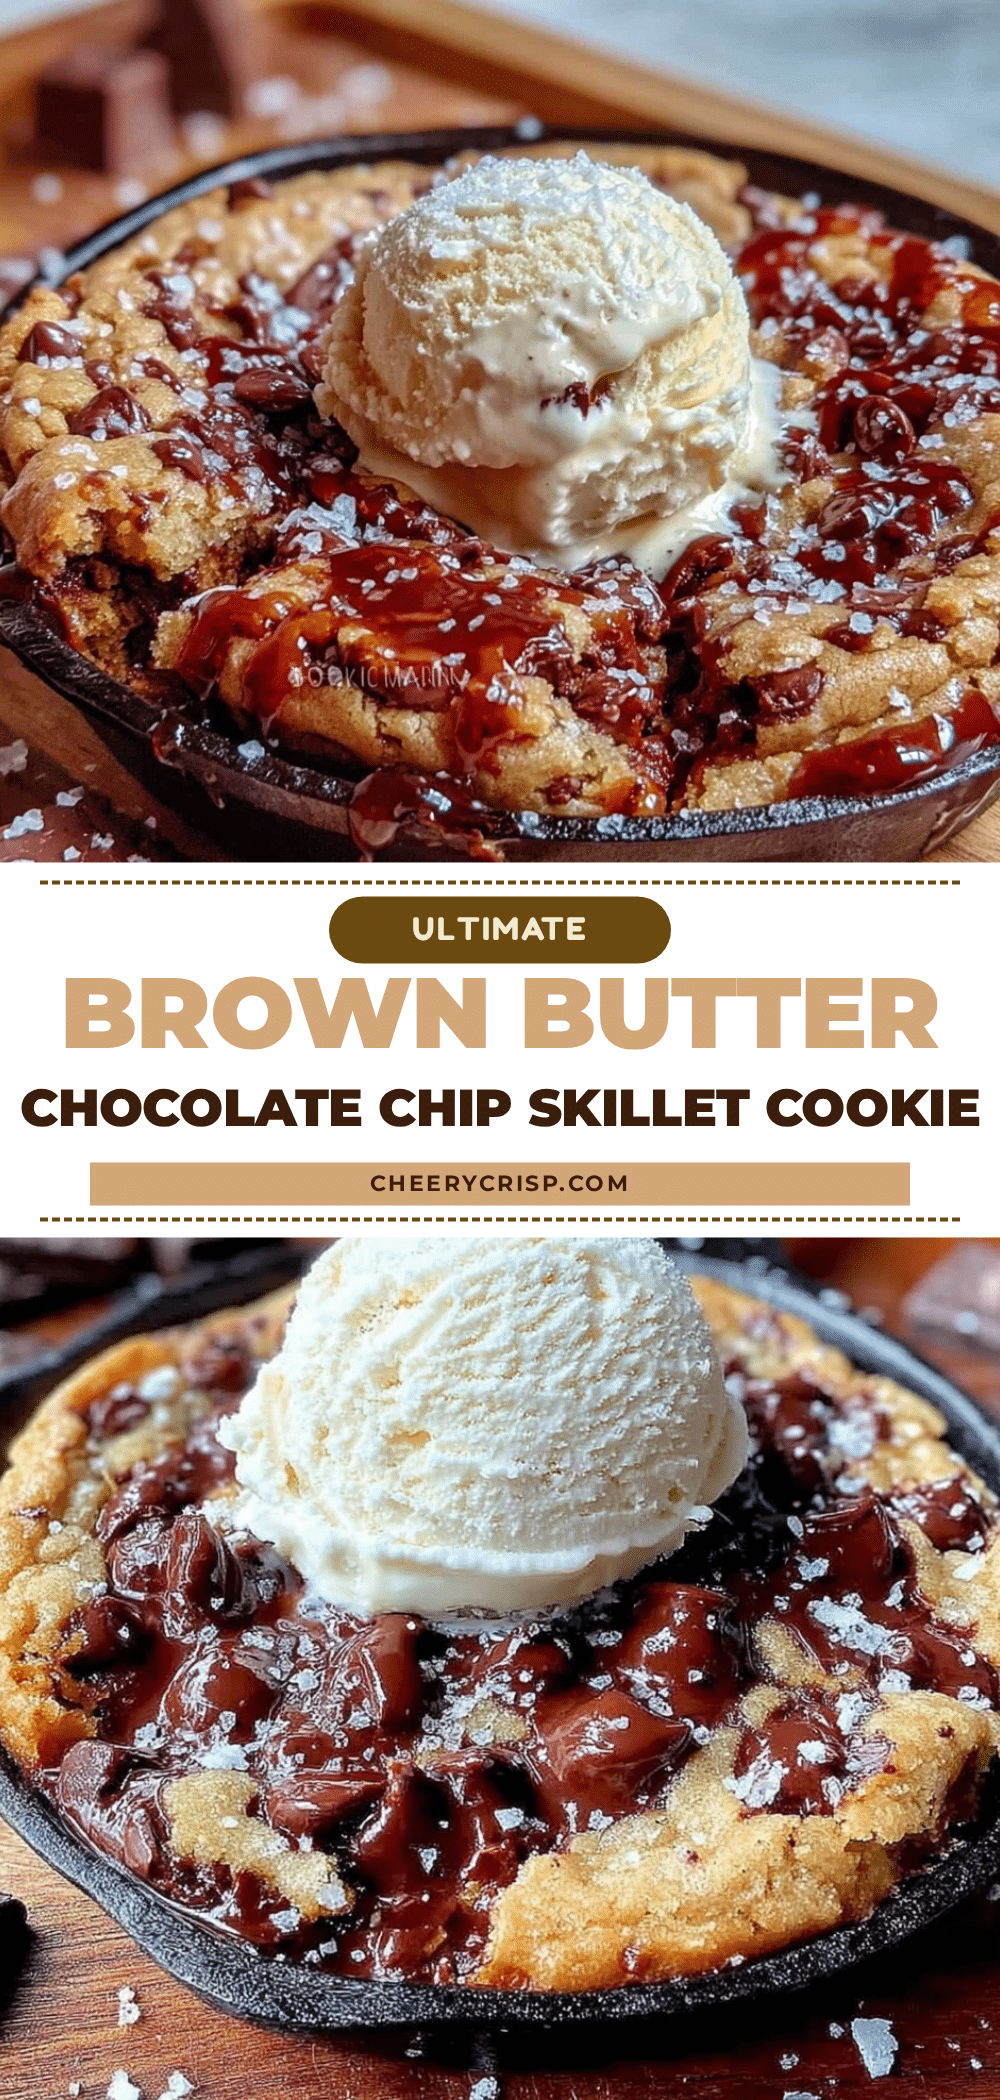
Ultimate Brown Butter Chocolate Chip Skillet Cookie Recipe with Vanilla Bean Ice Cream
A warm, gooey, and nostalgic skillet cookie featuring nutty brown butter and melty chocolate chips, served with creamy vanilla bean ice cream. Perfect for quick homemade desserts that impress without stress.
- Prep Time: 15 minutes
- Cook Time: 20 minutes
- Total Time: 35 minutes
- Yield: 6 servings 1x
- Category: Dessert
- Cuisine: American
Ingredients
- 1 stick (113g) unsalted butter, browned
- 3/4 cup (150g) light brown sugar
- 1/4 cup (50g) granulated sugar
- 1 large egg, room temperature
- 1 teaspoon pure vanilla extract
- 1 cup (125g) all-purpose flour (or almond flour for gluten-free option)
- 1/4 teaspoon baking soda
- 1/2 teaspoon salt
- 3/4 cup (130g) semi-sweet chocolate chips
- Vanilla bean ice cream, for serving
Instructions
- Brown the butter: In a small saucepan over medium heat, melt the unsalted butter. Stir frequently as it foams and then turns a golden brown with a nutty aroma. Remove from heat when golden specks appear and aroma is toasty. Pour into a mixing bowl and let cool for about 5 minutes.
- Mix sugars and butter: Add light brown sugar and granulated sugar to the browned butter. Stir until combined and slightly glossy.
- Add egg and vanilla: Crack in the egg and add pure vanilla extract. Whisk until smooth and creamy. If mixture is too warm, wait before adding egg to avoid cooking it.
- Combine dry ingredients: In a separate bowl, whisk together all-purpose flour, baking soda, and salt.
- Mix dry into wet: Gradually add dry ingredients to wet mixture. Stir gently with a wooden spoon or spatula until just combined; do not overmix.
- Fold in chocolate chips: Add semi-sweet chocolate chips and fold evenly into the dough.
- Transfer dough to skillet: Spread dough evenly in a well-seasoned 8-inch cast-iron skillet, smoothing the top.
- Bake: Place skillet in a preheated 350°F (175°C) oven. Bake for 18-22 minutes until edges are golden brown and center is set but still soft.
- Cool slightly and serve: Let cool on a wire rack for about 5 minutes. Serve warm topped with a scoop of vanilla bean ice cream.
Notes
Watch the butter carefully when browning to avoid burning; remove from heat as soon as it smells nutty and turns golden. Do not overmix the dough to keep the cookie tender and chewy. Tent with foil if edges brown too fast. Let the cookie rest after baking to set texture. For dairy-free, substitute butter with coconut oil and use dairy-free ice cream. Dough can be refrigerated up to 24 hours before baking.
Nutrition
- Serving Size: About 1/6 of the ski
- Calories: 450
- Fat: 22
- Carbohydrates: 60
- Protein: 4
Keywords: brown butter, chocolate chip cookie, skillet cookie, vanilla bean ice cream, homemade dessert, easy dessert, cast iron skillet