Love this? Save it for later!
Share the inspiration with your friends
“You won’t believe how simple this is,” my friend Jenna said as she handed me a tiny cup topped with a swirl of cream and a sprinkle of crushed cookies. It was a sweltering July afternoon, and honestly, I was skeptical. Cheesecake usually meant hours in the kitchen, baking, chilling, and—let’s face it—waiting impatiently. But these creamy no-bake cheesecake cups were different.
She had whipped up this easy layered dessert in less than 20 minutes, no oven required, just a few ingredients, and a bit of patience while they chilled. The first bite was a revelation: silky, rich, and just tangy enough to balance the sweet crust. I remember juggling my phone, a toddler, and a melting popsicle, but this dessert felt like a small, delicious victory on a chaotic day.
Maybe you’ve been there—wanting something indulgent but without the hassle or heat of baking. This recipe came from Jenna’s stash, scribbled on a crumpled index card she pulled out while we waited for a summer thunderstorm to pass. It’s perfect for anyone who loves cheesecake but hates the fuss, or just needs a quick, crowd-pleasing treat that looks impressive but is honestly foolproof.
Since that day, I’ve made these no-bake cheesecake cups more times than I can count, tweaking the layers and flavors, always ending up with the same creamy, dreamy result. Whether it’s a last-minute dessert for friends or a calm evening treat, they’ve become my go-to. Let me tell you—once you try these, you’ll wonder why you ever bothered with the oven at all.
Why You’ll Love This Recipe
This recipe is honestly one of those rare gems that feels fancy but comes together so fast you’ll want to make it again and again. Here’s why it’s a keeper:
- Quick & Easy: Ready in about 20 minutes, plus chilling time—perfect for busy evenings or spontaneous dessert cravings.
- Simple Ingredients: Uses pantry staples like cream cheese and graham crackers, no special runs to the store needed.
- Perfect for Any Occasion: Whether it’s a casual gathering, a picnic, or a festive brunch, these cups fit right in.
- Crowd-Pleaser: Kids, adults, picky eaters—they all ask for seconds, trust me.
- Unbelievably Delicious: The creamy texture paired with a buttery crust? Next-level comfort food.
What sets this version apart? The secret is in the layering technique and the use of whipped cream to lighten up the filling. I’ve tried other no-bake cheesecakes that turned out dense or overly sweet, but blending cream cheese with just the right amount of sugar and whipping it up makes the filling airy yet rich. Plus, the crushed cookie crust isn’t just a base—it’s part of the experience, giving a little crunch and a perfect contrast to the smooth cream.
Honestly, this recipe is the kind that makes you close your eyes after the first bite and smile. It’s comfort food, reimagined to be fast, fuss-free, and totally satisfying. Whether you’re impressing guests or indulging yourself, these cups never disappoint.
What Ingredients You Will Need
This recipe uses simple, wholesome ingredients to deliver bold flavor and satisfying texture without the fuss. Most of these are pantry staples or easy-to-find items, and you can swap a few to suit your needs.
- For the crust:
- 1 ½ cups graham cracker crumbs (about 10-12 full sheets, crushed finely) – I prefer Kroger’s for consistent texture
- 5 tablespoons unsalted butter, melted (adds richness and helps bind the crust)
- 2 tablespoons granulated sugar (balances the buttery crust)
- For the cheesecake filling:
- 16 oz (450g) cream cheese, softened to room temperature – Philadelphia brand is my go-to for smoothness
- ½ cup powdered sugar (adjust to taste for sweetness)
- 1 teaspoon pure vanilla extract (quality vanilla makes all the difference)
- 1 cup heavy whipping cream, cold (whipped to soft peaks for lightness)
- Optional: 1 tablespoon lemon juice or zest (adds a nice tang if you like it a bit brighter)
- Optional toppings:
- Fresh berries (strawberries, blueberries, or raspberries – in season)
- Chocolate shavings or cocoa powder
- Crushed nuts or cookie crumbs
If you need a dairy-free option, swap cream cheese with a vegan spread and use coconut cream instead of heavy cream. Gluten-free graham crackers work perfectly for the crust too.
Equipment Needed
- Mixing bowls – one large for the filling and one medium for the crust mixture
- Electric mixer or stand mixer – essential for whipping the cream cheese and heavy cream smoothly
- Measuring cups and spoons – for precise ingredient amounts
- Spatula – to fold whipped cream gently into the cream cheese mixture
- Serving cups or small jars – to assemble the layered dessert individually
- Optional: Food processor or plastic bag and rolling pin – for crushing graham crackers finely
If you don’t have an electric mixer, a sturdy whisk and some patience will work, but whipping the cream by hand can take a bit longer. For budget-friendly options, I recommend using glass jars or repurposed small containers for serving; they’re easy to clean and look charming on the table.
Preparation Method
- Prepare the crust: In a medium bowl, combine 1½ cups graham cracker crumbs, 5 tablespoons melted butter, and 2 tablespoons granulated sugar. Stir until the crumbs are evenly coated and the mixture holds together when pressed. (About 3 minutes)
- Assemble the crust layer: Spoon about 2 tablespoons of the crumb mixture into each serving cup. Press down gently with the back of a spoon or your fingers to create a firm base. Set cups aside while you make the filling.
- Make the cheesecake filling: In a large bowl, beat 16 oz softened cream cheese until smooth and creamy (about 2 minutes). Add ½ cup powdered sugar and 1 teaspoon vanilla extract, then beat again until fully incorporated. If using lemon juice or zest, add it now.
- Whip the cream: In a separate chilled bowl, whip 1 cup cold heavy cream to soft peaks using an electric mixer. (Tip: Cold cream whips better, so don’t skip chilling the bowl if possible.)
- Fold the whipped cream into the cream cheese mixture: Use a spatula to gently fold the whipped cream into the cream cheese mixture. This keeps the filling light and airy. Take your time—folding slowly prevents deflating.
- Layer the dessert: Spoon the creamy filling over the crust in each cup, filling almost to the top. Smooth the surface with the back of a spoon or a small offset spatula.
- Chill: Refrigerate the cheesecake cups for at least 3 hours, or until set and firm. Overnight chilling is ideal for the best texture.
- Add toppings: Just before serving, top with fresh berries, chocolate shavings, or crushed nuts as desired for an extra touch of flavor and texture.
Pro tip: If your cream cheese feels too cold or stiff, give it 10 minutes at room temperature before mixing to avoid lumps. Also, if you forgot to chill the bowl for whipping cream, just add a few ice cubes under the bowl while whipping—it helps!
Cooking Tips & Techniques
Making no-bake cheesecake cups might sound easy, but a few tricks make all the difference. First, patience is key when whipping the cream. It should be fluffy but not overwhipped into butter. I once overdid it and ended up with a grainy filling—lesson learned!
Softening the cream cheese properly is another must. Room temperature means about 30 minutes on the counter; cold cream cheese won’t blend smoothly and can cause lumps. If you’re in a rush, microwave it in 5-second bursts, but be careful not to melt it.
When folding whipped cream into the cream cheese, use a light hand. Stirring too vigorously deflates the air bubbles, resulting in a dense texture. I like to use a rubber spatula and fold with a gentle “cut and lift” motion.
For the crust, pressing it firmly but not too hard ensures it holds together without becoming rock-hard. Some people like to toast the crumbs lightly for extra flavor, but I prefer the fresh buttery taste straight from the mixture.
Timing-wise, multitasking helps: prepare the crust, then whip the filling while the crust sets slightly. This recipe is forgiving, so if you need to pause, the filling can sit safely in the fridge for a few hours before assembling.
Variations & Adaptations
This recipe is like a blank canvas, ready for your creativity. Here are some tasty twists I’ve tried and loved:
- Berry Swirl: Gently fold in a few tablespoons of raspberry or strawberry puree into the cheesecake filling before layering for a colorful marbled effect.
- Chocolate Lovers: Add ¼ cup melted dark chocolate to the cream cheese mixture for a rich chocolate cheesecake cup. Top with mini chocolate chips or cocoa powder.
- Nutty Crunch: Mix chopped toasted pecans or almonds into the crust or sprinkle on top for extra texture and flavor.
- Seasonal Fruit: Swap fresh berries for chopped peaches, mango, or kiwi depending on the season—makes it fresh and vibrant.
- Vegan-Friendly: Use dairy-free cream cheese and coconut cream whipped to soft peaks. Use gluten-free graham crackers for the crust.
One personal favorite is adding a layer of salted caramel sauce between the crust and filling—trust me, it’s ridiculously good. If you want to try baking the crust slightly before chilling, you can, but it’s optional and changes the texture a bit.
Serving & Storage Suggestions
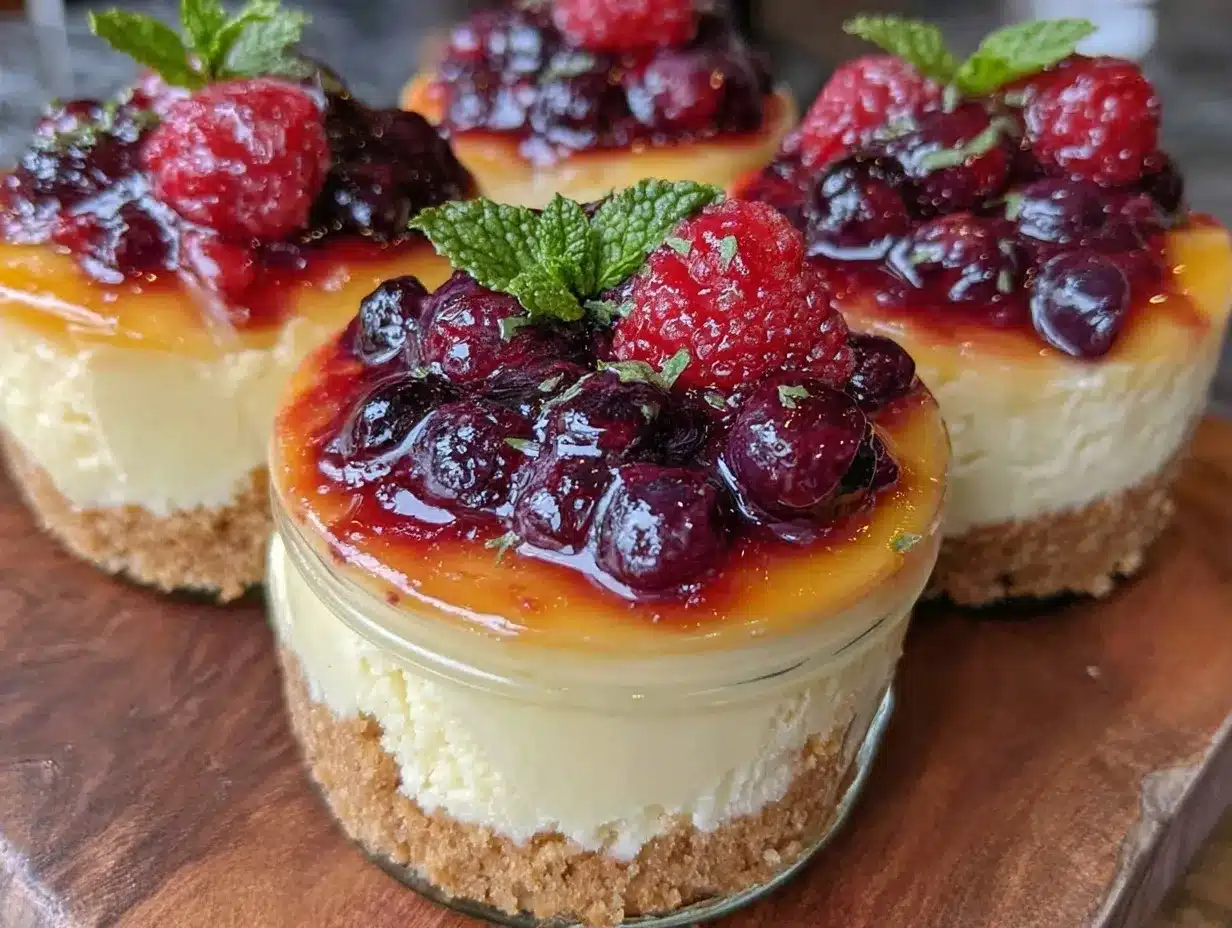
Serve these cheesecake cups chilled, straight from the fridge. They’re perfect little portions that look elegant on a dessert tray or casual enough for a picnic. For presentation, try clear glass cups to show off the layers or mini mason jars for a rustic vibe.
They pair wonderfully with a hot cup of coffee or a fruity iced tea. If you want to add a fresh touch, a sprig of mint or a dusting of cinnamon can brighten things up.
Store leftovers tightly covered in the refrigerator for up to 4 days—though they rarely last that long in my house! For longer storage, you can freeze them for up to 2 weeks; thaw overnight in the fridge before serving. The texture might be slightly softer but still delicious.
Flavors develop beautifully after a night in the fridge, so making them a day ahead is a smart move for stress-free entertaining.
Nutritional Information & Benefits
Each serving of these creamy no-bake cheesecake cups contains roughly:
- Calories: 320
- Fat: 22g
- Protein: 5g
- Carbohydrates: 24g
- Sugar: 18g
The cream cheese provides a good source of calcium and protein, while the heavy cream adds richness. Using fresh berries on top adds antioxidants and vitamins, making each bite a bit more nourishing. Of course, this is an indulgent treat, but with portion control and fresh toppings, it fits nicely into a balanced diet.
If you’re mindful of gluten, swapping to gluten-free graham crackers works perfectly. For lower sugar, reduce the powdered sugar or use a sugar substitute, but keep in mind it might change the texture slightly.
Conclusion
These creamy no-bake cheesecake cups are a dessert winner for so many reasons: they’re quick, easy, and incredibly satisfying. Whether you’re new to cheesecake or a seasoned dessert lover, this recipe offers a flawless balance of creamy filling and crunchy crust that makes every spoonful a delight.
Feel free to get creative with flavors and toppings—it’s your dessert, after all! I love how these cups bring a little joy to hectic days and impress guests without any stress. Honestly, once you try this recipe, you might find yourself making it over and over just like I did.
Let me know how your cheesecake cups turn out! I’d love to hear your tweaks, favorite toppings, or even funny kitchen mishaps while making them. Share your thoughts in the comments and spread the word if you enjoyed this little treat. Happy no-bake cheesecake adventures!
Frequently Asked Questions
Can I make these cheesecake cups ahead of time?
Yes! They actually taste better after chilling overnight, giving the flavors time to meld and the filling to set perfectly.
What can I use instead of graham crackers for the crust?
Digestive biscuits, vanilla wafers, or gluten-free cookies all work well as alternatives depending on your preference or dietary needs.
How do I soften cream cheese quickly?
Leave it on the counter for about 30 minutes, or microwave in 5-second bursts, turning after each until soft but not melted.
Can I double this recipe for a larger crowd?
Absolutely! Just double the ingredients and use larger serving dishes or more cups. Keep the layering and chilling times the same.
Is it possible to make these cups without heavy cream?
You can try using full-fat Greek yogurt for a lighter filling, but the texture will be less airy. Whipping cream is key for that classic creamy texture.
For a fun twist on creamy desserts, I remember how much my family enjoyed the creamy pumpkin parfait last fall. And if you like layered treats, you may appreciate the texture contrast in this crispy garlic chicken recipe I recently shared too—talk about crowd-pleasers!
Pin This Recipe!
Creamy No-Bake Cheesecake Cups

An easy, quick no-bake layered dessert featuring a buttery graham cracker crust and a light, airy cream cheese filling whipped with heavy cream. Perfect for beginners and ready in about 20 minutes plus chilling time.
- Prep Time: 15 minutes
- Cook Time: 0 minutes
- Total Time: 3 hours 15 minutes
- Yield: 6 servings 1x
- Category: Dessert
- Cuisine: American
Ingredients
- 1 ½ cups graham cracker crumbs (about 10–12 full sheets, crushed finely)
- 5 tablespoons unsalted butter, melted
- 2 tablespoons granulated sugar
- 16 oz (450g) cream cheese, softened to room temperature
- ½ cup powdered sugar
- 1 teaspoon pure vanilla extract
- 1 cup heavy whipping cream, cold
- Optional: 1 tablespoon lemon juice or zest
- Optional toppings: fresh berries (strawberries, blueberries, raspberries), chocolate shavings or cocoa powder, crushed nuts or cookie crumbs
Instructions
- Prepare the crust: In a medium bowl, combine graham cracker crumbs, melted butter, and granulated sugar. Stir until evenly coated and mixture holds together when pressed (about 3 minutes).
- Assemble the crust layer: Spoon about 2 tablespoons of the crumb mixture into each serving cup. Press down gently to create a firm base. Set aside.
- Make the cheesecake filling: In a large bowl, beat softened cream cheese until smooth (about 2 minutes). Add powdered sugar and vanilla extract, then beat until fully incorporated. Add lemon juice or zest if using.
- Whip the cream: In a separate chilled bowl, whip cold heavy cream to soft peaks using an electric mixer.
- Fold the whipped cream into the cream cheese mixture gently with a spatula to keep the filling light and airy.
- Layer the dessert: Spoon the creamy filling over the crust in each cup, filling almost to the top. Smooth the surface.
- Chill: Refrigerate the cheesecake cups for at least 3 hours or overnight for best texture.
- Add toppings: Just before serving, top with fresh berries, chocolate shavings, or crushed nuts as desired.
Notes
Softening cream cheese to room temperature is key to avoid lumps. Chill the bowl before whipping cream for best results. Fold whipped cream gently to keep filling airy. Crust can be lightly toasted for extra flavor but is optional. Can be made dairy-free and gluten-free with substitutions.
Nutrition
- Serving Size: 1 cheesecake cup
- Calories: 320
- Sugar: 18
- Sodium: 220
- Fat: 22
- Saturated Fat: 13
- Carbohydrates: 24
- Fiber: 1
- Protein: 5
Keywords: no-bake cheesecake, cheesecake cups, easy dessert, layered dessert, quick dessert, creamy cheesecake, graham cracker crust